- SAP BW - Home
- SAP BW - Overview of SAP BI
- SAP BW - Data Warehousing
- SAP BW - Data Flow
- SAP BW - Transformation
- SAP BW - InfoArea, Object & Catalog
- SAP BW - DataStore Objects & Types
- SAP BW - Write Optimized DSO
- SAP BW - Infoset
- SAP BW - InfoCube
- SAP BW - Virtual InfoProvider
- SAP BW - MultiProvider
- SAP BW - Flat File Data Transfer
- SAP BW - DB Connect
- SAP BW - Universal Data Connect
- SAP BW - Process Chain
- SAP BW - Reporting
SAP BW - Flat File Data Transfer
You can load the data from an external system to BI using these flat files. SAP BI supports data transfer using flat files, files in ASCII format, or in the CSV format.
The data from a flat file can be transferred to BI from a workstation or from an application server.
Following are the steps involved in a Flat File Data Transfer −
Define a file source system.
Create a DataSource in BI, defining the metadata for your file in BI.
Create an InfoPackage that includes the parameters for data transfer to the PSA.
Important Points about Flat File Data Transfer
If there are character fields that are not filled in a CSV file, they are filled with a blank space and with a zero (0) if they are numerical fields.
If separators are used inconsistently in a CSV file, the incorrect separator is read as a character and both fields are merged into one field and may be shortened. Subsequent fields are then no longer in the correct order.
A line break cannot be used as part of a value, even if the value if enclosed with an escape character.
A couple of pointers with regard to the CSV and ASCII files
The conversion routines that are used to determine whether you have to specify leading zeros. More information − Conversion Routines in the BI-System.
For dates, you usually use the format YYYYMMDD, without internal separators. Depending on the conversion routine being used, you can also use other formats.
Define a File Source System
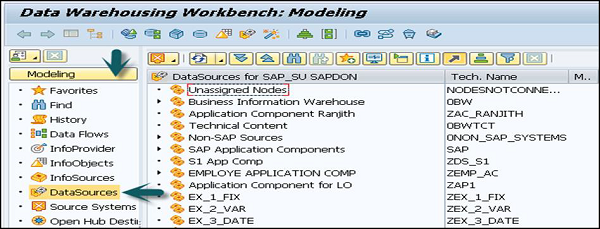
Before you can transfer data from a file source system, the metadata must be available in BI in the form of a DataSource. Go to Modeling tab → DataSources.
Right click in context area → Create DataSource.
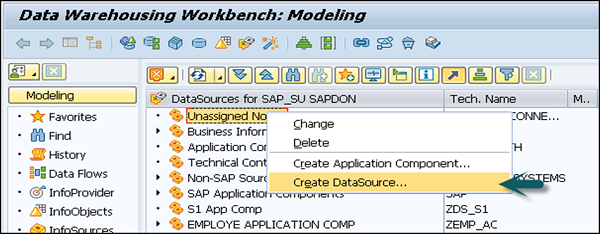
Enter the technical name of the data source, type of data source and then click on Transfer.

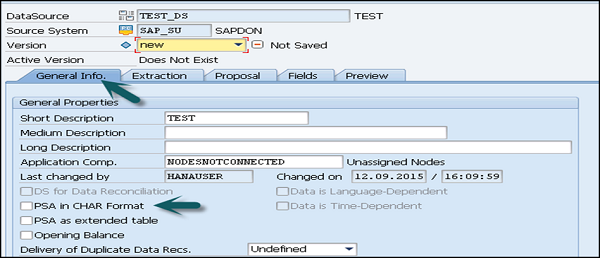
Go to General tab → Select the General Tab. Enter descriptions for the DataSource (short, medium, long).
If required, specify whether the DataSource is initial non-cumulative and might produce duplicate data records in one request.
You can specify whether you want to generate the PSA for the DataSource in the character format. If the PSA is not typed it is not generated in a typed structure but is generated with character-like fields of type CHAR only.
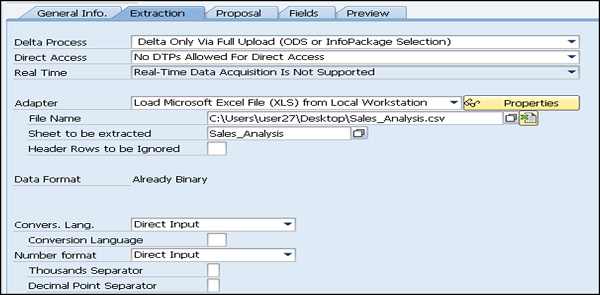
The next step is to click on the Extraction tab page and enter the following details −
Define the delta process for the DataSource. Specify whether you want the DataSource to support direct access to data (Real-time data acquisition is not supported for data transfer from files).
Select the adapter for the data transfer. You can load text files or binary files from your local work station or from the application server. Select the path to the file that you want to load or enter the name of the file directly.
In case you need to create a routine to determine the name of your file. The system reads the file name directly from the file name field, if no, then the routine is defined.
As per the adapter and the file to be loaded, the following setting has to be made −
Binary files − Specify the character record settings for the data that you want to transfer.
Text-type files − For text files, determine the rows in your file are header rows and they can therefore be ignored when the data is transferred. Specify the character record settings for the data that you want to transfer.
For ASCII files − To load the data from an ASCII file, the data is requested with a fixed data record length.
For CSV files − To load data from an Excel CSV file, mention the data separator and the escape character.
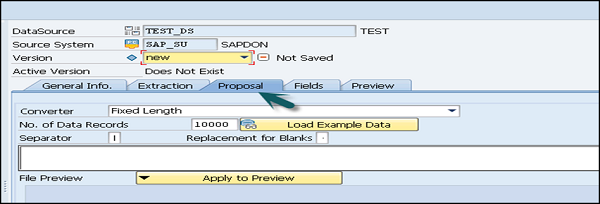
The next step is to go to the Proposal tab page, this is required only for CSV files. For files in different formats, define the field list on the Fields tab page.
The next step is to go to Fields tab −
You can edit the fields that you transferred to the field list of the DataSource from the Proposal tab. If you did not transfer the field list from a proposal, you can define the fields of the DataSource here as shown in the following screenshot.
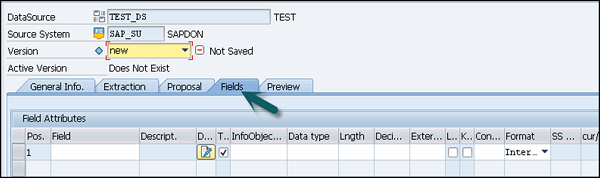
You can then perform check, save and activate the DataSource.
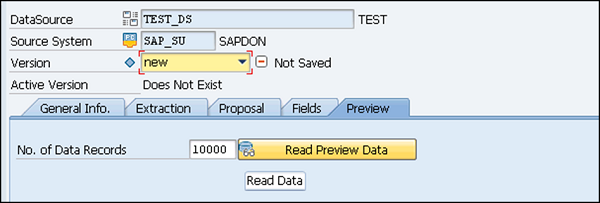
You can also select the Preview tab. If you select read Preview Data, the number of data records you specified in your field selection is displayed in a preview.