- Pygame - Home
- Pygame - Overview
- Pygame - Hello World
- Pygame - Display modes
- Pygame - Locals module
- Pygame - Color object
- Pygame - Event objects
- Pygame - Keyboard events
- Pygame - Mouse events
- Pygame - Drawing shapes
- Pygame - Loading image
- Pygame - Displaying Text in Window
- Pygame - Moving an image
- Pygame - Moving with Numeric pad keys
- Pygame - Moving with mouse
- Pygame - Moving Rectangular objects
- Pygame - Use Text as Buttons
- Pygame - Transforming Images
- Pygame - Sound objects
- Pygame - Mixer channels
- Pygame - Playing music
- Pygame - Playing Movie
- Pygame - Using Camera module
- Pygame - Load cursor
- Pygame - Access CDROM
- Pygame - The Sprite Module
- Pygame - PyOpenGL
- Pygame - Errors and Exception
Pygame Useful Resources
PyGame - Displaying Text in Window
To display text on the Pygame window, we need to obtain a font object first, with the help of SysFont() function defined in pygame.font module.
Fnt= SysFont(name, size, bold=False, italic=False)
List of fonts installed in current machine can be obtained by get_fonts() function.
fonts = pygame.font.get_fonts()
for f in fonts:
   print(f)
Let us define a font object representing Arial font of 36 point size.
font = pygame.font.SysFont("Arial", 36)
Next we obtain a new Surface object for rendering Hello World text in the newly created font with render() method of Font object.
txtsurf = font.render("Hello, World", True, white)
First argument is a one-line string, second argument represents antialias. If it is set to False, the rendered image is an 8-bit image, and 24-bit if true. An optional background color argument can also be used.
We now need to blit the text Surface at the center of screen window.
screen.blit(txtsurf,(200 - txtsurf.get_width() // 2, 150 - txtsurf.get_height() // 2))
Example - Displaying Text in Window
Following is the complete code −
main.py
import pygame
pygame.init()
screen = pygame.display.set_mode((400, 300))
done = False
white=(255,255,255)
red = (255,0,0)
green = (0,255,0)
blue = (0,0,255)
bg = (127,127,127)
while not done:
for event in pygame.event.get():
screen.fill(bg)
if event.type == pygame.QUIT:
done = True
font = pygame.font.SysFont("Arial", 36)
txtsurf = font.render("Hello, World", True, white)
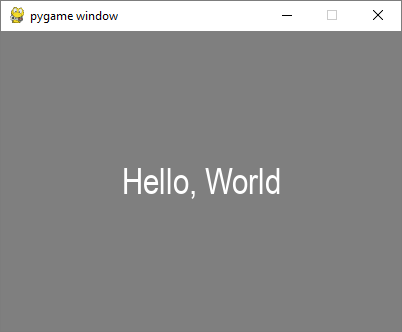
screen.blit(txtsurf,(200 - txtsurf.get_width() // 2, 150 - txtsurf.get_height() // 2))
pygame.display.update()
Output
In addition to SysFont() method, a Font object can also be obtained from a font file (having .ttf extension) or a Python file object pointing towards the ttf file. It is also possible to construct a font object with .ttc file. The font class defines following methods −
| bold() | Gets or sets whether the font should be rendered in bold. |
| italic() | Gets or sets whether the font should be rendered in italics. |
| underline() | Gets or sets whether the font should be rendered with an underline. |
| render() | draw text on a new Surface |
| size() | calculate size needed to render text |
| set_underline() | control if text is rendered with an underline |
| get_underline() | check if text will be rendered with an underline |
| set_bold() | enable fake rendering of bold text |
| get_bold() | check if text will be rendered bold |
| set_italic() | enable fake rendering of italic text |
| metrics() | gets the metrics for each character |
| get_italic() | check if the text will be rendered italic |
| get_linesize() | get the line space of the font text |
| get_height() | get the height of the font |
| get_ascent() | get the ascent of the font |
| get_descent() | get the descent of the font |
Given below is example to use ttf and ttc files to render text.
font1 = pygame.font.SysFont('chalkduster.ttf', 72)
img1 = font1.render('Hello World', True, BLUE)
font2 = pygame.font.SysFont('didot.ttc', 72)
img2 = font2.render('Hello Pygame', True, GREEN)

screen.blit(img1, (20, 50))
screen.blit(img2, (20, 120))
pygame.display.update()
In the above example, a predefined string has been rendered as a surface object. However, it is possible to read key value of KEYDOWN event to interactively enter a string and display it.
To begin with, we render an empty string. Next, we define the bounding rectangle and then a cursor rectangle which is placed to overlap the text bounding rectangle. Each keystroke identified in KEYDOWN event is appended to original empty string and repeatedly rendered.
Example - Taking Input Text and Displaying in Window
Following code initially displays a blank window. Each letter pressed will be displayed alongside each other.
main.py
import pygame

pygame.init()
screen = pygame.display.set_mode((400, 300))
done = False
white=(255,255,255)
red = (255,0,0)
green = (0,255,0)
blue = (0,0,255)

bg = (127,127,127)
text=""
while not done:
   for event in pygame.event.get():
      screen.fill(bg)
      if event.type == pygame.QUIT:
         done = True
      if event.type == pygame.KEYDOWN:
         text=text+event.unicode
      font = pygame.font.SysFont("Arial", 36)
      img = font.render(text, True, white)
      rect = img.get_rect()
      cursor = pygame.Rect(rect.topright, (3, rect.height))
      img = font.render(text, True, white)
      rect.size=img.get_size()
      cursor.topleft = rect.topright
      screen.blit(img,(200 - img.get_width() // 2, 150 - img.get_height() // 2))
   pygame.display.update()
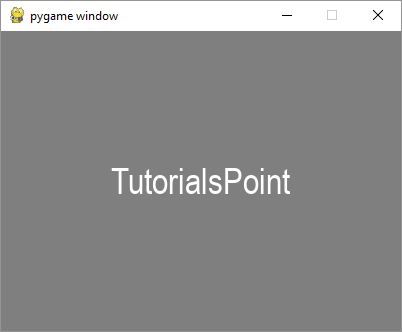
Output
Run the above code and enter some text. Sample output is as follows −