- MuleSoft - Home
- MuleSoft - Introduction to Mule ESB
- MuleSoft - The Mule Project
- MuleSoft - Mule in Our Machine
- MuleSoft - Anypoint Studio
- MuleSoft - Discovering Anypoint Studio
- Creating First Mule Application
- MuleSoft - DataWeave Language
- Message Processor & Script Components
- Core Components & Their Configuration
- MuleSoft - Endpoints
- Flow Control and Transformers
- Web Services Using Anypoint Studio
- MuleSoft - Mule Error Handling
- MuleSoft - Mule exception Handling
- MuleSoft - Testing with MUnit
- MuleSoft Useful Resources
- MuleSoft - Quick Guide
- MuleSoft - Useful Resources
- MuleSoft - Discussion
MuleSoft - Testing with MUnit
We understand unit testing is a method by which individual units of source code can be tested to determine whether they are fit for use or not. Java programmers can use Junit framework to write test cases. Similarly, MuleSoft is also having a framework called MUnit allowing us to write automated test cases for our APIs and integrations. It is a perfect fit for continuous integration/deployment environment. One of the biggest advantages of MUnit framework is that we can integrate it with Maven and Surefire.
Features of MUnit
Following are some of the very useful features of Mule MUnit testing framework −
In MUnit framework, we can create our Mule test by using Mule code as well as Java code.
We can design and test our Mule apps and APIs, either graphically or in XML, within Anypoint Studio.
MUnit allows us to easily integrate the testing into existing CI/CD process.
It provides auto-generated tests and coverage reports; hence the manual work is minimal.
We can also use local DB/FTP/mail servers to make testing more portable through the CI process.
It allows us to enable or disable tests.
We can also extend the MUnit framework with plugins.
It allows us to verify message processor calls.
With the help of MUnit testing framework, we can disable endpoint connectors as well as flow inbound end points.
We can check error reports with Mule stack trace.
Latest Release of Mule MUnit Testing Framework
MUnit 2.1.4 is the latest release of Mule MUnit testing framework. It requires following hardware and software requirements −
- MS Windows 8+
- Apple Mac OS X 10.10+
- Linux
- Java 8
- Maven 3.3.3, 3.3.9, 3.5.4, 3.6.0
It is compatible with Mule 4.1.4 and Anypoint Studio 7.3.0.
MUnit and Anypoint Studio
As discussed, MUnit is fully integrated in Anypoint studio and we can design and test our Mule apps and APIs graphically or in XML within Anypoint studio. In other words, we can use graphical interface of Anypoint Studio to do the following −
- For creating and designing MUnit tests
- For running our tests
- For viewing test results as well as coverage report
- For debugging the tests
So, let us start discussing each task one by one.
Creating and Designing MUnit Tests
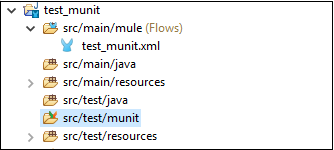
Once you start new project, it will automatically add a new folder namely src/test/munit to our project. For example, we started a new Mule project namely test_munit, you can see in the below image, it adds the above-mentioned folder under our project.
Now, once you started new project, there are two basic ways to create a new MUnit test in Anypoint Studio −
By Right-Clicking the Flow − In this method, we need to right-click the specific flow and select MUnit from the drop-down menu.
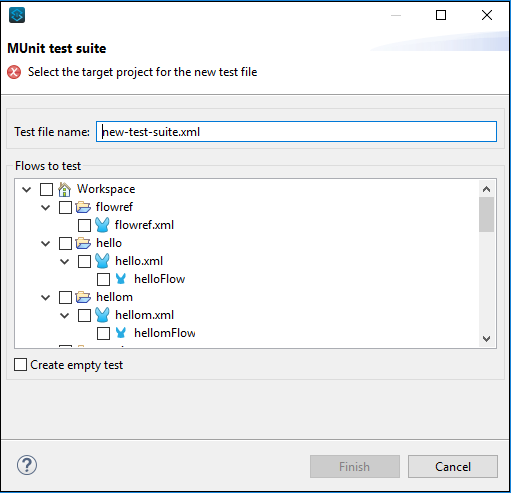
By Using the Wizard − In this method, we need to use the wizard for creating a test. It allows us to create a test for any flow in the workspace.
We are going to use Right-click the flow way to create a test for specific flow.
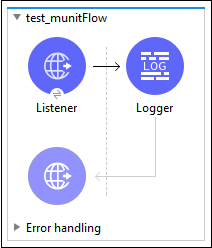
First, we need to create a flow in the workspace as follows −
Now, right click on this flow and select MUnit to create a test for this flow, as shown below −
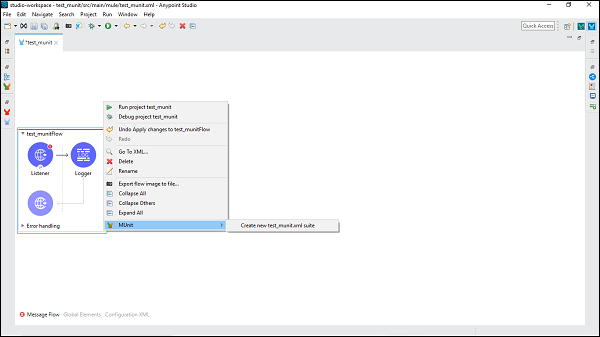
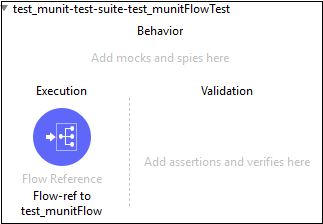
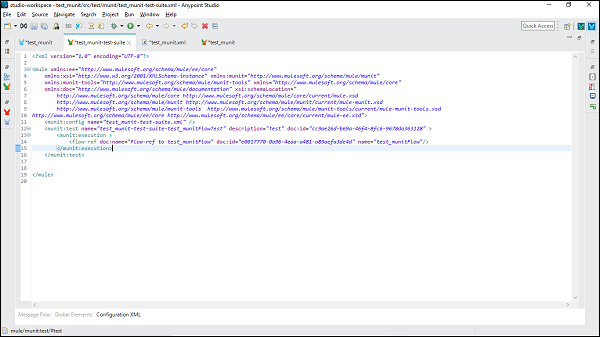
It will create a new test suite named after the XML file where the flow resides. In this case, test_munit-test-suite is the name of the new test suite as shown below −
Following is the XML editor for the above message flow −
Now, we can add an MUnit message processor to the test suite by dragging it from Mule Palette.
If you want to create a test via the Wizard then follow File → New → MUnit and it will lead you to the following MUnit testing suite −
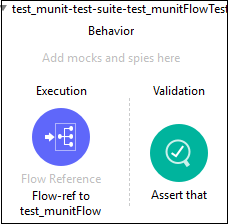
Configuring the test
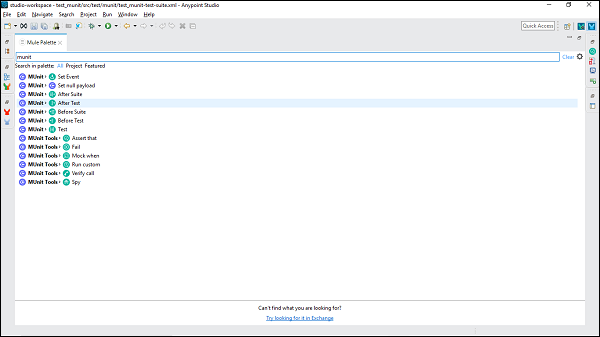
In Mule 4, we have two new sections namely MUnit and MUnit Tools, collectively having all MUnit message processor. You can drag any of the message processor in your MUnit test area. It is shown in the below screenshot −
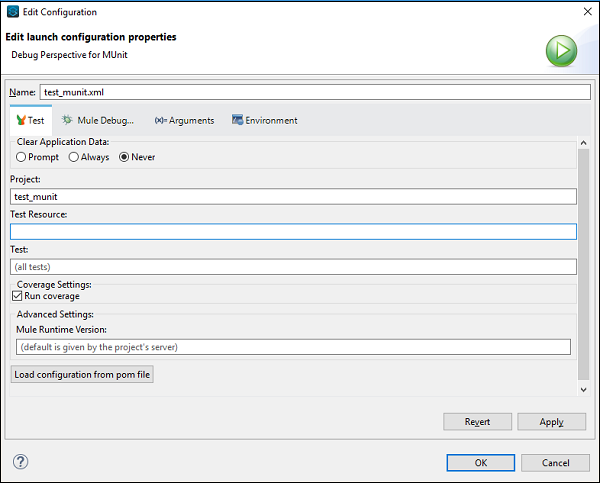
Now, if you want to edit the configuration for your suit or test in Anypoint Studio, then you need to follow the below steps −
Step 1
Go to the Package Explorer and right click on the .xml file for your suite or test. Then, select the Properties.
Step 2
Now, in the Properties window, we need to click Run/Debug Settings. After this click New.
Step 3
In the last step, click MUnit under Select Configuration Type window, and then click OK.
Running the Test
We can run a test suite as well as a test. First, we will see how to run a test suite.
Running a Test Suite
For running a test suite, right click on the empty part of the Mule Canvas where your test suite resides. It will open a drop-down menu. Now, click on the Run MUnit suite as shown below −
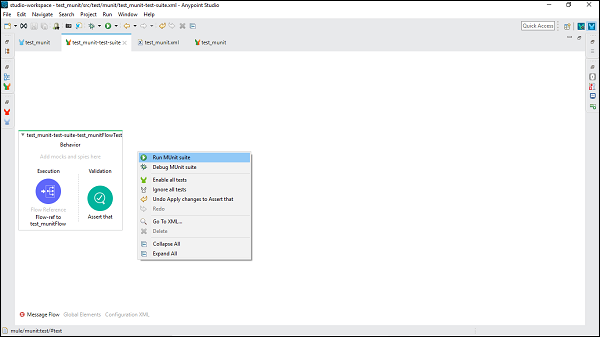
Later, we can see the output in the console.
Running a Test
To run a specific test, we need to select the specific test and right-click on that. We will get the same drop-down menu as we got while running test suite. Now, click on the Run MUnit Test option as shown below −
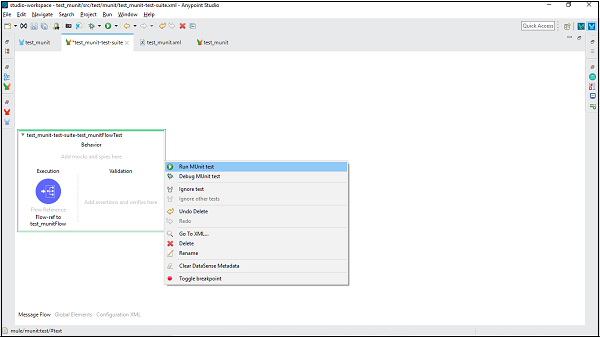
There after the output can be seen in the console.
Viewing and Analyzing Test Result
Anypoint studio displays the MUnit test result in the MUnit tab of the left-hand explorer pane. You can find successful tests in green color and failed tests in red one as shown below −
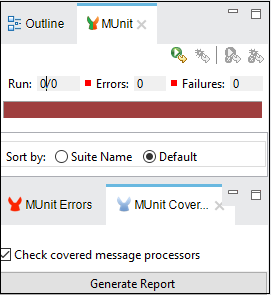
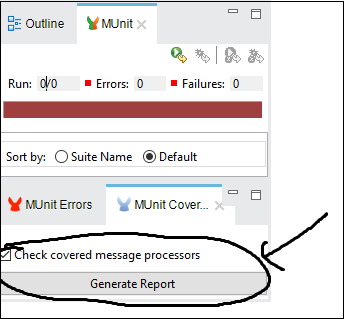
We can analyze our test result by viewing the coverage report. The main feature of Coverage Report is to provide a metric on how much of a Mule application has been successfully executed by a set of MUnit tests. MUnit coverage is basically based on the amount of MUnit message processors executed. MUnit coverage report provides metric for the following −
- Application overall coverage
- Resource coverage
- Flow coverage
To get the coverage report, we need to click on Generate Report under MUnit tab as shown below −
Debugging the test
We can debug a test suite as well as a test. First, we will see how to debug a test suite.
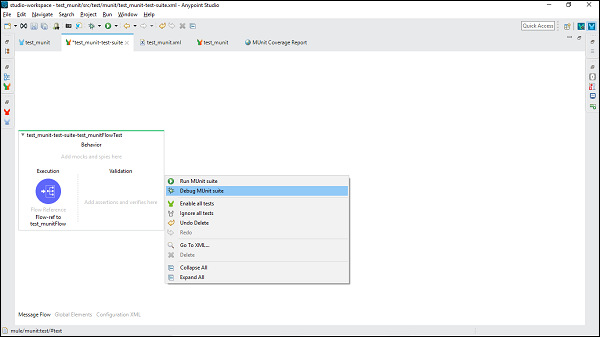
Debugging a Test Suite
For debugging a test suite, right click on the empty part of the Mule Canvas where your test suite resides. It will open a drop-down menu. Now, click on the Debug MUnit Suite as shown in the below image −
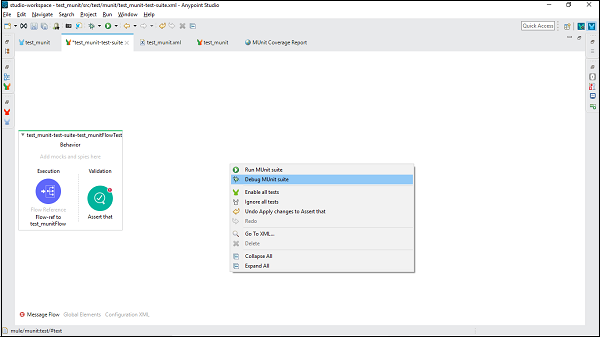
Then, we can see the output in the console.
Debugging a Test
To debug a specific test, we need to select the specific test and right-click on that. We will get the same drop-down menu as we got while debugging test suite. Now, click on the Debug MUnit Test option. It is shown in the below screen shot.