- MuleSoft - Home
- MuleSoft - Introduction to Mule ESB
- MuleSoft - The Mule Project
- MuleSoft - Mule in Our Machine
- MuleSoft - Anypoint Studio
- MuleSoft - Discovering Anypoint Studio
- Creating First Mule Application
- MuleSoft - DataWeave Language
- Message Processor & Script Components
- Core Components & Their Configuration
- MuleSoft - Endpoints
- Flow Control and Transformers
- Web Services Using Anypoint Studio
- MuleSoft - Mule Error Handling
- MuleSoft - Mule exception Handling
- MuleSoft - Testing with MUnit
- MuleSoft Useful Resources
- MuleSoft - Quick Guide
- MuleSoft - Useful Resources
- MuleSoft - Discussion
MuleSoft - Anypoint Studio
MuleSofts Anypoint Studio is a user-friendly IDE (integration development environment) used for designing and testing Mule applications. It is an Eclipse-based IDE. We can easily drag Connectors from the Mule Palette. In other words, Anypoint Studio is an Eclipse based IDE for development of flow, etc.
Prerequisites
We need to satisfy following prerequisites before installing Mule on all OS, i.e., Windows, Mac and Linux/Unix.
Java Development Kit (JDK) − Before installing Mule, verify that you have supported version of Java on your system. JDK 1.8.0 is recommended to successfully install Anypoint on your system.
Downloading and Installing Anypoint Studio
The procedure to download and install Anypoint Studio on different operating systems may vary. Next, there are steps to be followed for downloading and installing Anypoint Studio on various operating systems −
On Windows
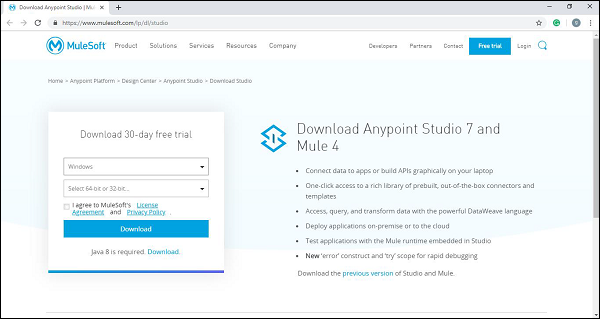
To download and install Anypoint Studio on Windows, we need to follow the steps below −
Step 1 − First, click on the link https://www.mulesoft.com/lp/dl/anypoint-mule-studio and choose the Windows operating system from top-down list to download the studio.
Step 2 − Now, extract it into the C:\ root folder.
Step 3 − Open the extracted Anypoint Studio.
Step 4 − For accepting the default workspace, click OK. You will get a welcome message when it loads for the first time.
Step 5 − Now, click on Get Started button to use Anypoint Studio.
On OS X
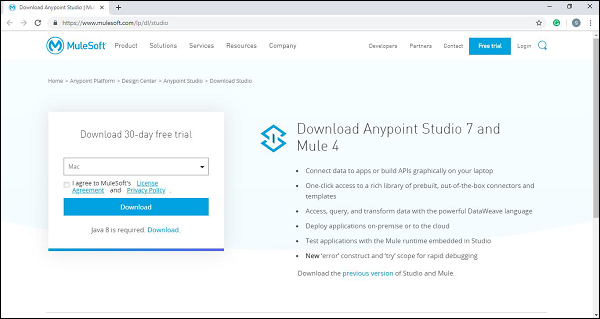
To download and install Anypoint Studio on OS X, we need to follow the steps below −
Step 1 − First, click on the link https://www.mulesoft.com/lp/dl/anypoint-mule-studio and download the studio.
Step 2 − Now, extract it. In case if you are using OS version Sierra, make sure to move the extracted app to /Applications folder before launching it.
Step 3 − Open the extracted Anypoint Studio.
Step 4 − For accepting the default workspace, click OK. You will get a welcome message when it loads for the first time.
Step 5 − Now, click on Get Started button to use Anypoint Studio.
If you are going to use custom path to your workspace, then please note that Anypoint Studio does not expand the ~ tilde used in Linux/Unix systems. Hence, it is recommended to use the absolute path while defining the workspace.
On Linux
To download and install Anypoint Studio on Linux, we need to follow the steps below −
Step 1 − First, click on the link https://www.mulesoft.com/lp/dl/anypoint-mule-studio and choose the Linux operating system from top-down list to download the studio.

Step 2 − Now, extract it.
Step 3 − Next, open the extracted Anypoint Studio.
Step 4 − For accepting the default workspace, click OK. You will get a welcome message when it loads for the first time.
Step 5 − Now, click on Get Started button to use Anypoint Studio.
If you are going to use custom path to your workspace, then please note that Anypoint Studio does not expand the ~ tilde used in Linux/Unix systems. Hence, it is recommended to use the absolute path while defining the workspace.
It is also recommended to install GTK version 2 to use complete Studio Themes in Linux.
Features of Anypoint Studio
Following are some features of Anypoint studio enhancing the productivity while building Mule applications −
It provides an instant run of Mule application inside a local runtime.
Anypoint studio gives us visual editor for configuring API definition files and Mule domains.
It has embedded unit testing framework enhancing the productivity.
Anypoint studio provides us the Built-in support to deploy to CloudHub.
It has the facility to integrate with Exchange for importing templates, examples, definitions and other resources from other Anypoint Platform organization.
