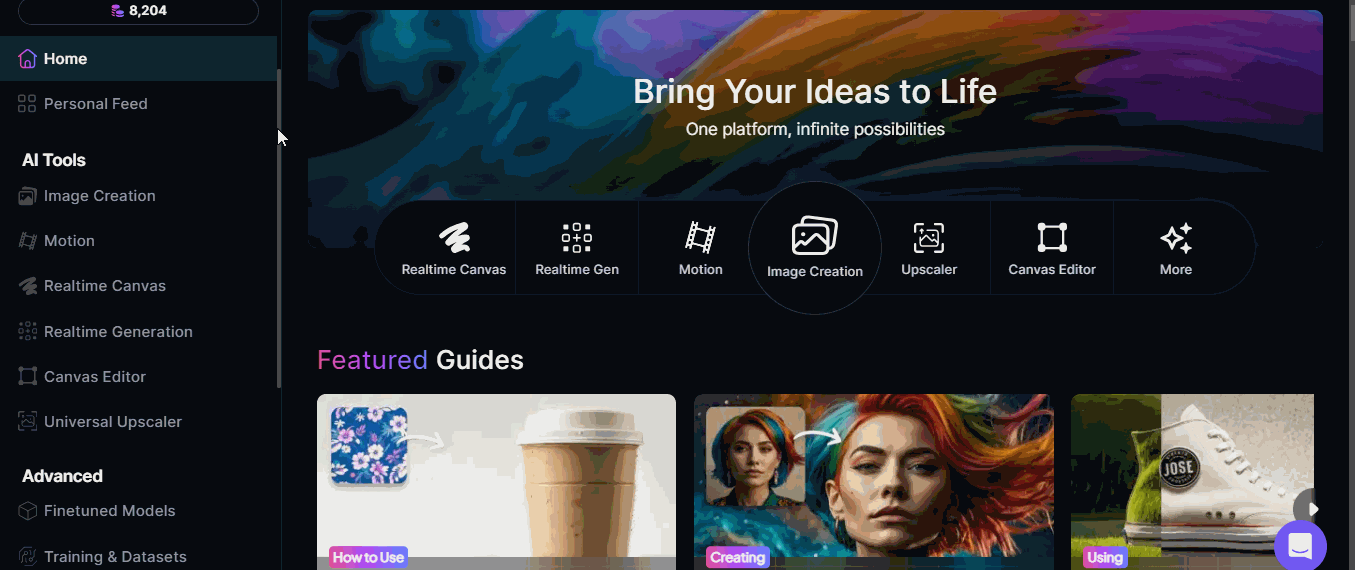
- Leonardo AI - Home
- What is Leonardo AI?
- Leonardo AI - Generating Images
- Leonardo AI - Text-to-Image Prompts
- Leonardo AI - Edit Images
- Leonardo AI - Image Enhancing
- Leonardo AI - Motion AI Tool
- Leonardo AI - Realtime Canvas
- Leonardo AI - Real-time Generation
- Leonardo AI - Universal Upscaler
- Leonardo AI - Finetuned Models
- Leonardo AI Useful Resources
- Leonardo AI - Quick Guide
- Leonardo AI - Resources
- Leonardo AI - Discussion
Leonardo AI - Quick Guide
What is Leonardo AI?
Leonardo AI is an AI-powered platform which is designed to create high-quality digital content. It primarily focuses on generative AI art. It enables users to design and create arts such as images, textures, 3D models, game assets, and much more.
Leonardo AI provides an intuitive interface and wide array of creative tools. Thats why it is popular among artists, game developers, and designers.
Key Features of Leonardo AI
Some of the key features of Leonardo AI are listed below −
- Generative AI Art − Users can simply describe what they want in a text prompt and Leonardo AI generate images and assets. It uses generative AI models to transform the text input into detailed visual content.
- Pre-trained AI Models − Leonardo AI platform provides pre-trained AI models for various types of artistic creation, like game environments, characters, 3D assets, etc. Users can customize these models or use them as a base for creating new designs.
- Fine-Tuning Models − Leonardo AI facilitate users to upload their own datasets or images to fine-tune Leonardo's models.
- User-Friendly Interface − Leonardo AI has a user-friendly interface which is designed for both beginners and experienced professionals. Its simple interface allows for easy content generation.
- High-Resolution Outputs − Leonardo AI can generate high-resolution outputs which makes it suitable for professional-grade artwork, game design, and animation.
- Customizable Outputs − Users can get customizable outputs. They have control over parameters such as styles, color palettes, and other artistic elements.
Use Cases of Leonardo AI
In this section, we have highlighted some of the use cases of Leonardo AI −
- Game Development − Leonardo AI is an ideal platform for the developers that need game assets such as character designs, landscapes, textures, and 3D models.
- Concept Art − Artists can use Leonardo AI to quickly generate concept art for movies, animation, or design projects.
- Marketing and Branding − You can use Leonardo AI to easily create visuals for marketing campaigns, logo design, and advertisements.
- 3D Modeling and Animation − You can use Leonardo AI to create high-quality 3D models that are essential for animation and virtual environments.
Leonardo AI Free vs. Paid Plans
Leonardo AI introduced various plans including Free, Apprentice, Artisan Unlimited, and Maestro Unlimited for its users.
The following table shows a comparison between its various plans −
| Starter (Free) | Apprentice ($12/month) | Artisan ($24/month) | Maestro ($48/month) |
|---|---|---|---|
| 150 Fast Tokens Resets Daily | 8,500 Fast Tokens Resets Monthly | 25,000 Fast Tokens Resets Monthly | 60,000 Fast Tokens Resets Monthly |
| No Rollover Token Bank Capacity | 25,500 Rollover Token Bank Capacity | 75,000 Rollover Token Bank Capacity | 180,000 Rollover Token Bank Capacity |
| Organize with 1 Collection | Unlimited Collections | Unlimited Collections | Unlimited Collections |
| Up to 200 Realtime Canvas Actions | Unlimited Realtime Canvas Actions | Unlimited Realtime Canvas Actions | Unlimited Realtime Canvas Actions |
| Up to 200 Realtime Generation Actions | Unlimited Realtime Generation Actions | Unlimited Realtime Generation Actions | Unlimited Realtime Generation Actions |
| Public Generations Only | Create Private Generations | Unlimited relaxed Image Generations at 0 Tokens | Unlimited relaxed Image Generations at 0 Tokens |
| No Concurrent Jobs | Generate 2 Jobs Concurrently | Create Private Generations | Unlimited relaxed Ultra Generations at 0 Tokens |
| Queue up to 5 Generations | Queue up to 5 Generations | Generate 3 jobs concurrently | Unlimited relaxed Motion Generations at 0 tokens |
| Browse and use Community Made AI Models | Train 10 AI models with Training & Datasets | Queue up to 10 Generations | Create Private Generations |
| Try Enhanced Quality | Unlock Enhanced Quality | Train 20 AI models with Training & Datasets | Generate 6 jobs concurrently |
| Create Motion Videos with Watermark | Create Motion Videos without Watermark | Unlock Enhanced Quality | Queue up to 20 generations |
| Create Motion Videos without Watermark | Train 50 AI models with Training & Datasets | ||
| Unlock Enhanced Quality | |||
| Create Motion Videos without Watermark |
Note that these are the current plans of Leonardo as of September 2024.
Leonardo AI - Generating Images
Log on to Leonardo.AI with your credentials and follow the below given steps to generate images −
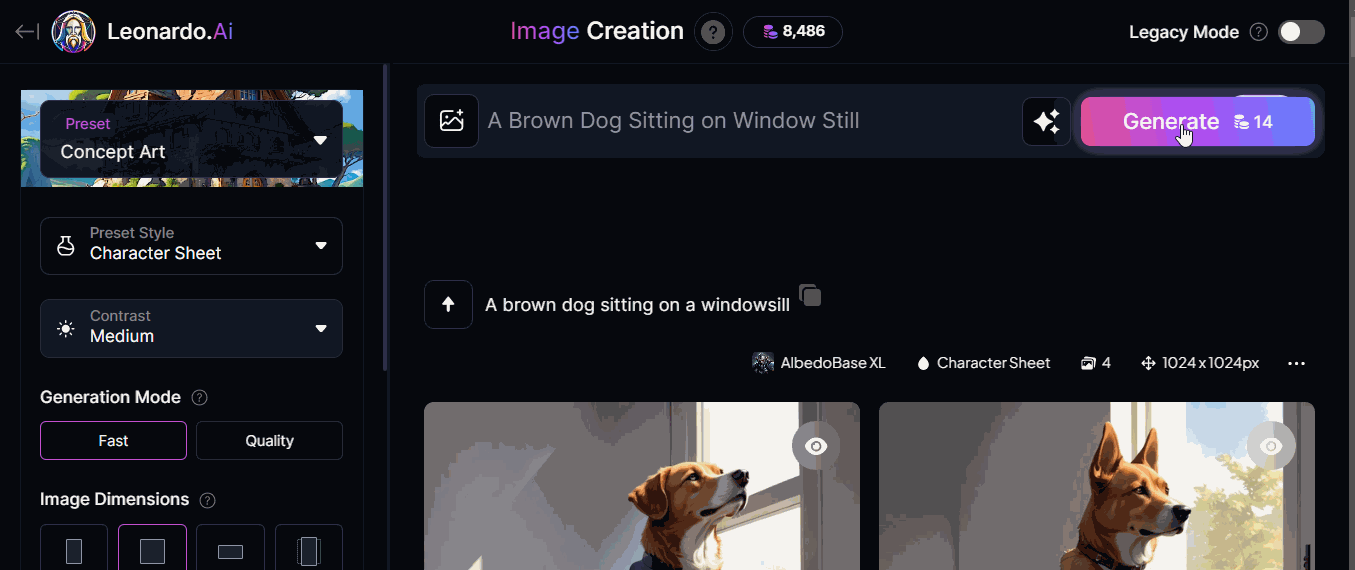
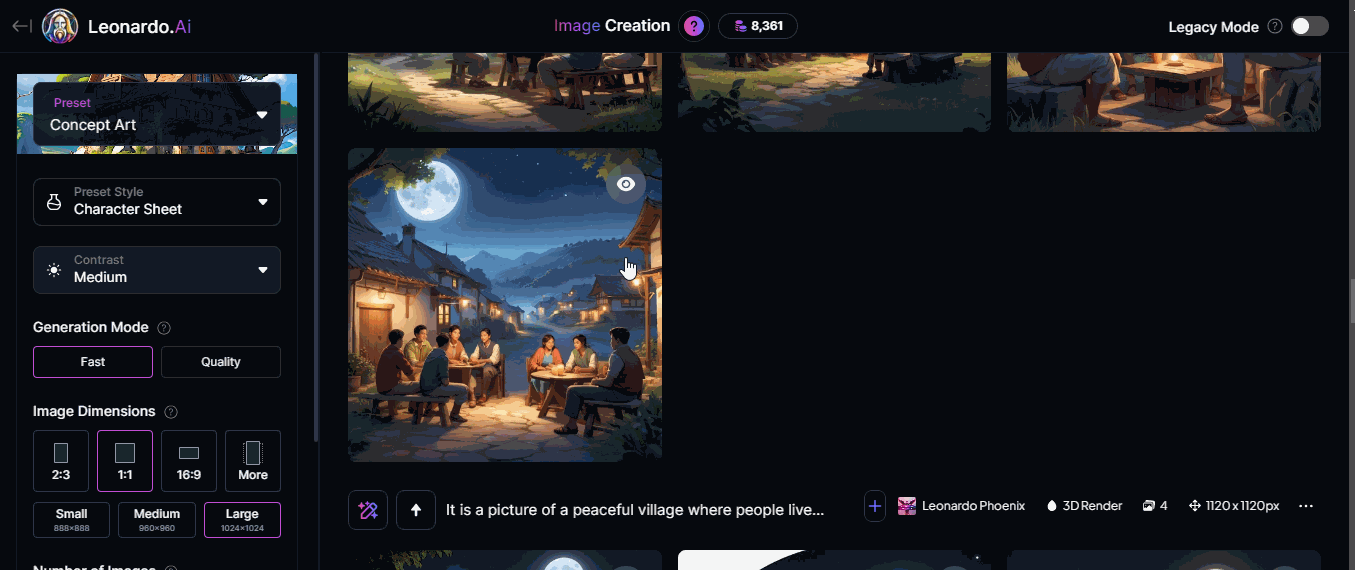
Step 1: Navigate to Image Creation
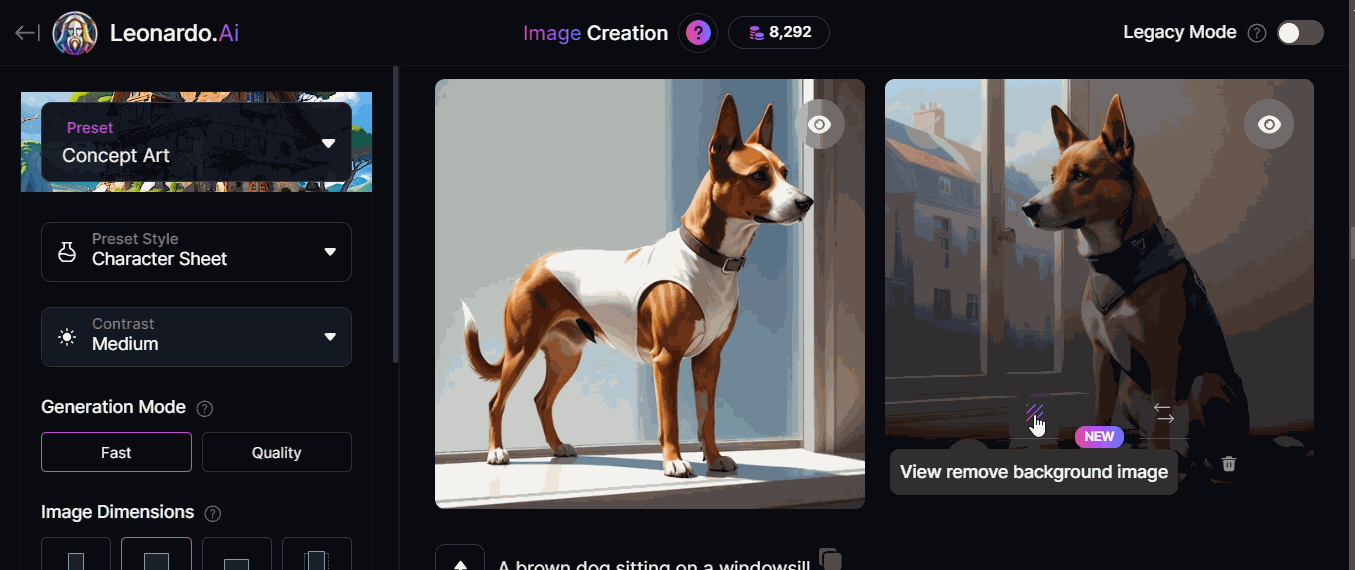
To start creating AI images, click on Image Creation in the AI Tools in the left sidebar. Check the image below −

As you can see the Image Generation page has some default settings like a Preset, Preset Style, Generation Mode, Image Size, and the Number of Images. For creating your first image, lets use these default settings.
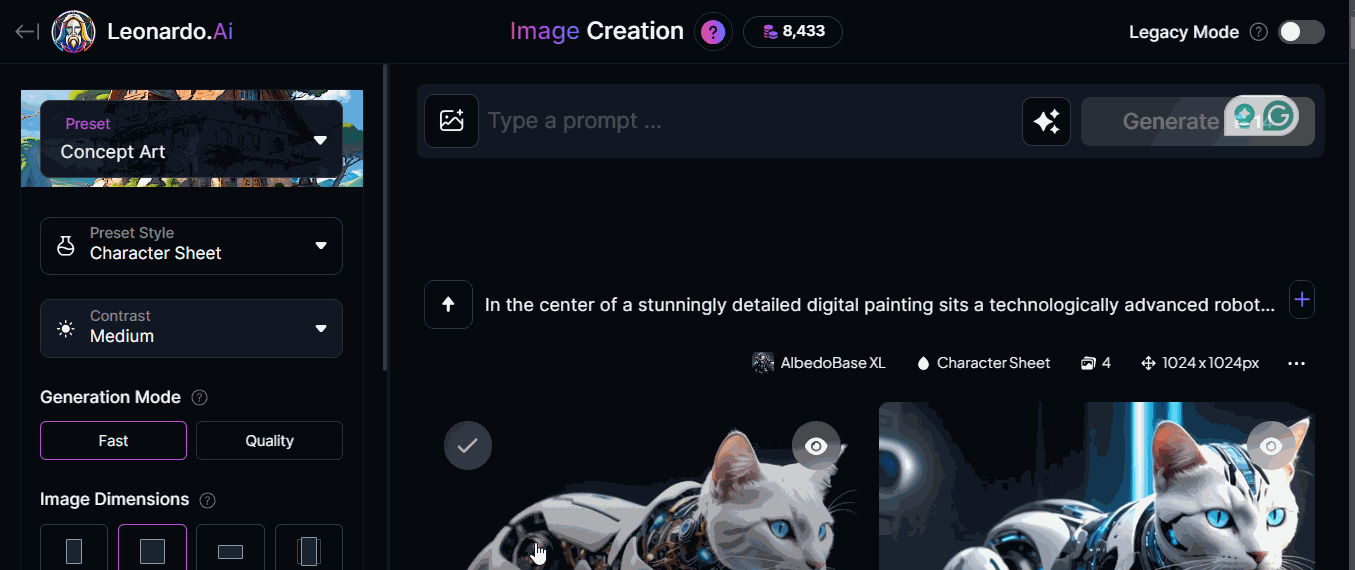
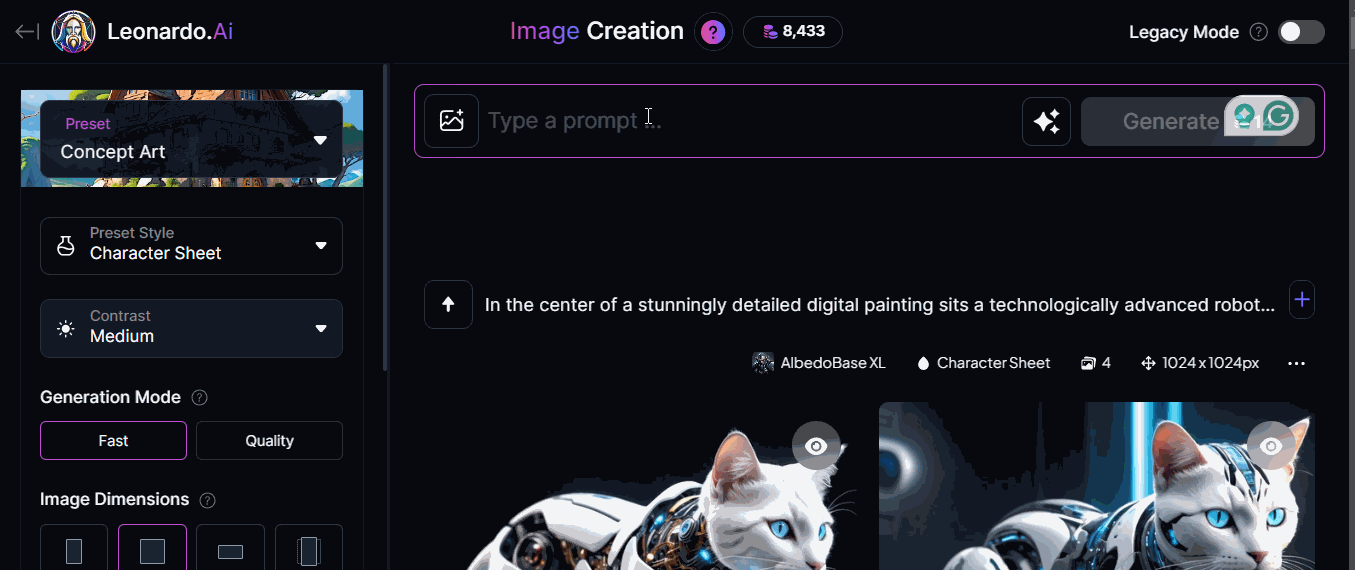
Step 2: Enter a Text Prompt
In the Image Generation prompt bar, write a text description of the image you want to generate. For example, A brown dog by the windowsill. Check out the image below −
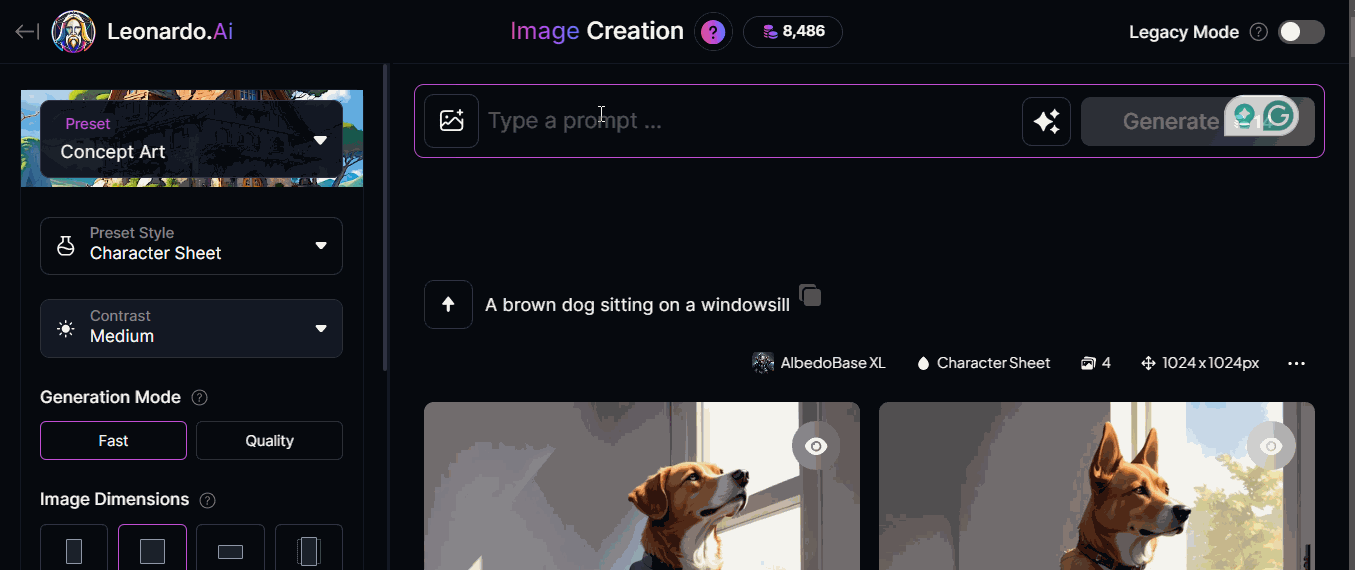
Step 3: Click on the Generate Button
After you finish typing in your text prompt, it is time to click on the Generate button. The platform will start the image generation process. It will usually take around 30-40 seconds with Quality mode selected.
Once the image generation is complete, the images will appear on your screen. You can then download the image and use it for your project.
In just a few simple steps, you have successfully created a high-quality image with Leonardo.AI.
Leonardo AI - Text-to-Image Prompts
When you generated your first image with text prompts, you start with a simple prompt like "A Brown Dog Sitting by a Window Still". In this chapter, we will show you how to make your prompts better by using prompts from Leonardo.AI's images, its prompt tools, and some best practices.
Leonardo.AI's Images
On the front page, scroll through the images to find the ones you like. Now, click on that image and check its prompt details.
Using Prompt Tools
If you want to use automated help for prompts, you can use Leonardo.AIs AI tools provided within the platform.
In the AI Image Creation page, to the right of the prompt bar there are three starts which can either help you create a new random prompt or improve prompt.
New Random Prompt
When the prompt bar is empty, click on the three starts icon. Now, from the list select 'New Random Prompt. It will generate a random prompt but before using it check the description that appear.
Use Improve Prompt
If you want Leonardo.AI to improve your prompt, then click on the second option from the list which is "Improve Prompt". You can start with a short prompt like "a brown dog".
Then, click on Improve Prompt to generate a prompt from your initial prompt. It is advised to note the added details generated within the prompt.
You can use either your random prompt or improved prompt to generate the images.
Best Practices for Good Prompt Structure
A good prompt will contain the following five elements −
- Subject − For example, "a brown dog"
- Medium − For example, "Oil painting"
- Style − For example, "Realism"
- Composition − For example, "Seated pose with a focus on facial expression"
- Color and Lighting − For example, "Natural and muted colors with soft and ambient lighting"
Lets put them together −
"Realistic oil painting of a brown dog in a seated pose focusing on facial expressions, with natural and muted colors with soft and ambient lighting."
Leonardo AI - Edit Images
When you generate images, it is possible that some details require editing or some adjustments. Leonardo.AI provides us with the tool called Canvas Editor to edit the images. Lets see step-by-step how we can edit the images −
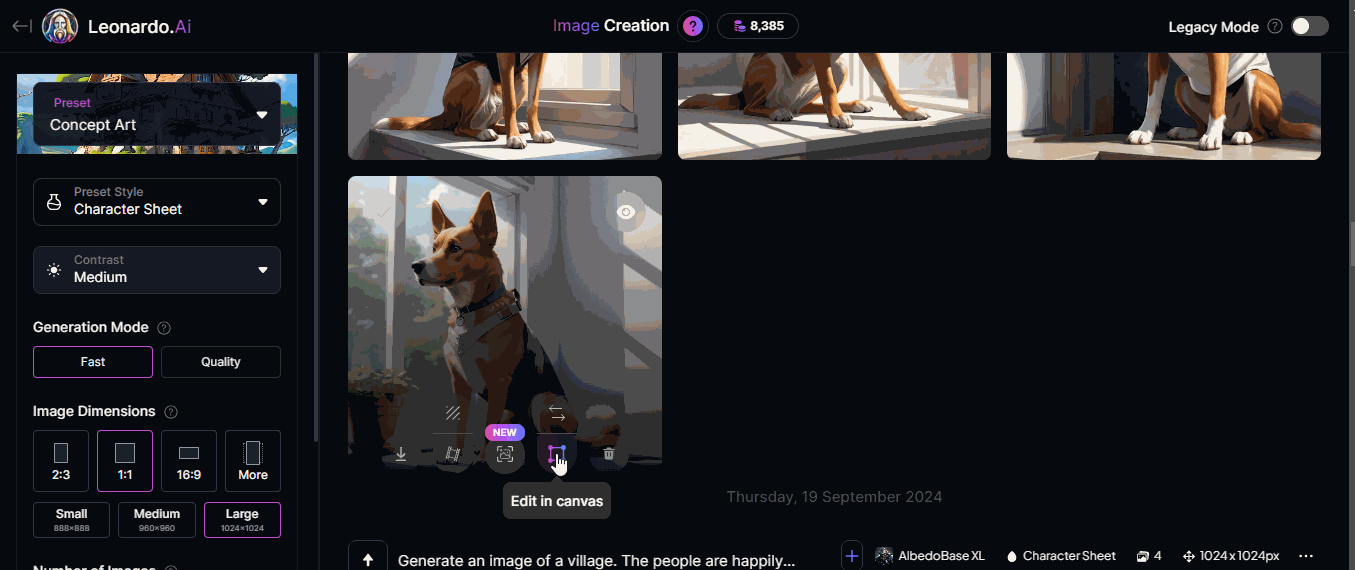
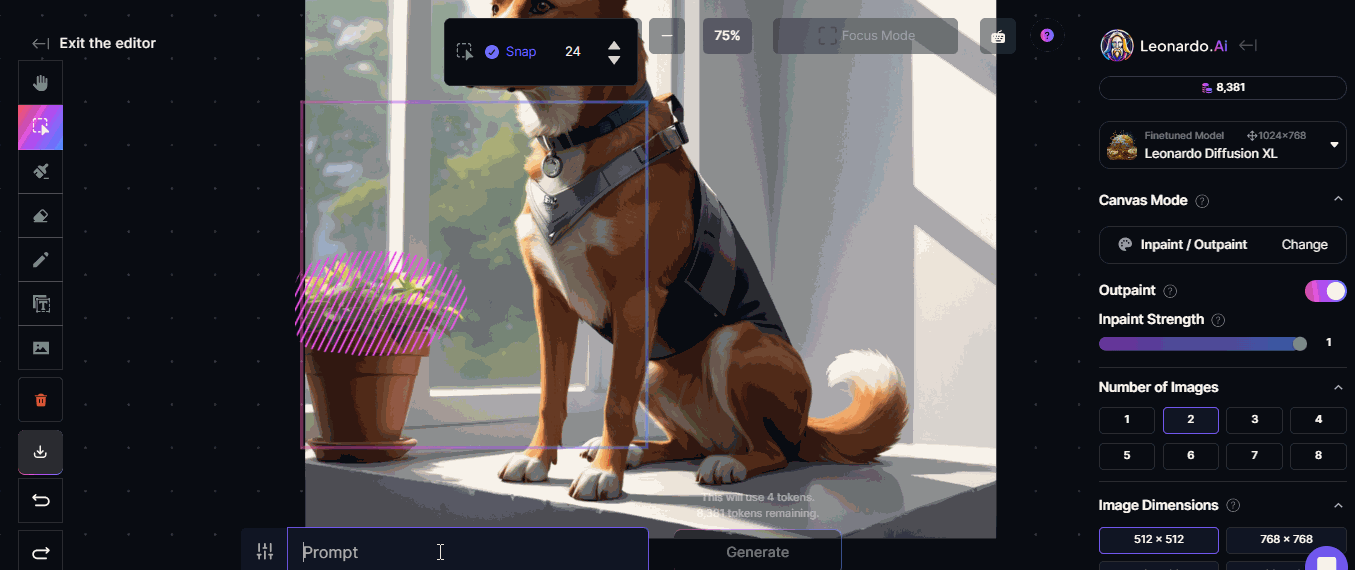
Step 1: Navigate to Canvas Editor
If you want to edit the image, you need to go to the Canvas Editor which is represented by a square icon on the image. Click on the square "Canvas Editor" icon to bring that image into the Canvas Editor or you can also download that image from the generated images.
You can also click on Canvas Editor AI tool on the left-side toolbar.
Step 2: Select the Area
Now, you need to select the area of the image you would like to edit. To do so, click on the Select icon on the left-hand menu. Now, drag the selection box to the target area.
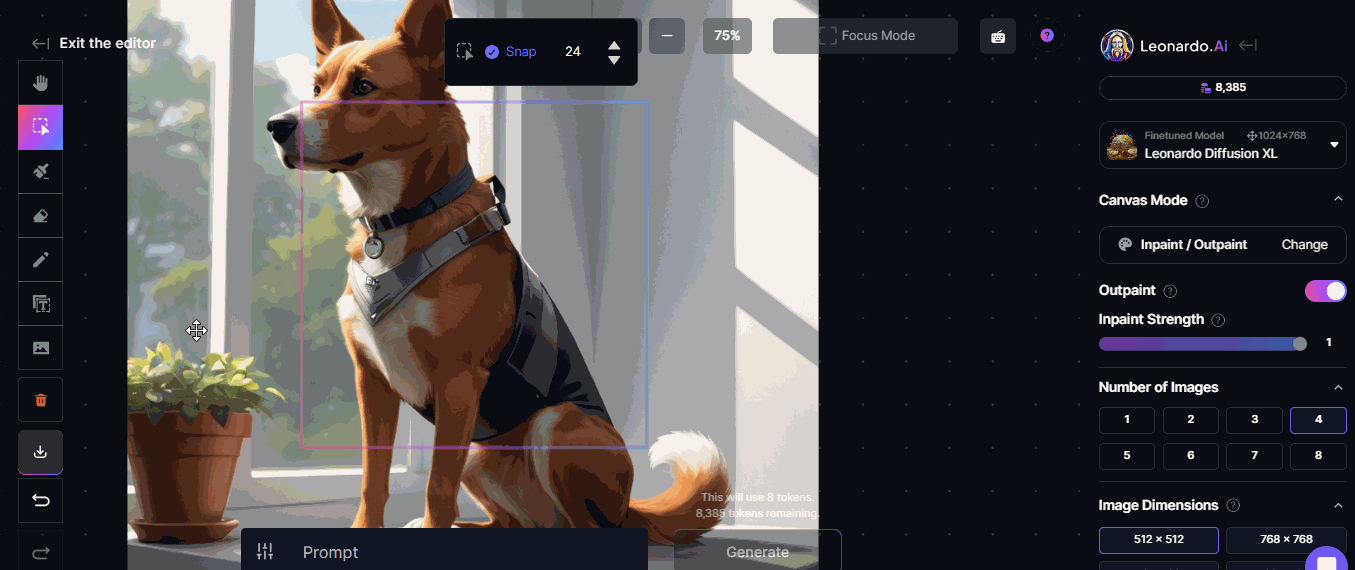
Once done, now we need to click on the "Draw Mask" icon on the left-hand menu. Now, draw a mask over the area of the image that you would like to edit.
Step 3: Generating Images in the Selected Area
First, we need to set the generation settings on the sidebar on the right −
- Try to keep Inpainting Strength to 1. It is because the higher the strength the more the output will diverge from the original image.
- Try to set the Number of Images to 4 so that we can choose among 4 generated images.
Once done with the settings, you can type your prompt at the prompt bar at the bottom. In our case, we want "white flowers". Now, click on the Generate button and it will take few seconds to generate the images.
Step 4: Downloading the Image
After generating the images, you can choose among the number of images it generated as per your settings.
After selecting a particular image, you can click on the download button in the left side bar to download and use that image in your project.
Leonardo AI - Image Enhancing
After creating an image of your choice, you sometimes may want to enhance that image. You may require an upscaled version for printing or a no background version for compositing.
Within Leonardo.AI web application, you can directly upscale an image using its upscale tools.
Using Alchemy Upscale
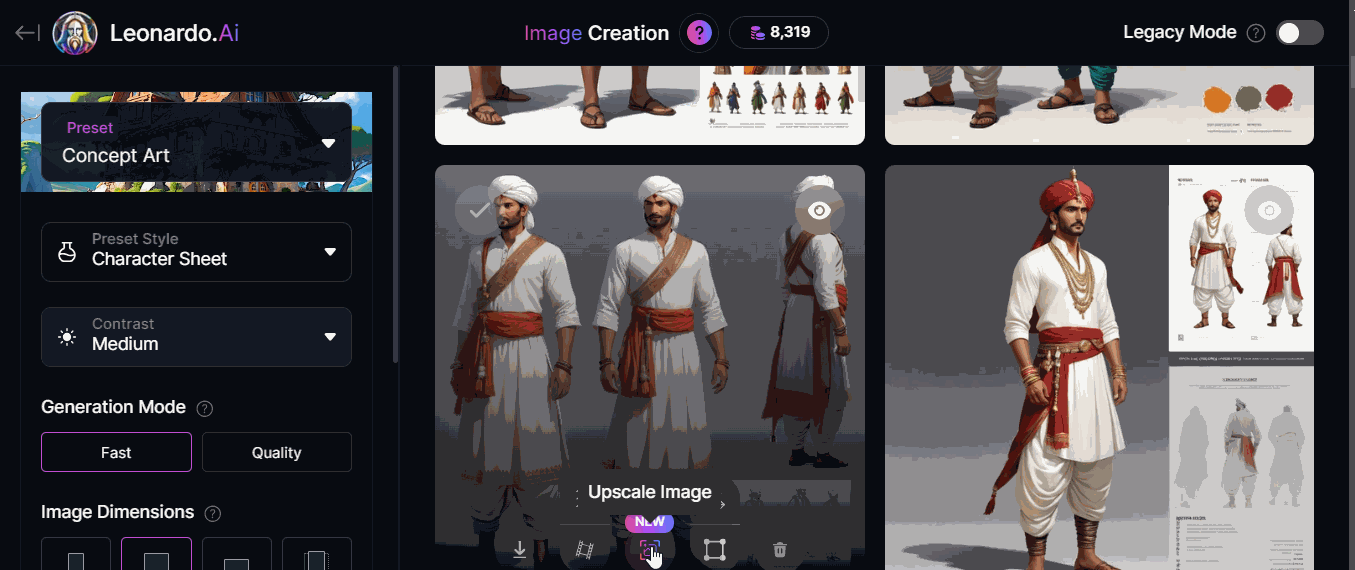
First, navigate to the Leonardo.AI Image Generation Page and choose an image which you want to upscale. Now, hover on the image find the Upscale Image icon. Click on the icon and choose the option Alchemy.
In Alchemy, change the settings like Refiner Strength to high and enable Smooth Mode. Once done, click on the Upscale Image button. Within a few seconds, Leonardo.AI will upscale the image.
Using Ultra Upscale
This is the new method to upscale images. For this also you first need to navigate to the Leonardo.AI Image Generation Page and choose an image which you want to upscale.
Now, hover on the image find the Upscale Image icon. Click on the icon and choose the option Ultra.
In Ultra option, change the settings like Upscaler Style to Realistic or Artistic, as per your choice. You can also change Advanced Settings accordingly. Once done, click on the Upscale image button. Within a few seconds Leonardo.AI will upscale the image.
Remove the Background
Sometimes we do not need the image background. We can use the Remove Background tool to remove the background of the image.
For this, you first need to navigate to the Leonardo.AI Image Generation Page and choose an image of which you want to remove background. Now, hover on the image find the Remove Background icon. Click on the icon wait for few seconds.
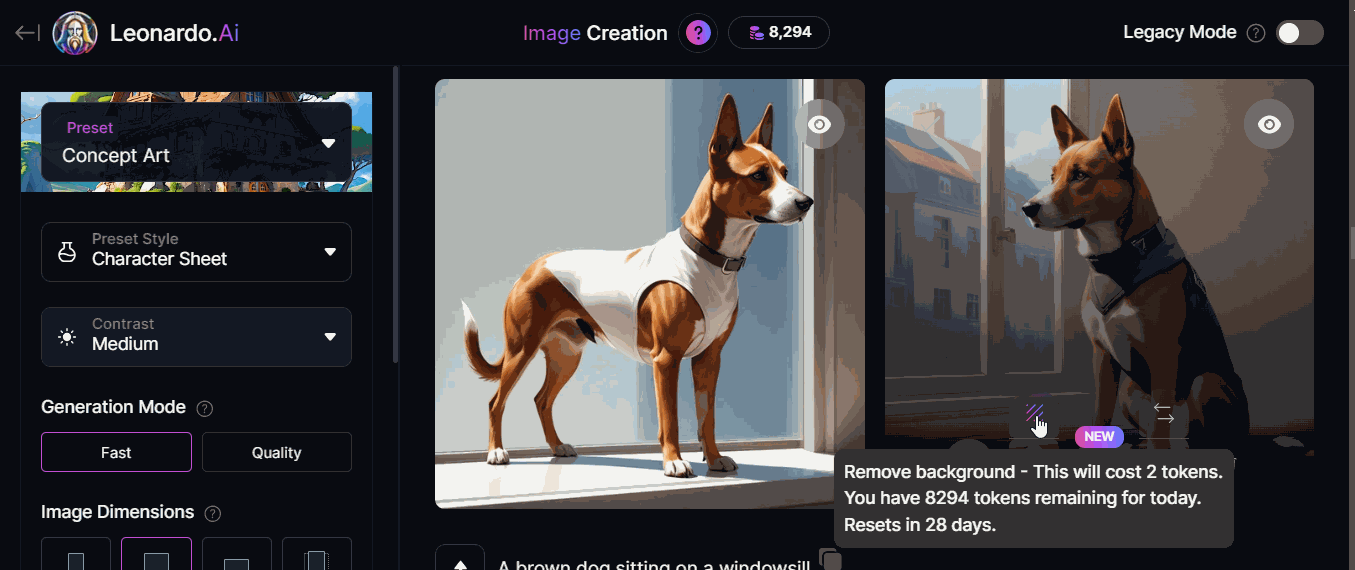
Once completed, the icon of the Remove Background will change. Click on it to get the image without background.
Leonardo AI - Motion AI Tool
Motion AI tool is the very first animation tool of Leonardo.AI. It can give life to your generated images. With Motion AI tool, you can create animated videos from high quality images, and you do not need to worry about the style and look of the output.
- With Motion AI tool, you can choose any generated images, or you can also select image from already uploaded images.
- It is simple to use as there are no complicated sliders and options involved.
- It provides users enhanced motion control with the help of which user can easily fine-tune degree of dynamism.
How to Use the Motion AI Tool?
In this chapter, let's understand step-by-step how the Motion AI tool works in Leonardo AI.
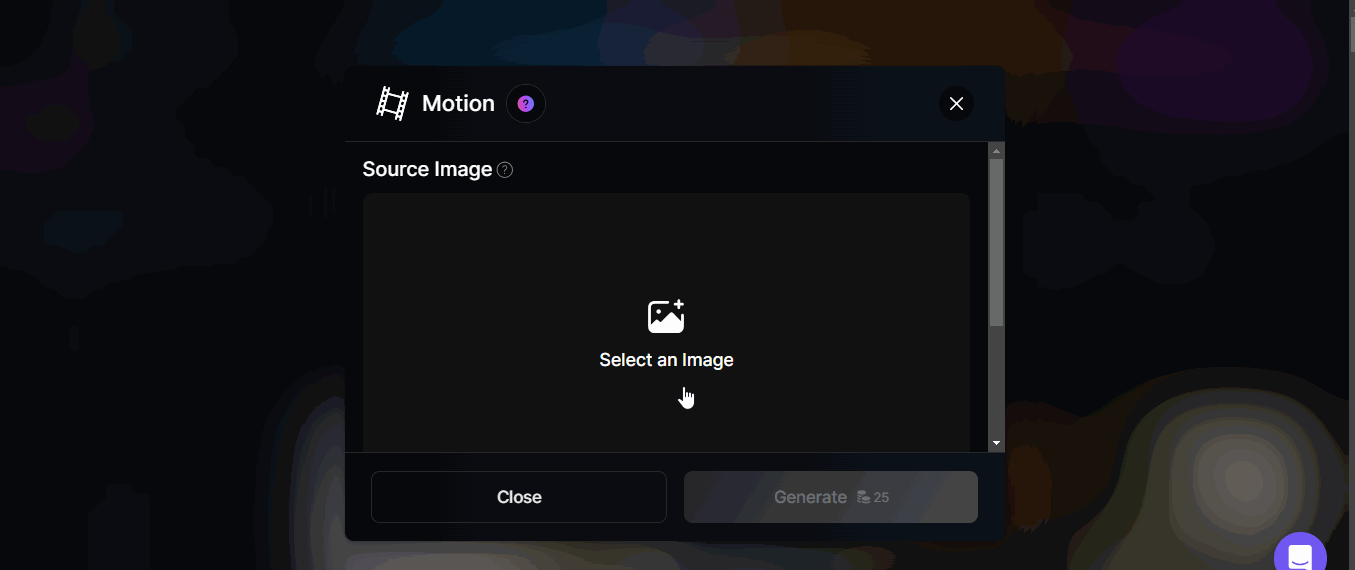
Step 1: Click on the Motion AI Tool
First, click on the Motion AI tool from the left-side toolbar. It is under AI tools. It will prompt you to select an image.
Before selecting the image, set the Motion Strength Property as per your requirements. Also, enable Private Mode, as it will keep your generated motion image private to you only.
Step 2: Pick an Image
Now, you need to select an image you wish to create motion for. You can pick images from your Generations, Uploads, Collections, Community Feed, or Flower Feed.
After selecting the image, click on generate and then view generation. Within a few seconds, you will get the motion image.
You can also download this motion image as MP4 file and use it in your project.
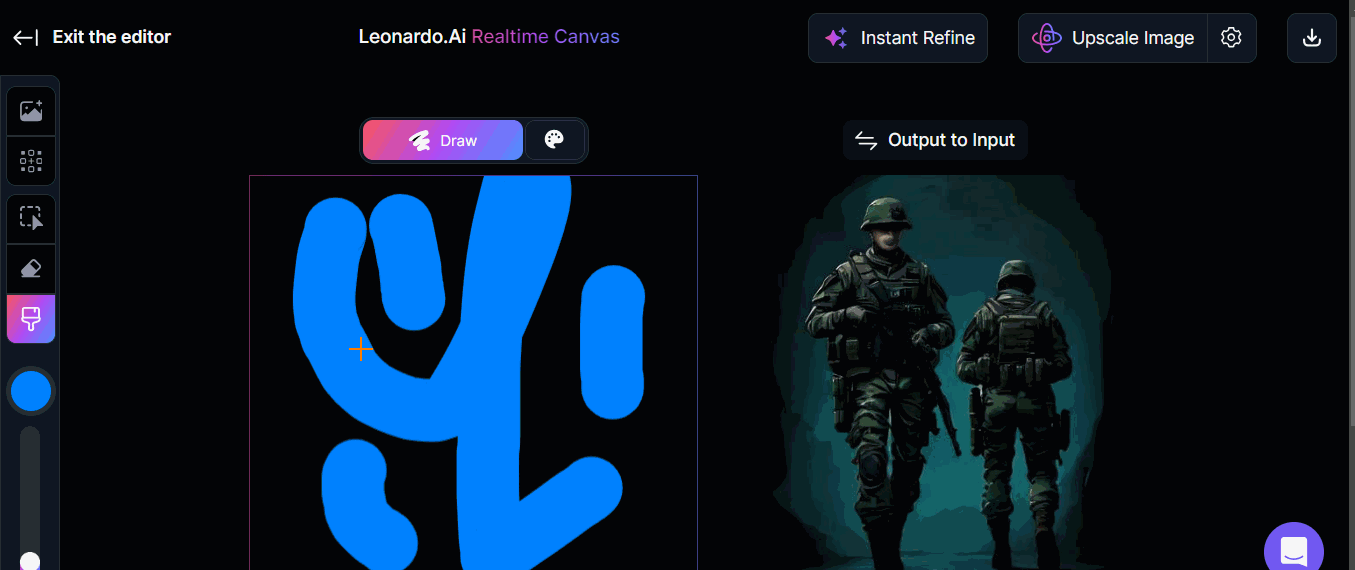
Leonardo AI - Realtime Canvas
Real-time Canvas of Leonardo.AI is a powerful tool that turns your drawings into amazing artwork almost instantly using the latest image transformation technology. It makes creating images feel as natural as painting on a digital canvas.
Real-time canvas gives you an easy and enjoyable way to interact with AI for art generation.
Real-time Canvas of Leonardo AI
Lets understand more about Real-time Canvas −
- Real-Time Mode (For Premium Users Only) − In this mode, as you sketch, Realtime Canvas instantly transforms your drawing into detailed artwork.
- Interactive Mode − In this mode, the canvas waits until you are done with actions like dragging or clicking before transforming your sketch into a detailed image.
- Realtime Generation − It allows you to quickly add extra elements to your image without drawing them yourself.
- Refinement & Personalization − You can use the Alchemy Upscaler to improve the quality of your image. The refined image is automatically saved to your Personal Feed for easy access. Choose between two options: Normal or Creative for refining.
- Style Presets − It allows you to try different art styles to change the look of your sketch.
- Efficient UI − You got the split-screen layout which lets you easily upload images and work with precision.
- Inpaint Mode − This mode allows you to make small edits to parts of your image without changing the whole thing.
Benefits of Using Real-time Canvas
Some of the benefits of using Realtime Canvas in Leonardo.AI are listed below −
- Boost Creativity − Realtime Canvas gives you complete creative control. It lets you quickly turn your ideas into visual art.
- Better Color Control − With realtime canvas, it is easy to control the colors in your image. Keep the Creativity Strength lower if you want more closely the image will follow your sketch.
- Fast Ideas − It helps user to quickly turn rough sketches into detailed artwork. You can also add a prompt for more accuracy, or let the AI interpret your sketch without one.
- Edit Images − You can keep refining your artwork by sketching over the generated image or upload your own image to start editing.
How to Use Real-time Canvas?
In this section, let's understand step-by-step how to use real-time canvas in Leonardo AI −
Step 1: Launch Real-time Canvas
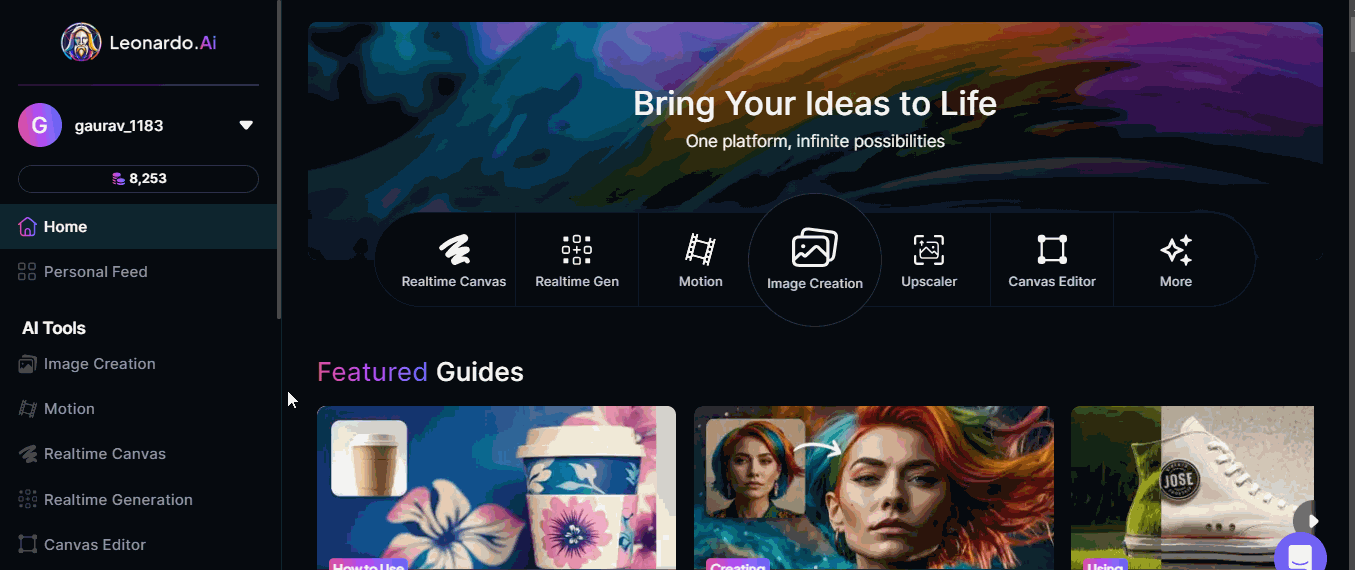
To launch real-time canvas, go to the main page under AI tools in the left sidebar, and click Real-time Canvas.
Step 2: Start Drawing on the Real-time Canvas
Now, select the brush tool, pick any color and start drawing. You can also upload an existing image to start with. If you want to draw something specific, you can enter a prompt. The Real-time Canvas updates the output in real time.
Step 3: Save the Output
Once done with drawing, you can save the result. Press the Upscale Image button and it will generate a refined, larger version of the result.
You can also download the image by clicking on the download button on the top right corner.
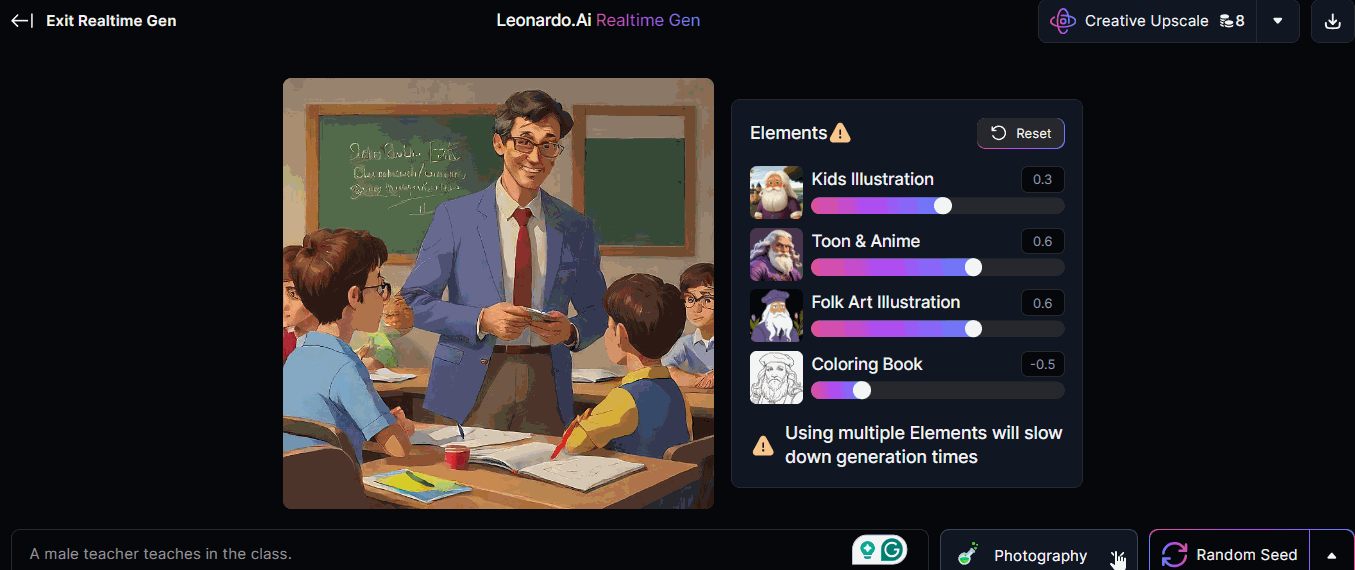
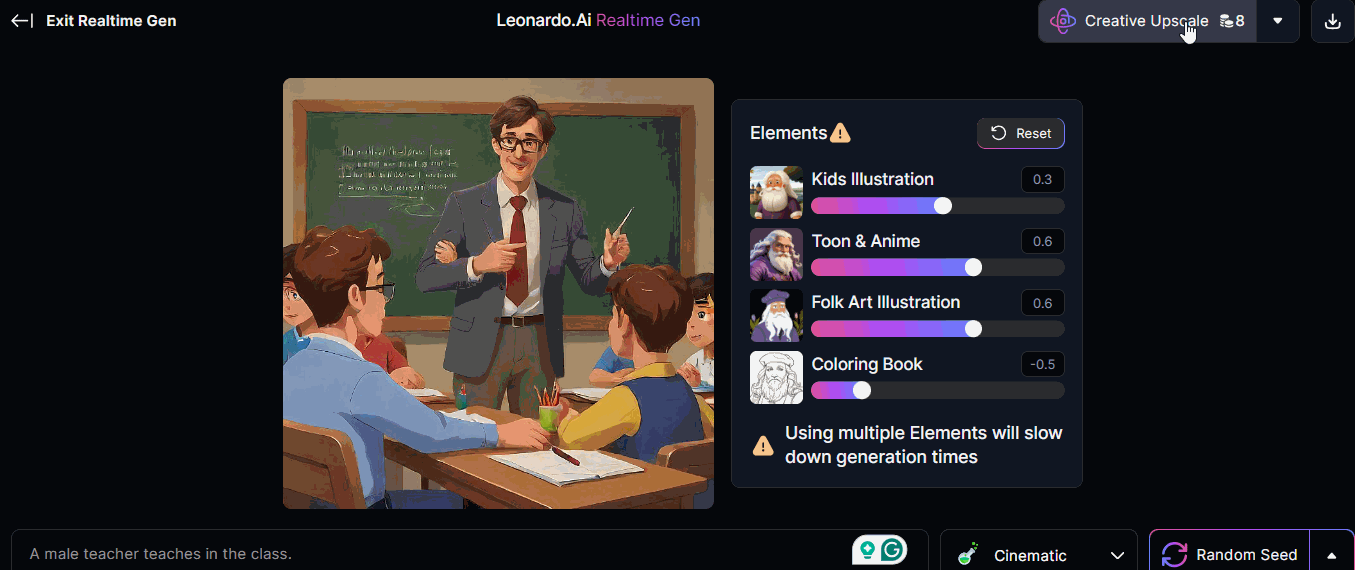
Leonardo AI - Real-time Generation
Real-time Generation is a new feature on Leonardo.AI with the help of which, as name implies, you can create images from text very quickly. As you type your prompt, the image changes in real time.
Real-time Generation in Leonardo AI
Real-time Generation gives you the flexibility to keep refining the image until you get exactly what you want.
Lets understand more about Real-time Generation −
- Refine and Personalize − You can use the Alchemy Upscaler to improve the quality of your images. It automatically saves the better version to your Personal Feed for easy access. You have the choice between Normal or Creative modes for refining.
- Style Presets − It provides different styles presets with the help of which you can easily switch between different styles to change how your image looks.
- Elements − You can also add fun elements to your images instantly with Leonardos Elements tool.
- Concept Sliders − The user can also adjust things like character age, weather, or cartoon style in real-time.
- Easy to Use − The interface of Realtime Generation is simple and user-friendly.
- Fast Image Generation − It provides Random Seed option with the help of which you can create a new version of your image with your current prompt and settings.
Benefits of Using Real-time Generation
We have listed here some of the benefits of using Real-time Generation AI tool −
- Live Feedback − Your image updates instantly as you type the prompt. It let you quickly change your prompt or settings and see the results in real time.
- Smooth Creative Flow − Its simple interface helps user to stay focused on their ideas without getting distracted by complicated settings.
- Save Time − It saves the time as you can quickly experiment with different ideas and get the results you want faster.
- For Everyone − Real-time Generation is easy to use for all skill levels, beginner or advanced.
How to Use Real-time Generation in Leonardo AI?
In this section, we have explained step-by-step how you can use Real-time Generation in Leonardo AI.
Step 1: Launch Real-time Generation
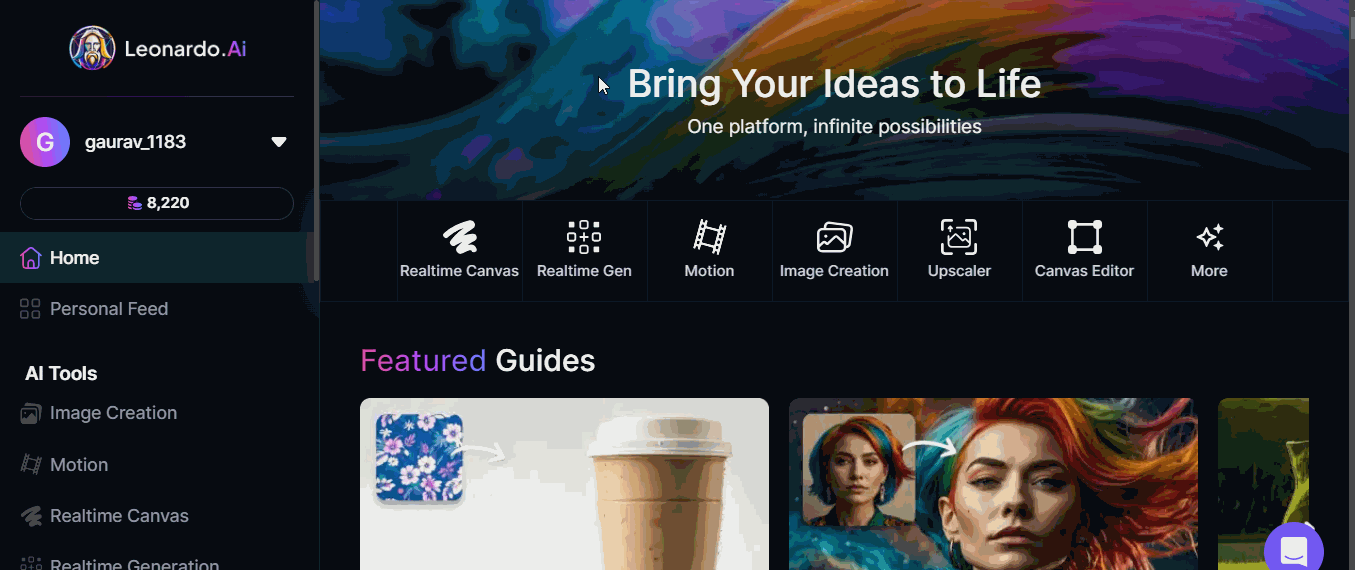
To launch Real-time Generation, go to the main page under AI tools in the left sidebar, and click on Real-time Generation.
Step 2: Write the Prompt
Write the prompt into the text box and you can see the output changes as you type.
Step 3: Customize the Generated Image
You can customize the generated image by picking up a style preset.
Step 4: Refine the Image
You can save your output or use one of the Refine options to create and save both the original image and refined output.
Leonardo AI - Universal Upscaler
The Universal Upscaler AI tool is Leonardo.AI's most powerful tool for improving the quality and resolution of any image. This advanced feature allows you to enhance images from the app or upload your own. This tool comes with customizable settings so you can adjust how the upscaling process works to suit your needs.
Lets understand more about Universal Upscaler −
- Customize the Upscaling − You can adjust several settings to control exactly how the upscaling is done. It gives you full control over the process.
- Works with Any Image − Unlike other tools, Universal Upscaler lets you upscale images both you upload and those in the app also.
- Compare Results Easily − You can compare the original image and the upscaled version easily.
- Upscaled Feed − You can easily access your upscaled images as they are saved in one place.
Benefits of Using Universal Upscaler
Listed here are some of the benefits of using Universal Upscaler AI tool −
- Better Image Quality − This tool is perfect for professionals like graphic designers, photographers, and digital artists, who need high-resolution images.
- Customizable − It allows you to tweak the upscaling process to fit your specific needs.
- Easy to Use − This advanced tool has simple interface which makes it accessible to everyone.
How to Use Universal Upscaler?
In this section, we have explained step-by-step how you can use the Universal Upscaler tool in Leonardo AI.
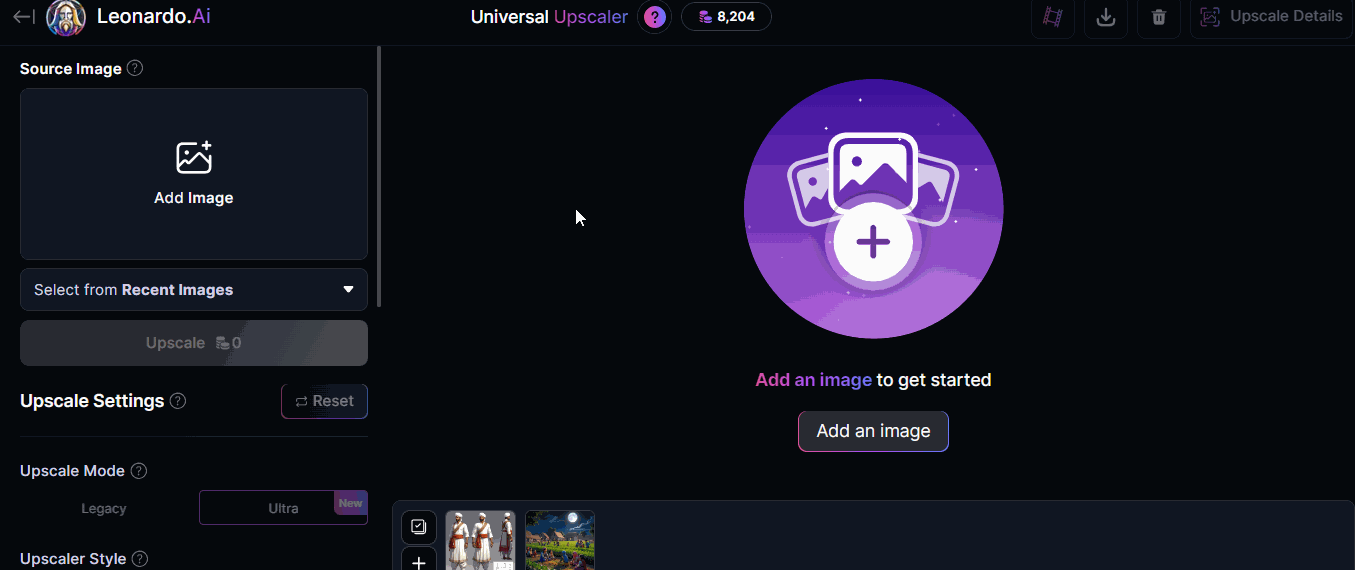
Step 1: Launch the Universal Upscaler
To launch the Universal Upscaler, go to the main page under AI tools in the left sidebar, and click on Universal Upscaler.
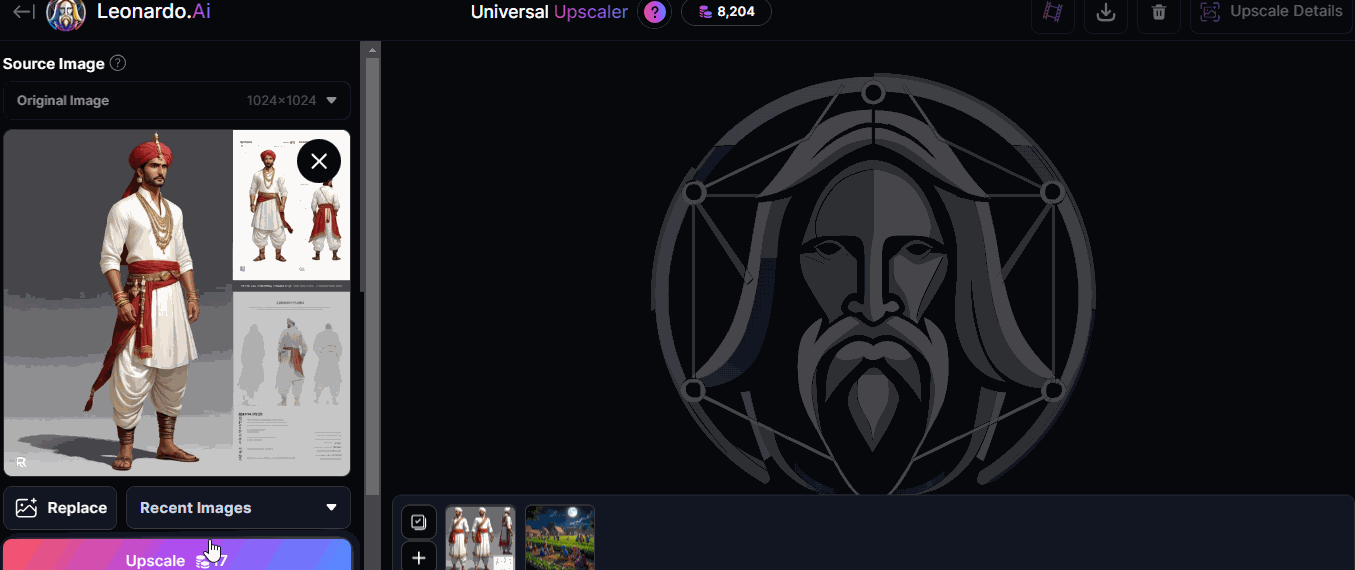
Step 2: Select the Image
Click on Add Image in the Source Image section of the sidebar on the left or you can select from Recent Images as well. Select an image and click Confirm.
Step 3: Tweak the Image
After uploading the image, you can adjust the Upscaler Style, Creativity Strength and Upscale Multiplier amount as per your preferences.

Step 4: Upscale the Image
Once done with settings, you can click on Upscale Image. Within a few seconds, your image will be upscaled.
Step 5: Save and Download
The upscaled images are automatically saved to your Personal Feed.
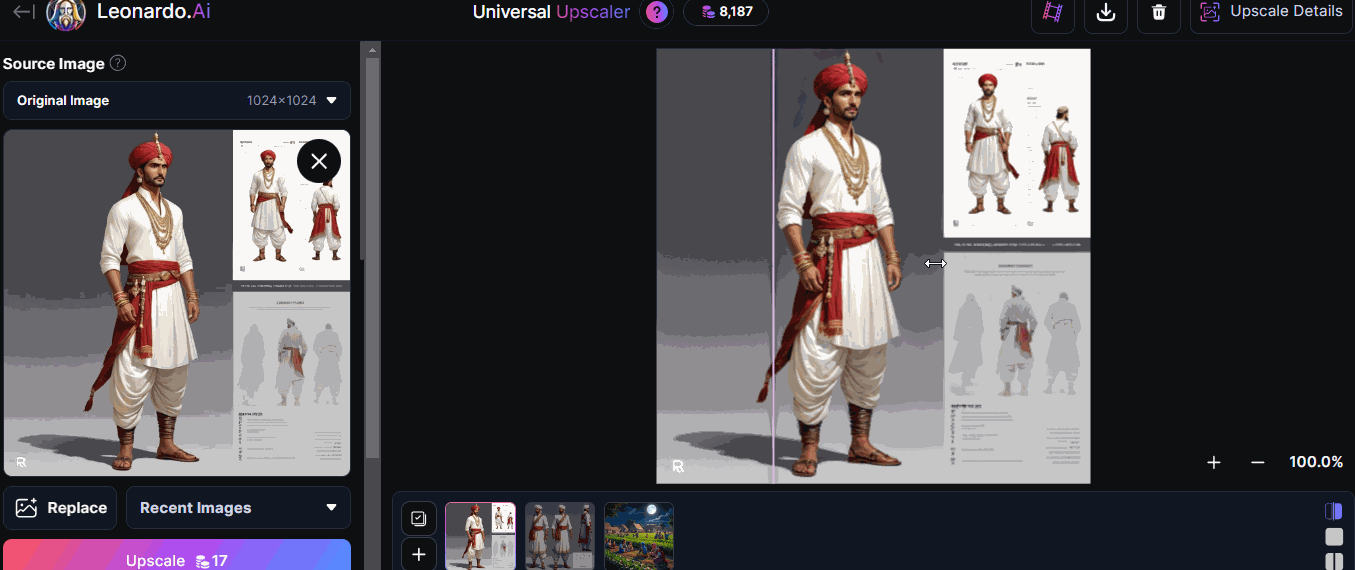
If you want to download the image, click on the Download button on the upper right corner.
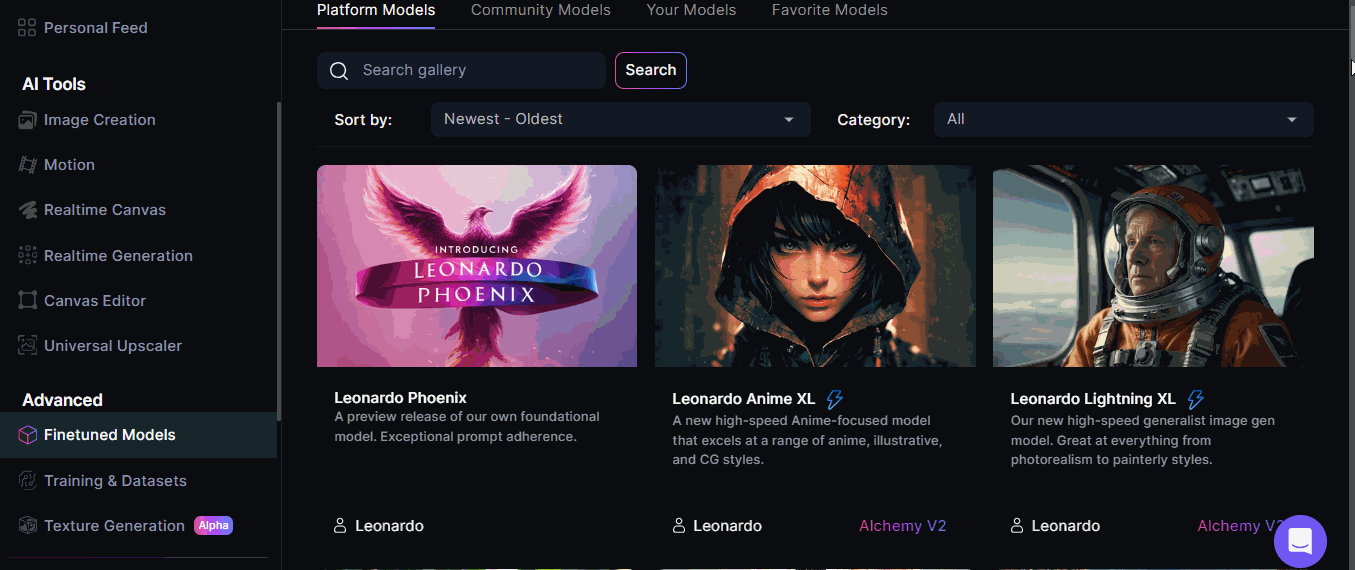
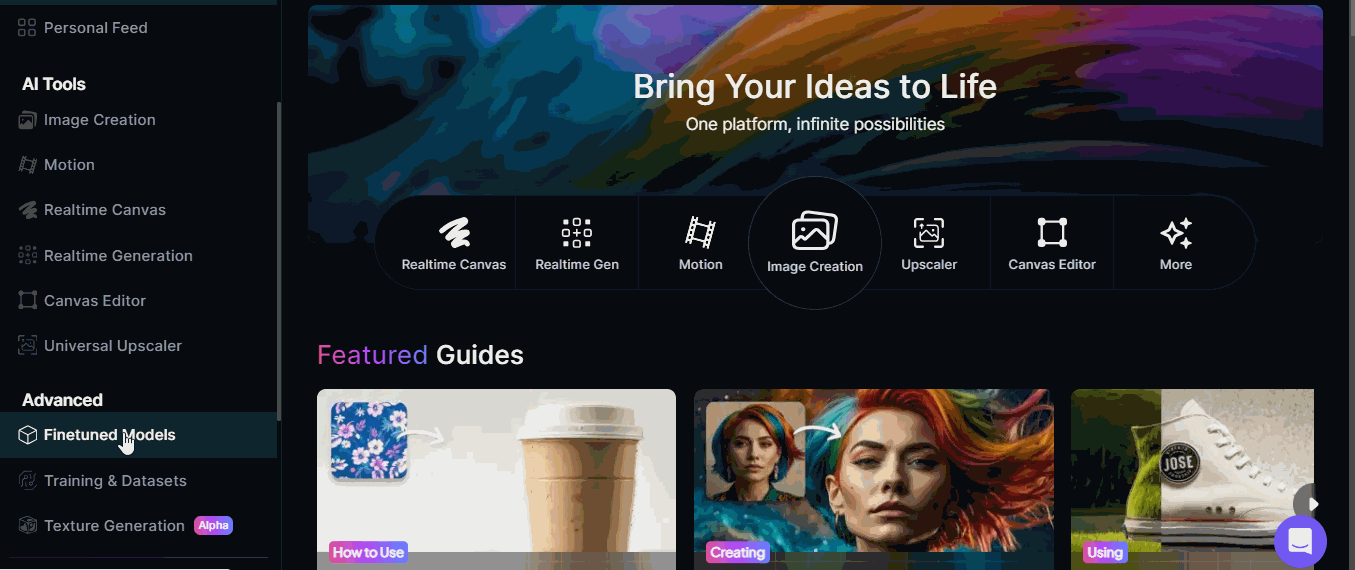
Leonardo AI - Finetuned Models
Leonardo.AI platform provides us various finetuned models to generate AI images. We can choose any of them. In this chapter, we will explain how you can use finetuned models of Leonardo.AI in your project.
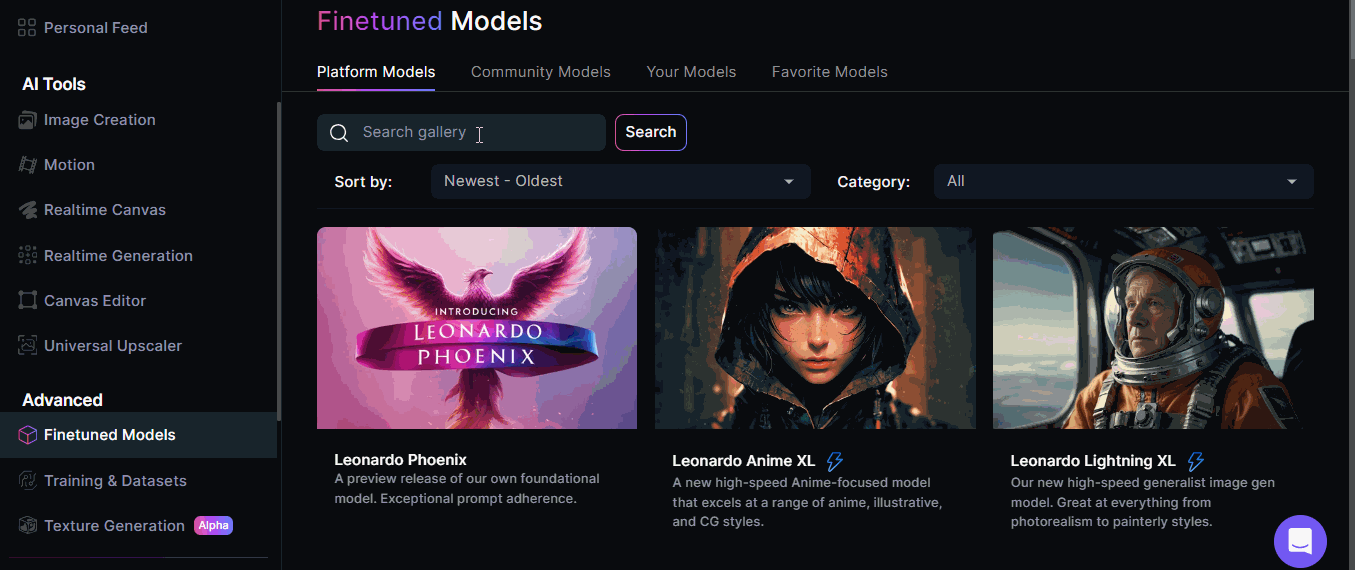
Step 1: Launch Finetuned Models
To launch Finetuned Models, go to the main page under AI tools in the left sidebar, and click on Finetuned Models.
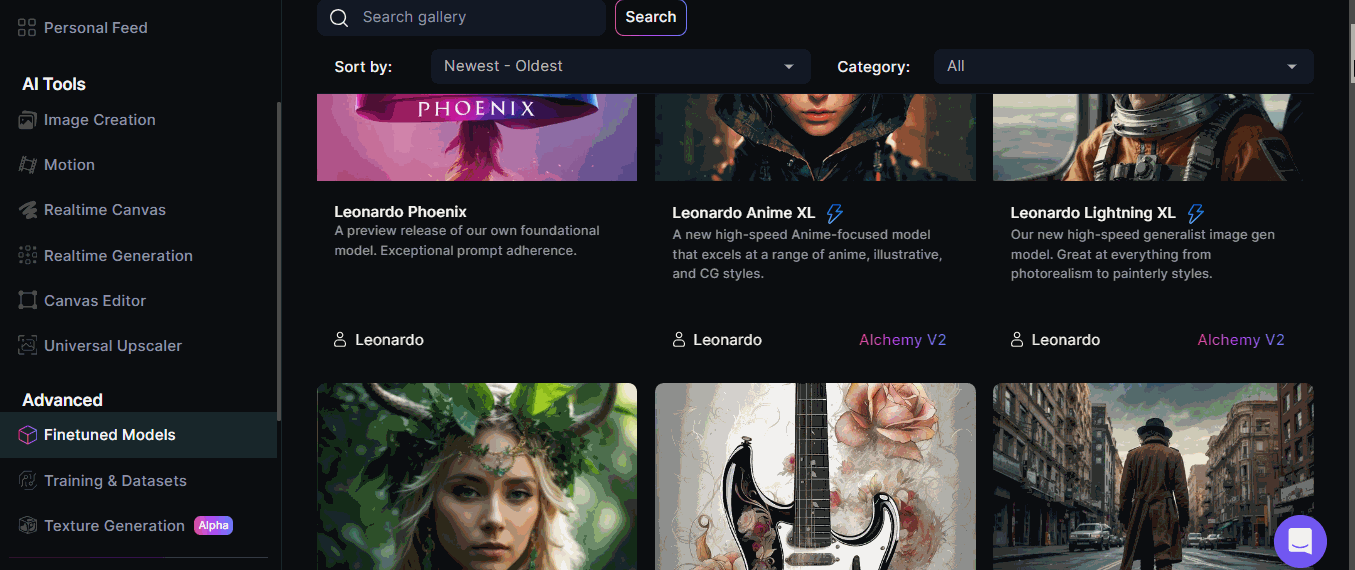
Step 2: Selecting from Various Models
You have various ways to select the models from. Lets see below −
Step 3: Selecting a Model
You can select any model to use and generate the image. Lets see below −
Step 4: Adjust the Settings
You can adjust the settings after selecting a particular model as follows −