- Leonardo AI - Home
- What is Leonardo AI?
- Leonardo AI - Generating Images
- Leonardo AI - Text-to-Image Prompts
- Leonardo AI - Edit Images
- Leonardo AI - Image Enhancing
- Leonardo AI - Motion AI Tool
- Leonardo AI - Realtime Canvas
- Leonardo AI - Real-time Generation
- Leonardo AI - Universal Upscaler
- Leonardo AI - Finetuned Models
Leonardo AI Useful Resources
Leonardo AI - Edit Images
When you generate images, it is possible that some details require editing or some adjustments. Leonardo.AI provides us with the tool called Canvas Editor to edit the images. Lets see step-by-step how we can edit the images −
Step 1: Navigate to Canvas Editor
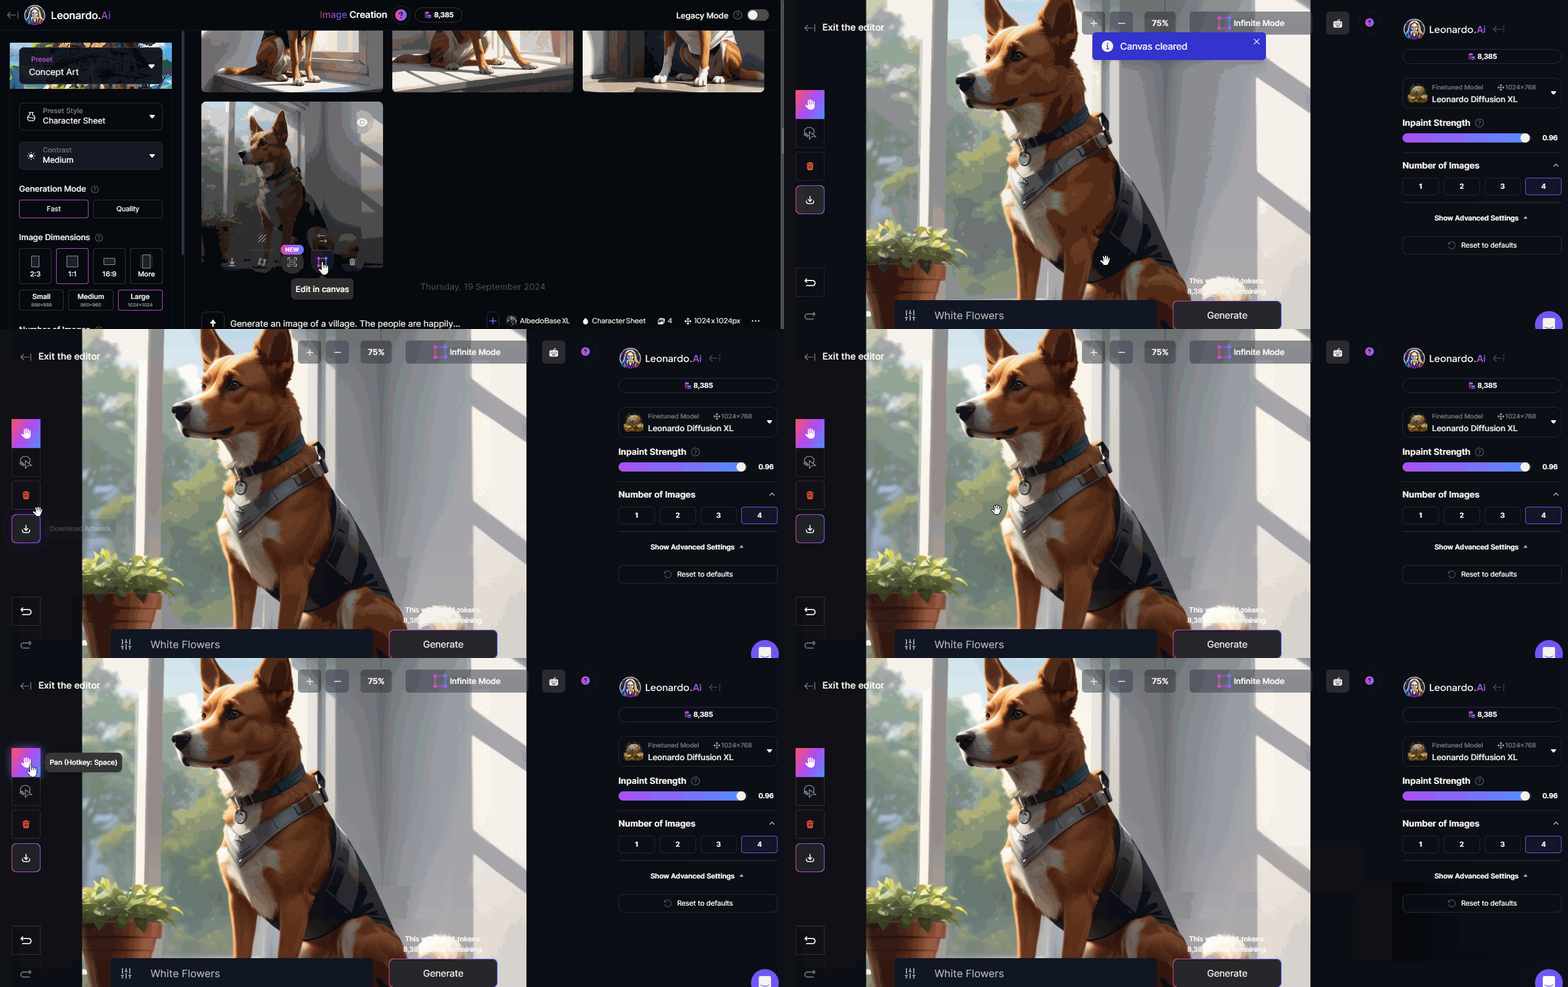
If you want to edit the image, you need to go to the Canvas Editor which is represented by a square icon on the image. Click on the square "Canvas Editor" icon to bring that image into the Canvas Editor or you can also download that image from the generated images.
You can also click on Canvas Editor AI tool on the left-side toolbar.

Step 2: Select the Area
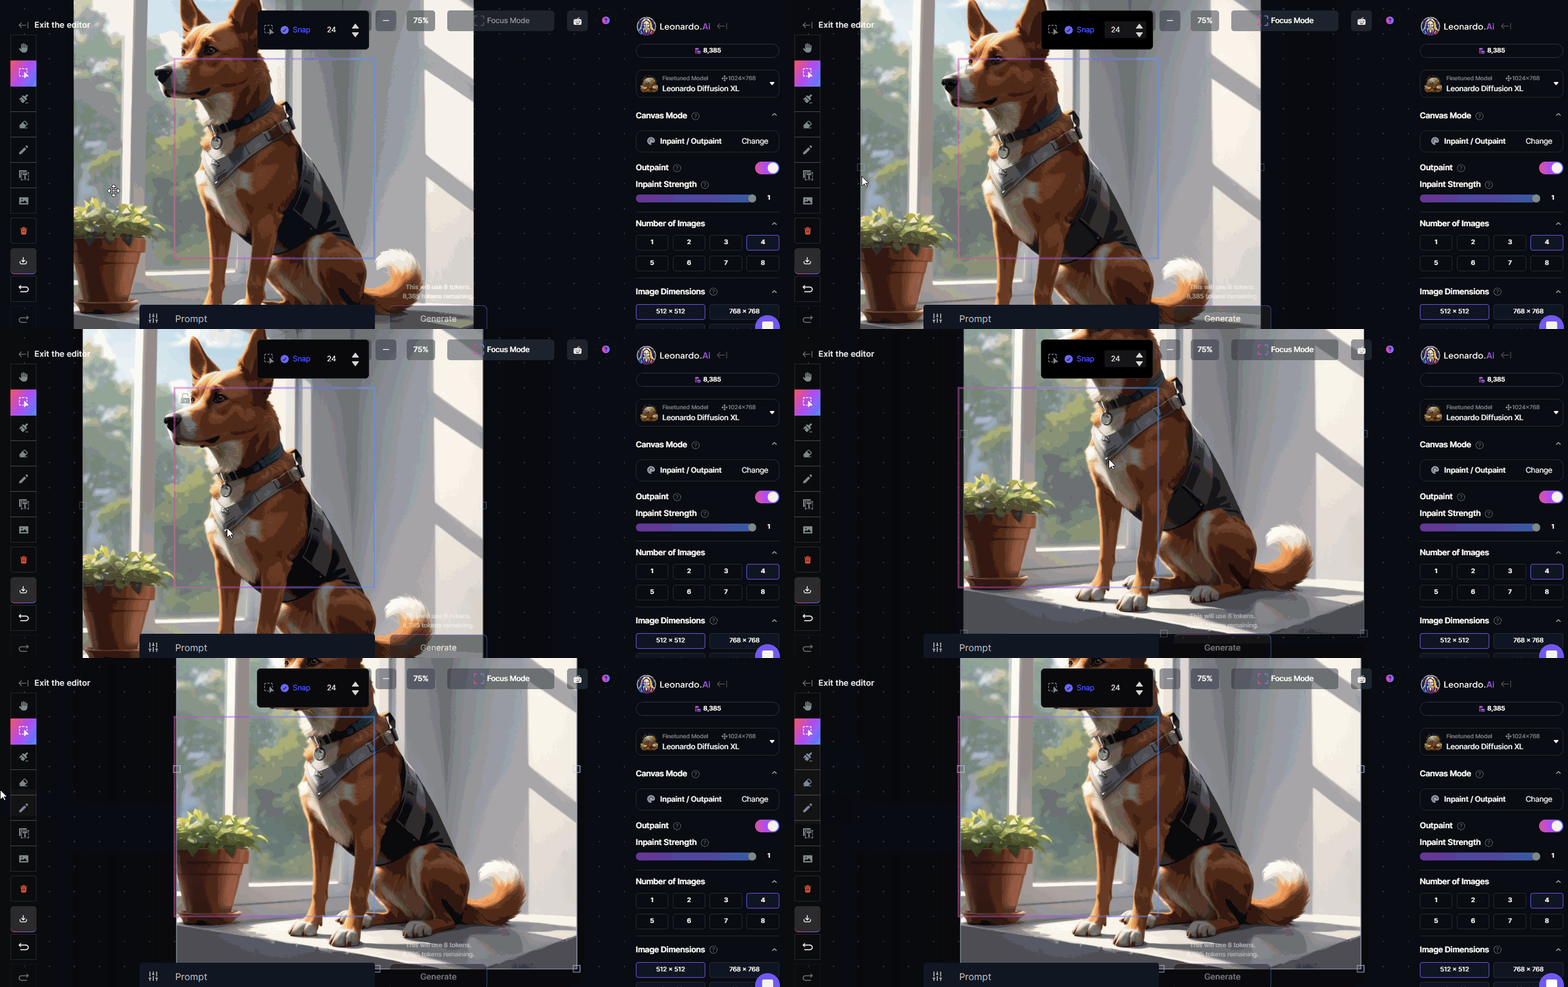
Now, you need to select the area of the image you would like to edit. To do so, click on the Select icon on the left-hand menu. Now, drag the selection box to the target area.

Once done, now we need to click on the "Draw Mask" icon on the left-hand menu. Now, draw a mask over the area of the image that you would like to edit.
Step 3: Generating Images in the Selected Area
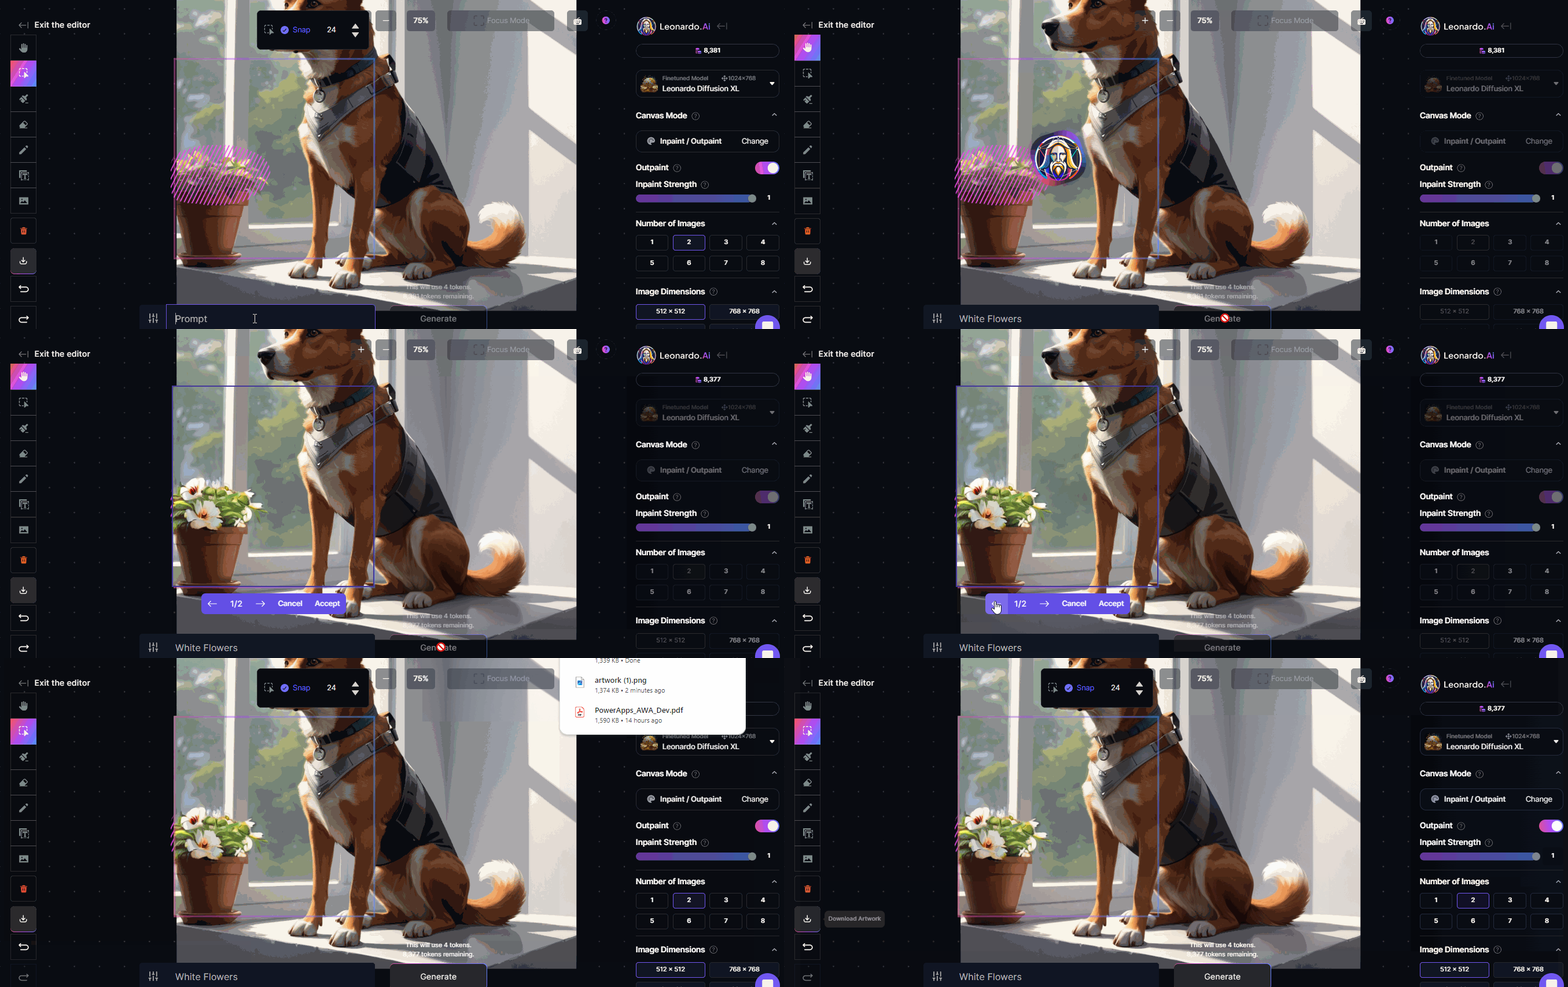
First, we need to set the generation settings on the sidebar on the right −
- Try to keep Inpainting Strength to 1. It is because the higher the strength the more the output will diverge from the original image.
- Try to set the Number of Images to 4 so that we can choose among 4 generated images.
Once done with the settings, you can type your prompt at the prompt bar at the bottom. In our case, we want "white flowers". Now, click on the Generate button and it will take few seconds to generate the images.

Step 4: Downloading the Image
After generating the images, you can choose among the number of images it generated as per your settings.
After selecting a particular image, you can click on the download button in the left side bar to download and use that image in your project.