- Laravel - Home
- Laravel - Overview
- Laravel - Installation
- Laravel - Application Structure
- Laravel - Configuration
- Laravel - Routing
- Laravel - Middleware
- Laravel - Namespaces
- Laravel - Controllers
- Laravel - Request
- Laravel - Cookie
- Laravel - Response
- Laravel - Views
- Laravel - Blade Templates
- Laravel - Redirections
- Laravel - Working With Database
- Laravel - Errors & Logging
- Laravel - Forms
- Laravel - Localization
- Laravel - Session
- Laravel - Validation
- Laravel - File Uploading
- Laravel - Sending Email
- Laravel - Ajax
- Laravel - Error Handling
- Laravel - Event Handling
- Laravel - Facades
- Laravel - Contracts
- Laravel - CSRF Protection
- Laravel - Authentication
- Laravel - Authorization
- Laravel - Artisan Console
- Laravel - Encryption
- Laravel - Hashing
- Understanding Release Process
- Laravel - Guest User Gates
- Laravel - Artisan Commands
- Laravel - Pagination Customizations
- Laravel - Dump Server
- Laravel - Action URL
Laravel - Update Records
We can update the records using the DB facade with update method. The syntax of update method is as shown in the following table.
| Syntax | int update(string $query, array $bindings = array()) |
| Parameters |
|
| Returns | int |
| Description | Run an update statement against the database. |
Example
Observe the following example to understand more about updating records −
Step 1 − Execute the below command to create a controller called StudViewController.
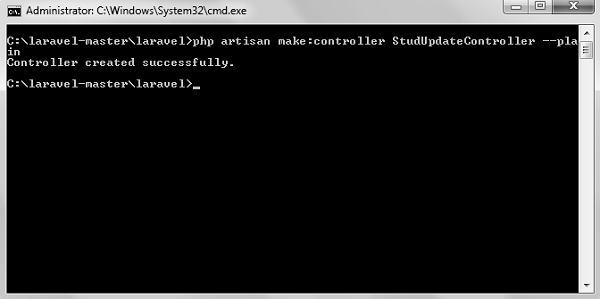
php artisan make:controller StudUpdateController --plain
Step 2 − After successful execution, you will receive the following output −
Step 3 − Copy the following code to file app/Http/Controllers/ StudUpdateController.php
app/Http/Controllers/StudUpdateController.php
<?php
namespace App\Http\Controllers;
use Illuminate\Http\Request;
use DB;
use App\Http\Requests;
use App\Http\Controllers\Controller;
class StudUpdateController extends Controller {
public function index() {
$users = DB::select('select * from student');
return view('stud_edit_view',['users'=>$users]);
}
public function show($id) {
$users = DB::select('select * from student where id = ?',[$id]);
return view('stud_update',['users'=>$users]);
}
public function edit(Request $request,$id) {
$name = $request->input('stud_name');
DB::update('update student set name = ? where id = ?',[$name,$id]);
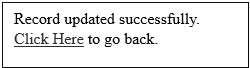
echo "Record updated successfully.<br/>";
echo '<a href = "/edit-records">Click Here</a> to go back.';
}
}
Step 4 − Create a view file called
resources/views/stud_edit_view.blade.php and copy the following code in that file.
resources/views/stud_edit_view.blade.php
<html>
   <head>
      <title>View Student Records</title>
   </head>

   <body>

      <table border = "1">
         <tr>
            <td>ID</td>
            <td>Name</td>
            <td>Edit</td>
         </tr>
         @foreach ($users as $user)
         <tr>
            <td>{{ $user->id }}</td>
            <td>{{ $user->name }}</td>
            <td><a href = 'edit/{{ $user->id }}'>Edit</a></td>
         </tr>
         @endforeach
      </table>
   </body>
</html>
Step 5 − Create another view file called
resources/views/stud_update.php and copy the following code in that file.
resources/views/stud_update.php
<html>

   <head>
      <title>Student Management | Edit</title>
   </head>

   <body>
      <form action = "/edit/<?php echo $users[0]->id; ?>" method = "post">
         <input type = "hidden" name = "_token" value = "<?php echo csrf_token(); ?>">

         <table>
            <tr>
               <td>Name</td>
               <td>
                  <input type = 'text' name = 'stud_name'
                     value = '<?php echo$users[0]->name; ?>'/>
               </td>
            </tr>
            <tr>
               <td colspan = '2'>
                  <input type = 'submit' value = "Update student" />
               </td>
            </tr>
         </table>
      </form>
   </body>
</html>
Step 6 − Add the following lines in app/Http/routes.php.
app/Http/routes.php.
Route::get('edit-records','StudUpdateController@index');
Route::get('edit/{id}','StudUpdateController@show');
Route::post('edit/{id}','StudUpdateController@edit');
Step 7 − Visit the following URL to update records in database.
http://localhost:8000/edit-records
Step 8 − The output will appear as shown in the following image.
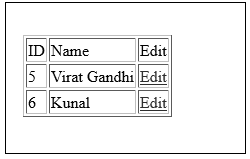
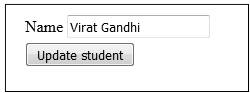
Step 9 − Click the edit link on any record and you will be redirected to a page where you can edit that particular record.
Step 10 − The output will appear as shown in the following image.
Step 11 − After editing that record, you will see a prompt as shown in the following image.