- Laravel - Home
- Laravel - Overview
- Laravel - Installation
- Laravel - Application Structure
- Laravel - Configuration
- Laravel - Routing
- Laravel - Middleware
- Laravel - Namespaces
- Laravel - Controllers
- Laravel - Request
- Laravel - Cookie
- Laravel - Response
- Laravel - Views
- Laravel - Blade Templates
- Laravel - Redirections
- Laravel - Working With Database
- Laravel - Errors & Logging
- Laravel - Forms
- Laravel - Localization
- Laravel - Session
- Laravel - Validation
- Laravel - File Uploading
- Laravel - Sending Email
- Laravel - Ajax
- Laravel - Error Handling
- Laravel - Event Handling
- Laravel - Facades
- Laravel - Contracts
- Laravel - CSRF Protection
- Laravel - Authentication
- Laravel - Authorization
- Laravel - Artisan Console
- Laravel - Encryption
- Laravel - Hashing
- Understanding Release Process
- Laravel - Guest User Gates
- Laravel - Artisan Commands
- Laravel - Pagination Customizations
- Laravel - Dump Server
- Laravel - Action URL
Laravel - Sending Email
Laravel uses free feature-rich library SwiftMailer to send emails. Using the library function, we can easily send emails without too many hassles. The e-mail templates are loaded in the same way as views, which means you can use the Blade syntax and inject data into your templates.
The following table shows the syntax and attributes of send function −
| Syntax | void send(string|array $view, array $data, Closure|string $callback) |
| Parameters |
|
| Returns | nothing |
| Description | Sends email. |
In the third argument, the $callback closure received message instance and with that instance we can also call the following functions and alter the message as shown below.
- $message → subject('Welcome to the Tutorials Point');
- $message → from('email@example.com', 'Mr. Example');
- $message → to('email@example.com', 'Mr. Example');
Some of the less common methods include −
- $message → sender('email@example.com', 'Mr. Example');
- $message → returnPath('email@example.com');
- $message → cc('email@example.com', 'Mr. Example');
- $message → bcc('email@example.com', 'Mr. Example');
- $message → replyTo('email@example.com', 'Mr. Example');
- $message → priority(2);
To attach or embed files, you can use the following methods −
- $message → attach('path/to/attachment.txt');
- $message → embed('path/to/attachment.jpg');
Mail can be sent as HTML or text. You can indicate the type of mail that you want to send in the first argument by passing an array as shown below. The default type is HTML. If you want to send plain text mail then use the following syntax.
Syntax
Mail::send([text=>text.view], $data, $callback);
In this syntax, the first argument takes an array. Use text as the key name of the view as value of the key.
Example
Step 1 − We will now send an email from Gmail account and for that you need to configure your Gmail account in Laravel environment file - .env file. Enable 2-step verification in your Gmail account and create an application specific password followed by changing the .env parameters as shown below.
.env
MAIL_DRIVER = smtp
MAIL_HOST = smtp.gmail.com
MAIL_PORT = 587
MAIL_USERNAME = your-gmail-username
MAIL_PASSWORD = your-application-specific-password
MAIL_ENCRYPTION = tls
Step 2 − After changing the .env file execute the below two commands to clear the cache and restart the Laravel server.
php artisan config:cache
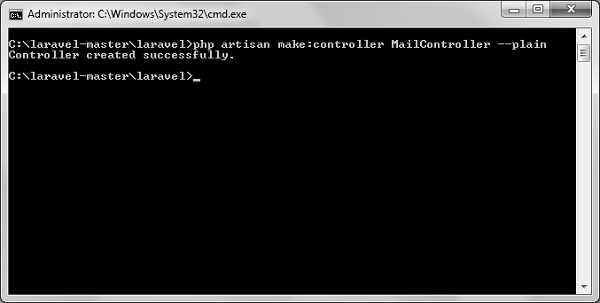
Step 3 − Create a controller called MailController by executing the following command.
php artisan make:controller MailController --plain
Step 4 − After successful execution, you will receive the following output −
Step 5 − Copy the following code in
app/Http/Controllers/MailController.php file.
app/Http/Controllers/MailController.php
<?php

namespace App\Http\Controllers;
use Illuminate\Http\Request;
use Mail;

use App\Http\Requests;
use App\Http\Controllers\Controller;

class MailController extends Controller {
   public function basic_email() {
      $data = array('name'=>"Virat Gandhi");

      Mail::send(['text'=>'mail'], $data, function($message) {
         $message->to('abc@gmail.com', 'Tutorials Point')->subject
            ('Laravel Basic Testing Mail');
         $message->from('xyz@gmail.com','Virat Gandhi');
      });
      echo "Basic Email Sent. Check your inbox.";
   }
   public function html_email() {
      $data = array('name'=>"Virat Gandhi");
      Mail::send('mail', $data, function($message) {
         $message->to('abc@gmail.com', 'Tutorials Point')->subject
            ('Laravel HTML Testing Mail');
         $message->from('xyz@gmail.com','Virat Gandhi');
      });
      echo "HTML Email Sent. Check your inbox.";
   }
   public function attachment_email() {
      $data = array('name'=>"Virat Gandhi");
      Mail::send('mail', $data, function($message) {
         $message->to('abc@gmail.com', 'Tutorials Point')->subject
            ('Laravel Testing Mail with Attachment');
         $message->attach('C:\laravel-master\laravel\public\uploads\image.png');
         $message->attach('C:\laravel-master\laravel\public\uploads\test.txt');
         $message->from('xyz@gmail.com','Virat Gandhi');
      });
      echo "Email Sent with attachment. Check your inbox.";
   }
}
Step 6 − Copy the following code in resources/views/mail.blade.php file.
resources/views/mail.blade.php
<h1>Hi, {{ $name }}</h1>
l<p>Sending Mail from Laravel.</p>
Step 7 − Add the following lines in app/Http/routes.php.
app/Http/routes.php
Route::get('sendbasicemail','MailController@basic_email');
Route::get('sendhtmlemail','MailController@html_email');
Route::get('sendattachmentemail','MailController@attachment_email');
Step 8 − Visit the following URL to test basic email.
http://localhost:8000/sendbasicemail
Step 9 − The output screen will look something like this. Check your inbox to see the basic email output.

Step 10 − Visit the following URL to test the HTML email.
http://localhost:8000/sendhtmlemail
Step 11 − The output screen will look something like this. Check your inbox to see the html email output.

Step 12 − Visit the following URL to test the HTML email with attachment.
http://localhost:8000/sendattachmentemail
Step 13 − You can see the following output

Note − In the MailController.php file the email address in the from method should be the email address from which you can send email address. Generally, it should be the email address configured on your server.
