- JOGL - API for Basic Templates
- JOGL - Canvas with AWT
- JOGL - Canvas with Swing
- JOGL - GLJPanel Class
- JOGL Graphical Shapes
- JOGL - Drawing Basics
- JOGL - Drawing with GL_Lines
- JOGL - Pre-defined shapes
- JOGL Effects & Transformation
- JOGL - Transformation
- JOGL - Coloring
- JOGL - Scaling
- JOGL - Rotation
- JOGL - Lighting
- JOGL 3D Graphics
- JOGL - 3D Basics
- JOGL - 3D Triangle
- JOGL - 3D Cube
- JOGL - Appendix
- JOGL Useful Resources
- JOGL - Quick Guide
- JOGL - Useful Resources
- JOGL - Discussion
JOGL - Installation
This chapter covers setting up of the environment to use JOGL on your system using different Integrated Development Environments (IDEs).
Installing JOGL
For JOGL Installation, you need to have following system requirements −
System Requirements
The first requirement is to have the Java Development Kit (JDK) installed on your machine.
| Requirement | Description |
|---|---|
| JDK Version | 1.4 or above |
| Memory | no minimum requirement |
| Disk Space | no minimum requirement |
| Operating System | no minimum requirement |
You need to follow the given steps to setup your environment to start with JOGL application development −
Step 1 - Verifying Java Installation on Your Machine
Open console of your system and execute the following java command −
| Platform | TASK | COMMAND |
|---|---|---|
| Windows | Open Command Console | C:\>java-version |
| Linux | Open Command terminal | $ java -version |
| MAC | Open Terminal | Machine:~ joseph$ java -version |
Verify the output on the respective operating system.
| Platform | Output |
|---|---|
| Windows | Java 1.6.0.21 java(TM) SE Runtime Environment(build 1..6.0_21-b07)Java HotSpot(TM) Client VM(build 17.0-b7, mixed mode, sharing) |
| Linux | Java 1.6.0.21 java(TM) SE Runtime Environment(build 1..6.0_21-b07)Java HotSpot(TM) Client VM(build 17.0-b7, mixed mode, sharing) |
| MAC | Java 1.6.0.21 java(TM) SE Runtime Environment(build 1..6.0_21-b07)Java HotSpot(TM) Client VM(build 17.0-b7, mixed mode, sharing) |
Step 2 Setting up Java Development Kit (JDK)
If Java is not installed on your machine, then you need to install Java SDK from the Oracle website: Oracle. You can find instructions for installing the JDK from the downloaded files. You need to follow the given instructions to install and configure the setup. Finally, set PATH and JAVA_HOME environment variables to refer to the directory that contains java.exe and javac.exe files, typically java_install_dir/bin and java_install_dir respectively.
Set Java-home environment variable to point to the base directory location on the same path, where Java is installed on your machine.
| Platform | Command |
|---|---|
| Windows | Set the environment variable JAVA_HOME to C:\ProgramFiles\Java\Jdk1.6.0_21 |
| Linux | Export JAVA_HOME=/usr/local/java-current |
| MAC | Export JAVA_HOME=/Library/Java/Home |
Append Java compiler location to System Path as follows −
| Platform | Command |
|---|---|
| Windows | Append the string ;%JAVA_HOME% bin at the end of the system variable and path |
| Linux | Export PATH=$PATH:$JAVA_HOME/bin/ |
| MAC | Not required |
Step 3 Downloading JOGL
You can download latest version of JOGL from the website www.jogamp.org
Go to the home page of www.jogamp.org
Click on Builds/Downloads > Current (zip).

This takes you to the list of .jar files for all APIs maintained by the website.
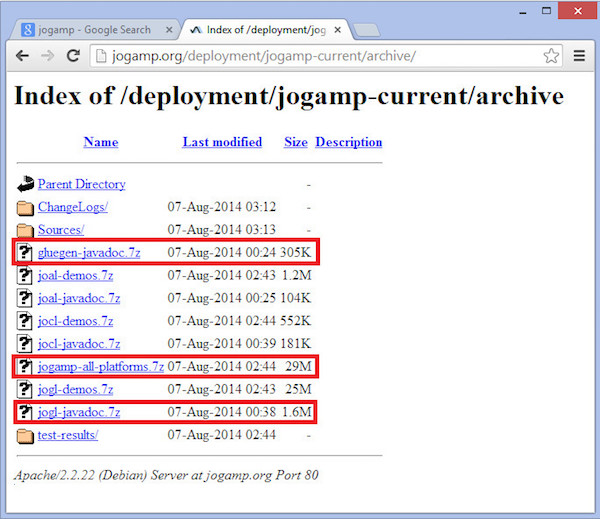
Download the library .jar file jogamp-all-platforms.7z, java documentations for OpenGL native library glugen-javadoc.7z, and JOGL jogl-javadocs.7z.
Extract the downloaded .jar files using any zip extracting software.
When you open the extracted folder, you will find jar folder, source-codes, and other files.
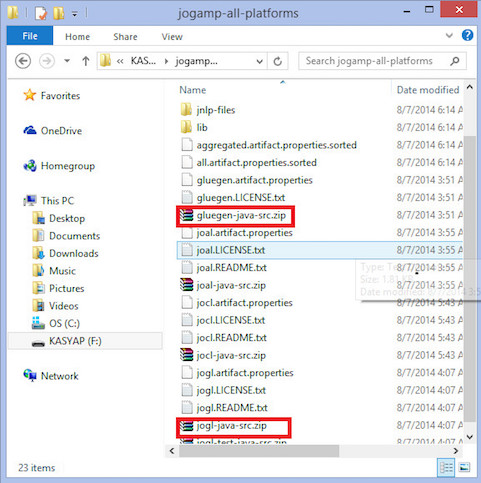
Get the source codes gluegen-java-src.zip and jogl-java-src.zip for supporting IDE. This is optional.
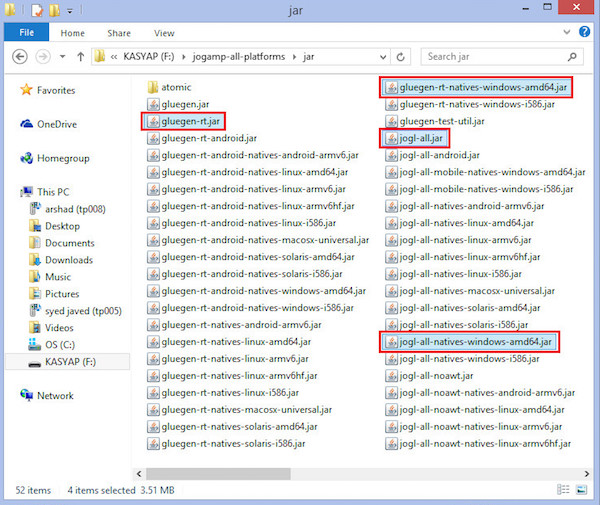
Inside the jar folder, there are multiple .jar files. This collection of files belongs to Glugen and JOGL.
JOAMP provides native libraries that support various operating systems such as Windows, Solaris, Linux and Android. Hence, you need to take appropriate jar files which can execute on your desired platform. For example, if you are using Windows 64-bit operating system, then get the following .jar files from the jar folder −
- gluegenrt.jar
- jogl-all.jar
- gluegen-rt-natives-windows-amd64.jar
- jogl-all-natives-windowsamd64.jar
Setting up JOGL for Eclipse 4.4
Follow the given procedure for setting up JOGL −
Adding Libraries
Step 1 − Open Eclipse.
Step 2 − Create a new project.
Step 3 − Create a new folder named lib in the project folder.
Step 4 − Copy the files gluegen-rt-natives-windows-amd64.jar, gluegenrt.jar, jogl-all-natives-windowsamd64.jar and jogl-all.jar into the lib folder.
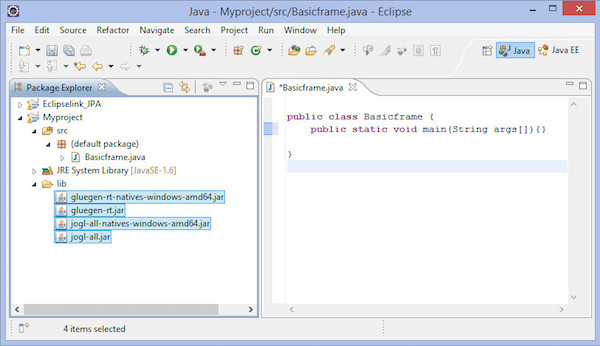
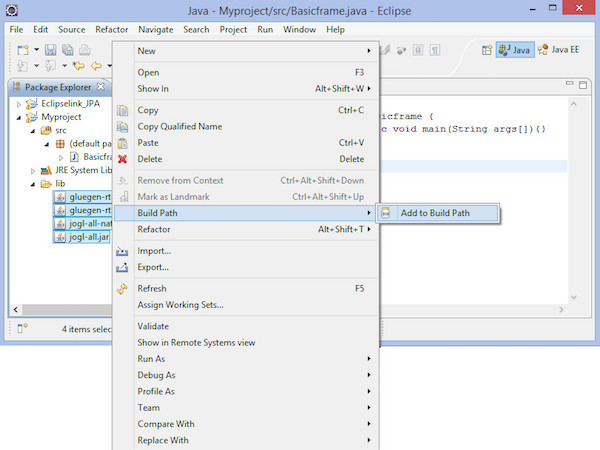
Step 5 − Now select these files and right click your mouse button. A shortcut menu is displayed, which contains Build Path > Add to Build Path.
Step 6 − To make all .jar files available to other projects, go to main menu. Select Window > Preferences. The Preferences window appears.


In preferences window, in the drop down menu on the left hand side, follow the hierarchy- Java → Build Path → User Libraries.
Click on New button.
It opens up a dialog box. Enter the library name as jogl2.1.
Add jar files glugen-rt.jar and jogl-all.jar using button Add External JARs....
It creates a new user library named jogl2.1.
In the same way, we can add java documentation and source code for the added.jar files.
Adding Native Libraries
Step 1 − Expand the jogl-all.jar node, select Javadoc location (none).
Step 2 − Click on New button. Enter the name for JOGL Java Document.
Step 3 − Click on Add External JARs button.
Step 4 − It opens a dialog box where you need to select the location of JOGL Java documentation, which we already have downloaded earlier.
Adding source code
Step 1 − Select the node Native library location: (None).
Step 2 − Click on New button.
Step 3 − Enter name for native libraries and click OK button.
Step 4 − Click on Add External JARs button.
Step 5 − Now select the path where native library files ('gluegen-rt-natives-windows-amd64.jar and joglall-natives-windows-amd64.jar') are located.
Step 6 − Repeat the same procedure for source code.
Step 7 − We can set the locations for Javadoc, source code and jar files in the same way as given above for both native library files glegen-rt.jar and glugen-natives-windows-amd64.jar.
Setting up JOGL for NetBeans 4.4
Let us go through the steps for setting up JOGL for NetBeans 4.4 −
Adding Libraries
Step 1 − In the main menu, select Tools > Libraries.
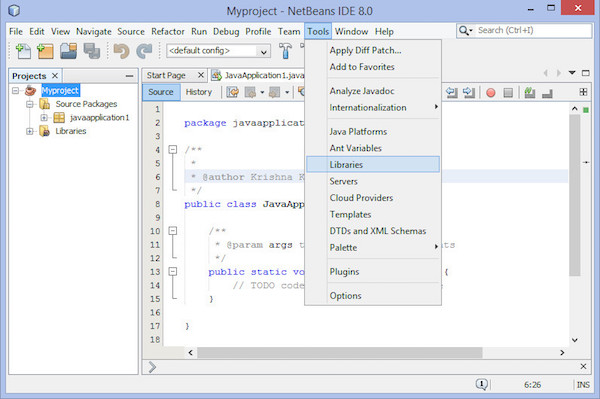
Step 2 − It leads you to Ant Library Manager.
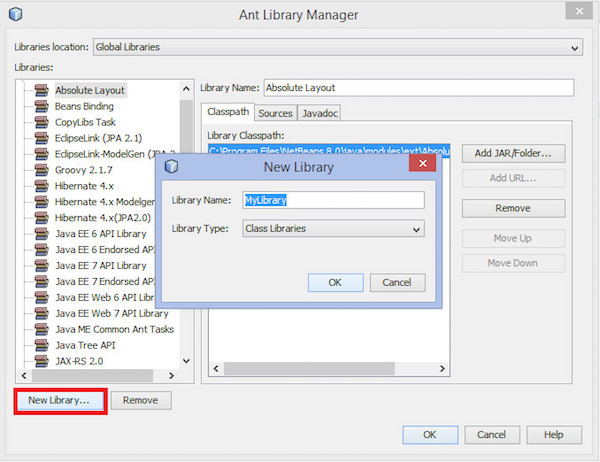
Step 3 − Under the Classpath tab, click New Library button located on the left lower corner. It opens a small dialog box.
Step 4 − Enter Library name as JoGl2.0.
Step 5 − Click on OK button.
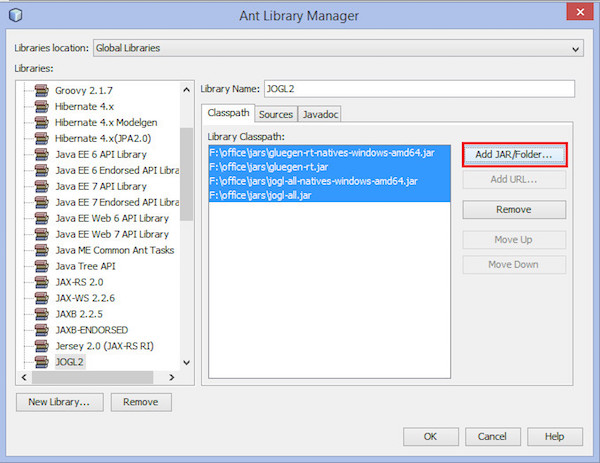
Step 6 − Click on Add JAR/Folder button.
Step 7 − Select the path where .jar files jogl.all.jar and gluegen-rt.jar are located.
To include JOGL library into each project, follow the steps given below −
Step 1 − Right-click on the project name. It shows a short-cut menu.
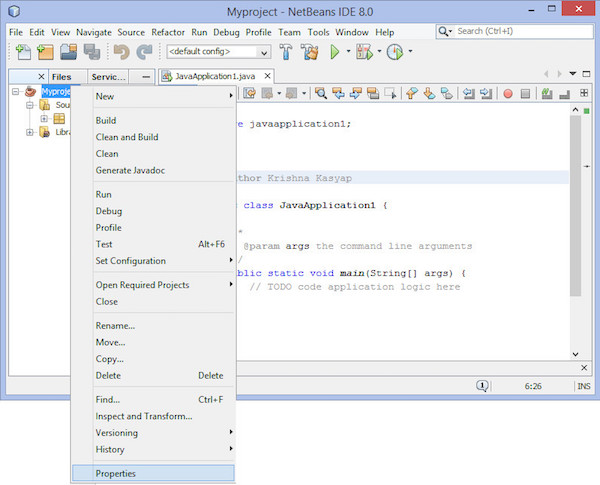
Step 2 − Select Properties. It opens a window named Project properties.
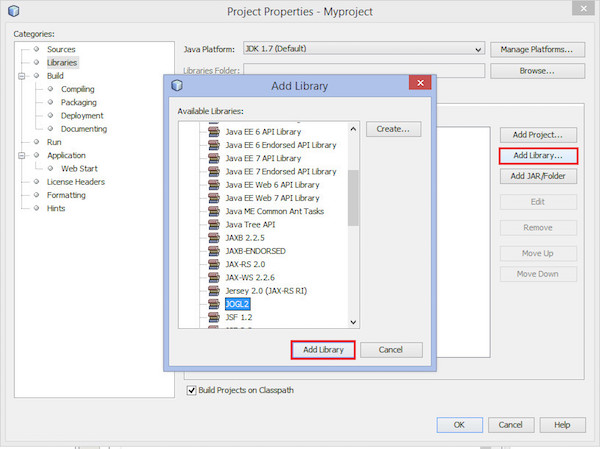
Step 3 − Select Libraries from Categories on the left hand side.
Step 4 − Select Compile tab and click on Add Library... button. Add library dialog box comes up.
Step 5 − Now add JOGL2.0 library, which you created earlier.
Including Native Library in Each Project
Follow the given steps to include native library in each project −
Step 1 − Right-click the project.
Step 2 − Select Set Configuration > Customize
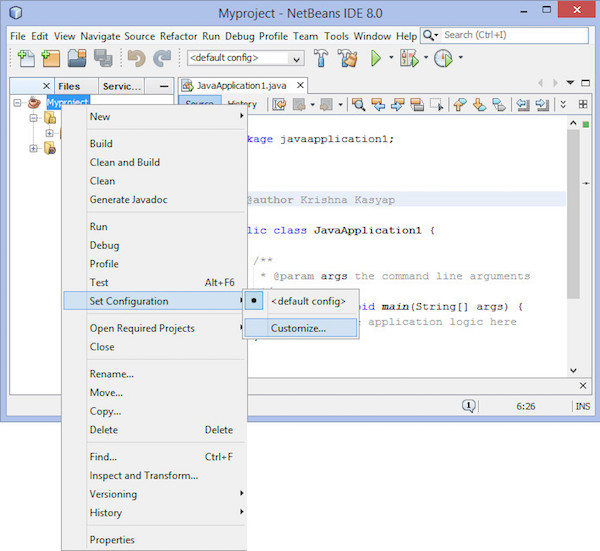
It leads you to the Project Properties window.
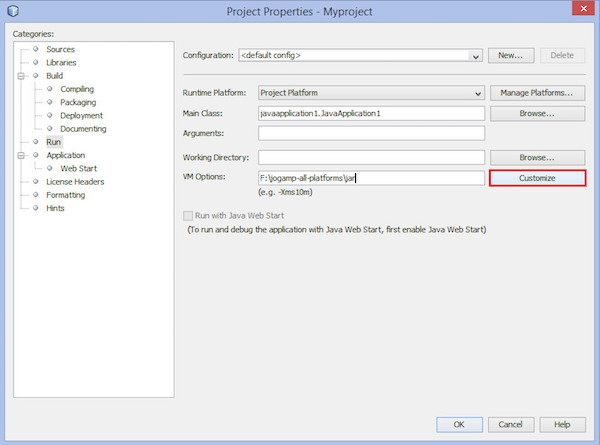
Step 3 − On the right hand side, in VM options, click on Customize button.
Step 4 − Browse for the path that contains JOGL native libraries gluegen-rtnatives-windows-amd64.jar'' and 'jogl-all-natives-windowsamd64.jar.
Adding Java Documentation of Native Libraries
You need to open Ant library manager again to make sources and Javadoc available for each project. Follow the given procedure −
Step 1 − Open main menu.
Step 2 − Select Tools > Libraries. This leads you to Library manager.
Step 3 − Under the JavaDoc tab, click on New Library button.
Step 4 − Enter JOGLJavadoc name. (You can enter any desired name.)
Step 5 − Click on Add jars/libraries button.
Step 6 − Select the path where unzipped JOGL documentation code is located.
Adding Source Code of Native Libraries
Step 1 − Under Sources tab, click on New Library button. Enter JOGLsources name.
Step 2 − Click on Add jars/libraries button. Select the path where unzipped source code is located.
Customizing the JDK Editor
Step 1 − Set Classpath for files jogl.all.jar and gluegen-rt.jar.
Step 2 − Set path to native libraries gluegen-rt-natives-windows-amd64.jar and joglall-natives-windowsamd64.jar or copy all the jar files from the folder where you have downloaded them and paste them into the jse lib folder.
