 Data Structure
 Networking
 RDBMS
RDBMS Operating System
 Java
Java MS Excel
 iOS
iOS HTML
HTML CSS
CSS Android
 Python
 C Programming
 C++
C++ C#
C# MongoDB
 MySQL
MySQL Javascript
 PHP
PHP
- Selected Reading
- UPSC IAS Exams Notes
- Developer's Best Practices
- Questions and Answers
- Effective Resume Writing
- HR Interview Questions
- Computer Glossary
- Who is Who
if/else condition in CSS
Users can not directly use if/else condition in CSS. For conditional styling in CSS, we have to use alternatives of if/else condition. We will be understanding three different alternate ways to use conditional styling in CSS.
In this article, our task is to implement if/else condition in CSS. Since if/else condition is not supported in CSS, we will be understanding its alternate approaches.
Approaches for Using Conditional Styling in CSS
Here is a list of approaches for using conditional styling in CSS which we will be discussing in this article with stepwise explanation and complete example codes.
Using :checked pseudo-class Selector
To use conditional (if/else) styling in CSS, we have used :checked psuedo-class selector with a general sibling combinator.
- We have used input tag with type attribute to create five radio buttons and labels to label them. Then we have created five div elements with information about corresponding color and wrapped them inside div with class output.
- We have used #output>div to initially keep all the div elements hidden using display property and set the font-size of the text of div elements.
- Then we have used :checked psuedo-class selector with general sibling combinator to display the color name corresponding to radio button checked.
- For example: #orange:checked ~ #output .orange targets div element with class orange inside div with id output when radio button with id orange is checked. As a result when radio button with id orange is checked it displays div element with class orange.
- Then we have used classes corresponding to color names to change the text color upon checking the radio button.
Example
Here is a complete example code implementing above mentioned steps for conditional styling in CSS using :checked pseudo-class selector and general sibling combinator(~).
<html>
<head>
    <style>
        #output>div {
            font-size: 20px;
            display: none;
        }
        #red:checked ~ #output .red,
        #green:checked ~ #output .green,
        #blue:checked ~ #output .blue,
        #yellow:checked ~ #output .yellow,
        #orange:checked ~ #output .orange {
            display: block;
        }
        .red {
            color: red;
        }
        .green {
            color: green;
        }
        .blue {
            color: blue;
        }
        .yellow {
            color: yellow;
        }
        .orange {
            color: orange;
        }
    </style>
</head>
<body>
    <h4>
        Check the radio buttons to get color name
    </h4>
    <input type="radio" name="color" id="red" value="red">
    <label for="red">Red</label>
    <input type="radio" name="color" id="green" value="green">
    <label for="green">Green</label>
    <input type="radio" name="color" id="blue" value="blue">
    <label for="blue">Blue</label>
    <input type="radio" name="color" id="yellow"
           value="yellow" checked>
    <label for="yellow">Yellow</label>
    <input type="radio" name="color" id="orange" value="orange">
    <label for="orange">Orange</label>
    <br><br>
    <div id="output">
        <div class="red">You have selected red color.</div>
        <div class="green">You have selected green color.</div>
        <div class="blue">You have selected blue color.</div>
        <div class="yellow">Yellow color is selected by default.</div>
        <div class="orange">You have selected orange color.</div>
    </div>
</body>
</html>
Using media Queries
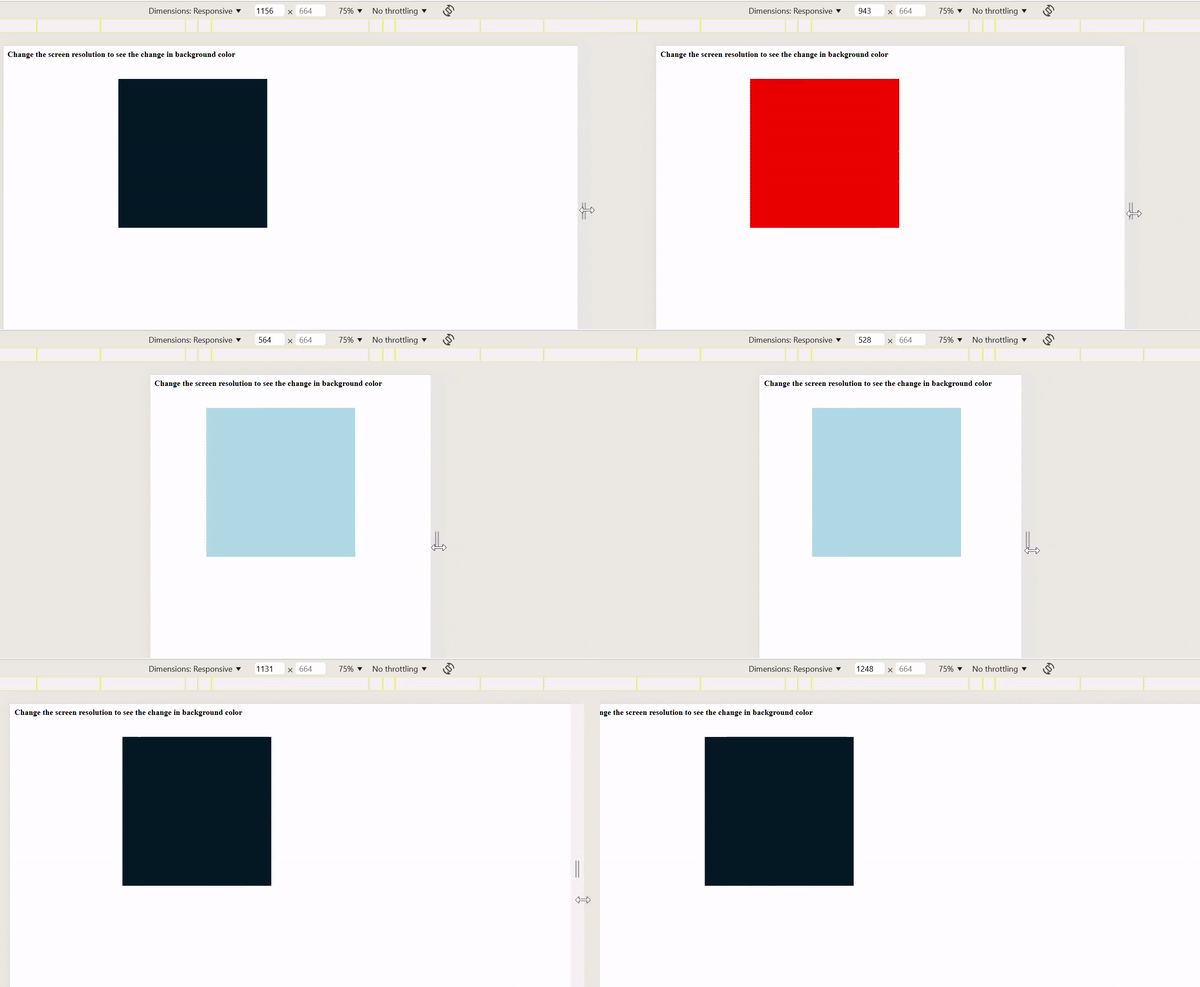
In this approach to use conditional (if/else) styling in CSS, we have used media queries to change the background color of the div box based on viewport width.
- We have used div to create a box and set its dimension using height and width, background-color and positioned it using top, left and position property.
- Then we have used media queries to set different color of the div box for different width value. For example, the box is of green color for width 600px or wider, red for 800px and wider.
Example
Here is a complete example code implementing above mentioned steps for conditional styling in CSS using media queries.
<!DOCTYPE html>
<html lang="en">
<head>
    <meta name="viewport" content="width=device-width, initial-scale=1.0">
    <title>Document</title>
    <style>
        .container {
            height: 300px;
            width: 300px;
            background-color: lightblue;
            top: 10%;
            left: 20%;
            position: absolute;
        }

        @media (min-width: 600px) {
            .container {
                background-color: #04af2f;
            }
        }
        @media (min-width: 800px) {
            .container {
                background-color: red;
            }
        }
        @media (min-width: 1000px) {
            .container {
                background-color: #031926;
            }
        }
    </style>
</head>
<body>
    <strong>
        Chnage the screen resolution to see the
        change in background color
    </strong>
    <div class="container"></div>
</body>
</html>
Output

Using :hover pseudo-class
In this approach we have used :hover psuedo-class to use conditional (if/else) styling in CSS.
- We have used four div to create four boxes with some text. We have used div as element selector to style all the div elements by setting padding, border and background-color of the div elements.
- We have centered the text and used color property to change the text color.
- Then we have used :hover psuedo-class to set the background color of div elements upon hovering on them.
Example
Here is a complete example code implementing above mentioned steps for conditional styling in CSS using :hover psuedo-class.
<!DOCTYPE html>
<html lang="en">
<head>
    <title>Document</title>
    <style>
        div {
            padding: 30px;
            text-align: center;
            background-color: lightblue;
            border: 1px solid white;
            color: white;
        }
        .color1:hover {
            background-color: #04af2f;
        }
        .color2:hover{
            background-color: #031926;
        }
        .color3:hover {
            background-color: #CDC1FF;
        }
        .color4:hover{
            background-color: #2E073F;
        }

    </style>
</head>
<body>
    <strong>
        Hover over boxes to see the change
        in background color
    </strong>
    <div class="color1">This is div 1</div>
    <div class="color2">This is div 2</div>
    <div class="color3">This is div 3</div>
    <div class="color4">This is div 4</div>
</body>
</html>
Conclusion
In this article, we have learnt and understood to use alternative solutions for the if/else condition in CSS. We have used three approaches for conditional styling in CSS which are: by using :checked psuedo-class with sibling combinator, by using media queries and by using :hover psuedo class.

