
 Data Structure
 Networking
 RDBMS
RDBMS Operating System
 Java
Java MS Excel
 iOS
iOS HTML
HTML CSS
CSS Android
 Python
 C Programming
 C++
C++ C#
C# MongoDB
 MySQL
MySQL Javascript
 PHP
PHP
- Selected Reading
- UPSC IAS Exams Notes
- Developer's Best Practices
- Questions and Answers
- Effective Resume Writing
- HR Interview Questions
- Computer Glossary
- Who is Who
HTTP REST API calls in ElectronJS
We can choose from various libraries like request, axios, or fetch to make requests to our HTTP REST API endpoint. Doing so allows us to interact with data from our API and display it in our ElectronJS application.
ElectronJS is an open-source project actively maintained by the OpenJS Foundation and a community of contributors. With ElectronJS, we can build cross-platform desktop applications using web technologies such as HTML, JavaScript, and CSS.
In this tutorial, we will learn how to use HTTP REST API calls in our ElectronJS application.
Steps to use HTTP REST API calls in ElectronJS
Here are the basic steps we need to follow to use HTTP REST API calls in ElectronJS ?
Step 1 ? First, we must install the library for our project. For example, we can install axios using the following command ?
npm install axios
Step 2 ? After that, To make HTTP requests from the renderer process of our ElectronJS application and handle the response in the main process, we need to establish communication between the two processes using the ipcMain and ipcRenderer modules.
In the main.js file, we can set up a listener for an event triggered by the renderer process. For example ?
const { ipcMain } = require('electron');
ipcMain.on('get-data', (event, url) => {

   // Handle the request here
});
In the renderer process, we can use the ipcRenderer module to send a request to the main process. For example ?
const { ipcRenderer } = require('electron');
ipcRenderer.send('get-data', 'https://example.com/api/data');
Step 3 ? Now, we can use the library to make HTTP requests to our REST API.
Use built-in ?net' module to make HTTP requests
We can use the built-in net module in Electron.js to make HTTP requests. The net module provides a low-level network interface and can be used to create and interact with TCP servers and clients. While it is possible to use this module to make HTTP requests, it requires more work and low-level knowledge of the HTTP protocol.
The net module in Node.js provides a lot of advantages over the native modules when it comes to making HTTP requests. Here are some of the benefits of using the net module ?
The net module supports the wpad protocol and proxy pac configuration files.
It can automatically create a tunnel for HTTPS requests
This module supports basic, digest, NTLM, Kerberos, or negotiate authentication schemes for authenticating proxies.
The net module also supports Fiddler-like proxies that are used for access control and monitoring
Here is an example of using the net module to make an HTTP request ?
const net = require('net');

// Define the request
const request = `GET / HTTP/1.1\r
Host: example.com\r
\r
`;

// Create a TCP socket and connect to the server
const socket = net.createConnection({ host: 'example.com', port: 80 }, () => {

   // Send the request to the server
   socket.write(request);
});

// Receive the response from the server
socket.on('data', (data) => {
   console.log(data.toString());
});

// Handle errors
socket.on('error', (err) => {
   console.error(err);
});
Example
In this example, we're using the axios library to make a HTTP request to a REST API. The code is split into three parts: main.js, index.js, and index.html.
In the main process, the app listens for the fetch-data event from the renderer process. When it receives the event, it makes a HTTP request using the axios library to the "https://catfact.ninja/fact" URL. Upon receiving the response data, the main process sends the fetch-data-response event with the response data back to the renderer process.
In the renderer process, the index.js file listens for the fetch-data-response event and updates the response element in the HTML document with the response data. Then, it sends the fetch-data event to the main process to trigger the HTTP request.
Finally, the index.html file contains the HTML code for the application UI, which consists of a header, a response div, and a script tag that loads the index.js file.
main.js
const { app, BrowserWindow, ipcMain } = require('electron');
const axios = require('axios');

function createWindow () {
   const win = new BrowserWindow({
      width: 800,
      height: 600,
      webPreferences: {
         nodeIntegration: true,
         contextIsolation: false
      }
   })

   win.loadFile('index.html')
   ipcMain.on('fetch-data', async (event, args) => {
      try {
         const response = await axios.get('https://catfact.ninja/fact');
         event.reply('fetch-data-response', response.data);
      } catch (error) {
         console.error(error);
      }
   });
}
app.whenReady().then(createWindow);
index.js
const { ipcRenderer } = require('electron');
const responseElement = document.getElementById('response');

ipcRenderer.on('fetch-data-response', (event, data) => {
   responseElement.innerHTML = JSON.stringify(data);
});

ipcRenderer.send('fetch-data');
index.html
<html>
<head>
   <meta charset="UTF-8">
   <title>My Electron App</title>
   <style>
      body{
         text-align: center;
         padding: 1rem;
      }
      p{
         color: green;
      }
   </style>
</head>
<body>
   <h1> HTTP Request Response: </h1>
   <p id = "response" > </p>
   <script src = "./index.js" > </script>
</body>
</html>
Output

Example
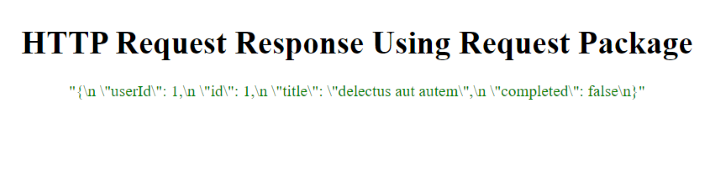
This example is an Electron.js application that makes an HTTP request to an external API using the request package.
The application consists of three parts ?
In the main.js file, the request package is used to make an HTTP request to an external API, and the response is sent to the renderer process using IPC.
The index.js file is responsible for receiving the response from the main process and updating the HTML to display the response.
And the index.html file is the HTML file that is loaded into the Electron.js window. It shows the HTTP response from that received from the external API.
main.js
const { app, BrowserWindow, ipcMain } = require('electron');
const request = require('request');

function createWindow () {
   const win = new BrowserWindow({
      width: 800,
      height: 600,
      webPreferences: {
         nodeIntegration: true,
         contextIsolation: false
      }
   })

   win.loadFile('index.html')

   ipcMain.on('fetch-data', (event, args) => {
      request('https://jsonplaceholder.typicode.com/todos/1', (error, response, body) => {
         if (error) {
            console.error(error);
            return;
         }
         event.reply('fetch-data-response', body);
      });
   });
}

app.whenReady().then(createWindow);
index.js
const { ipcRenderer } = require('electron');

const responseElement = document.getElementById('response');

ipcRenderer.on('fetch-data-response', (event, data) => {
   responseElement.innerHTML = JSON.stringify(data);
});

ipcRenderer.send('fetch-data');
index.html
<!DOCTYPE html>
<html>
<head>
   <meta charset = "UTF-8">
   <title> My Electron App </title>
   <style>
      body{
         text-align: center;
         padding: 1rem;
      }
      p{
         color: green;
      }
   </style>
</head>
<body>
   <h1> HTTP Request Response Using Request Package </h1>
   <p id = "response"> </p>
   <script src= "./index.js" ></script>
</body>
</html>
Output
This tutorial taught us to use HTTP REST API calls in an ElectronJS application. We discussed installing and using a library such as Axios, Request or Fetch.
We then went through two examples demonstrating how to make HTTP requests to REST APIs using different libraries and display the response data in an ElectronJS application.
Overall, by using HTTP REST API calls in an ElectronJS application, we can interact with data from a remote server and display it within our application, enabling us to build powerful and flexible desktop applications that are accessible across different platforms.

7K+ Views
