
Article Categories
- All Categories
-
 Data Structure
-
 Networking
-
 RDBMS
RDBMS
-
 Operating System
-
 Java
Java
-
 MS Excel
-
 iOS
iOS
-
 HTML
HTML
-
 CSS
CSS
-
 Android
-
 Python
-
 C Programming
-
 C++
C++
-
 C#
C#
-
 MongoDB
-
 MySQL
MySQL
-
 Javascript
-
 PHP
PHP
-
 Economics & Finance
How to use Azure Rest API in PowerShell?
To use the Azure Rest API using PowerShell, we first need to connect to the Azure cloud account using the Connect-AzAccount. Once you are connected to the Azure Account, you can use the below authorization header (same has been provided on the MS website) which contains a bearer token to authenticate the rest API.
$azContext = Get-AzContext
$azProfile = [Microsoft.Azure.Commands.Common.Authentication.Abstractions.AzureRm
ProfileProvider]::Instance.Profile
$profileClient = New-Object -
TypeName Microsoft.Azure.Commands.ResourceManager.Common.RMProfileClient -
ArgumentList ($azProfile)
$token = $profileClient.AcquireAccessToken($azContext.Subscription.TenantId)
$authHeader = @{
   'Content-Type'='application/json'
   'Authorization'='Bearer ' + $token.AccessToken
}
Once you have the Authorization header available, you can use it for authentication. Now let assume we need to use the Rest-API to list all Virtual Machines in Azure from the subscription.
https://docs.microsoft.com/en-us/rest/api/compute/virtual-machines/list-all/
We will use the below rest API URL to get all VMs.
https://management.azure.com/subscriptions/{subscriptionId}/providers/Microsoft.Compute /virtualMachines?api-version=2021-03-01
Here, we need to provide a subscription ID from which we need to list VMs.
Our command will look like below,
$restUri = https://management.azure.com/subscriptions/xxxxx-xxxxx-x--xxxxx/providers/Microsoft.Compute/virtualMachines?api-version=2021-03-01
$response = Invoke-RestMethod -Uri $restUri -Method Get -Headers $authHeader
Output
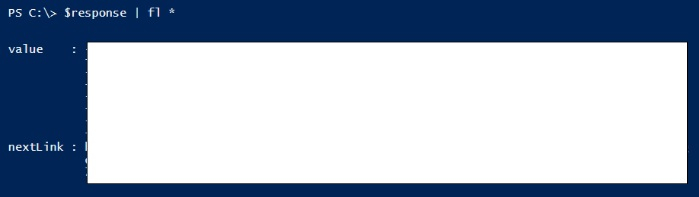
You can expand further properties.
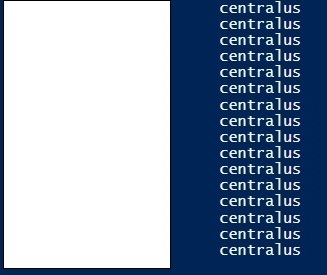
PS C:\> $response.value | Select Name, location
Output

5K+ Views
