- HTML Canvas - Home
- HTML Canvas - Introduction
- Environmental Setup
- HTML Canvas - First Application
- HTML Canvas - Drawing 2D Shapes
- HTML Canvas - Path Elements
- 2D Shapes Using Path Elements
- HTML Canvas - Colors
- HTML Canvas - Adding Styles
- HTML Canvas - Adding Text
- HTML Canvas - Adding Images
- HTML Canvas - Canvas Clock
- HTML Canvas - Transformations
- Composting and Clipping
- HTML Canvas - Basic Animations
- Advanced Animations
- HTML Canvas API Functions
- HTML Canvas - Element
- HTML Canvas - Rectangles
- HTML Canvas - Lines
- HTML Canvas - Paths
- HTML Canvas - Text
- HTML Canvas - Colors and Styles
- HTML Canvas - Images
- HTML Canvas - Shadows and Transformations
- HTML Canvas Useful Resources
- HTML Canvas - Quick Guide
- HTML Canvas - Useful Resources
- HTML Canvas - Discussion
HTML Canvas - API
HTML Canvas Element
Canvas element is the outline of the HTML Canvas tag which is defined by the HTML code and is styled using the CSS. We can render graphics inside the canvas using JavaScript code by a context object.
Canvas element is equipped with the interface HTMLCanvasElement containing properties and methods to manipulate the layout as well as the features supported by the Canvas element.
The properties and methods available to create and modify the Canvas element are given in the below table.
Properties
Following are various properties of HTML Canvas Element −
| S.No | Property and Description |
|---|---|
| 1 | canvas The canvas property of CanvasRenderingContext2D interface provides the canvas outline by using CSS styling. Without styling, we cannot see it on the webpage even though it is formed. |
| 2 | width This property helps us to set the height for the Canvas layout. |
| 3 | height This property helps us to set the height for the Canvas layout. |
Methods
Below given is the list of methods provided by the HTML Canvas Element class −
| S.No | Method & Description |
|---|---|
| 1 | getContext()
This method refers to the context of the drawing on the Canvas element. We give the context type and attributes as the parameters which are displayed on the Canvas. |
HTML Canvas canvas Property
The HTML Canvas property of the Canvas API is a reference to the Canvas context object. It helps us to define the canvas tag and use it to develop graphics using the canvas object. This is achieved by using JavaScript code.
Possible input values
It takes the canvas tag and the provided code snippet and constructs a new Canvas element object with the specified dimensions and the styles given.
Using this context can be provided to the Canvas element and graphics can be rendered using the available methods and properties.
Example
The following example demonstrates how the HTML Canvas property can be used to generate a new context object which can be further used to render shapes.
<!DOCTYPE html>
<html lang="en">
   <head>
      <title>Reference API</title>
      <style>
         body {
            margin: 10px;
            padding: 10px;
         }
      </style>
   </head>
   <body>
      <canvas id="canvas" height="200" width="200" style="border: 1px solid black;"></canvas>
      <script>
         var canvas = document.getElementById('canvas');
         var context = canvas.getContext('2d');
         console.log(context.canvas);
      </script>
   </body>
</html>
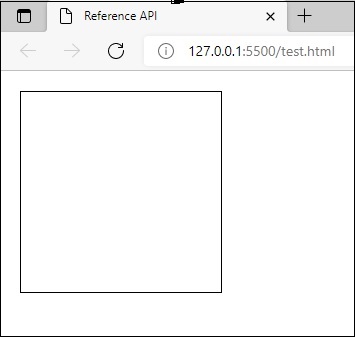
Output
The output returned by the above code in the webpage console as −
The output seen on the webpage as −
Example
The following example demonstrates how canvas property can be used to generate a new context object and the border is styled by increasing size and adding color.
<!DOCTYPE html>
<html lang="en">
   <head>
      <title>Reference API</title>
      <style>
         body {
            margin: 10px;
            padding: 10px;
         }
         #canvas {
            border: 10px solid green;
         }
      </style>
   </head>
   <body>
      <canvas id="canvas" height="200" width="200"></canvas>
      <script>
         var canvas = document.getElementById('canvas');
         var context = canvas.getContext('2d');
      </script>
   </body>
</html>
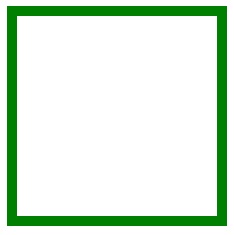
Output
The output returned by the above code in the webpage as −
Example
The following example demonstrates how canvas property can be used to generate a new context object and the background is filled.
<!DOCTYPE html>
<html lang="en">
   <head>
      <title>Reference API</title>
      <style>
         body {
            margin: 10px;
            padding: 10px;
         }

         #canvas {
            background-color: aqua;
         }
      </style>
   </head>
   <body>
      <canvas id="canvas"></canvas>
      <script>
         var canvas = document.getElementById('canvas');
         var context = canvas.getContext('2d');
      </script>
   </body>
</html>
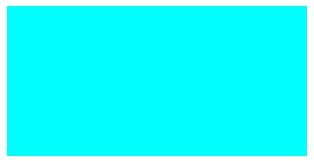
Output
The output returned by the above code in the webpage as −
Example
The following example demonstrates how canvas property can be used to generate a new context object and the border is styled using CSS styles.
<!DOCTYPE html>
<html lang="en">
   <head>
      <title>Reference API</title>
      <style>
         body {
            margin: 10px;
            padding: 10px;
         }

         #canvas {
            border: 50px groove grey;
         }
      </style>
   </head>
   <body>
      <canvas id="canvas"></canvas>
      <script>
         var canvas = document.getElementById('canvas');
         var context = canvas.getContext('2d');
      </script>
   </body>
</html>
Output
The output returned by the above code in the webpage as −
HTML Canvas height property
The HTML Canvas height property of HTMLCanvasElement interface accepts a positive integer and then sets the height of the Canvas element layout.
It is passed as an attribute to the Canvas tag in HTML5 code. When the property is not given, the default value is used which is of 150. It basically controls the height of the Canvas element when used.
Possible input values
It accepts all positive integer values and sets the given value as height of the Canvas element in pixels.
Example
The following example demonstrates how the HTML Canvas height property of the Canvas element can be used to change dimensions of the Canvas.
<!DOCTYPE html>
<html lang="en">
   <head>
      <title>Reference API</title>
      <style>
         body {
            margin: 10px;
            padding: 10px;
         }
      </style>
   </head>
   <body>
      <canvas id="canvas1" height="200" style="border: 1px solid blueviolet;"></canvas>
      <canvas id="canvas2" height="500" style="border: 1px solid green;"></canvas>
   </body>
</html>
Output
The program creates two canvases with different heights and shows how the property can change the layout of Canvas element. The above code returns the output on a new webpage as −
Example
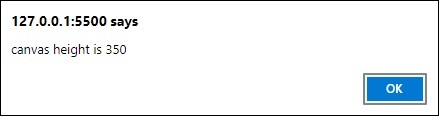
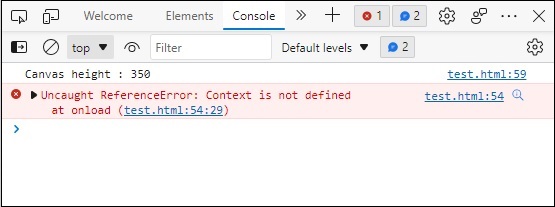
The following example shows the height of the Canvas element in console as well as the window alert.
<!DOCTYPE html>
<html lang="en">
   <head>
      <title>Reference API</title>
      <style>
         body {
            margin: 10px;
            padding: 10px;
         }
      </style>
   </head>
   <body onload="Context();">
      <canvas id="canvas" height="350" style="border: 1px solid black;"></canvas>
      <script>
         var canvas = document.getElementById('canvas');
         var context = canvas.getContext('2d');
         console.log('Canvas height : ' + canvas.height);
         window.alert('canvas height is ' + canvas.height);
      </script>
</html>
Output
The program creates a canvas with input height and shows it on console and window alert. The above code returns the output by window alert as −
The output shown in console as −
The canvas formed by the above code on the webpage as −

HTML Canvas width property
The HTML Canvas width property of HTMLCanvasElement interface accepts a positive integer and then sets the width size of the Canvas element layout.
It is passed as an attribute to the Canvas tag in HTML5 code. When the property is not given, the default value of 300 is used. It basically controls the width of Canvas element.
Possible input values
It accepts all positive integer values and applies the value to width of the Canvas element in pixels.
Example
The following example uses default HTML Canvas width property value and constructs the Canvas element layout.
<!DOCTYPE html>
<html lang="en">
   <head>
      <title>Reference API</title>
      <style>
         body {
            margin: 10px;
            padding: 10px;
         }
      </style>
   </head>
   <body>
      <canvas id="canvas" style="border: 1px solid black;"></canvas>
   </body>
</html>
Output
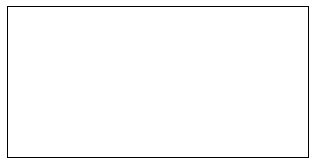
Since we did not give the value of width in the above code, the default value of Canvas width is considered (300) and the Canvas element layout is drawn. The output given by the above code on the webpage as −
Example
The following example demonstrates how width property of the Canvas element can be used to change dimensions of the Canvas.
<!DOCTYPE html>
<html lang="en">
   <head>
      <title>Reference API</title>
      <style>
         body {
            margin: 10px;
            padding: 10px;
         }
      </style>
   </head>
   <body>
      <canvas id="canvas1" width="100" style="border: 1px solid rgb(100, 82, 117);"></canvas>
      <canvas id="canvas2" width="200" style="border: 1px solid rgb(43, 236, 43);"></canvas>
   </body>
</html>
Output
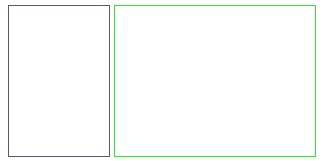
The program creates two canvases with different widths and shows how the property can change the layout of Canvas element. The above code returns the output on a new webpage as −
Example
The following example displays the width of the Canvas element in console as well as the window alert.
<!DOCTYPE html>
<html lang="en">
<head>
<title>Reference API</title>
<style>
body {
margin: 10px;
padding: 10px;
}
</style>
</head>
<body onload="Context();">
<canvas id="canvas" width="600" style="border: 1px solid black;"></canvas>
<script>
var canvas = document.getElementById('canvas');
var context = canvas.getContext('2d');
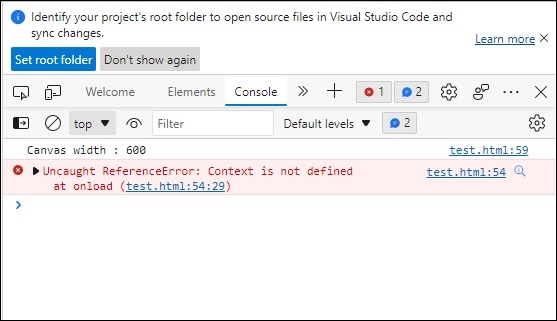
console.log('Canvas width : ' + canvas.width);
window.alert('canvas width is ' + canvas.width);
</script>
</html>
Output
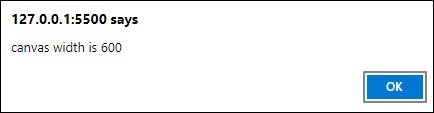
The program creates a canvas with input width and shows it on console and window alert. The above code returns the output by window alert as −
The output shown in console as −
The canvas formed by the above code on the webpage as −
HTML Canvas getContext() method
The HTML Canvas getContext() method is used to get/retrieve the context object. This method accepts a string variable as a parameter specifying the desired context.
In case of failure this method returns NULL (If the specified context is not supported). This method belongs to the HTMLCanvasElement interface. We cannot draw a shape of different context as mentioned by the method.
Syntax
Following is the syntax of the HTML Canvas getContext() method −
HTMLCanvasElement.getContext(context_type);
Parameters
Following is the parameter of this method −
| S.No | Parameter & Description |
|---|---|
| 1 | context_type It takes a string containing context identifier of the Canvas element. The values accepted by the parameter are −
|
Example
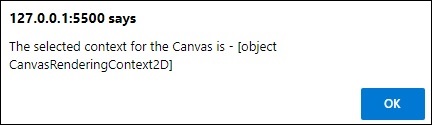
The following code sets the context of the Canvas element to 2D using the HTML Canvas getContext() method and is returned by the window alert.
<!DOCTYPE html>
<html lang="en">
<head>
<title>Reference API</title>
<style>
body {
margin: 10px;
padding: 10px;
}
</style>
</head>
<body>
<canvas id="canvas" height="300" style="border: 1px solid black;"></canvas>
<script>
var canvas = document.getElementById('canvas');
var context = canvas.getContext('2d');
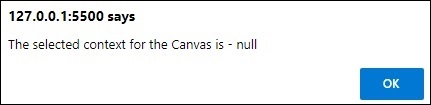
window.alert("The selected context for the Canvas is - " + context);
</script>
</body>
</html>
Output
The canvas formed by the above code on the webpage is −
The window alert request for the code is −
Example
The following code sets the context of the Canvas element by giving a random string and the object context is returned by the window alert.
<!DOCTYPE html>
<html lang="en">
   <head>
      <title>Reference API</title>
      <style>
         body {
            margin: 10px;
            padding: 10px;
         }
      </style>
   </head>
   <body>
      <canvas id="canvas" height="200" style="border: 1px solid black;"></canvas>
      <script>
         var canvas = document.getElementById('canvas');
         var context = canvas.getContext('shapes');
         window.alert("The selected context for the Canvas is - " + context);
      </script>
   </body>
</html>
Output
The canvas formed by the above code on the webpage is −
The window alert request for the code is −
Rectangles
Rectangle is a simple 2D shape consisting of 4 sides, corners and right angles. Opposite sides of the rectangle have same length and one pair is bigger than the other.
The interface CanvasRenderringContext2D provides properties and methods to render 2D graphics such as rectangles onto the drawing surface of Canvas element. It can be used for drawing shapes as well as styling them on the <canvas> element.
Properties
The properties available to draw rectangles inside the Canvas element are given in the below table.
| S.No | Property and Description |
|---|---|
| 1 | fillStyle
This property can be used to fill the shape drawn onto canvas and specifies the color, gradient or pattern used. The input of this property is all coloring values. |
| 2 | strokeStyle
This property applies color, gradient or pattern to the stroked shapes inside Canvas element. |
Methods
Following are the various methods available to draw various shapes on HTML Canvas −
| S.No | Method & Description |
|---|---|
| 1 | clearRect()
This method erases all the pixels in the given rectangular area by parameters. |
| 2 | fillRect()
This method draws a filled rectangle with the given dimensions inside Canvas element. |
| 3 | getContextAttributes()
This method creates an object containing context parameters of the available canvas. To fetch and display this data, we use console or window alerts. |
| 4 | rect()
The constructor method rect() is used to add rectangle to the current path. |
| 5 | strokeRect()
This method draws a stroked rectangle with the given dimensions inside Canvas element. |
HTML Canvas fillStyle property
The HTML Canvas fillStyle property of Canvas 2D API is from the interface CanvasRenderingContext2D takes the context object shape and fills it with the passed color value.
It mainly specifies the color, gradient, or pattern to use inside any shape. The color is black by default.
Possible input values
The property accepts any one of the following values −
Any format of CSS color value.
A gradient object for adding inside the shape.
A pattern object for creating a repeated pattern inside the shape.
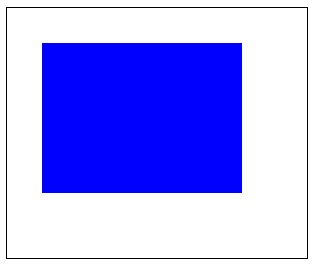
Example
The following program draws a rectangle inside the Canvas element and fills using the HTML Canvas fillStyle property.
<!DOCTYPE html>
<html lang="en">
   <head>
      <title>Reference API</title>
      <style>
         body {
            margin: 10px;
            padding: 10px;
         }
      </style>
   </head>
   <body>
      <canvas id="canvas" width="300" height="250" style="border: 1px solid black;"></canvas>
      <script>
         var canvas = document.getElementById('canvas');
         var context = canvas.getContext('2d');
         context.fillStyle = 'blue';
         context.rect(35, 35, 200, 150);
         context.fill();
      </script>
   </body>
</html>
Output
The output returned by the above code on the webpage as −
Example
The following program draws a rectangle inside the Canvas element and fills a pattern created using the fillStyle property.
<!DOCTYPE html>
<html lang="en">
   <head>
      <title>Reference API</title>
      <style>
         body {
            margin: 10px;
            padding: 10px;
         }
      </style>
   </head>
   <body>
      <canvas id="canvas" width="300" height="250" style="border: 1px solid black; background-color: blue;"></canvas>
      <script>
         var canvas = document.getElementById('canvas');
         var context = canvas.getContext('2d')
         var image = new Image();
         image.src = 'https://www.tutorialspoint.com/themes/home/tp-diamond-logo-white.png';
         image.onload = function() {
            var pattern = context.createPattern(image, 'repeat');
            context.fillStyle = pattern;
            context.fillRect(0, 0, canvas.width, canvas.height);
         }
      </script>
   </body>
</html>
Output
The output returned by the above code on the webpage as −

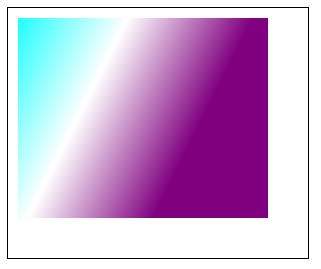
Example
The following program draws a rectangle inside the Canvas element and fills a gradient object using the fillStyle property.
<!DOCTYPE html>
<html lang="en">
   <head>
      <title>Reference API</title>
      <style>
         body {
            margin: 10px;
            padding: 10px;
         }
      </style>
   </head>
   <body>
      <canvas id="canvas" width="300" height="250" style="border: 1px solid black;"></canvas>
      <script>
         var canvas = document.getElementById("canvas");
         var context = canvas.getContext('2d');
         var lineargrad = context.createLinearGradient(0, 0, 200, 100);
         context.fillStyle = lineargrad;
         lineargrad.addColorStop(0, 'cyan');
         lineargrad.addColorStop(0.5, 'white');
         lineargrad.addColorStop(1, 'purple');
         context.fillRect(10, 10, 250, 200);
      </script>
   </body>
</html>
Output
The output returned by the above code on the webpage as −
HTML Canvas strokeStyle property
The HTML Canvas strokeStyle property of Canvas 2D API is from the interface CanvasRenderingContext2D uses the context object of the Canvas element and colors the stroked graphic with the provided color.
It mainly specifies the color, gradient, or pattern for adding strokes to any shape. The color is black by default.
Possible input values
The property accepts any one of the following values −
Any format of CSS color value.
A gradient object for adding inside the shape.
A pattern object for creating a repeated pattern inside the shape.
Example
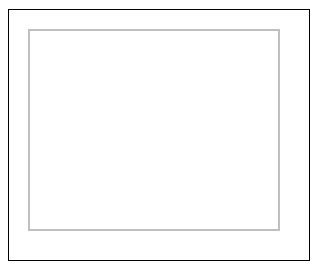
The following example adds strokes to a rectangle created by the CanvasRenderingContext2D object using color name passed by the HTML Canvas strokeStyle property.
<!DOCTYPE html>
<html lang="en">
   <head>
      <title>Reference API</title>
      <style>
         body {
            margin: 10px;
            padding: 10px;
         }
      </style>
   </head>
   <body>
      <canvas id="canvas" width="300" height="250" style="border: 1px solid black;"></canvas>
      <script>
         var canvas = document.getElementById("canvas");
         var context = canvas.getContext('2d');
         context.strokeStyle = 'grey';
         context.rect(20, 20, 250, 200);
         context.stroke();
      </script>
   </body>
</html>
Output
The output returned by the above code on the webpage as −
Example
The following example adds strokes to a rectangle created by the CanvasRenderingContext2D object using RGB color value.
<!DOCTYPE html>
<html lang="en">
   <head>
      <title>Reference API</title>
      <style>
         body {
            margin: 10px;
            padding: 10px;
         }
      </style>
   </head>
   <body>
      <canvas id="canvas" width="500" height="300" style="border: 1px solid black;"></canvas>
      <script>
         var canvas = document.getElementById("canvas");
         var context = canvas.getContext('2d');
         context.lineWidth = 10;
         context.strokeStyle = 'rgb(100,100,100)';
         context.rect(50, 20, 150, 100);
         context.stroke();
         context.lineWidth = 10;
         context.strokeStyle = 'rgba(200,200,200,0.75)';
         context.rect(300, 150, 150, 100);
         context.stroke();
      </script>
   </body>
</html>
Output
The output returned by the above code on the webpage as −
HTML Canvas clearRect() method
The HTML Canvas clearRect() method can be used to erase the pixel data in the given area and from the point given by the parameters.
It is from the interface CanvasRenderingContext2D and makes the given area completely white. It should be clearly defined to avoid any errors resulting in not working of the method.
When this method is called, the co-ordinates passed is taken as the top left co-ordinates of the rectangle area which is made transparent black.
Syntax
Following is the syntax of HTML Canvas clearRect() method −
CanvasRenderingContext2D.clearRect(x, y, width, height);
Parameters
Following is the list of parameters of this method −
| S.No | Parameters and Description |
|---|---|
| 1 | x
The x co-ordinate value of the starting point of the rectangle. |
| 2 | y
The y co-ordinate value of the starting point of the rectangle |
| 3 | width
The width of the drawing rectangle. |
| 4 | height
The height of the drawing rectangle. |
Return values
When the method is called, the rectangular area formed by the given parameters is taken and the pixels are changed to white.
Example
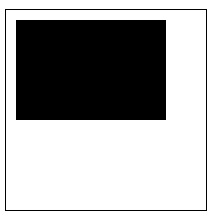
The following example creates a filled rectangle and shows how the HTML Canvas clearRect() method removes the area from the rectangle.
<!DOCTYPE html>
<html lang="en">
   <head>
      <title>Reference API</title>
      <style>
         body {
            margin: 10px;
            padding: 10px;
         }
      </style>
   </head>
   <body>
      <canvas id="canvas" width="300" height="200" style="border: 1px solid black;"></canvas>
      <script>
         var canvas = document.getElementById("canvas");
         var context = canvas.getContext('2d');
         context.fillStyle = 'orange';
         context.fillRect(10, 10, 250, 180);
         context.clearRect(30, 30, 50, 50);
      </script>
   </body>
</html>
Output
The output returned by the above code on webpage as −

Example
The following example creates a filled rectangle with same width and height of the canvas element and shows how clearRect() method can be used to design simple shapes.
<!DOCTYPE html>
<html lang="en">
   <head>
      <title>Reference API</title>
      <style>
         body {
            margin: 10px;
            padding: 10px;
         }
      </style>
   </head>
   <body>
      <canvas id="canvas" width="300" height="200" style="border: 1px solid black;"></canvas>
      <script>
         var canvas = document.getElementById("canvas");
         var context = canvas.getContext('2d');
         context.fillRect(0, 0, 300, 200);
         context.clearRect(10, 100, 280, 10);
         context.clearRect(150, 10, 10, 180);
      </script>
   </body>
</html>
Output
The output returned by the above code on the webpage as −
HTML Canvas fillRect() method
The HTML Canvas fillRect() method can be used to fill the given area from the point and dimensions given by the parameters.
It is from the CanvasRenderingContext2D interface and fills the given area completely black when no color input is given.
We can give color input using fillStyle property for the context object before drawing the rectangle. It should be clearly defined to avoid any errors resulting in not working of the method.
When this method is called, the co-ordinates passed is taken as the top left co-ordinates of the rectangle area which is filled using the given input or black by default.
Syntax
Following is the syntax of HTML Canvas fillRect() method −
CanvasRenderingContext2D.fillRect(x, y, width, height);
Parameters
Following is the list of parameters of this method −
| S.No | Parameter & Description |
|---|---|
| 1 | x
The x co-ordinate value of the starting point of the rectangle. |
| 2 | y
The y co-ordinate value of the starting point of the rectangle |
| 3 | width
The width of the drawing rectangle. |
| 4 | height
The height of the drawing rectangle. |
Return values
When the method is called, the rectangular area formed by the given parameters is taken and is filled based on provided input.
Example
The following example creates a filled rectangles and shows how the HTML Canvas fillRect() method can be used to achieve this.
<!DOCTYPE html>
<html lang="en">
   <head>
      <title>Reference API</title>
      <style>
         body {
            margin: 10px;
            padding: 10px;
         }
      </style>
   </head>
   <body>
      <canvas id="canvas" width="500" height="200" style="border: 1px solid black;"></canvas>
      <script>
         var canvas = document.getElementById("canvas");
         var context = canvas.getContext('2d');
         // creating filled rectangle with default color
         context.fillRect(10, 10, 200, 150);
         // creating filled rectangle using input color
         context.fillStyle = 'brown';
         context.fillRect(250, 10, 200, 150);
      </script>
   </body>
</html>
Output
The output returned by the above code in webpage as −

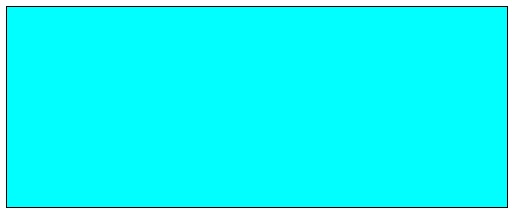
Example
The following example fills the whole HTMLCanvasElement interface object canvas area by using fillStyle property.
<!DOCTYPE html>
<html lang="en">
   <head>
      <title>Reference API</title>
      <style>
         body {
            margin: 10px;
            padding: 10px;
         }
      </style>
   </head>
   <body>
      <canvas id="canvas" width="500" height="200" style="border: 1px solid black;"></canvas>
      <script>
         var canvas = document.getElementById("canvas");
         var context = canvas.getContext('2d');
         context.fillStyle = 'cyan';
         context.fillRect(0, 0, canvas.width, canvas.height);
      </script>
   </body>
</html>
Output
The output returned by the above code in web page as −
HTML Canvas getContextAttributes() method
The HTML Canvas getContextAttributes() method of Canvas API returns a Canvas object containing the same context parameters.
These attributes are generally requested by getContext() method on the context creation. It generally returns the context of any graphic drawn inside the canvas element when requested by using its object.
Syntax
Following is the syntax of HTML Canvas getContextAttributes() method
CanvasRenderingContext2D.getContextAttributes();
Parameters
Since it is only a return method, it does not take any parameters.
Return value
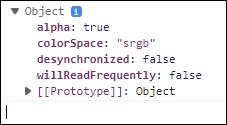
The interface CanvasRenderingContext2D method uses the context object and the object parameters are returned via console or window alerts when the HTML Canvas getContextAttributes() method is used by the object.
Example
The following example returns the context parameters of the canvas element in the console using the HTML Canvas getContextAttributes() method. The implementation code is given below.
<!DOCTYPE html>
<html lang="en">
   <head>
      <title>Reference API</title>
      <style>
         body {
            margin: 10px;
            padding: 10px;
         }
      </style>
   </head>
   <body onload="Context();">
      <canvas id="canvas" width="200" height="200" style="border: 1px solid black;"></canvas>
      <script>
         function Context() {
            var canvas = document.getElementById("canvas");
            var context = canvas.getContext("2d");
            console.log(context.getContextAttributes());
         }
      </script>
   </body>
</html>
Output
The output returned by the method on the webpage as −
The output that can be seen on console screen as −
Example
The following example returns the context parameters of a filled rectangle inside canvas element in the console. The implementation code is given below.
<!DOCTYPE html>
<html lang="en">
   <head>
      <title>Reference API</title>
      <style>
         body {
            margin: 10px;
            padding: 10px;
         }
      </style>
   </head>
   <body onload="Context();">
      <canvas id="canvas" width="200" height="200" style="border: 1px solid black;"></canvas>
      <script>
         function Context() {
            var canvas = document.getElementById("canvas");
            var context = canvas.getContext("2d");
            context.fillRect(10, 10, 150, 100);
            console.log(context.getContextAttributes());
         }
      </script>
   </body>
</html>
Output
The output returned by the method on web page as −
The output that can be seen on the console screen as −
HTML Canvas rect() method
The HTML Canvas rect() method is a constructor method which can be used to draw a rectangle on the current path inside the Canvas element.
It is from the CanvasRenderingContext2D interface and adds the input rectangle onto the current path.
When this method is called, the co-ordinates passed is taken as the top left co-ordinates of the rectangle to be drawn. Width and height mentioned are collectively used to draw the rectangle.
Syntax
Following is the syntax of HTML Canvas rect() method −
CanvasRenderingContext2D.rect(x, y, width, height);
Parameters
Following is the list of parameters of this method −
| S.No | Parameter & Description |
|---|---|
| 1 | x
The x co-ordinate value of the starting point of the rectangle. |
| 2 | y
The y co-ordinate value of the starting point of the rectangle |
| 3 | width
The width of the drawing rectangle. |
| 4 | height
The height of the drawing rectangle. |
Return values
When the method rect() is called, input parameter values are used to draw a rectangle on current available path inside the canvas element.
Example
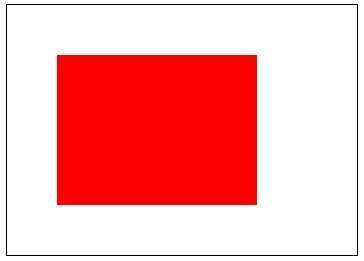
The following example creates a filled rectangle using the HTML Canvas rect() method on the current path. Implementation code is given below.
<!DOCTYPE html>
<html lang="en">
   <head>
      <title>Reference API</title>
      <style>
         body {
            margin: 10px;
            padding: 10px;
         }
      </style>
   </head>
   <body onload="Context();">
      <canvas id="canvas" width="350" height="250" style="border: 1px solid black;"></canvas>
      <script>
         function Context() {
            var canvas = document.getElementById("canvas");
            var context = canvas.getContext("2d");
            context.beginPath();
            context.fillStyle = 'red';
            context.rect(50, 50, 200, 150);
            context.fill();
            context.closePath();
         }
      </script>
   </body>
</html>
Output
The output returned by the above code on webpage as −
Example
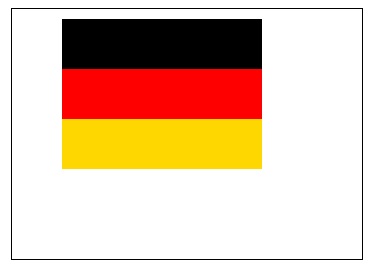
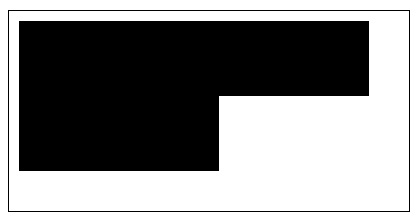
The following example creates Germany country flag using three rectangles using rect() method on the current path. Implementation code is given below.
<!DOCTYPE html>
<html lang="en">
   <head>
      <title>Reference API</title>
      <style>
         body {
            margin: 10px;
            padding: 10px;
         }
      </style>
   </head>
   <body onload="Context();">
      <canvas id="canvas" width="350" height="250" style="border: 1px solid black;"></canvas>
      <script>
         function Context() {
            var canvas = document.getElementById("canvas");
            var context = canvas.getContext("2d");
            // germany flag
            context.beginPath();
            context.fillStyle = 'black';
            context.rect(50, 10, 200, 50);
            context.fill();
            context.closePath();
            context.beginPath();
            context.fillStyle = 'red';
            context.rect(50, 60, 200, 50);
            context.fill();
            context.closePath();
            context.beginPath();
            context.fillStyle = 'gold';
            context.rect(50, 110, 200, 50);
            context.fill();
            context.closePath();
         }
      </script>
   </body>
</html>
Output
The output returned by the above code on webpage as −
HTML Canvas strokeRect() method
The HTML Canvas strokeRect() method of Canvas 2D API can be used to stroke a rectangle with the data provided using the parameters.
It is available in the CanvasRenderingContext2D interface and strokes to the given area of Canvas element completely black when no color input is given.
We can give color input using strokeStyle property for the context object before drawing the rectangle. It should be clearly defined to avoid any errors resulting in not working of the method.
When this method is called, the co-ordinates passed is taken as the top left co-ordinates of the rectangle area which is stroked using the given input or black by default.
Syntax
Following is the syntax of HTML Canvas strokeRect() method −
CanvasRenderingContext2D.strokeRect(x, y, width, height);
Parameters
Following is the list of parameters of this method −
| S.No | Parameter & Description |
|---|---|
| 1 | .x
The x co-ordinate value of the starting point of the rectangle. |
| 2 | y
The y co-ordinate value of the starting point of the rectangle |
| 3 | width
The width of the drawing rectangle. |
| 4 | height
The height of the drawing rectangle. |
Return values
When the method is called, a rectangle is stroked based on the parameters passed with the method.
Example
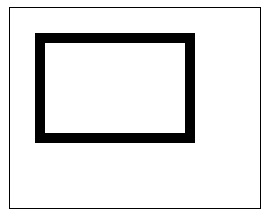
The following code creates a stroked rectangle with default color style using the HTML Canvas strokeRect() method.
<!DOCTYPE html>
<html lang="en">
   <head>
      <title>Reference API</title>
      <style>
         body {
            margin: 10px;
            padding: 10px;
         }
      </style>
   </head>
   <body onload="Context();">
      <canvas id="canvas" width="350" height="250" style="border: 1px solid black;"></canvas>
      <script>
         function Context() {
            var canvas = document.getElementById("canvas");
            var context = canvas.getContext("2d");
            context.strokeRect(50, 50, 200, 150);
         }
      </script>
   </body>undefined
</html>
Output
The output returned by the above code in web page as −
Example
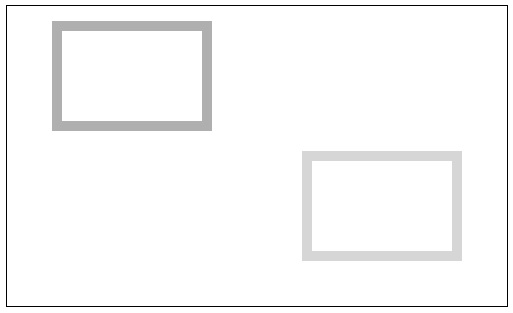
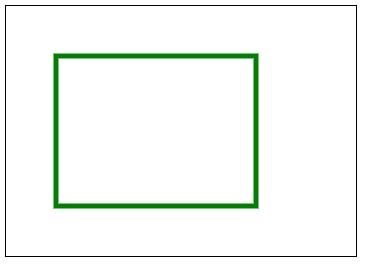
The following example adds strokes to the rectangle using color value specified by the strokeStyle property given for the context object.
<!DOCTYPE html>
<html lang="en">
   <head>
      <title>Reference API</title>
      <style>
         body {
            margin: 10px;
            padding: 10px;
         }
      </style>
   </head>
   <body onload="Context();">
      <canvas id="canvas" width="350" height="250" style="border: 1px solid black;"></canvas>
      <script>
         function Context() {
            var canvas = document.getElementById("canvas");
            var context = canvas.getContext("2d");
            context.strokeStyle = 'green';
            context.lineWidth = 3;
            context.strokeRect(50, 50, 200, 150);
         }
      </script>
   </body>
</html>
Output
The output returned by the above code in web page as −
Example
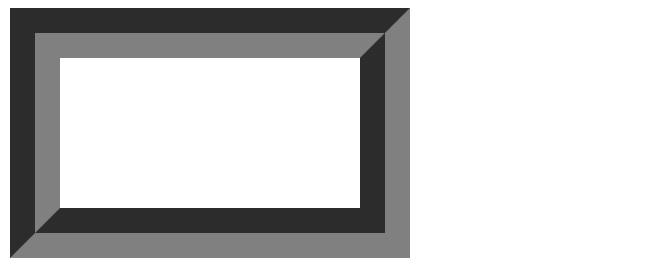
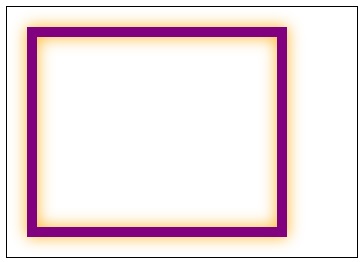
The following example adds strokes to the rectangle using color value specified by the strokeStyle property and uses other line properties to draw a designed rectangle by the context object.
<!DOCTYPE html>
<html lang="en">
   <head>
      <title>Reference API</title>
      <style>
         body {
            margin: 10px;
            padding: 10px;
         }
      </style>
   </head>
   <body onload="Context();">
      <canvas id="canvas" width="350" height="250" style="border: 1px solid black;"></canvas>
      <script>
         function Context() {
            var canvas = document.getElementById("canvas");
            var context = canvas.getContext("2d");
            context.strokeStyle = 'purple';
            context.lineWidth = 10;
            context.shadowColor = 'orange';
            context.shadowBlur = 15;
            context.strokeRect(25, 25, 250, 200)
         }
      </script>
   </body>undefined
</html>
Output
The output returned by the above code in web page as −
Lines
Line is a simple figure formed by a set of points which are extended in opposite direction towards one another until they meet.
The interface CanvasRenderringContext2D contains properties and methods to draw lines onto the canvas element using the context object of interface. The interface can be used for drawing lines as well as styling them on the <canvas> element.
Properties
The properties and available to draw and style lines inside the Canvas element are given in the below table.
| S.No | Property and Description |
|---|---|
| 1 | lineCap
The property lineCap helps us to style the ends of the lines drawn using lineTo() method. |
| 2 | lineDashOffset
This property helps us to draw dashed lines onto the Canvas. |
| 3 | lineJoin
This property allows to style the point where the endpoints of two line segments meet. |
| 4 | lineWidth
This property of the Canvas API can be used to change the thickness of the lines drawn on the Canvas element. |
| 5 | miterLimit
The property miterLimit of the CanvasRenderingContext2D interface helps us to set the ratio of miter limit. |
Methods
Following are the list of methods available to draw various types lines using HTML Canvas −
| S.No | Method & Description |
|---|---|
| 1 | getLineDash()
The method getLineDash() of Canvas API returns a line dash pattern. |
| 2 | lineTo()
This method draws a line from its current point to the point given as the parameters. |
| 3 | setLineDash()
This method can be used to set the line dash pattern while adding strokes to the lines in a Canvas element. |
HTML Canvas lineCap property
The HTML Canvas lineCap property of Canvas API can be used to style the end points of lines drawn inside canvas element.
This property should be applied before drawing the line and is from the CanvasRenderingContext2D interface.
Possible input values
The values accepted by the lineCap. property are listed in the below table.
| S.No | Value & Description | Sample Image |
|---|---|---|
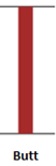
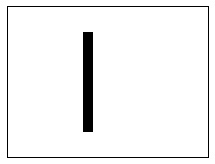
| 1 | butt
Ends of the line are squared off. |
 |
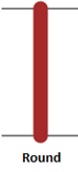
| 2 | round
Ends of the line are rounded. |
 |
| 3 | square
Ends of the line are boxed off with same thickness of the line. |
 |
Example
The following program implements butt style of the HTML Canvas lineCap property to the line inside Canvas element.
<!DOCTYPE html>
<html lang="en">
   <head>
      <title>Reference API</title>
      <style>
         body {
            margin: 10px;
            padding: 10px;
         }
      </style>
   </head>
   <body>
      <canvas id="canvas" width="200" height="150" style="border: 1px solid black;"></canvas>
      <script>
         var canvas = document.getElementById("canvas");
         var context = canvas.getContext('2d');
         context.beginPath();
         context.moveTo(80, 30);
         context.lineTo(80, 120);
         context.lineWidth = 10;
         context.lineCap = 'butt';
         context.stroke();
         context.closePath();
      </script>
   </body>
</html>
Output
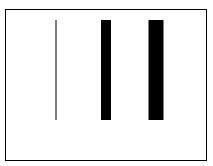
The output returned by the above code on the webpage as &minud;
Example
The following program implements round style of lineCap property to the line inside Canvas element.
<!DOCTYPE html>
<html lang="en">
   <head>
      <title>Reference API</title>
      <style>
         body {
            margin: 10px;
            padding: 10px;
         }
      </style>
   </head>
   <body>
      <canvas id="canvas" width="200" height="150" style="border: 1px solid black;"></canvas>
      <script>
         var canvas = document.getElementById("canvas");
         var context = canvas.getContext('2d');
         context.beginPath();
         context.moveTo(80, 30);
         context.lineTo(80, 120);
         context.lineWidth = 10;
         context.lineCap = 'round';
         context.stroke();
         context.closePath();
      </script>
   </body>
</html>
Output
The output returned by the above code on the webpage as −
Example
The following program implements square style of lineCap property to the line inside Canvas element.
<!DOCTYPE html>
<html lang="en">
   <head>
      <title>Reference API</title>
      <style>
         body {
            margin: 10px;
            padding: 10px;
         }
      </style>
   </head>
   <body>
      <canvas id="canvas" width="200" height="150" style="border: 1px solid black;"></canvas>
      <script>
         var canvas = document.getElementById("canvas");
         var context = canvas.getContext('2d');
         context.beginPath();
         context.moveTo(80, 30);
         context.lineTo(80, 120);
         context.lineWidth = 10;
         context.lineCap = 'square';
         context.stroke();
         context.closePath();
      </script>
   </body>
</html>
Output
The output returned by the above code on the webpage as −
The butt style and square style looks similar, but the difference can be clearly observed in the possible input values table.
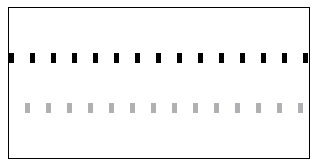
HTML Canvas linedashOffset property
The HTML Canvas lineDashOffset property of Canvas API can be used set the line dash style using an number value breaks.
This property should be applied before drawing the line and is from the CanvasRenderingContext2D interface.
Possible input values
It accepts float number values which specifies the correct space for line dash offset. The default value is taken as 0.
Example
The following program implements the HTML Canvas lineDashOffset property to the CanvasRenderingContext2D interface context object so that a line pattern can be drawn.
<!DOCTYPE html>
<html lang="en">
   <head>
      <title>Reference API</title>
      <style>
         body {
            margin: 10px;
            padding: 10px;
         }
      </style>
   </head>
   <body>
      <canvas id="canvas" width="300" height="150" style="border: 1px solid black;"></canvas>
      <script>
         var canvas = document.getElementById('canvas');
         var context = canvas.getContext('2d');
         context.setLineDash([5, 16]);
         context.beginPath();
         context.lineWidth = 10;
         context.moveTo(0, 50);
         context.lineTo(300, 50);
         context.stroke();
         context.closePath();
         context.beginPath();
         context.strokeStyle = 'rgba(123,124,125,0.6)';
         context.lineWidth = 10;
         context.lineDashOffset = 5;
         context.moveTo(0, 100);
         context.lineTo(300, 100);
         context.stroke();
         context.closePath();
      </script>
   </body>
</html>
Output
The output returned by the above code on the web page according to the pixels is −
Example
The following program implements uses the property lineDashOffset to draw a pattern using lines and the property.
<!DOCTYPE html>
<html lang="en">
   <head>
      <title>Reference API</title>
      <style>
         body {
            margin: 10px;
            padding: 10px;
         }
      </style>
   </head>
   <body>
      <canvas id="canvas" width="350" height="200" style="border: 1px solid black;"></canvas>
      <script>
         function linestyles() {
            var canvas = document.getElementById("canvas");
            var ctx = canvas.getContext('2d');
            var offset = 0;

            function draw() {
               ctx.clearRect(0, 0, canvas.width, canvas.height);
               ctx.setLineDash([50, 10]);
               ctx.lineDashOffset = offset;
               ctx.strokeRect(10, 10, 250, 125);
            }

            function animate() {
               offset++;
               if (offset > 25) {
                  offset = 0;
               }
               draw();
               setTimeout(animate, 50);
            }
            animate();
         }
      </script>
   </body>undefined undefined
</html>
Output
The output returned by the above code on the web page according to the pixels is −
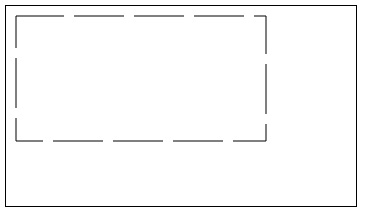
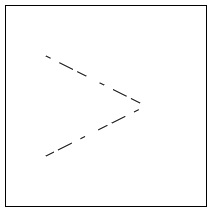
HTML Canvas lineJoin property
The HTML Canvas lineJoin property of Canvas API from the CanvasRenderingContext2D interface can be used set the shape joining two-line segments at their meeting point.
This does not generally affect the width, length of the lines as it does not extend further than the given input.
Possible input values
The values accepted by the lineJoin property are listed in the below table.
| S.No | Value & Description | Sample Image |
|---|---|---|
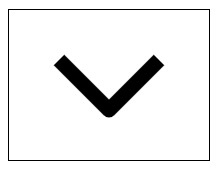
| 1 | round
It rounds off the corner of the shape. |
 |
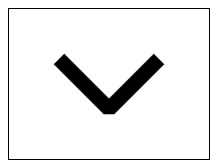
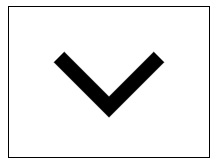
| 2 | bevel
Fills a triangle at the endpoint between lines and a rectangular corners of the segment on other side. |
 |
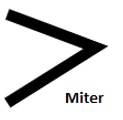
| 3 | miter
The edges of two line segments are extended till they meet at a point. It is the default value for the property. |
 |
Example
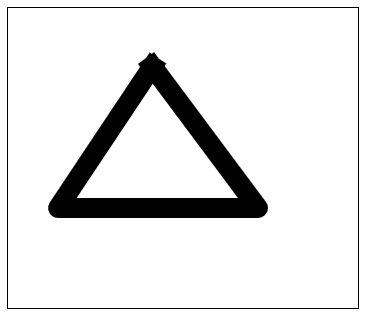
The following program implements round value style of the HTML Canvas lineJoin property to the line segments inside the Canvas element.
<!DOCTYPE html>
<html lang="en">
   <head>
      <title>Reference API</title>
      <style>
         body {
            margin: 10px;
            padding: 10px;
         }
      </style>
   </head>
   <body>
      <canvas id="canvas" width="200" height="150" style="border: 1px solid black;"></canvas>
      <script>
         var canvas = document.getElementById('canvas');
         var context = canvas.getContext('2d');
         context.beginPath();
         context.lineWidth = 15;
         context.lineJoin = 'round';
         context.moveTo(50, 50);
         context.lineTo(100, 100);
         context.lineTo(150, 50);
         context.stroke();
         context.closePath();
      </script>
   </body>
</html>
Output
The output returned by the above code on the webpage as −
Example
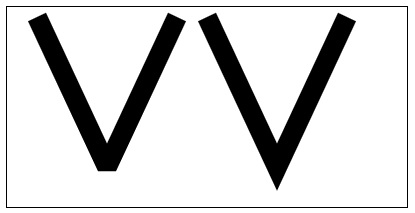
The following program implements bevel value style of lineJoin property to the line segments inside the Canvas element.
<!DOCTYPE html>
<html lang="en">
   <head>
      <title>Reference API</title>
      <style>
         body {
            margin: 10px;
            padding: 10px;
         }
      </style>
   </head>
   <body>
      <canvas id="canvas" width="200" height="150" style="border: 1px solid black;"></canvas>
      <script>
         var canvas = document.getElementById('canvas');
         var context = canvas.getContext('2d');
         context.beginPath();
         context.lineWidth = 15;
         context.lineJoin = 'bevel';
         context.moveTo(50, 50);
         context.lineTo(100, 100);
         context.lineTo(150, 50);
         context.stroke();
         context.closePath();
      </script>
   </body>
</html>
Output
The output returned by the above code on the webpage as −
Example
The following program implements miter line value style of lineJoin property to the line segments drawn inside the Canvas element.
<!DOCTYPE html>
<html lang="en">
   <head>
      <title>Reference API</title>
      <style>
         body {
            margin: 10px;
            padding: 10px;
         }
      </style>
   </head>
   <body>
      <canvas id="canvas" width="200" height="150" style="border: 1px solid black;"></canvas>
      <script>
         var canvas = document.getElementById('canvas');
         var context = canvas.getContext('2d');
         context.beginPath();
         context.lineWidth = 15;
         context.lineJoin = 'miter';
         context.moveTo(50, 50);
         context.lineTo(100, 100);
         context.lineTo(150, 50);
         context.stroke();
         context.closePath();
      </script>
   </body>
</html>
Output
The output returned by the above code on the webpage as −
HTML Canvas lineWidth property
The HTML Canvas lineWidth property of Canvas 2D API can be used set the line thickness inside the Canvas element.
This property should be applied before drawing the line using context object and is available in the CanvasRenderingContext2D interface.
Possible input values
It accepts integer decimal number values which specifies the line width drawn inside the canvas element. The default value is taken as 1.0 by default.
Example
The following example demonstrates the HTML Canvas lineWidth property by drawing a line without applying lineWidth property and another lines with lineWidth property.
<!DOCTYPE html>
<html lang="en">
   <head>
      <title>Reference API</title>
      <style>
         body {
            margin: 10px;
            padding: 10px;
         }
      </style>
   </head>
   <body>
      <canvas id="canvas" width="200" height="150" style="border: 1px solid black;"></canvas>
      <script>
         var canvas = document.getElementById('canvas');
         var context = canvas.getContext('2d');
         context.beginPath();
         context.moveTo(50, 10);
         context.lineTo(50, 110);
         context.stroke();
         context.closePath();
         context.beginPath();
         context.lineWidth = 10;
         context.moveTo(100, 10);
         context.lineTo(100, 110);
         context.stroke();
         context.closePath();
         context.beginPath();
         context.lineWidth = 15;
         context.moveTo(150, 10);
         context.lineTo(150, 110);
         context.stroke();
         context.closePath();
      </script>
   </body>
</html>
Output
The output returned by the above code on the webpage as −
Example
The following example demonstrates lineWidth property by drawing a triangle using lineWidth property to increase the thickness of the edges.
<!DOCTYPE html>
<html lang="en">
   <head>
      <title>Reference API</title>
      <style>
         body {
            margin: 10px;
            padding: 10px;
         }
      </style>
   </head>
   <body>
      <canvas id="canvas" width="350" height="300" style="border: 1px solid black;"></canvas>
      <script>
         var canvas = document.getElementById('canvas');
         var context = canvas.getContext('2d');
         context.beginPath();
         context.lineWidth = 20;
         context.lineJoin = 'round';
         context.moveTo(150, 50);
         context.lineTo(50, 200);
         context.lineTo(250, 200);
         context.lineTo(138, 50);
         context.stroke();
         context.closePath();
      </script>
   </body>
</html>
Output
The output returned by the above code on the webpage as −
Example
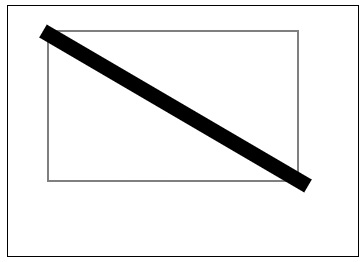
The following example demonstrates lineWidth property by drawing a diagonal to the rectangle with more thickness.
<!DOCTYPE html>
<html lang="en">
   <head>
      <title>Reference API</title>
      <style>
         body {
            margin: 10px;
            padding: 10px;
         }
      </style>
   </head>
   <body>
      <canvas id="canvas" width="350" height="250" style="border: 1px solid black;"></canvas>
      <script>
         var canvas = document.getElementById('canvas');
         var context = canvas.getContext('2d');
         context.strokeRect(40, 25, 250, 150);
         context.beginPath();
         context.lineWidth = 15;
         context.moveTo(35, 25);
         context.lineTo(300, 180);
         context.stroke();
         context.closePath();
      </script>
   </body>
</html>
Output
The output returned by the above code on the webpage as −
HTML Canvas miterLimit property
The HTML Canvas miterLimit property of Canvas 2D API can be used set the ratio of miter style applied using lineJoin property.
This property should be applied after starting the path and before drawing the line and is from the CanvasRenderingContext2D interface.
Possible input values
It accepts non-zero integer number values which specifies the miter limit ratio drawn inside the canvas element. The default value is taken as 10.0 by default.
Example
The following example draws simple lines onto the Canvas element after applying the HTML Canvas miterLimit property.
<!DOCTYPE html>
<html lang="en">
   <head>
      <title>Reference API</title>
      <style>
         body {
            margin: 10px;
            padding: 10px;
         }
      </style>
   </head>
   <body>
      <canvas id="canvas" width="400" height="200" style="border: 1px solid black;"></canvas>
      <script>
         var canvas = document.getElementById('canvas');
         var context = canvas.getContext('2d');
         context.beginPath()
         context.moveTo(30, 10);
         context.lineTo(100, 160);
         context.lineTo(170, 10);
         context.lineJoin = 'miter';
         context.miterLimit = 2;
         context.lineWidth = 20;
         context.stroke();
         context.closePath();
         context.beginPath();
         context.moveTo(200, 10);
         context.lineTo(270, 160);
         context.lineTo(340, 10);
         context.miterLimit = 25;
         context.lineJoin = 'miter';
         context.lineWidth = 20;
         context.stroke();
         context.closePath();
      </script>
   </body>
</html>
Output
The output returned by the above code on the webpage as −
Example
The following program implements miterLimit property on the shape rectangle drawn inside the Canvas element using lines.
<!DOCTYPE html>
<html lang="en">
   <head>
      <title>Reference API</title>
      <style>
         body {
            margin: 10px;
            padding: 10px;
         }
      </style>
   </head>
   <body>
      <canvas id="canvas" width="250" height="200" style="border: 1px solid black;"></canvas>
      <script>
         var canvas = document.getElementById('canvas');
         var context = canvas.getContext('2d');
         context.beginPath();
         context.miterLimit = 20;
         context.lineJoin = 'miter';
         context.lineWidth = 10;
         context.moveTo(30, 30);
         context.lineTo(30, 130);
         context.lineTo(180, 130);
         context.lineTo(180, 30);
         context.lineTo(25, 30);
         context.stroke();
         context.closePath();
      </script>
   </body>
</html>
Output
The output returned by the above code on the webpage as −
HTML Canvas getLineDash() method
The HTML Canvas getLineDash() method of Canvas API is from the CanvasRenderingContext2D interface and is when called by the context object gives the currently applied line dash pattern.
Syntax
Following is the syntax of HTML Canvas getLineDash() method −
CanvasRenderingContext2D.getLineDash();
Parameters
This is only a return method. Hence, it does not take any parameters.
Return values
An array is returned containing the distances of drawing the line and gap used.
Example
The following example draws a line in the canvas element after applying line dash method and shows the variables used in the window alert of the webpage every time when loaded by the HTML Canvas getLineDash() method.
<!DOCTYPE html>
<html lang="en">
   <head>
      <title>Reference API</title>
      <style>
         body {
            margin: 10px;
            padding: 10px;
         }
      </style>
   </head>
   <body>
      <canvas id="canvas" width="250" height="100" style="border: 1px solid black;"></canvas>
      <script>
         var canvas = document.getElementById('canvas');
         var context = canvas.getContext('2d');
         context.setLineDash([5, 10]);
         window.alert(context.getLineDash());
         context.beginPath();
         context.moveTo(10, 50);
         context.lineTo(200, 50);
         context.stroke();
         context.closePath();
      </script>
   </body>
</html>
Output
The output returned by the above code on the webpage as −

The output returned in the window alert as −
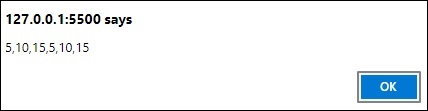
Example 2
The following example draws two lines and applies the line dash to them using setLineDash() method and then returns their array inputs by window alert using getLineDash() method.
<!DOCTYPE html>
<html lang="en">
   <head>
      <title>Reference API</title>
      <style>
         body {
            margin: 10px;
            padding: 10px;
         }
      </style>
   </head>
   <body>
      <canvas id="canvas" width="200" height="200" style="border: 1px solid black;"></canvas>
      <script>
         var canvas = document.getElementById('canvas');
         var context = canvas.getContext('2d');
         context.setLineDash([5, 10, 15]);
         window.alert(context.getLineDash());
         context.beginPath();
         context.moveTo(40, 50);
         context.lineTo(140, 100);
         context.lineTo(40, 150);
         context.stroke();
         context.closePath();
      </script>
   </body>
</html>
Output
The output returned by the above code on the webpage as −
The output returned in the window alert as −
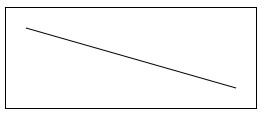
HTML Canvas lineTo() method
The HTML Canvas lineTo() method of Canvas API is generally used to add a straight line to the current path to the point passed as input parameters.
To view this line rendered on the Canvas element, we have to use fill() or stroke() methods to the canvas context object.
Syntax
Following is the syntax of HTML Canvas lineTo() method −
CanvasRenderingContext2D.lineTo(x, y);
Parameters
Following is the list of parameters of this method −
| S.No | Parameter & Description |
|---|---|
| 1 | x
The x co-ordinate value of the end point of line. |
| 2 | y
The y co-ordinate value of the end point of line. |
Return values
It creates a line inside the Canvas element which can be viewed only if filled or stroked using respective methods.
Example 1
The following example draws a line onto the canvas to the specified point using the HTML Canvas lineTo() method.
<!DOCTYPE html>
<html lang="en">
   <head>
      <title>Reference API</title>
      <style>
         body {
            margin: 10px;
            padding: 10px;
         }
      </style>
   </head>
   <body>
      <canvas id="canvas" width="250" height="100" style="border: 1px solid black;"></canvas>
      <script>
         var canvas = document.getElementById('canvas');
         var context = canvas.getContext('2d');
         context.moveTo(20, 20);
         context.lineTo(230, 80);
         context.stroke();
      </script>
   </body>
</html>
Output
The output formed by the given code is displayed on the webpage as −
Example
The following example draws K letter by using lineTo() method.
<!DOCTYPE html>
<html lang="en">
   <head>
      <title>Reference API</title>
      <style>
         body {
            margin: 10px;
            padding: 10px;
         }
      </style>
   </head>
   <body>
      <canvas id="canvas" width="150" height="100" style="border: 1px solid black;"></canvas>
      <script>
         var canvas = document.getElementById('canvas');
         var context = canvas.getContext('2d');
         context.moveTo(40, 20);
         context.lineTo(40, 90);
         context.moveTo(100, 20);
         context.lineTo(40, 55);
         context.lineTo(100, 90);
         context.stroke();
      </script>
   </body>
</html>
Output
The output formed by the given code is displayed on the webpage as −

Example
The following example draws tin word onto the canvas element by drawing lines using lineTo() method.
<!DOCTYPE html>
<html lang="en">
   <head>
      <title>Reference API</title>
      <style>
         body {
            margin: 10px;
            padding: 10px;
         }
      </style>
   </head>
   <body>
      <canvas id="canvas" width="250" height="100" style="border: 1px solid black;"></canvas>
      <script>
         var canvas = document.getElementById('canvas');
         var context = canvas.getContext('2d');
         context.strokeStyle = 'blue';
         context.moveTo(40, 20);
         context.lineTo(80, 20);
         context.moveTo(60, 20);
         context.lineTo(60, 90);
         context.moveTo(100, 20);
         context.lineTo(140, 20);
         context.moveTo(120, 20);
         context.lineTo(120, 90);
         context.moveTo(100, 90);
         context.lineTo(140, 90);
         context.moveTo(160, 90);
         context.lineTo(160, 20);
         context.lineTo(200, 90);
         context.lineTo(200, 20);
         context.stroke();
      </script>
   </body>
</html>
Output
The output formed by the given code is displayed on the webpage as −

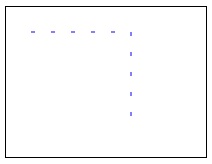
HTML Canvas setLineDash() method
The HTML Canvas setLineDash() method is used to set the line dash pattern when there is a need to stroke the lines in Canvas element.
It takes an array specifying the lengths and gaps values and applies the style. It is available in the CanvasRenderingContext2D interface.
Syntax
Following is the syntax of HTML Canvas setLineDash() method −
CanvasRenderingContext2D.setLineDash(values);
Parameters
Following is the parameter used by this method
| S.No | Parameter & Description |
|---|---|
| 1 | values
An array of numbers representing the distances to maintain the space between each line dash and the length of the line dash pattern. |
Return values
A line dash pattern is returned on the canvas element only when it is stroked or filled by using their respective methods.
Example
The following example draws a dashed line by using the HTML Canvas setLineDash() method for the CanvasRenderingContext2D object.
<!DOCTYPE html>
<html lang="en">
   <head>
      <title>Reference API</title>
      <style>
         body {
            margin: 10px;
            padding: 10px;
         }
      </style>
   </head>
   <body>
      <canvas id="canvas" width="200" height="150" style="border: 1px solid black;"></canvas>
      <script>
         var canvas = document.getElementById('canvas');
         var context = canvas.getContext('2d');
         context.setLineDash([4, 16]);
         context.beginPath();
         context.strokeStyle = 'blue';
         context.moveTo(25, 25);
         context.lineTo(125, 25);
         context.lineTo(125, 125);
         context.stroke();
      </script>
   </body>
</html>
Output
The output returned by the above code on the webpage as −
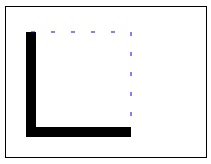
Example
The following example draws a square onto the Canvas and applies setLineDash() method to its borders to get the line dash pattern.
<!DOCTYPE html>
<html lang="en">
   <head>
      <title>Reference API</title>
      <style>
         body {
            margin: 10px;
            padding: 10px;
         }
      </style>
   </head>
   <body>
      <canvas id="canvas" width="200" height="150" style="border: 1px solid black;"></canvas>
      <script>
         var canvas = document.getElementById('canvas');
         var context = canvas.getContext('2d');
         context.beginPath();
         context.lineWidth = 10;
         context.strokeStyle = 'black';
         context.moveTo(25, 25);
         context.lineTo(25, 125);
         context.lineTo(125, 125);
         context.stroke();
         context.closePath();
         context.setLineDash([4, 16]);
         context.beginPath();
         context.lineWidth = 1;
         context.strokeStyle = 'blue';
         context.moveTo(25, 25);
         context.lineTo(125, 25);
         context.lineTo(125, 125);
         context.stroke();
         context.closePath();
      </script>
   </body>
</html>
Output
The output returned by the above code on the webpage as −
Paths
Path is a continuous mapping of points as a trial which does not have repeating vertices and does can go in any angle until the final destination point is reached.
The interface CanvasRenderringContext2D and Path2D contains properties and methods to add paths onto the canvas element using the context object of interface. The interface can be used for adding paths as well as closing them on the <canvas> element.
The properties and methods available to add paths and draw shapes inside the Canvas element are given in the below table.
| S.No | Method & Description | |
|---|---|---|
| 1 | addPath()
This method can be used to add an extra path for the current path. |
|
| 2 | arc()
The arc() method of Canvas API can be used to draw circular arcs to the path started. |
|
| 3 | ar-cTo()
The arcTo() method of Canvas API can be used to draw circular arcs to current path with given control points and radius as parameters. |
|
| 4 | beginPath()
When we have to draw graphics on Canvas element using paths, we call this method to create a new path. |
|
| 5 | bezierCurveTo()
The method bezierCurveTo() of CanvasRenderingContext2D interface draws |
|
| 6 | clip()
This method is used to clip a region of path and draw another graphics in it. | |
| 7 | closePath()
The method closePath() closes the current path by doing the required operations. |
|
| 8 | drawFocusIfNeeded()
To add focus to an existing path or a path that is about to be created, this method can be called by the interface. |
|
| 9 | ellipse()
This method is used to draw an elliptical arc on the drawing surface of Canvas element. | |
| 10 | fill()
This method fills the current or given path with black by default unless fillStyle property is given. |
|
| 11 | isPointInPath()
To check whether a point is inside or with the path, we use this method. It takes the point as parameter and returns Boolean value. | |
| 12 | isPointInStroke()
This method of Canvas 2D API verifies whether the given point is inside a stroked path or not and returns Boolean value (true or false). |
|
| 13 | moveTo()
The context object moves the sub path to the given co-ordinates by parameters. |
|
| 14 | Path2D() | |
| 15 | quadraticCurveTo()
This method draws a quadratic Bezier curve by using the path context. |
|
| 16 | scrollPathIntoView()
This method of Canvas 2D API when called, scrolls the available path into view when it is passed as the parameter. |
|
| 17 | stroke()
This method of Canvas API adds strokes to the current path or shape which is drawn inside the Canvas element. |
HTML Canvas addPath() method
The HTML Canvas addPath() method of Path2D interface can be used to add one canvas path object to another object.
It can be only used for Path2D constructor object and cannot be applied for other objects as it needs a direct path. It is from the Path2D interface.
Syntax
Following is the syntax of HTML Canvas addPath() method −
Path2D.addPath(current-path, transform);
Parameters
Following is the list of parameters of this method −
| S.No | Parameter & Description |
|---|---|
| 1 | Current-path
A path currently available in the Canvas element to add. |
| 2 | transform
To apply transform to the path that is being added. |
Return value
The new path generated by using the current path is displayed on the Canvas element only when requested.
Example
The following example draws a circle from the existing path using the HTML Canvas addPath() method and displays it on the Canvas element.
<!DOCTYPE html>
<html lang="en">
   <head>
      <title>Reference API</title>
      <style>
         body {
            margin: 10px;
            padding: 10px;
         }
      </style>
   </head>
   <body>
      <canvas id="canvas" width="500" height="250" style="border: 1px solid black;"></canvas>
      <script>
         var canvas = document.getElementById('canvas');
         var context = canvas.getContext('2d');
         var path1 = new Path2D();
         path1.arc(150, 150, 25, 0, 2 * Math.PI);
         var path2 = new Path2D();
         path2.arc(300, 150, 50, 0, 2 * Math.PI);
         path1.addPath(path2);
         context.fill(path1);
      </script>
   </body>
</html>
Output
The output returned by the above code on the webpage as −
Example
The following example firstly draws a rectangle onto the Canvas element and copies some data of path onto the Canvas element and applies transform to it.
<!DOCTYPE html>
<html lang="en">
   <head>
      <title<Reference API</title>
      <style>
         body {
            margin: 10px;
            padding: 10px;
         }
      </style>
   </head>
   <body>
      <canvas id="canvas" width="400" height="200" style="border: 1px solid black;"></canvas>
      <script>
         var canvas = document.getElementById('canvas');
         var context = canvas.getContext('2d');
         var path1 = new Path2D();
         path1.rect(10, 10, 200, 150);
         var path2 = new Path2D();
         path2.rect(10, 10, 200, 75);
         let transform = new DOMMatrix();
         transform.a = 1;
         transform.b = 0;
         transform.c = 0;
         transform.d = 1;
         transform.e = 150;
         transform.f = 0;
         path1.addPath(path2, transform);
         context.fill(path1);
      </script>
   </body>
</html>
Output
The output returned by the above code on the webpage as −
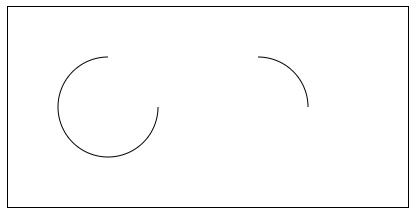
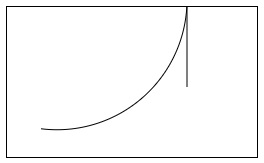
HTML Canvas arc() method
The HTML Canvas arc() method of CanvasRenderingContext2D interface can be used to add arcs to the current path in the Canvas element.
Syntax
Following is the syntax of HTML Canvas arc() method −
CanvasRenderingContext2D.arc(x, y, radius, start_angle, end_angle, anti_clockwise);
Parameters
Following is the list of parameters of this method −
| S.No | Parameter & Description |
|---|---|
| 1 | x
A path currently available in the Canvas element to add. |
| 2 | Y
To apply transform to the path that is being added. |
| 3 | radius
Radius of the arc to be drawn onto the canvas element. |
| 4 | start_angle
The angle of the arc measured from X-axis in radians. |
| 5 | end_angle
The angle of the arc measured from Y-axis in radians. |
| 6 | anti_clockwise
A Boolean value which corresponds to clockwise direction if false is given and anti-clockwise direction if true is given. Default value is false. |
Return value
By taking the values passed as parameters, an arc is drawn on the canvas element.
Example
The following example is used to draw simple arcs onto the Canvas element using the HTML Canvas arc() method.
<!DOCTYPE html>
<html lang="en">
   <head>
      <title>Reference API</title>
      <style>
         body {
            margin: 10px;
            padding: 10px;
         }
      </style>
   </head>
   <body>
      <canvas id="canvas" width="400" height="200" style="border: 1px solid black;"></canvas>
      <script>
         var canvas = document.getElementById('canvas');
         var context = canvas.getContext('2d');
         context.beginPath();
         context.arc(100, 100, 50, 0, 1.5 * Math.PI);
         context.stroke();
         context.closePath();
         context.beginPath();
         context.arc(250, 100, 50, 1.5 * Math.PI, 2 * Math.PI, false);
         context.stroke();
         context.closePath();
      </script>
   </body>
</html>
Output
The output returned by the above code on the webpage as −
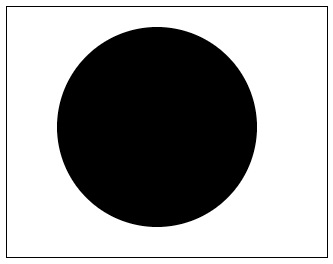
Example
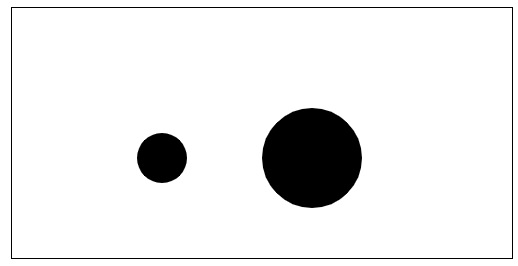
The following example draws a filled circle onto the Canvas element using arc() method.
<!DOCTYPE html>
<html lang="en">
   <head>
      <title>Reference API</title>
      <style>
         body {
            margin: 10px;
            padding: 10px;
         }
      </style>
   </head>
   <body>
      <canvas id="canvas" width="320" height="250" style="border: 1px solid black;"></canvas>
      <script>
         var canvas = document.getElementById('canvas');
         var context = canvas.getContext('2d');
         context.beginPath();
         context.arc(150, 120, 100, 0, 2 * Math.PI);
         context.fill();
         context.closePath();
      </script>
   </body>
</html>
Output
The output returned by the above code on the webpage as −
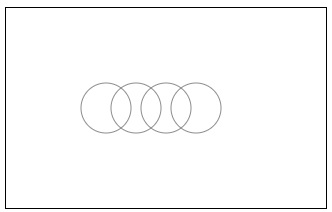
Example
The following example uses arc() method to draw Audi car logo on the Canvas element.
<!DOCTYPE html>
<html lang="en">
   <head>
      <title>Reference API</title>
      <style>
         body {
            margin: 10px;
            padding: 10px;
         }
      </style>
   </head>
   <body>
      <canvas id="canvas" width="320" height="200" style="border: 1px solid black;"></canvas>
      <script>
         var canvas = document.getElementById('canvas');
         var context = canvas.getContext('2d');
         context.beginPath();
         context.strokeStyle = '#8A8D8F';
         context.lineWidth = 4;
         context.arc(100, 100, 25, 0, 2 * Math.PI);
         context.stroke();
         context.closePath();
         context.beginPath();
         context.strokeStyle = '#8A8D8F'
         context.arc(130, 100, 25, 0, 2 * Math.PI);
         context.stroke();
         context.closePath();
         context.beginPath();
         context.strokeStyle = '#8A8D8F'
         context.arc(160, 100, 25, 0, 2 * Math.PI);
         context.stroke();
         context.closePath();
         context.beginPath();
         context.strokeStyle = '#8A8D8F'
         context.arc(190, 100, 25, 0, 2 * Math.PI);
         context.stroke();
         context.closePath();
      </script>
   </body>
</html>
Output
The output returned by the above code on the webpage as −
HTML Canvas arcTo() method
The HTML Canvas arcTo() method of CanvasRenderingContext2D interface can be used to add circular arcs to the current path, using two control point co-ordinates with the radius inside the Canvas element.
This method generally returns rounded corners, semi arcs etc which are drawn using circular paths.
Syntax
Following is the syntax of HTML Canvas arcTo() method −
CanvasRenderingContext2D.arcTo(x1, y1, x2, y2, radius);
Parameters
Following is the list of parameters of this method −
| S.No | Parameter & Description |
|---|---|
| 1 | x1
x co-ordinate of the first control point. |
| 2 | y1
y co-ordinate of the first control point. |
| 3 | x2
x co-ordinate of the second control point. |
| 4 | y2
y co-ordinate of the second control point. |
| 5 | radius
Radius of the arc to be drawn onto the canvas element. |
Return value
By taking the control points and radius values passed as parameters, a rounded arc is drawn on the canvas element.
Example
The following example is used to draw simple arc onto the Canvas element using HTML Canvas arcTo() method.
<!DOCTYPE html>
<html lang="en">
   <head>
      <title>Reference API</title>
      <style>
         body {
            margin: 10px;
            padding: 10px;
         }
      </style>
   </head>
   <body>
      <canvas id="canvas" width="150" height="100" style="border: 1px solid black;"></canvas>
      <script>
         var canvas = document.getElementById('canvas');
         var context = canvas.getContext('2d');
         context.beginPath();
         context.moveTo(25, 25);
         context.arcTo(50, 50, 400, 130, 150);
         context.stroke();
         context.closePath();
      </script>
   </body>
</html>
Output
The output returned by the above code on the webpage as −
Example
The following example draws a simple arc onto the Canvas element with the help of arcTo() method.
<!DOCTYPE html>
<html lang="en">
   <head>
      <title>Reference API</title>
      <style>
         body {
            margin: 10px;
            padding: 10px;
         }
      </style>
   </head>
   <body>
      <canvas id="canvas" width="250" height="150" style="border: 1px solid black;"></canvas>
      <script>
         var canvas = document.getElementById('canvas');
         var context = canvas.getContext('2d');
         context.beginPath();
         context.moveTo(180, 80);
         context.arcTo(180, 140, 100, 130, 130);
         context.stroke();
      </script>
   </body>
</html>
Output
The output returned by the above code on the webpage as −
HTML Canvas beginPath() method
The HTML Canvas beginPath() method of CanvasRenderingContext2D interface creates an empty path in the Canvas element to draw the shapes.
This is only called when a new path is needed on the Canvas context. If the paths to be drawn are multiple, we have to use the same number of beginPath() methods.
Syntax
Following is the syntax of HTML Canvas beginPath() method −
CanvasRenderingContext2D.beginPath();
Parameters
It does not take any parameters as it is a return method only which performs the single task to create an empty path.
Return value
It creates an empty path which can be used to draw various shapes inside the Canvas element. It does not directly return anything rather than provides a path.
Example
In the following example, we use HTML Canvas beginPath() method to create an empty path and draw simple lines on it.
<!DOCTYPE html>
<html lang="en">
   <head>
      <title>Reference API</title>
      <style>
         body {
            margin: 10px;
            padding: 10px;
         }
      </style>
   </head>
   <body>
      <canvas id="canvas" width="250" height="200" style="border: 1px solid black;"></canvas>
      <script>
         var canvas = document.getElementById('canvas');
         var context = canvas.getContext('2d');
         context.beginPath();
         context.moveTo(150, 50);
         context.lineTo(150, 120);
         context.lineTo(50, 190);
         context.stroke();
      </script>
   </body>
</html>
Output
The output returned by the following code on the webpage as −

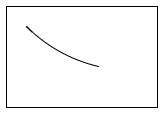
Example
The following example draws a right angled triangle using lines inside the Canvas element after creating the path by beginPath() method.
<!DOCTYPE html>
<html lang="en">
   <head>
      <title>Reference API</title>
      <style>
         body {
            margin: 10px;
            padding: 10px;
         }
      </style>
   </head>
   <body>
      <canvas id="canvas" width="250" height="200" style="border: 1px solid black;"></canvas>
      <script>
         var canvas = document.getElementById('canvas');
         var context = canvas.getContext('2d');
         context.beginPath();
         context.moveTo(50, 50);
         context.lineTo(50, 150);
         context.lineTo(150, 50);
         context.lineTo(50, 50);
         context.stroke();
      </script>
   </body>
</html>
Output
The output returned by the above code on the webpage as −
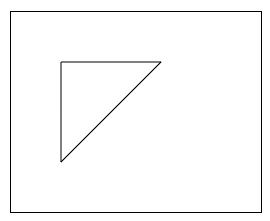
HTML Canvas bezierCurveTo() method
The HTML Canvas bezierCurveTo() method of CanvasRenderingContext2D interface can be used to draw a cubic Bezier curve onto the current path.
It takes two control points and another end point as parameters to take as reference and draws the Bezier cubic curve onto the Canvas element.
Syntax
Following is the syntax of HTML Canvas bezierCurveTo() method −
CanvasRenderingContext2D.bezierCurveTo(p1x, p1y, p2x, p2y, x, y);
Parameters
Following is the list of parameters of this method −
| S.No | Parameter & Description |
|---|---|
| 1 | p1x
x co-ordinate of the first control point. |
| 2 | p1y
y co-ordinate of the first control point. |
| 3 | p2x
x co-ordinate of the second control point. |
| 4 | p2y
y co-ordinate of the second control point. |
| 5 | x
x co-ordinate of the end point. |
| 6 | y
y co-ordinate of the end point. |
Return value
A cubic Bezier curve is drawn when the method is called by the context object of CanvasRenderingContext2D interface of the Canvas element.
Example
The following example draws a simple cubic curve by using the HTML Canvas bezierCurveTo() method.
<!DOCTYPE html>
<html lang="en">
   <head>
      <title>Reference API</title>
      <style>
         body {
            margin: 10px;
            padding: 10px;
         }
      </style>
   </head>
   <body>
      <canvas id="canvas" width="250" height="100" style="border: 1px solid black;"></canvas>
      <script>
         var canvas = document.getElementById('canvas');
         var context = canvas.getContext('2d');
         context.lineWidth = 5;
         context.beginPath();
         context.lineWidth = 10;
         context.moveTo(15, 15);
         context.bezierCurveTo(20, 110, 180, 90, 230, 20);
         context.stroke();
         context.closePath();
      </script>
   </body>
</html>
Output
The output returned by the above code on the webpage as −
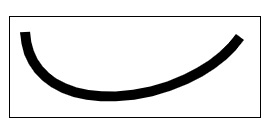
Example
The following example draws a Bezier curve by taking the control points and contact points passed as parameters to the bezierCurveTo() method.
<!DOCTYPE html>
<html lang="en">
   <head>
      <title>Reference API</title>
      <style>
         body {
            margin: 10px;
            padding: 10px;
         }
      </style>
   </head>
   <body>
      <canvas id="canvas" width="500" height="200" style="border: 1px solid black;"></canvas>
      <script>
         var canvas = document.getElementById('canvas');
         var context = canvas.getContext('2d');
         context.lineWidth = 5;
         context.beginPath();
         context.moveTo(100, 100);
         context.bezierCurveTo(150, 15, 300, 150, 350, 75);
         context.stroke();
         context.closePath();
      </script>
   </body>
</html>
Output
The output returned by the above code on the webpage as −

Example
The following example draws a Bezier cubic curve by taking the control points and contact points passed as parameters to the bezierCurveTo() method. The code to achieve this is given below.
<!DOCTYPE html>
<html lang="en">
   <head>
      <title>Reference API</title>
      <style>
         body {
            margin: 10px;
            padding: 10px;
         }
      </style>
   </head>
   <body>
      <canvas id="canvas" width="300" height="200" style="border: 1px solid black;"></canvas>
      <script>
         var canvas = document.getElementById('canvas');
         var context = canvas.getContext('2d');
         context.lineWidth = 5;
         context.beginPath();
         context.strokeStyle = 'blue';
         context.moveTo(25, 25);
         context.bezierCurveTo(100, 150, 150, 25, 250, 150);
         context.stroke();
         context.closePath();
      </script>
   </body>
</html>
Output
The output returned by the above code on the webpage as −
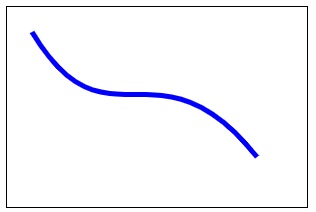
HTML Canvas clip() method
The HTML Canvas clip() method of CanvasRenderingContext2D interface can be used to change the current available path on the Canvas region into new clipping region.
We can change the clip region by adding various styles and current path. This particularly clips the previous path and add the new path data into it.
Syntax
Following is the syntax of HTML Canvas clip() method −
CanvasRenderingContext2D.clip(path, fillrule);
Parameters
Following is the list of parameters of this method −
| S.No | Parameter & Description |
|---|---|
| 1 | path
Path to be used to apply the clip method. |
| 2 | fillrule
The algorithm to apply to check the point is in or out of the clipping region. The possible values for this method are −
|
Return value
The clipping region formed to the current path is rendered on the canvas element.
Example
The following example uses HTML Canvas clip() method to draw a circle on the Canvas element and clip some of the region inside it.
<!DOCTYPE html>
<html lang="en">
   <head>
      <title>Reference API</title>
      <style>
         body {
            margin: 10px;
            padding: 10px;
         }
      </style>
   </head>
   <body>
      <canvas id="canvas" width="300" height="200" style="border: 1px solid black;"></canvas>
      <script>
         var canvas = document.getElementById('canvas');
         var context = canvas.getContext('2d');
         context.beginPath();
         context.arc(100, 75, 50, 0, Math.PI * 2);
         context.clip();
         context.fillStyle = 'white';
         context.arc(0, 0, 50, 0, Math.PI * 1);
         context.fillStyle = 'black';
         context.arc(0, 0, 50, 0.2 * Math.PI, 0.3 * Math.PI);
         context.fill();
      </script>
   </body>
</html>
Output
The output returned by the above code on the webpage as −
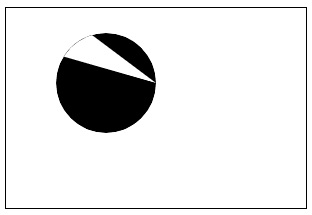
Example
The following program draws a rectangle onto the Canvas element and clips some of the region inside it using clip() method.
<!DOCTYPE html>
<html lang="en">
   <head>
      <title>Reference API</title>
      <style>
         body {
            margin: 10px;
            padding: 10px;
         }
      </style>
   </head>
   <body>
      <canvas id="canvas" width="260" height="200" style="border: 1px solid black;"></canvas>
      <script>
         var canvas = document.getElementById('canvas');
         var context = canvas.getContext('2d');
         context.beginPath();
         context.rect(20, 20, 200, 150);
         context.stroke();
         context.clip();
         context.fillStyle = 'grey';
         context.fillRect(0, 0, 150, 100);
      </script>
   </body>
</html>
Output
The output returned by the above code on the webpage as −
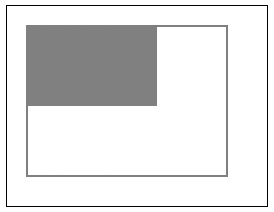
HTML Canvas closePath() method
The HTML Canvas closePath() method of CanvasRenderingContext2D interface adds a straight line to the current point and closes the current path.
If the path is already closed by the user, the method does not do anything. Even if there is a single path available on the Canvas element, there is no need to close that path.
Syntax
Following is the syntax of HTML Canvas closePath() method −
CanvasRenderingContext2D.closePath();
Parameters
It does not take any parameters and perform only a single operation every time.
Return value
The method when called by the context object completes the path by adding a straight line if it is not completed.
Example
The following example closes the arc drawn onto the Canvas using HTML Canvas closePath() method
<!DOCTYPE html>
<html lang="en">
   <head>
      <title>Reference API</title>
      <style>
         body {
            margin: 10px;
            padding: 10px;
         }
      </style>
   </head>
   <body>
      <canvas id="canvas" width="200" height="150" style="border: 1px solid black;"></canvas>
      <script>
         var canvas = document.getElementById('canvas');
         var context = canvas.getContext('2d');
         context.beginPath();
         context.arc(100, 50, 75, 0, 1 * Math.PI);
         context.closePath();
         context.stroke();
      </script>
   </body>
</html>
Output
The output returned by the above code on the webpage as −
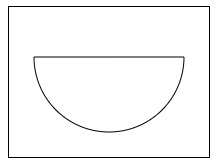
Example
The following program draws two triangles with two edges and closes one of it using the closePath() method.
<!DOCTYPE html>
<html lang="en">
   <head>
      <title>Reference API</title>
      <style>
         body {
            margin: 10px;
            padding: 10px;
         }
      </style>
   </head>
   <body>
      <canvas id="canvas" width="450" height="150" style="border: 1px solid black;"></canvas>
      <script>
         var canvas = document.getElementById('canvas');
         var context = canvas.getContext('2d');
         // 1st triangle
         context.beginPath();
         context.moveTo(100, 25);
         context.lineTo(25, 125);
         context.lineTo(175, 125);
         context.stroke();
         context.closePath();
         // 2nd triangle
         context.beginPath();
         context.moveTo(300, 25);
         context.lineTo(225, 125);
         context.lineTo(375, 125);
         context.closePath();
         context.stroke();
      </script>
   </body>
</html>
Output
The output returned by the above code on the webpage as −
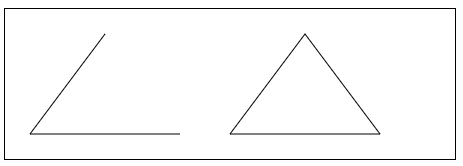
HTML Canvas drawFocusIfNeeded() method
The HTML Canvas drawFocusIfNeeded() method of CanvasRenderingContext2D interface from the Canvas 2D API adds focus to the existing path or a given path when provided.
Syntax
Following is the syntax of HTML Canvas drawFocusIfNeeded() method −
CanvasRenderingContext2D.drawFocusIfNeeded(given_path, element);
Parameters
Following is the list of parameters of this method −
| S.No | Parameters and Description |
|---|---|
| 1 | given_path
The available path in the canvas to use. |
| 2 | element
The current element in canvas to check if it is focused or not. |
Return Value
For an existing path or a new path, its elements are focused and returned by using the above method.
Example
The following example adds focus to the rectangular button when needed using HTML Canvas drawFocusIfNeeded() method.
<!DOCTYPE html>
<html lang="en">
   <head>
      <title>Reference API</title>
      <style>
         body {
            margin: 10px;
            padding: 10px;
         }
      </style>
   </head>
   <body onload="Context();">
      <canvas id="canvas" width="300" height="200" style="border: 1px solid black;">
         <input id="button" type="range" min="1" max="10">
      </canvas>
      <script>
         function Context() {
            var canvas = document.getElementById("canvas");
            var context = canvas.getContext("2d");
            var button = document.getElementById("button");
            button.focus();
            context.beginPath();
            context.rect(20, 20, 100, 75);
            context.drawFocusIfNeeded(button);
         }
      </script>
   </body>
</html>
Output
The output returned by the above code on the webpage as −
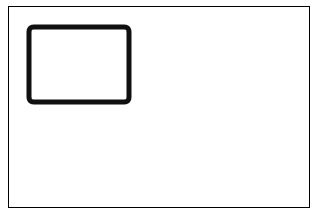
Example
The following example adds focus to the circle button when needed.
<!DOCTYPE html>
<html lang="en">
   <head>
      <title>Reference API</title>
      <style>
         body {
            margin: 10px;
            padding: 10px;
         }
      </style>
   </head>
   <body onload="Context();">
      <canvas id="canvas" width="300" height="200" style="border: 1px solid black;">
         <input id="button" type="range" min="1" max="10">
      </canvas>
      <script>
         function Context() {
            var canvas = document.getElementById("canvas");
            var context = canvas.getContext("2d");
            var button = document.getElementById("button");
            button.focus();
            context.beginPath();
            context.arc(100, 100, 75, 0, 2 * Math.PI);
            context.drawFocusIfNeeded(button);
         }
      </script>
   </body>
</html>
Output
The output returned by the above code on the webpage as −

HTML Canvas ellipse() method
The HTML Canvas ellipse() method is used to draw elliptical arcs to the available path for the context object of CanvasRenderingContext2D interface.
This method creates an elliptical arc having center (x,y) with the radii x_radius and y_radius, respectively. The path is drawn from start_angle and ends at end_angle with the direction given as last parameter.
Syntax
Following is the syntax of HTML Canvas ellipse() method −
CanvasRenderingContext2D.ellipse(x, y, x_radius, y_radius, rotation, start_angle, end_angle, direction);
Parameters
Following is the list of parameters of this method −
| S.No | Parameter & Description | |
|---|---|---|
| 1 | x
The x co-ordinate of the center of ellipse. | |
| 2 | y
The y co-ordinate of the center of ellipse. |
|
| 3 | x_radius
The radius of ellipses major axis. The value must be positive. |
|
| 4 | y_radius
The radius of ellipses minor axis. The value must be positive. |
|
| 5 | rotation
The rotation angle of ellipse in radians. |
|
| 6 | start_angle
The starting angle of ellipse from positive X-axis. |
|
| 7 | end_angle
The ending angle of ellipse from Y-axis and is measured in radians. |
|
| 8 | direction
The direction in which ellipse is drawn. It takes Boolean values and when true is given, ellipse is drawn anti-clockwise. When false is given the ellipse is drawn clockwise. The ellipse is drawn clockwise by default. |
Return value
This method when applied to the CanvasRenderingContext2D interface context object draws an ellipse inside the Canvas element.
Example
The following example draws an ellipse inside the Canvas element using HTML Canvas ellipse() method. The implementation code is given below.
<!DOCTYPE html>
<html lang="en">
   <head>
      <title>Reference API</title>
      <style>
         body {
            margin: 10px;
            padding: 10px;
         }
      </style>
   </head>
   <body onload="Context();">
      <canvas id="canvas" width="200" height="200" style="border: 1px solid black;"></canvas>
      <script>
         function Context() {
            var canvas = document.getElementById("canvas");
            var context = canvas.getContext("2d");
            context.beginPath();
            context.ellipse(90, 90, 30, 50, Math.PI / 3, 0, 2 * Math.PI)
            context.stroke();
         }
      </script>
   </body>
</html>
Output
The output returned by the above code on the webpage as −
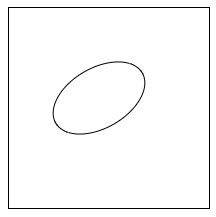
Example
The following example draws a line divides the ellipse into two inside the Canvas element. The implementation code is given below.
<!DOCTYPE html>
<html lang="en">
   <head>
      <title>Reference API</title>
      <style>
         body {
            margin: 10px;
            padding: 10px;
         }
      </style>
   </head>
   <body onload="Context();">
      <canvas id="canvas" width="270" height="250" style="border: 1px solid black;"></canvas>
      <script>
         function Context() {
            var canvas = document.getElementById("canvas");
            var context = canvas.getContext("2d");
            context.beginPath();
            context.ellipse(120, 120, 70, 50, 0, 0, 2 * Math.PI);
            context.stroke();
            context.beginPath();
            context.moveTo(25, 125);
            context.lineTo(225, 125);
            context.stroke()
            context.closePath();
         }
      </script>
   </body>
</html>
Output
The output returned by the above code on the webpage as
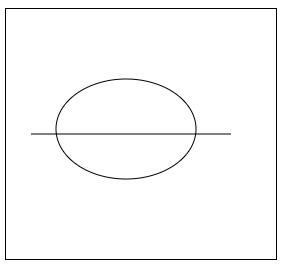
Example
The following example draws an ellipse by combining two semi ellipses inside the Canvas element. The implementation code is given below.
<!DOCTYPE html>
<html lang="en">
   <head>
      <title>Reference API</title>
      <style>
         body {
            margin: 10px;
            padding: 10px;
         }
      </style>
   </head>
   <body onload="Context();">
      <canvas id="canvas" width="400" height="200" style="border: 1px solid black;"></canvas>
      <script>
         function Context() {
            var canvas = document.getElementById("canvas");
            var context = canvas.getContext("2d");
            // vertical ellipse
            context.beginPath();
            context.fillStyle = 'orange';
            context.ellipse(100, 100, 30, 50, 0, 0, Math.PI);
            context.fill();
            context.closePath();
            context.beginPath();
            context.fillStyle = 'green';
            context.ellipse(100, 100, 30, 50, 0, 0, Math.PI, true);
            context.fill();
            context.closePath();
            // horizantal ellipse
            context.beginPath();
            context.fillStyle = 'blue';
            context.ellipse(300, 100, 50, 30, 0, 0, Math.PI);
            context.fill();
            context.closePath();
            context.beginPath();
            context.fillStyle = 'purple';
            context.ellipse(300, 100, 50, 30, 0, 0, Math.PI, true);
            context.fill();
            context.closePath();
         }
      </script>
   </body>
</html>
Output
The output returned by the above code on the webpage as −
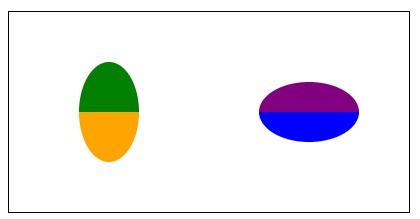
Example
The following example draws semi inside the Canvas element. The implementation code is given below.
<!DOCTYPE html>
<html lang="en">
   <head>
      <title>Reference API</title>
      <style>
         body {
            margin: 10px;
            padding: 10px;
         }
      </style>
   </head>
   <body onload="Context();">
      <canvas id="canvas" width="400" height="200" style="border: 1px solid black;"></canvas>
      <script>
         function Context() {
            var canvas = document.getElementById("canvas");
            var context = canvas.getContext("2d");
            context.beginPath();
            context.fillStyle = 'rgb(229,203,122)';
            context.ellipse(100, 100, 70, 50, Math.PI / 4, 0, Math.PI);
            context.fill();
            context.closePath();
            context.beginPath();
            context.fillStyle = 'rgb(69,1,1)';
            context.ellipse(200, 90, 70, 50, Math.PI / 4, 0, 2 * Math.PI);
            context.fill();
            context.closePath();
            context.beginPath();
            context.fillStyle = 'rgb(229,203,122)';
            context.ellipse(300, 70, 70, 50, Math.PI / 4, 0, Math.PI, true);
            context.fill();
            context.closePath();
         }
      </script>
   </body>
</html>
Output
The output returned by the above code on the webpage as −
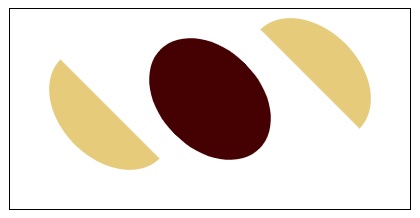
HTML Canvas fill() method
The HTML Canvas fill() method of Canvas 2D API is used to fill the current path or the given path inside the Canvas element.
It fills the path using black color by default which can be changed using the color passed using the fillStyle property.
Syntax
Following is the syntax of HTML Canvas fill() method −
CanvasRenderingContext2D.fill(path, fillrule)
Parameters
Following is the list of parameters of this method −
| S.No | Parameter & Description |
|---|---|
| 1 | path
Path to be used to apply for the fill() method. |
| 2 | fillrule
The algorithm to apply to check the point is in or out of the clipping region. The possible values for this method are &minud;
|
Return Value
The given path is filled using the color passed by fillStyle property or black by default.
Example 1
The following example draws a rhombus onto the Canvas element and fills it using HTML Canvas fill() method.
<!DOCTYPE html>
<html lang="en">
   <head>
      <title>Reference API</title>
      <style>
         body {
            margin: 10px;
            padding: 10px;
         }
      </style>
   </head>
   <body>
      <canvas id="canvas" width="220" height="200" style="border: 1px solid black;"></canvas>
      <script>
         var canvas = document.getElementById('canvas');
         var context = canvas.getContext('2d');
         context.beginPath();
         context.moveTo(100, 50);
         context.lineTo(50, 100);
         context.lineTo(100, 150);
         context.lineTo(150, 100);
         context.closePath();
         context.fill();
      </script>
   </body>
</html>
Output
The output returned by the above code on the webpage as −
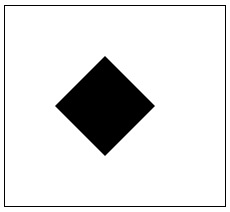
Example 2
The following example draws shapes on the Canvas element and fills them accordingly using fillrule algorithms.
<!DOCTYPE html>
<html lang="en">
   <head>
      <title>Reference API</title>
      <style>
         body {
            margin: 10px;
            padding: 10px;
         }
      </style>
   </head>
   <body>
      <canvas id="canvas" width="340" height="340" style="border: 1px solid black;"></canvas>
      <script>
         var canvas = document.getElementById('canvas');
         var context = canvas.getContext('2d');
         context.rect(20, 20, 300, 300);
         context.rect(50, 50, 200, 200);
         context.rect(80, 80, 100, 100);
         context.lineWidth = 5;
         context.stroke();
         context.fillStyle = 'blue';
         context.fill('evenodd');
         context.closePath();
      </script>
   </body>
</html>
Output
The output returned by the above code on the webpage as −
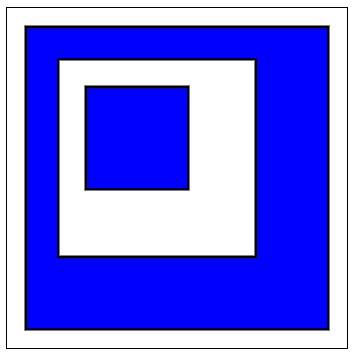
HTML Canvas isPointInPath() method.
The HTML Canvas isPointInPath() method of the Canvas 2D API checks whether the specified point is contained in the current path and reports it by using Boolean output.
Syntax
Following is the syntax of HTML Canvas isPointInPath() method −
CanvasRenderingContext2D.isPointInPath(x, y, path, rule);
Parameters
Following is the list of parameters of this method
| S.No | Parameter & Description |
|---|---|
| 1 | x
The x co-ordinate of the point to check. |
| 2 | y
The y co-ordinate of the point to check. |
| 3 | path
Path which is to be referred to check if the provided point is contained in it or not. If no path is given, current path is used. |
| 4 | rule
The algorithm to be used to determine whether the point is in path or not. This parameter takes two input values.
|
Return value
When a CanvasRenderingContext2D interface context object access isPointInPath() method, it returns a Boolean value whether the point is in path or not.
Example 1
The following example draws a circle in the Canvas element and checks whether the provided point is in the path or not using HTML Canvas isPointInPath() method.
<!DOCTYPE html>
<html lang="en">
   <head>
      <title>Reference API</title>
      <style>
         body {
            margin: 10px;
            padding: 10px;
         }
      </style>
   </head>
   <body onload="Context();">
      <canvas id="canvas" width="200" height="200" style="border: 1px solid black;"></canvas>
      <p>Check the given point is in the path : <code id="check">false</code>
      </p>
      <script>
         function Context() {
            var canvas = document.getElementById("canvas");
            var context = canvas.getContext("2d");
            var check = document.getElementById("check");
            context.beginPath();
            context.arc(100, 100, 75, 1 * Math.PI, 5 * Math.PI);
            context.fill();
            context.closePath();
            check.innerText = context.isPointInPath(150, 150);
         }
      </script>
   </body>
</html>
Output
The following code returns output on the webpage as −
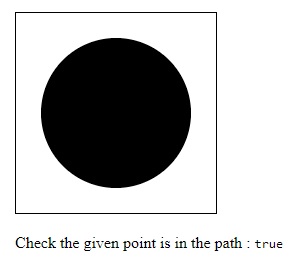
Example 2
The following example draws a stroked triangle in the Canvas element and checks whether the provided point is in the path or not.
<!DOCTYPE html>
<html lang="en">
   <head>
      <title>Reference API</title>
      <style>
         body {
            margin: 10px;
            padding: 10px;
         }
      </style>
   </head>
   <body onload="Context();">
      <canvas id="canvas" width="200" height="200" style="border: 1px solid black;"></canvas>
      <p>Check the given point is in the shape : <code id="check">false</code>
      </p>
      <script>
         function Context() {
            var canvas = document.getElementById("canvas");
            var context = canvas.getContext("2d");
            var check = document.getElementById("check");
            context.strokeStyle = 'blue';
            context.beginPath();
            context.moveTo(100, 50);
            context.lineTo(25, 150);
            context.lineTo(175, 150);
            context.lineTo(100, 50);
            context.stroke();
            context.closePath();
            check.innerText = context.isPointInPath(15, 15);
         }
      </script>
   </body>
</html>
Output
The following code returns output on the webpage as −
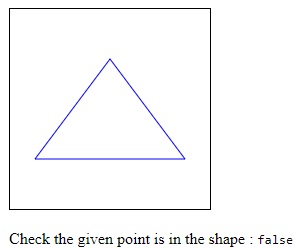
HTML Canvas isPointInStroke() method
The HTML Canvas isPointInStroke() method of the Canvas 2D API checks whether the specified point is inside the stroked path or not and reports it using Boolean value.
Syntax
Following is the syntax of HTML Canvas isPointInStroke() method −
CanvasRenderingContext2D.isPointInStroke(x, y, path);
Parameters
Following is the list of parameters of this method −
| S.No | Parameter & Description |
|---|---|
| ass="ts">1 | x
The x co-ordinate of the point to check. |
| 2 | y
The y co-ordinate of the point to check. |
| 3 | path
Path which is to be referred to check if the provided point is available inside of it or not. If no path is given, current path is used. |
Return Values
When a CanvasRenderingContext2D interface context object access isPointInStroke() method, it returns a Boolean value whether the point is available inside the stroked path or not.
Example 1
The following example draws a triangle inside the Canvas element and checks whether the given point is inside it or not using HTML Canvas isPointInStroke() method.
<!DOCTYPE html>
<html lang="en">
   <head>
      <title>Reference API</title>
      <style>
         body {
            margin: 10px;
            padding: 10px;
         }
      </style>
   </head>
   <body onload="Context();">
      <canvas id="canvas" width="200" height="200" style="border: 1px solid black;"></canvas>
      <p>Check the given shape is stroked or not at the given point : <code id="check">false</code>
      </p>
      <script>
         function Context() {
            var canvas = document.getElementById("canvas");
            var context = canvas.getContext("2d");
            var check = document.getElementById("check");
            context.beginPath();
            context.moveTo(100, 50);
            context.lineTo(50, 100);
            context.lineTo(150, 100);
            context.lineTo(100, 50);
            context.fillStyle = 'brown';
            context.fill();
            context.closePath();
            check.innerText = context.isPointInStroke(150, 150);
         }
      </script>
   </body>
</html>
Output
The output returned by the above code on the webpage as −
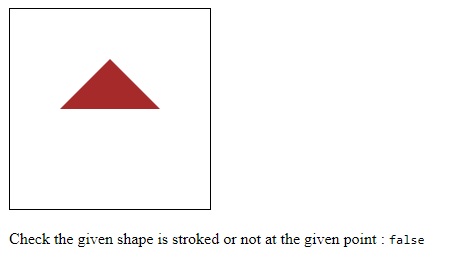
Example 2
The following example draws text inside the Canvas element and checks whether the given point is inside it or not.
<!DOCTYPE html>
<html lang="en">
   <head>
      <title>Reference API</title>
      <style>
         body {
            margin: 10px;
            padding: 10px;
         }
      </style>
   </head>
   <body onload="Context();">
      <canvas id="canvas" width="200" height="100" style="border: 1px solid black;"></canvas>
      <p>Check the given shape is stroked or not at the given point : <code id="check">false</code>
      </p>
      <script>
         function Context() {
            var canvas = document.getElementById("canvas");
            var context = canvas.getContext("2d");
            var check = document.getElementById("check");
            context.font = '55px Verdana';
            context.fillStyle = 'green';
            context.fillText('Hello', 10, 50);
            check.innerText = context.isPointInStroke(100, 30);
         }
      </script>
   </body>
</html>
Output
The output returned by the above code on the webpage as −
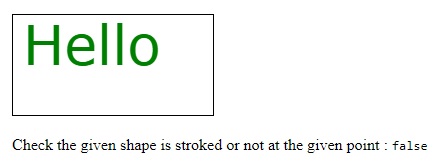
Example 3
The following example adds strokes to a rectangle inside the Canvas element and checks whether the given point is inside it or not.
<!DOCTYPE html>
<html lang="en">
   <head>
      <title>Reference API</title>
      <style>
         body {
            margin: 10px;
            padding: 10px;
         }
      </style>
   </head>
   <body onload="Context();">
      <canvas id="canvas" width="200" height="150" style="border: 1px solid black;"></canvas>
      <p>Check the given shape is stroked or not at the given point : <code id="check">false</code>
      </p>
      <script>
         function Context() {
            var canvas = document.getElementById("canvas");
            var context = canvas.getContext("2d");
            var check = document.getElementById("check");
            context.strokeStyle = 'grey';
            context.strokeRect(20, 20, 150, 100);
            check.innerText = context.isPointInStroke(100, 100);
         }
      </script>
   </body>
</html>
Output
The output returned by the above code on the webpage as −
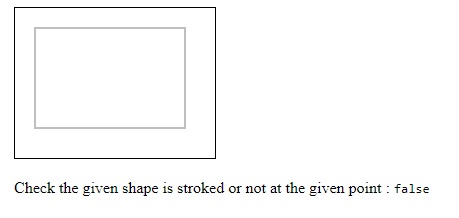
HTML Canvas moveTo() method
The HTML Canvas moveTo() method starts a new path from the given co-ordinates as parameters to the method.
Syntax
Following is the syntax of HTML Canvas moveTo() method −
CanvasRenderingContext2D.moveTo(x, y);
Parameters
Following is the list of parameters of this method −
| S.No | Parameter & Description |
|---|---|
| 1 | x
The x co-ordinate of the point. |
| 2 | y
The y co-ordinate of the point. |
Return Value
The method does not return anything directly but changes the cursor position inside the Canvas element.
Example 1
The following example applies the HTML Canvas moveTo() method to the context object and returns the current position of the cursor by window alert.
<!DOCTYPE html>
<html lang="en">
   <head>
      <title>Reference API</title>
      <style>
         body {
            margin: 10px;
            padding: 10px;
         }
      </style>
   </head>
   <body>
      <canvas id="canvas" width="350" height="350" style="border: 1px solid black;"></canvas>
      <script>
         var canvas = document.getElementById('canvas');
         var context = canvas.getContext('2d');
         const x = canvas.width - 100;
         const y = canvas.height - 100;
         context.moveTo(x, y);
         alert('The cursor is positioned currently at : ' + '(' + x + ', ' + y + ')');
      </script>
   </body>
</html>
Output
The output returned by the above code on the webpage as −
The window alert returned by the above code on the webpage as −
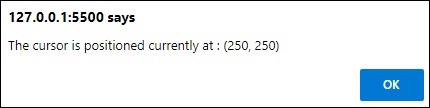
Example 2
The following example draws two lines onto the Canvas element from different positions.
<!DOCTYPE html>
<html lang="en">
   <head>
      <title>Reference API</title>
      <style>
         body {
            margin: 10px;
            padding: 10px;
         }
      </style>
   </head>
   <body>
      <canvas id="canvas" width="350" height="350" style="border: 1px solid black;"></canvas>
      <script>
         var canvas = document.getElementById('canvas');
         var context = canvas.getContext('2d');
         context.moveTo(50, 50);
         context.lineTo(69, 304);
         context.moveTo(340, 328);
         context.lineTo(23, 47);
         context.stroke();
      </script>
   </body>
</html>
Output
The output returned by the above code on the webpage as −
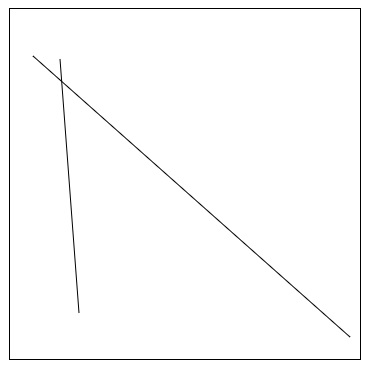
HTML Canvas path2D() method
The HTML Canvas path2D() constructor method returns a newly created path2D object consisting of path data.
Syntax
Following is the syntax of HTML Canvas path2D() method −
Path2D(path, d);
Parameters
Following is the list of parameters of this method −
| S.No | Parameter & Description |
|---|---|
| 1 | path
Other path from which a copy of the path argument is created. |
| 2 | d
SVG path data value given to create a path based on the description provided. |
Return Value
It returns a newly created path2D object which can be further used to draw paths easily on the Canvas element.
Example 1
The following example adds strokes to a rectangle on the Canvas element using HTML Canvas path2D() method.
<!DOCTYPE html>
<html lang="en">
   <head>
      <title>Reference API</title>
      <style>
         body {
            margin: 10px;
            padding: 10px;
         }
      </style>
   </head>
   <body>
      <canvas id="canvas" width="300" height="200" style="border: 1px solid black;"></canvas>
      <script>
         var canvas = document.getElementById('canvas');
         var context = canvas.getContext('2d');
         var path = new Path2D();
         path.rect(30, 20, 150, 100);
         context.stroke(path);
      </script>
   </body>
</html>
Output
The output returned by the above code on the webpage as −
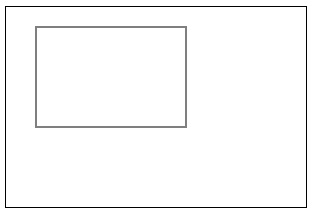
Example 2
The following example draws a circle onto the Canvas element using the path2D() constructor method.
<!DOCTYPE html>
<html lang="en">
   <head>
      <title>Reference API</title>
      <style>
         body {
            margin: 10px;
            padding: 10px;
         }
      </style>
   </head>
   <body>
      <canvas id="canvas" width="300" height="200" style="border: 1px solid black;"></canvas>
      <script>
         var canvas = document.getElementById('canvas');
         var context = canvas.getContext('2d');
         var path = new Path2D();
         path.arc(140, 100, 55, 0, 2 * Math.PI);;
         context.stroke(path);
      </script>
   </body>
</html>
Output
The output returned by the above code on the webpage as −
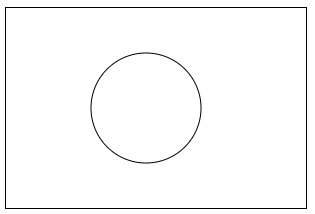
Example 3
By using path2D() method, the following example draws combined shapes on the canvas element.
<!DOCTYPE html>
<html lang="en">
   <head>
      <title>Reference API</title>
      <style>
         body {
            margin: 10px;
            padding: 10px;
         }
      </style>
   </head>
   <body>
      <canvas id="canvas" width="300" height="200" style="border: 1px solid black;"></canvas>
      <script>
         var canvas = document.getElementById('canvas');
         var context = canvas.getContext('2d');
         var path = new Path2D();
         path.rect(25, 25, 250, 150);
         context.stroke(path);
         let path1 = new Path2D();
         path1.moveTo(220, 60);
         path1.arc(100, 100, 30, 0, 2 * Math.PI);
         context.fill(path1);
         let path2 = new Path2D();
         path2.moveTo(220, 60);
         path2.arc(200, 100, 30, 0, 2 * Math.PI);
         context.fill(path2);
      </script>
   </body>
</html>
Output
The output returned by the above code on the webpage as −
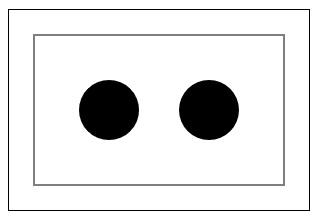
HTML Canvas quadraticCurveTo() method
The HTML Canvas quadraticCurveTo() method of CanvasRenderingContext2D interface is used to add a quadratic Bezier curve to the current path in Canvas element.
It takes one control point and one end point as parameters to the method and uses the point co-ordinates to draw a quadratic curve onto the Canvas element.
Syntax
Following is the syntax of HTML Canvas quadraticCurveTo() method −
CanvasRenderingContext2D.quadraticCurveTo(p1x, p1y, x, y);
Parameters
Following is the list of −
| S.No | Parameter & Description |
|---|---|
| 1 | p1x
x co-ordinate of the first control point. |
| 2 | p1y
y co-ordinate of the first control point. |
| 3 | x
x co-ordinate of the end point. |
| 4 | y
y co-ordinate of the end point. |
Return Value
Upon calling the method, a quadratic Bezier is added to the current path inside the Canvas element.
Example 1
The following example adds a quadratic curve to the current path using HTML Canvas quadraticCurveTo() method.
<!DOCTYPE html>
<html lang="en">
   <head>
      <title>Reference API</title>
      <style>
         body {
            margin: 10px;
            padding: 10px;
         }
      </style>
   </head>
   <body>
      <canvas id="canvas" width="300" height="200" style="border: 1px solid black;"></canvas>
      <script>
         var canvas = document.getElementById('canvas');
         var context = canvas.getContext('2d');
         context.lineWidth = 5;
         context.beginPath();
         context.moveTo(50, 50);
         context.quadraticCurveTo(50, 225, 200, 50);
         context.stroke();
         context.closePath();
      </script>
   </body>
</html>
Output
The output returned by the above code on the webpage as −
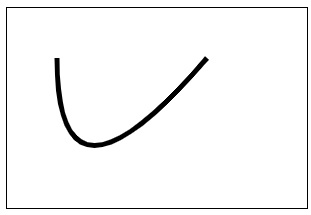
Example 2
The following example draws a quadratic Bezier curve on the Canvas element by context object using quadraticCurveTo() method
.
<!DOCTYPE html>
<html lang="en">
   <head>
      <title>Reference API</title>
      <style>
         body {
            margin: 10px;
            padding: 10px;
         }
      </style>
   </head>
   <body>
      <canvas id="canvas" width="300" height="200" style="border: 1px solid black;"></canvas>
      <script>
         var canvas = document.getElementById('canvas');
         var context = canvas.getContext('2d');
         context.lineWidth = 5;
         context.beginPath();
         context.moveTo(70, 50);
         context.quadraticCurveTo(200, 125, 100, 150);
         context.stroke();
         context.closePath();
      </script>
   </body>
</html>
Output
The output returned by the above code on the webpage as −
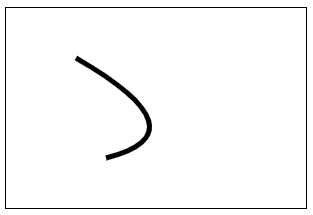
HTML Canvas scrollPathIntoView() metho
The HTML Canvas scrollPathIntoView() method takes the CanvasRenderingContext2D interface context object and scrolls the path given into view.
Syntax
Following is the syntax of HTML Canvas scrollPathIntoView() method −
CanvasRenderingContext2D.scrollPathIntoView(cur_path);
Parameters
Following is the list of parameters of this method −
| S.No | Parameter & Description |
|---|---|
| 1 | cur_path
The path to which the method is to be applied. |
Return Value
When the following method is applied to the CanvasRenderingContext2D interface context object, the path of the object is made available in the view.
Example 1
The following example demonstrates how the HTML Canvas scrollPathIntoView() method is used inside the Canvas element.
<!DOCTYPE html>
<html lang="en">
   <head>
      <title>Reference API</title>
      <style>
         body {
            margin: 10px;
            padding: 10px;
         }
      </style>
   </head>
   <body onload="Context();">
      <canvas id="canvas" width="200" height="200" style="border: 1px solid black;"></canvas>
      <script>
         function Context() {
            var canvas = document.getElementById("canvas");
            var context = canvas.getContext("2d");
            context.beginPath();
            context.moveTo(100, 50);
            context.lineTo(50, 100);
            context.lineTo(150, 100);
            context.lineTo(100, 50);
            context.fillStyle = 'brown';
            context.fill();
            context.closePath();
            context.strokeRect(30, 30, 150, 100);
            context.scrollPathIntoView();
         }
      </script>
   </body>
</html>
Output
The output returned by the above code on the webpage as −
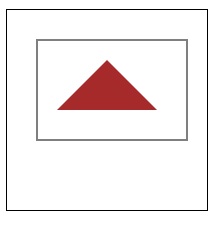
Example 2
The following example demonstrates how the scrollPathIntoView() method hides the shape drawn inside the Canvas element when it has bigger boundaries than the original canvas element.
<!DOCTYPE html>
<html lang="en">
   <head>
      <title>Reference API</title>
      <style>
         body {
            margin: 10px;
            padding: 10px;
         }
      </style>
   </head>
   <body>
      <canvas id="canvas" width="300" height="200" style="border: 1px solid black;"></canvas>
      <script>
         var canvas = document.getElementById('canvas');
         var context = canvas.getContext('2d');
         context.beginPath();
         // remove the below line to observe the difference
         context.scrollPathIntoView();
         context.strokeRect(30, 30, 350, 200);
      </script>
   </body>
</html>
Output
The output returned by the above code on the webpage as −
HTML Canvas stroke() method
The HTML Canvas stroke() method is used to add strokes to the outlines of the given path or any shape.
It adds strokes to the path using black color by default and also searches for the input color given by strokeStyle property and uses this color input instead of black color.
Syntax
Following is the syntax of HTML Canvas stroke() method −
CanvasRenderingContext2D.stroke(path);
Parameters
Following is the parameter used by this method −
| S.No | Parameters and Description |
|---|---|
| 1 | path
Path to be used to apply the stroke() method. |
Return Value
The path to which the method stroke() is applied, is stroked inside the Canvas element using black color. If there is strokeStyle property, the color passed there is used to stroke the path.
Example 1
The following example adds strokes to a rectangle on the Canvas element using HTML Canvas stroke() method.
<!DOCTYPE html>
<html lang="en">
   <head>
      <title>Reference API</title>
      <style>
         body {
            margin: 10px;
            padding: 10px;
         }
      </style>
   </head>
   <body>
      <canvas id="canvas" width="250" height="150" style="border: 1px solid black;"></canvas>
      <script>
         var canvas = document.getElementById('canvas');
         var context = canvas.getContext('2d');
         context.rect(25, 25, 150, 100);
         context.stroke();
      </script>
   </body>
</html>
Output
The output returned by the above code on the webpage as −
Example
The following example first creates an empty path and draws a triangle using lineTo() method and later adds strokes to the canvas element using the stroke() method with mentioned color using strokeStyle property.
<!DOCTYPE html>
<html lang="en">
   <head>
      <title>Reference API</title>
      <style>
         body {
            margin: 10px;
            padding: 10px;
         }
      </style>
   </head>
   <body>
      <canvas id="canvas" width="300" height="200" style="border: 1px solid black;"></canvas>
      <script>
         var canvas = document.getElementById('canvas');
         var context = canvas.getContext('2d');
         context.beginPath();
         context.strokeStyle = 'green';
         context.moveTo(150, 50);
         context.lineTo(50, 150);
         context.lineTo(250, 150);
         context.closePath();
         context.stroke();
      </script>
   </body>
</html>
Output
The output returned by the above code on the webpage as −
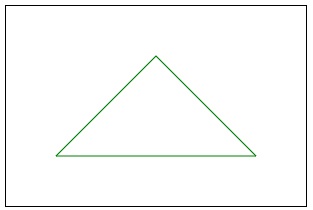
Text
Text can be rendered on the Canvas element using the available methods and properties. We can also style the drawn text so that efficient graphics can be generated.
The TextMetrics interface and CanvasRenderingcontext2D is used to draw and style text as well as to identify the structural properties of text rendered inside the Canvas element. The text is generally rendered using a CanvasRenderingContext2D object by available methods and also can be retrieved using read-only properties.
Properties
The properties available to draw and style text on the Canvas element are listed in the below table.
| S.No | Property and Description |
|---|---|
| 1 | actualBoundingBoxAscent
This property returns the distance from the horizontal line indicated by the baseline property to the rectangle top from which text is drawn inside the Canvas. |
| 2 | actualBoundingBoxDescent
This property returns the distance from the horizontal line indicated by the baseline property to the rectangle bottom from which text is drawn inside the Canvas. |
| 3 | actualBoundingBoxLeft
This property returns the distance parallel to the text baseline to the left side of bounding rectangle of text in pixels. |
| 4 | actualBoundingBoxRight
This property returns the distance parallel to the text baseline to the right side of bounding rectangle of text in pixels. |
| 5 | direction
The direction property specifies the direction of text which is about to be drawn onto the Canvas element. |
| 6 | font
This property of Canvas API specifies the text size, style and font style of the text about to be drawn onto the Canvas element. |
| 7 | fontBoundingBoxAscent
This property of the TextMetrics interface returns the distance from horizontal line of text baseline to the top of highest bounding rectangle of the text inside canvas element. |
| 8 | fontBoundingBoxDescent
This property of the TextMetrics interface returns the distance from horizontal line of text baseline to the bottom of highest bounding rectangle of the text inside canvas element. |
| 9 | textAlign
This property of Canvas element object specifies the text alignment to be used when drawing text. |
| 10 | textBaseline
This property of Canvas element object specifies the text baseline to be used when drawing text. |
Methods
Following are various methods available to perform various operations on the Text element of HTML Canvas.
| S.No | Method & Description |
|---|---|
| 1 | fillText()
This method fills the text drawn on the Canvas element. |
| 2 | MeasureText()
when this method is used, the text information which is drawn onto the canvas is returned. |
| 3 | strokeText()
This method adds strokes to the text to be drawn on the Canvas element. |
HTML Canvas actualBoundingBoxDescent property
The HTML Canvas actualBoundingBoxAscent property of TextMetrics interface is a read-only method which returns a double value giving the distance from horizontal line indicated by the text baseline of CanvasRenderingContext2D interface context object to the top of the bounding rectangle box in which the text is rendered. The double value is given in CSS pixels.
The HTML Canvas actualBoundingBoxDescent property of TextMetrics interface is a read-only method which returns a double value giving the distance from horizontal line indicated by the text baseline of CanvasRenderingContext2D interface context object to the bottom of the bounding rectangle box in which the text is rendered. The double value is given in CSS pixels.
Example 1 − (Returning values)
The following example demonstrates the HTML Canvas actualBoundingBoxAscent and actualBoundingBoxDescent properties. The code for the implementation is given below.
<!DOCTYPE html>
<html lang="en">
   <head>
      <title>Reference API</title>
      <style>
         body {
            margin: 10px;
            padding: 10px;
         }
      </style>
   </head>
   <body onload="text();">
      <canvas id="canvas" width="500" height="100" style="border: 1px solid black;"></canvas>
      <script>
         function text() {
            var canvas = document.getElementById("canvas");
            var context = canvas.getContext("2d");
            context.font = '50px Verdana';
            context.fillText('TutorialsPoint', 50, 50);
            var word = context.measureText('TutorialsPoint');
            alert("Bounding box ascent : " + word.actualBoundingBoxAscent + "\nBounding box descent : " + word.actualBoundingBoxDescent);
         }
      </script>
   </body>
</html>
Output
The output window alert raised by the above code on the webpage as −
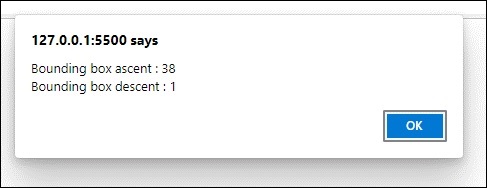
HTML Canvas actualBoundingBoxLeft Property
The property actualBoundingBoxLeft of TextMetrics interface is a read-only method which returns a double value giving the distance parellel to the text baseline of CanvasRenderingContext2D interface context object to the left-side of the bounding rectangle box in which the text is rendered. The double value is given in CSS pixels.
The property actualBoundingBoxRight of TextMetrics interface is a read-only method which returns a double value giving the distance parellel to the text baseline of CanvasRenderingContext2D interface context object to the right-side of the bounding rectangle box in which the text is rendered. The double value is given in CSS pixels.
Example 1: (Returning values)
The following example demonstrates the HTML Canvas actualBoundingBoxLeft and actualBoundingBoxRight properties. The code for the implementation is given below.
<!DOCTYPE html>
<html lang="en">
   <head>
      <title>Reference API</title>
      <style>
         body {
            margin: 10px;
            padding: 10px;
         }
      </style>
   </head>
   <body onload="text();">
      <canvas id="canvas" width="500" height="100" style="border: 1px solid black;"></canvas>
      <script>
         function text() {
            var canvas = document.getElementById("canvas");
            var context = canvas.getContext("2d");
            context.font = '50px Verdana';
            context.fillText('TutorialsPoint', 50, 50);
            var word = context.measureText('TutorialsPoint');
            alert("Bounding box left : " + word.actualBoundingBoxLeft + "\nBounding box right : " + word.actualBoundingBoxRight);
         }
      </script>
   </body>
</html>
Output
The output returned by the above code on the webpage as −
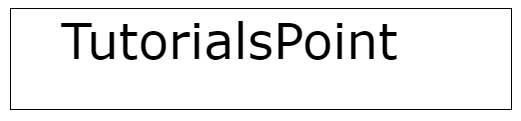
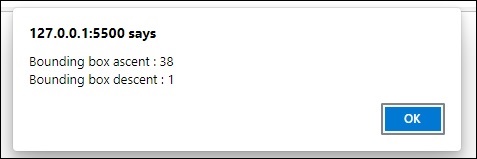
HTML Canvas direction property
The HTML Canvas direction property uses CanvasRenderingContext2D interface context object can be used to change the text direction inside the Canvas element.
It can be used to specify the current text direction while adding text to the canvas.
Possible input values
The possible values taken by the property are −
| S.No | Value & Description |
|---|---|
| 1 | ltr
Text direction is from left to right. |
| 2 | rtl
Text direction is from right to left |
| 3 | inherit
The direction to draw the text onto the Canvas element is taken from the canvas element specifications as appropriate. |
Example 1
The following example uses the default inherit direction to draw the text onto the Canvas element using HTML Canvas direction property.
<!DOCTYPE html>
<html lang="en">
   <head>
      <title>Reference API</title>
      <style>
         body {
            margin: 10px;
            padding: 10px;
         }
      </style>
   </head>
   <body>
      <canvas id="canvas" width="300" height="200" style="border: 1px solid black;"></canvas>
      <script>
         var canvas = document.getElementById('canvas');
         var context = canvas.getContext('2d');
         context.font = "25px Verdana";
         context.fillText('direction-', 150, 50);
         context.direction = 'inherit';
         context.fillText('direction-', 150, 130);
      </script>
   </body>
</html>
Output
The output returned by the following code on the webpage as −
Example 2
The following example draws text onto the canvas from right to left direction using the property direction of CanvasRenderingContext2D object.
<!DOCTYPE html>
<html lang="en">
   <head>
      <title>Reference API</title>
      <style>
         body {
            margin: 10px;
            padding: 10px;
         }
      </style>
   </head>
   <body>
      <canvas id="canvas" width="300" height="200" style="border: 1px solid black;"></canvas>
      <script>
         var canvas = document.getElementById('canvas');
         var context = canvas.getContext('2d');
         context.font = "25px Verdana";
         context.fillText('hello world-', 150, 50);
         context.direction = 'rtl';
         context.fillText('hello world-', 150, 130);
      </script>
   </body>
</html>
Output
The output returned by the above code on the webpage as −
Example 3
The following example draws text onto the canvas from left to right direction using the property direction of CanvasRenderingContext2D object.
<!DOCTYPE html>
<html lang="en">
   <head>
      <title>Reference API</title>
      <style>
         body {
            margin: 10px;
            padding: 10px;
         }
      </style>
   </head>
   <body>
      <canvas id="canvas" width="300" height="200" style="border: 1px solid black;"></canvas>
      <script>
         var canvas = document.getElementById('canvas');
         var context = canvas.getContext('2d');
         context.font = "25px Verdana";
         context.fillText('-hello world', 150, 50);
         context.direction = 'ltr';
         context.fillText('-hello world', 150, 130);
      </script>
   </body>
</html>
Output
The output returned by the above code on the webpage as −
HTML Canvas font property
The HTML Canvas font property from the CanvasRenderingContext2D interface is called by the context object to specify the current text style to use while drawing the text onto the Canvas element.
Possible input values
It takes a string input containing text pixel size and the font style to be used. The context object takes 10px sans-serif by default to draw the text onto the Canvas element.
Example 1
The following example draws text on the Canvas element using HTML Canvas font property.
<!DOCTYPE html>
<html lang="en">
   <head>
      <title>Reference API</title>
      <style>
         body {
            margin: 10px;
            padding: 10px;
         }
      </style>
   </head>
   <body>
      <canvas id="canvas" width="100" height="100" style="border: 1px solid black;"></canvas>
      <script>
         var canvas = document.getElementById('canvas');
         var context = canvas.getContext('2d');
         context.strokeText('TutorialsPoint', 10, 50);
      </script>
   </body>
</html>
Output
The following code returns the output on the webpage as −
Example 2
The following example draws text onto the Canvas element with different font style and size using font property.
<!DOCTYPE html>
<html lang="en">
   <head>
      <title>Reference API</title>
      <style>
         body {
            margin: 10px;
            padding: 10px;
         }
      </style>
   </head>
   <body>
      <canvas id="canvas" width="400" height="100" style="border: 1px solid black;"></canvas>
      <script>
         var canvas = document.getElementById('canvas');
         var context = canvas.getContext('2d');
         context.font = '55px Verdana';
         context.strokeText('TutorialsPoint', 10, 50);
      </script>
   </body>
</html>
Output
The following code returns the output on the webpage as −
HTML Canvas fontBoundingBoxAscent property
The HTML Canvas fontBoundingBoxAscen property of TextMetrics interface is a read-only method which returns a double value giving the distance from horizontal line to the text baseline of CanvasRenderingContext2D interface context object to the top of the highest bounding rectangle box of all the fonts used for text rendering. The double value is given in CSS pixels.
The HTML Canvas fontBoundingBoxDescent property TextMetrics interface is a read-only method which returns a double value giving the distance from horizontal line to the text baseline of CanvasRenderingContext2D interface context object to the bottom of the highest bounding rectangle box of all the fonts used for text rendering. The double value is given in CSS pixels.
Example
The following example demonstrates the HTML Canvas fontBoundingBoxAscent and fontBoundingBoxDescent properties. The code for the implementation is given below.
<!DOCTYPE html>
<html lang="en">
   <head>
      <title>Reference API</title>
      <style>
         body {
            margin: 10px;
            padding: 10px;
         }
      </style>
   </head>
   <body onload="text();">
      <canvas id="canvas" width="500" height="100" style="border: 1px solid black;"></canvas>
      <script>
         function text() {
            var canvas = document.getElementById("canvas");
            var context = canvas.getContext("2d");
            context.font = '50px Verdana';
            context.fillText('TutorialsPoint', 50, 50);
            var word = context.measureText('TutorialsPoint');
            alert("font ascent : " + word.fontBoundingBoxAscent + "\nfont descent : " + word.fontBoundingBoxDescent);
         }
      </script>
   </body>
</html>
Output
The output returned by the above code on the webpage as −

HTML Canvas textAlign property
The HTML Canvas textAlign property from the interface CanvasRenderingContext2D is called by the context object to specify the current text alignment to be used to draw the text onto the Canvas element.
Possible input values
The input values accepted by the property are −
| S.No | Value & Description |
|---|---|
| 1 | left
Text will be left-aligned. |
| 2 | right
Text will be right aligned. |
| 3 | center
Text is centered in the canvas element. |
| 4 | start
The text is started at its normal place. It is a default value taken by the property when there is no input. |
| 5 | end
The text is ended at its normal place in the canvas element. |
Example
The following example demonstrates the left and right values of HTML Canvas direction property.
<!DOCTYPE html>
<html lang="en">
   <head>
      <title>Reference API</title>
      <style>
         body {
            margin: 10px;
            padding: 10px;
         }
      </style>
   </head>
   <body>
      <canvas id="canvas" width="400" height="100" style="border: 1px solid black;"></canvas>
      <script>
         var canvas = document.getElementById('canvas');
         var context = canvas.getContext('2d');
         context.font = "25px Verdana";
         context.textAlign = "left";
         context.fillText('(left)', 200, 50);
         context.textAlign = "right";
         context.fillText('(right)', 200, 50);
      </script>
   </body>
</html>
Output
The output returned by the above code on the webpage as −
Example
The following example demonstrates the center value of HTML Canvas direction property.
<!DOCTYPE html>
<html lang="en">
   <head>
      <title>Reference API</title>
      <style>
         body {
            margin: 10px;
            padding: 10px;
         }
      </style>
   </head>
   <body>
      <canvas id="canvas" width="400" height="100" style="border: 1px solid black;"></canvas>
      <script>
         var canvas = document.getElementById('canvas');
         var context = canvas.getContext('2d');
         context.font = "25px Verdana";
         context.textAlign = "center";
         context.fillText('(center)', 200, 50);
      </script>
   </body>
</html>
Output
The output returned by the above code on the webpage as −
Example
The following example demonstrates the start and end values of HTML Canvas direction property.
<!DOCTYPE html>
<html lang="en">
   <head>
      <title>Reference API</title>
      <style>
         body {
            margin: 10px;
            padding: 10px;
         }
      </style>
   </head>
   <body>
      <canvas id="canvas" width="400" height="100" style="border: 1px solid black;"></canvas>
      <script>
         var canvas = document.getElementById('canvas');
         var context = canvas.getContext('2d');
         context.font = "25px Verdana";
         context.textAlign = "end";
         context.fillText('(end)', 200, 50);
         context.textAlign = "start";
         context.fillText('(start)', 200, 50);
      </script>
   </body>
</html>
Output
The output returned by the above code on the webpage as −
HTML Canvas textBaseline property
The HTML Canvas textBaseline property from the interface CanvasRenderingContext2D is called by the context object to specify the current text baseline to be used to draw the text onto the Canvas element.
Possible input values
The input values accepted by the property are −
| S.No | Value & Description |
|---|---|
| 1 | top
Top of the em square is used as text baseline. |
| 2 | middle
Middle of the em square is used as text baseline. |
| 3 | bottom
Bottom of the bounding box is used as text baseline. |
| 4 | alphabetic
Normal alphabetic baseline is used as the text baseline to draw text onto the Canvas element. |
| 5 | ideographic
The text baseline is ideographic baseline which is basically used by some language scripts such as Korean, Japanese, and Chinese. |
| 6 | hanging
The text baseline is hanging baseline which is generally used by some language scripts such as Tibetian, and Indic scripts. |
Example 1
The following example demonstrates the top and bottom values of HTML Canvas textBaseline property.
<!DOCTYPE html>
<html lang="en">
   <head>
      <title>Reference API</title>
      <style>
         body {
            margin: 10px;
            padding: 10px;
         }
      </style>
   </head>
   <body>
      <canvas id="canvas" width="200" height="150" style="border: 1px solid black;"></canvas>
      <script>
         var canvas = document.getElementById('canvas');
         var context = canvas.getContext('2d');
         context.font = "25px Verdana";
         context.textBaseline = "top";
         context.fillText(context.textBaseline, 10, 75);
         context.textBaseline = "bottom";
         context.fillText(context.textBaseline, 90, 75);
      </script>
   </body>
Output
The output returned by the above code on the webpage as −
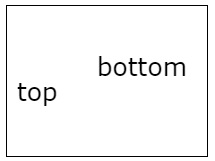
Example 2
The following program code demonstrates all available textBaseline property values on the Canvas element.
<!DOCTYPE html>
<html lang="en">
   <head>
      <title>Reference API</title>
      <style>
         body {
            margin: 10px;
            padding: 10px;
         }
      </style>
   </head>
   <body>
      <canvas id="canvas" width="700" height="150" style="border: 1px solid black;"></canvas>
      <script>
         var canvas = document.getElementById('canvas');
         var context = canvas.getContext('2d');
         context.font = "25px Verdana";
         context.textBaseline = "top";
         context.strokeText(context.textBaseline, 0, 75);
         context.textBaseline = "hanging";
         context.strokeText(context.textBaseline, 80, 75);
         context.textBaseline = "middle";
         context.strokeText(context.textBaseline, 210, 75);
         context.textBaseline = "alphabetic";
         context.strokeText(context.textBaseline, 310, 75);
         context.textBaseline = "ideographic";
         context.strokeText(context.textBaseline, 450, 75);
         context.textBaseline = "bottom";
         context.strokeText(context.textBaseline, 610, 75);
      </script>
   </body>
</html>
Output
The output returned by the above code on the webpage as −
HTML Canvas fillText() method
The HTML Canvas fillText() method can be used to draw a text string on the Canvas element at the specified co-ordinates with the current fillStyle property.
It is available in the CanvasRenderingContext2D interface and fills the text drawn by the context object.
Syntax
Following is the syntax of HTML Canvas fillText() method −
CanvasRenderingContext2D.fillText(text, x, y, text_width)
Parameters
Following is the list of parameters of this methods −
| S.No | Parameter & Description |
|---|---|
| 1 | text
The text string to be rendered onto the Canvas element. |
| 2 | x
x co-ordinate of the point from which text is to be drawn in the Canvas element. |
| 3 | y
y co-ordinate of the point from which text is to be drawn in the Canvas element. |
| 4 | text_width
Width of the text to be drawn in pixels. |
Return values
It renders the string passed as a parameter on the Canvas element.
Example 1
The following example draws a string onto the Canvas element using HTML Canvas fillText() method.
<!DOCTYPE html>
<html lang="en">
   <head>
      <title>Reference API</title>
      <style>
         body {
            margin: 10px;
            padding: 10px;
         }
      </style>
   </head>
   <body>
      <canvas id="canvas" width="300" height="100" style="border: 1px solid black;"></canvas>
      <script>
         var canvas = document.getElementById('canvas');
         var context = canvas.getContext('2d');
         context.font = "40px Verdana";
         context.fillText('TutorialsPoint', 20, 50);
      </script>
   </body>
</html>
Output
The output returned by the above code on the webpage as −
Example 2
The following code adds a sentence string to the Canvas element using fillText() method and without font property.
<!DOCTYPE html>
<html lang="en">
   <head>
      <title>Reference API</title>
      <style>
         body {
            margin: 10px;
            padding: 10px;
         }
      </style>
   </head>
   <body>
      <canvas id="canvas" width="340" height="100" style="border: 1px solid black;"></canvas>
      <script>
         var canvas = document.getElementById('canvas');
         var context = canvas.getContext('2d');
         context.font = "40px Verdana";
         context.fillText('This text is written on the canvas element using fillText() method', 20, 50);
      </script>
   </body>
</html>
Output
The output returned by the above code on the webpage as −
HTML Canvas measureText() method
The HTML Canvas measureText() method of Canvas API from the CanvasRenderingContext2D interface returns text width of the text drawn using context object from the Canvas element.
Syntax
Following is the syntax of HTML Canvas measureText() method −
CanvasRenderingContext2D.measureText(text);
Parameters
Following is the list of parameters of this method −
| S.No | Parameters and Description |
|---|---|
| 1 | text
The text string to be measured from the Canvas element. |
Return values
Upon calling this method by the context object, the text width is returned to the user by window alerts or console.
Example 1
The following example draws a text onto the canvas element using fillText() method and return its width by the console using HTML Canvas measureText() method.
<!DOCTYPE html>
<html lang="en">
   <head>
      <title>Reference API</title>
      <style>
         body {
            margin: 10px;
            padding: 10px;
         }
      </style>
   </head>
   <body>
      <canvas id="canvas" width="250" height="100" style="border: 1px solid black;"></canvas>
      <script>
         var canvas = document.getElementById('canvas');
         var context = canvas.getContext('2d');
         context.font = '30px Verdana'
         context.fillText('Hello World', 20, 50);
         var text = context.measureText('Hello World');
         console.log(text.width);
      </script>
   </body>
</html>
Output
The output returned by the above code on the webpage as −

Example 2
The following example draws text and return its width from the Canvas element by window alert using measureText() method.
<!DOCTYPE html>
<html lang="en">
   <head>
      <title>Reference API</title>
      <style>
         body {
            margin: 10px;
            padding: 10px;
         }
      </style>
   </head>
   <body>
      <canvas id="canvas" width="250" height="100" style="border: 1px solid black;"></canvas>
      <script>
         var canvas = document.getElementById('canvas');
         var context = canvas.getContext('2d');
         context.font = '30px Verdana'
         context.fillText('TutorialsPoint', 20, 50);
         var text = context.measureText('TutorialsPoint');
         alert(text.width);
      </script>
   </body>
</html>
Output
The output returned by the above code on the webpage as −
HTML Canvas strokeText() method
The HTML Canvas strokeText() method of the CanvasRenderingContext2D interface is called by the context object to stroke text onto the Canvas element.
Syntax
Following is the syntax of HTML Canvas strokeText() method −
CanvasRenderingContext2D.strokeText(text, x, y, text_width);
Parameters
Following is the list of parameters of this method −
| S.No | Parameter & Description |
|---|---|
| 1 | text
The text string to be rendered onto the Canvas element. |
| 2 | x
x co-ordinate of the point from which text is to be drawn in the Canvas element. |
| 3 | y
y co-ordinate of the point from which text is to be drawn in the Canvas element. |
| 4 | text_width
Width of the text to be drawn in pixels. |
Return values
The method strokeText() adds strokes to the text and renders it on the Canvas element.
Example 1
The following example adds strokes to a letter to the Canvas element using HTML Canvas strokeText() method.
<!DOCTYPE html>
<html lang="en">
   <head>
      <title>Reference API</title>
      <style>
         body {
            margin: 10px;
            padding: 10px;
         }
      </style>
   </head>
   <body>
      <canvas id="canvas" width="250" height="100" style="border: 1px solid black;"></canvas>
      <script>
         var canvas = document.getElementById('canvas');
         var context = canvas.getContext('2d');
         context.font = '30px Verdana'
         context.strokeText('C', 20, 50);
         context.strokeText('A', 100, 50);
         context.strokeText('T', 180, 50);
      </script>
   </body>
</html>
Output
The output returned by the above code on the webpage as −
Example 2
The following example adds strokes to a word which is in the Canvas element at the specified co-ordinates as passed by parameters using the method strokeText().
<!DOCTYPE html>
<html lang="en">
   <head>
      <title>Reference API</title>
      <style>
         body {
            margin: 10px;
            padding: 10px;
         }
      </style>
   </head>
   <body>
      <canvas id="canvas" width="400" height="100" style="border: 1px solid black;"></canvas>
      <script>
         var canvas = document.getElementById('canvas');
         var context = canvas.getContext('2d');
         context.font = '30px Verdana'
         context.strokeText('This is a stroked text.', 35, 50);
      </script>
   </body>
</html>
Output
The output returned by the above code on the webpage as −

Colors and Styles
We can also style the drawn graphics onto Canvas using its API methods and properties so that attractive visual content can be generated and used. Canvas provides a wide variety of options to style the graphics rendered on the Canvas element.
The interface CanvasRenderringContext2D contains most of the methods and properties to create attractive graphics on the Canvas element. The other interfaces containing graphic styling methods and properties are also used by the context object when needed.
Properties
Following is the list of properties available to apply different Colors and Styles to HTML5 elements.
| S.No | Property & Description |
|---|---|
| 1 | filter
This property provides filter effects such as grayscale, opacity, and blurring. It accepts all the values accepted by CSS filter style. |
2 | globalAlpha
This property specifies the transparency to be applied to the current graphic of the Context object. |
| 3 | globalCompositeOperation
This property applies the compositing operations to the Canvas element object. |
Methods
The methods available to create graphics as well as to color and style them inside the Canvas element are given in the below table.
| S.No | Method & Description | |
|---|---|---|
| 1 | addcolorStop()
This method adds a new color stop given to the canvas gradient inside the canvas element. |
|
| 2 | createConicGradient()
The method createConicGradient() of Canvas API creates a gradient around a point with given co-ordinates. |
|
| 3 | createLinearGradient()
The method createLinearGradient() of Canvas API creates a gradient along the line connecting given co-ordinates. | |
| 4 | createPattern()
This method creates a pattern by repetition of the input image in the given area. |
|
| 5 | createRadialGradient()
The method createRadialGradient() of Canvas API creates a radial gradient by using size and given co-ordinates of two circles. |
HTML Canvas filter property
The HTML Canvas filter property is used to apply color and contrast effects such as grayscale, sepia, etc to the image drawn onto the canvas element using the context object.
It works exactly as the CSS filter property and takes the same input values. It applies the filter provided with the exact value to the image inside the Canvas element.
Possible input values
The filter property accepts none value which does not return anything. The values accepted by the parameter are given below.
| S.No | Value & Description |
|---|---|
| 1 | url()
This value is given when CSS URL is needed to access the filter data and apply to the CanvasRenderingContext2D object. |
| 2 | blur()
When this value is given as object filter, the object is blurred. Values of input are integers and when zero is given, the object remains unchanged. |
| 3 | brightness()
This in-built method is used to make the object brighter or darker. If the value given is less than 100%, the object darkens and if the value is above 100%, the object brightens. |
| 4 | contrast()
This value of filter property is used to adjust the contrast of drawing. It is given in percentage and 0% gives a completely black object on the canvas. |
| 5 | drop-shadow()
It applies shadow to the object. It takes four values to perform this operation which is the distance of shadow from object, radius, and color of the shadow. |
| 6 | grayscale()
This value of filter property converts the object into grayscale. It takes percentage values as input. |
| 7 | hue-rotate()
This value applies hue-rotation onto the drawing. It is given in degrees and 0deg does not alter the drawing. |
| 8 | invert()
This method inverts the object in the canvas and takes percentage value to perform the operation. |
| 9 | opacity()
To make the drawing transparent, this method of filter property is called. It also takes percentage value as input. |
| 10 | saturation()
To saturate the drawing, we apply this filter property to the CanvasRenderingContext2D object, by giving percentage value. |
| 11 | sepia()
This adds sepia filter to the drawing when called by passing a percentage value indicating the requirement of filter. |
| 12 | none
No filter is applied and the drawing remains same. |
Example 1
The following program applies brightness value to the HTML Canvas filter property to the context object created.
<!DOCTYPE html>
<html lang="en">
   <head>
      <title>Reference API</title>
      <style>
         body {
            margin: 10px;
            padding: 10px;
         }
      </style>
   </head>
   <body onload="Context();">
      <canvas id="canvas" width="500" height="200" style="border: 1px solid black;"></canvas>
      <script>
         function Context() {
            var canvas = document.getElementById('canvas');
            var context = canvas.getContext('2d');
            context.filter = 'brightness(150%)'
            context.fillStyle = 'cyan';
            context.fill();
            context.fillRect(50, 20, 150, 100);
            context.filter = 'brightness(50%)'
            context.fillStyle = 'cyan';
            context.fill();
            context.fillRect(250, 20, 150, 100);
         }
      </script>
   </body>
</html>
Output
The output returned by the above code on the webpage as −

Example 2
The following program applies blur filter property to the context object created.
<!DOCTYPE html>
<html lang="en">
   <head>
      <title>Reference API</title>
      <style>
         body {
            margin: 10px;
            padding: 10px;
         }
      </style>
   </head>
   <body onload="Context();">
      <canvas id="canvas" width="400" height="200" style="border: 1px solid black;"></canvas>
      <script>
         function Context() {
            var canvas = document.getElementById('canvas');
            var context = canvas.getContext('2d');
            context.filter = 'blur(3px)';
            var image = new Image();
            image.onload = function() {
               context.drawImage(image, 50, 50);
            };
            image.src = 'https://www.tutorialspoint.com/html5/images/logo.png';
         }
      </script>
   </body>
</html>
Output
The output returned by the above code on the webpage as −

Example 3
The following program applies contrast filter property to the context object created.
<!DOCTYPE html>
<html lang="en">
   <head>
      <title>Reference API</title>
      <style>
         body {
            margin: 10px;
            padding: 10px;
         }
      </style>
   </head>
   <body onload="Context();">
      <canvas id="canvas" width="200" height="200" style="border: 1px solid black;"></canvas>
      <script>
         function Context() {
            var canvas = document.getElementById('canvas');
            var context = canvas.getContext('2d');
            context.filter = 'contrast(30%)';
            context.beginPath();
            context.arc(100, 100, 50, 1 * Math.PI, 5 * Math.PI);
            context.fill();
            context.closePath();
         }
      </script>
   </body>
</html>
Output
The output returned by the above code on the webpage as −
Example 4
The following program applies drop-shadow filter property to the context object created.
<!DOCTYPE html>
<html lang="en">
   <head>
      <title>Reference API</title>
      <style>
         body {
            margin: 10px;
            padding: 10px;
         }
      </style>
   </head>
   <body onload="Context();">
      <canvas id="canvas" width="400" height="200" style="border: 1px solid black;"></canvas>
      <script>
         function Context() {
            var canvas = document.getElementById('canvas');
            var context = canvas.getContext('2d');
            context.filter = 'drop-shadow(20px 10px grey)';
            var image = new Image();
            image.onload = function() {
               context.drawImage(image, 50, 50);
            };
            image.src = 'https://www.tutorialspoint.com/html5/images/logo.png';
         }
      </script>
   </body>
</html>
Output
The output returned by the above code on the webpage as −

Example 5
The following program applies grayscale filter property to the context object created.
<!DOCTYPE html>
<html lang="en">
   <head>
      <title>Reference API</title>
      <style>
         body {
            margin: 10px;
            padding: 10px;
         }
      </style>
   </head>
   <body onload="Context();">
      <canvas id="canvas" width="400" height="200" style="border: 1px solid black;"></canvas>
      <script>
         function Context() {
            var canvas = document.getElementById('canvas');
            var context = canvas.getContext('2d');
            context.filter = 'grayscale(125%)';
            var image = new Image();
            image.onload = function() {
               context.drawImage(image, 50, 50);
            };
            image.src = 'https://www.tutorialspoint.com/html5/images/logo.png';
         }
      </script>
   </body>
</html>
Output
The output returned by the above code on the webpage as −

Example
The following program applies hue-rotate filter property to the context object created.
<!DOCTYPE html>
<html lang="en">
   <head>
      <title>Reference API</title>
      <style>
         body {
            margin: 10px;
            padding: 10px;
         }
      </style>
   </head>
   <body onload="Context();">
      <canvas id="canvas" width="625" height="425" style="border: 1px solid black;"></canvas>
      <script>
         function Context() {
            var canvas = document.getElementById('canvas');
            var context = canvas.getContext('2d');
            context.filter = 'hue-rotate(45deg)';
            var image = new Image();
            image.onload = function() {
               context.drawImage(image, 10, 10);
            };
            image.src = '../../images/image3.png';
         }
      </script>
   </body>
</html>
Output
The image used in this program is −

The output returned by the above code on the webpage as −

Example
The following program applies invert filter property to the context object created.
<!DOCTYPE html>
<html lang="en">
   <head>
      <title>Reference API</title>
      <style>
         body {
            margin: 10px;
            padding: 10px;
         }
      </style>
   </head>
   <body onload="Context();">
      <canvas id="canvas" width="625" height="425" style="border: 1px solid black;"></canvas>
      <script>
         function Context() {
            var canvas = document.getElementById('canvas');
            var context = canvas.getContext('2d');
            context.filter = 'invert(100%)';
            var image = new Image();
            image.onload = function() {
               context.drawImage(image, 10, 10);
            };
            image.src = '../../images/image7.png';
         }
      </script>
   </body>
</html>
Output
The image used in this program is −

The output returned by the above code on the webpage as −
Example
The following program applies opacity filter property to the context object created.
<!DOCTYPE html>
<html lang="en">
<head>
    <title>Reference API</title>
    <style>
      body {
        margin: 10px;
        padding: 10px;
      }
   </style>
</head>
<body onload = "Context();">
    <canvas id="canvas" width="625" height="425" style="border: 1px solid black;"></canvas>
    <script>
       function Context(){
        var canvas=document.getElementById('canvas');
        var context=canvas.getContext('2d');
        context.filter = 'opacity(75%)';
        var image = new Image();
        image.onload = function() {
        context.drawImage(image, 10, 10);
      };
      image.src = '../../images/image33.png';
    }
</script>
</body>
</html>
Output
The image used in this program is −
The output returned by the above code on the webpage as −

Example
The following program applies saturation filter property to the context object created.
<!DOCTYPE html>
<html lang="en">
<head>

    <title>Reference API</title>
    <style>
      body {
        margin: 10px;
        padding: 10px;
      }
   </style>
</head>

<body onload = "Context();">
    <canvas id="canvas" width="625" height="425" style="border: 1px solid black;"></canvas>
    <script>
       function Context(){
        var canvas=document.getElementById('canvas');
        var context=canvas.getContext('2d');
        context.filter = 'saturate(250%)';
        var image = new Image();
        image.onload = function() {
        context.drawImage(image, 10, 10);
      };
      image.src = '../../images/image66.png';
    }
</script>
</body>
</html><!DOCTYPE html>
<html lang="en">
   <head>
      <title>Reference API</title>
      <style>
         body {
            margin: 10px;
            padding: 10px;
         }
      </style>
      </script>
   </head>
   <body onload="Context();">
      <canvas id="canvas" width="625" height="425" style="border: 1px solid black;"></canvas>
      <script>
         function Context() {
            var canvas = document.getElementById('canvas');
            var context = canvas.getContext('2d');
            context.filter = 'saturate(250%)';
            var image = new Image();
            image.onload = function() {
               context.drawImage(image, 10, 10);
            };
            image.src = '../../images/image66.png';
         }
      </script>
   </body>
</html>
Output
The image used in this program is

The output returned by the above code on the webpage as −
Example
The following program applies sepia filter property to the context object created.
<!DOCTYPE html>
<html lang="en">
   <head>
      <title>Reference API</title>
      <style>
         body {
            margin: 10px;
            padding: 10px;
         }
      </style>
   </head>
   <body onload="Context();">
      <canvas id="canvas" width="625" height="425" style="border: 1px solid black;"></canvas>
      <script>
         function Context() {
            var canvas = document.getElementById('canvas');
            var context = canvas.getContext('2d');
            context.filter = 'sepia(95%)';
            var image = new Image();
            image.onload = function() {
               context.drawImage(image, 10, 10);
            };
            image.src = '../../images/image77.png';
         }
      </script>
   </body>
</html>
Output
The image used in this program is −

The output returned by the above code on the webpage as −

HTML Canvas globalAlpha property
The HTML Canvas globalAlpha property can be used to specify the transparency value to be applied to the shapes drawn on the canvas element.
It generally specifies the alpha value so that the shape or image can be made more transparent. This is also used by the rgba color code where a is the transparency coefficient.
Possible input values
It takes a decimal number as input in the range 0.0 to 1.0 inclusive where 0.0 indicates full transparency and 1.0 indicates full opacity of the shape.
Example
The following example draws a square onto the Canvas element and applies transparency to it using the HTML Canvas globalAlpha property.
<!DOCTYPE html>
<html lang="en">
   <head>
      <title>Reference API</title>
      <style>
         body {
            margin: 10px;
            padding: 10px;
         }
      </style>
   </head>
   <body>
      <canvas id="canvas" width="200" height="100" style="border: 1px solid black;"></canvas>
      <script>
         var canvas = document.getElementById('canvas');
         var context = canvas.getContext('2d');
         context.beginPath();
         context.rect(50, 10, 75, 75);
         context.globalAlpha = 0.25;
         context.fillStyle = 'brown';
         context.fill();
         context.closePath();
      </script>
   </body>
</html>
Output
The output returned by the above code on the webpage as −
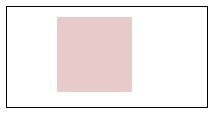
Example
The following example applies transparency to the triangle drawn onto the Canvas element using globalAlpha property.
<!DOCTYPE html>
<html lang="en">
   <head>
      <title>Reference API</title>
      <style>
         body {
            margin: 10px;
            padding: 10px;
         }
      </style>
   </head>
   <body>
      <canvas id="canvas" width="200" height="150" style="border: 1px solid black;"></canvas>
      <script>
         var canvas = document.getElementById('canvas');
         var context = canvas.getContext('2d');
         context.beginPath();
         context.moveTo(100, 50);
         context.lineTo(50, 100);
         context.lineTo(150, 100);
         context.lineTo(100, 50);
         context.globalAlpha = 0.5;
         context.fillStyle = 'blue';
         context.fill();
         context.closePath();
      </script>
   </body>
</html>
Output
The output returned by the above code on the webpage as −
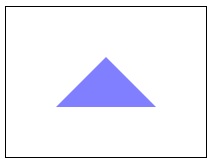
HTML Canvas globalCompositeOperation property
The HTML Canvas globalCompositeOperation property of the Canvas 2D API is used to set the composite operation to apply when drawing shapes onto the Canvas element.
It belongs to the CanvasRenderingContext2D interface and the composite operation can be only set to the 2D shapes drawn onto the Canvas.
Possible input values
Following are the list of predefined constants you can set/assign as values to this property −
| S. No | Value & Description |
|---|---|
| 1 | source-over It is used to draw one shape on the other content available on the Canvas element. |
| 2 | source-in It is used to insert overlapping graphics on the canvas. |
| 3 | source-out The graphics are only rendered when they are not overlaped. Remaining part is made transparent. |
| 4 | source-atop The new shape is overlapped with the Canvas context. |
| 5 | destination-over New shapes are generally rendered behind the existing content. |
| 6 | destination-in The existing content is made transparent when the new shapes are not overlapped. |
| 7 | destination-out When there is no overlap between the shapes, the existing content is kept. |
| 8 | destination-atop The existing content is only kept when overlapped with the new shape. The new shape is drawn behind the content. |
| 9 | lighter The color is determined at the area where shapes overlap. |
| 10 | copy Only the particular shape is shown. |
| 11 | xor The area where shapes overlap is made transparent. |
| 12 | multiply pixels are multiplied based on top layer and bottom layer. The picture becomes darker. |
| 13 | screen Pixels are inverter, multiplied and later inverted again. The picture lightens as the result. |
| 14 | overlay It forms a result which uses both the values multiply and screen. |
| 15 | darken This value retains the darkest pixels of the available layers when called. |
| 16 | lighten This value lighten the darkest pixels of the available layers when called. |
| 17 | color-dodge It divides the bottom layer by the inverted top layer. |
| 18 | color-burn It divides the inverted bottom layer by the top layer, and then inverts everything before displaying. |
| 19 | hard-light It is a combination of multiply and screen, but the top and bottom layers are swapped. |
| 20 | soft-light This values returns a softer version of hard-light when called. |
| 21 | difference subtracts the colors code such that the difference is positive and returns it by changing the color codes. |
| 22 | exclusion It is similar to the difference, but the contrast is reduced. |
| 23 | hue hue is applied to the top layer content in the Canvas element. |
| 24 | saturation saturation (chroma) is applied to the top layer inside the Canvas element. |
| 25 | color The color of the shapes is changed by applying hue and saturation effects. |
| 26 | luminosity luminosity is varied for the top layer inside the Canvas element when this property value is given. |
Example
The following example demonstrates source-out value to two striped rectangles using the HTML Canvas globalCompositeOperation property.
<!DOCTYPE html>
<html lang="en">
   <head>
      <title>Reference API</title>
      <style>
         body {
            margin: 10px;
            padding: 10px;
         }
      </style>
   </head>
   <body>
      <canvas id="canvas" width="400" height="300" style="border: 1px solid black;"></canvas>
      <script>
         var canvas = document.getElementById('canvas');
         var context = canvas.getContext('2d');
         context.globalCompositeOperation = 'source-out';
         context.fillStyle = 'blue';
         context.fillRect(25, 25, 200, 200);
         context.fill();
         context.fillStyle = 'purple';
         context.fillRect(175, 25, 150, 200);
         context.fill();
      </script>
   </body>
</html>
Output
The rectangles before applying the property is −

The output returned by the above code on the webpage as −
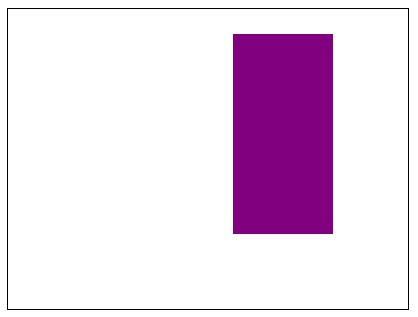
Example
The following example uses the Canvas element context object to apply the property globalCompositeOperation using the value destination-over.
<!DOCTYPE html>
<html lang="en">
   <head>
      <title>Reference API</title>
      <style>
         body {
            margin: 10px;
            padding: 10px;
         }
      </style>
   </head>
   <body>
      <canvas id="canvas" width="400" height="300" style="border: 1px solid black;"></canvas>
      <script>
         var canvas = document.getElementById('canvas');
         var context = canvas.getContext('2d');
         context.globalCompositeOperation = 'destination-over';
         context.fillStyle = 'blue';
         context.fillRect(25, 25, 200, 200);
         context.fill();
         context.fillStyle = 'purple';
         context.fillRect(175, 25, 150, 200);
         context.fill();
      </script>
   </body>
</html>
Output
The rectangles before applying the property is −

The output returned by the above code on the webpage as −

Example
The following example uses the Canvas element context object to apply the property globalCompositeOperation using the value destination-atop.
<!DOCTYPE html>
<html lang="en">
   <head>
      <title>Reference API</title>
      <style>
         body {
            margin: 10px;
            padding: 10px;
         }
      </style>
   </head>
   <body>
      <canvas id="canvas" width="400" height="300" style="border: 1px solid black;"></canvas>
      <script>
         var canvas = document.getElementById('canvas');
         var context = canvas.getContext('2d');
         context.globalCompositeOperation = 'destination-atop';
         context.fillStyle = 'blue';
         context.fillRect(25, 25, 200, 200);
         context.fill();
         context.fillStyle = 'purple';
         context.fillRect(175, 25, 150, 200);
         context.fill();
      </script>
   </body>
</html>
The output returned by the above code on the webpage as −
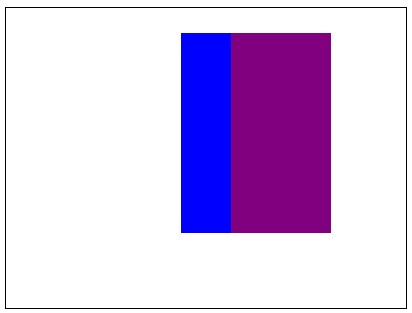
Example
The following example uses the Canvas element context object to apply the property globalCompositeOperation using the value lighter.
<!DOCTYPE html>
<html lang="en">
   <head>
      <title>Reference API</title>
      <style>
         body {
            margin: 10px;
            padding: 10px;
         }
      </style>
   </head>
   <body>
      <canvas id="canvas" width="400" height="300" style="border: 1px solid black;"></canvas>
      <script>
         var canvas = document.getElementById('canvas');
         var context = canvas.getContext('2d');
         context.globalCompositeOperation = 'lighter;
         context.fillStyle = 'blue';
         context.fillRect(25, 25, 200, 200);
         context.fill();
         context.fillStyle = 'purple';
         context.fillRect(175, 25, 150, 200);
         context.fill();
      </script>
   </body>
</html>
Output
The rectangles before applying the property is −

The output returned by the above code on the webpage as −
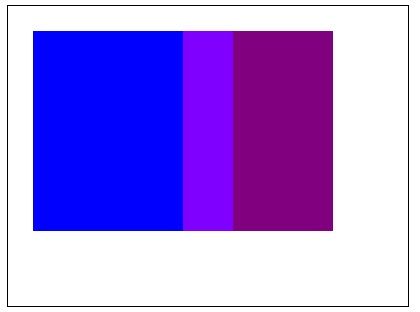
Example
The following example uses the Canvas element context object to apply the property globalCompositeOperation using the value xor.
<!DOCTYPE html>
<html lang="en">
   <head>
      <title>Reference API</title>
      <style>
         body {
            margin: 10px;
            padding: 10px;
         }
      </style>
   </head>
   <body>
      <canvas id="canvas" width="400" height="300" style="border: 1px solid black;"></canvas>
      <script>
         var canvas = document.getElementById('canvas');
         var context = canvas.getContext('2d');
         context.globalCompositeOperation = 'xor';
         context.fillStyle = 'blue';
         context.fillRect(25, 25, 200, 200);
         context.fill();
         context.fillStyle = 'purple';
         context.fillRect(175, 25, 150, 200);
         context.fill();
      </script>
   </body>
</html>
Output
The rectangles before applying the property is −
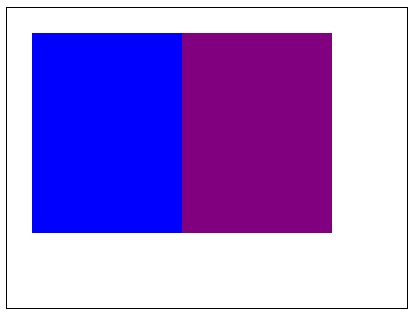
The output returned by the above code on the webpage as −
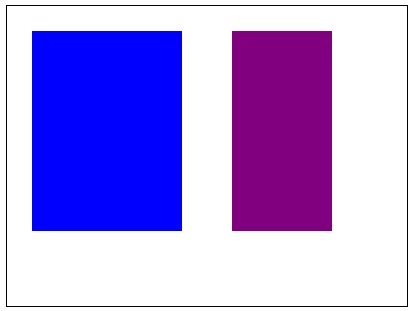
Example
The following example uses the Canvas element context object to apply the property globalCompositeOperation using the value multiply.
<!DOCTYPE html>
<html lang="en">
   <head>
      <title>Reference API</title>
      <style>
         body {
            margin: 10px;
            padding: 10px;
         }
      </style>
   </head>
   <body>
      <canvas id="canvas" width="400" height="300" style="border: 1px solid black;"></canvas>
      <script>
         var canvas = document.getElementById('canvas');
         var context = canvas.getContext('2d');
         context.globalCompositeOperation = 'multiply';
         context.fillStyle = 'blue';
         context.fillRect(25, 25, 200, 200);
         context.fill();
         context.fillStyle = 'purple';
         context.fillRect(175, 25, 150, 200);
         context.fill();
      </script>
   </body>
</html>
Output
The rectangles before applying the property is −

The output returned by the above code on the webpage as −

Example
The following example uses the Canvas element context object to apply the property globalCompositeOperation using the value screen.
<!DOCTYPE html>
<html lang="en">
   <head>
      <title>Reference API</title>
      <style>
         body {
            margin: 10px;
            padding: 10px;
         }
      </style>
   </head>
   <body>
      <canvas id="canvas" width="400" height="300" style="border: 1px solid black;"></canvas>
      <script>
         var canvas = document.getElementById('canvas');
         var context = canvas.getContext('2d');
         context.globalCompositeOperation = 'screen';
         context.fillStyle = 'blue';
         context.fillRect(25, 25, 200, 200);
         context.fill();
         context.fillStyle = 'purple';
         context.fillRect(175, 25, 150, 200);
         context.fill();
      </script>
   </body>
</html>
Output
The rectangles before applying the property is −

The output returned by the above code on the webpage as −

Example
The following example uses the Canvas element context object to apply the property globalCompositeOperation using the value difference. It returns the same colors at the area of coincidence.
<!DOCTYPE html>
<html lang="en">
   <head>
      <title>Reference API</title>
      <style>
         body {
            margin: 10px;
            padding: 10px;
         }
      </style>
   </head>
   <body>
      <canvas id="canvas" width="400" height="300" style="border: 1px solid black;"></canvas>
      <script>
         var canvas = document.getElementById('canvas');
         var context = canvas.getContext('2d');
         context.globalCompositeOperation = 'difference;
         context.fillStyle = 'blue';
         context.fillRect(25, 25, 200, 200);
         context.fill();
         context.fillStyle = 'purple';
         context.fillRect(175, 25, 150, 200);
         context.fill();
      </script>
   </body>
</html>
Output
The rectangles before applying the property is −

The output returned by the above code on the webpage as −

Example
The following example uses the Canvas element context object to apply the property globalCompositeOperation using the value hue.
<!DOCTYPE html>
<html lang="en">
   <head>
      <title>Reference API</title>
      <style>
         body {
            margin: 10px;
            padding: 10px;
         }
      </style>
   </head>
   <body>
      <canvas id="canvas" width="400" height="300" style="border: 1px solid black;"></canvas>
      <script>
         var canvas = document.getElementById('canvas');
         var context = canvas.getContext('2d');
         context.globalCompositeOperation = 'hue';
         context.fillStyle = 'blue';
         context.fillRect(25, 25, 200, 200);
         context.fill();
         context.fillStyle = 'purple';
         context.fillRect(175, 25, 150, 200);
         context.fill();
      </script>
   </body>
</html>
Output
The rectangles before applying the property is −

The output returned by the above code on the webpage as −

Example
The following example uses the Canvas element context object to apply the property globalCompositeOperation using the value luminosity.
<!DOCTYPE html>
<html lang="en">
   <head>
      <title>Reference API</title>
      <style>
         body {
            margin: 10px;
            padding: 10px;
         }
      </style>
   </head>
   <body>
      <canvas id="canvas" width="400" height="300" style="border: 1px solid black;"></canvas>
      <script>
         var canvas = document.getElementById('canvas');
         var context = canvas.getContext('2d');
         context.globalCompositeOperation = 'luminosity';
         context.fillStyle = 'blue';
         context.fillRect(25, 25, 200, 200);
         context.fill();
         context.fillStyle = 'purple';
         context.fillRect(175, 25, 150, 200);
         context.fill();
      </script>
   </body>
</html>
Output
The rectangles before applying the property is −

The output returned by the above code on the webpage as −

HTML Canvas addColorStop() method
The HTML Canvas addColorStop() method can be used to add new color to some part of the graphics rendered on the Canvas element.
It belongs to the canvasGradient interface and is used by all the gradient types to provide color input at the particular position of the graphic on the Canvas element.Syntax
Following is the syntax of HTML Canvas addColorStop() method −
canvasGradient.addColorStop(offset_value, color);
Parameters
Following is the list of parameters of this method −
| S.No | Parameter & Description |
|---|---|
| 1 | offset_value It takes a value between 0 and 1, inclusive which represents the position of the color stop. 0 represents the start of the gradient to apply color and 1 represents the end. |
| 2 | color The color to be applied with the specified offset_value. |
Return value
It applies gradient colors to a graphic drawn on the Canvas element and renders the result directly on the canvas.
Example
The following example draws a simple gradient patterned graphic onto the Canvas element using HTML Canvas addColorStop() method.
<!DOCTYPE html>
<html lang="en">
   <head>
      <title>Reference API</title>
      <style>
         body {
            margin: 10px;
            padding: 10px;
         }
      </style>
   </head>
   <body>
      <canvas id="canvas" width="250" height="100" style="border: 1px solid black;"></canvas>
      <script>
         var canvas = document.getElementById('canvas');
         var context = canvas.getContext('2d');
         var grad = context.createLinearGradient(0, 0, 200, 100);
         context.fillStyle = grad;
         grad.addColorStop(0.3, 'blue');
         grad.addColorStop(0.5, 'grey');
         grad.addColorStop(0.7, 'purple');
         context.fillRect(30, 10, 190, 80);
      </script>
   </body>
</html>
Output
The output returned by the above code on the webpage as −
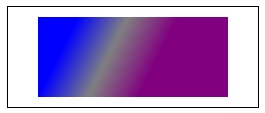
Example 2
The following program draws a rectangle onto the Canvas element and applies color pattern using addColorStop() method.
<!DOCTYPE html>
<html lang="en">
   <head>
      <title>Reference API</title>
      <style>
         body {
            margin: 10px;
            padding: 10px;
         }
      </style>
   </head>
   <body>
      <canvas id="canvas" width="250" height="100" style="border: 1px solid black;"></canvas>
      <script>
         var canvas = document.getElementById('canvas');
         var context = canvas.getContext('2d');
         var grad = context.createLinearGradient(0, 0, 200, 100);
         context.fillStyle = grad;
         grad.addColorStop(0.25, 'purple');
         grad.addColorStop(0.90, 'cyan');
         context.fillRect(30, 10, 190, 80);
      </script>
   </body>
</html>
Output
The output returned by the above code on the webpage as −
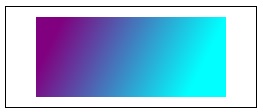
HTML Canvas createConicGradient() method
The HTML Canvas createConicGradient() method can be used to create a gradient around the point for the given co-ordinates.
Syntax
Following is the syntax of HTML Canvas createConicGradient() method −
CanvasRenderingContext2D.createConicGradient(angle, x, y);
Parameters
Following is the list of parameters of this method −
| S.No | Parameter & Description |
|---|---|
| 1 | angle The angle at which gradient is to be drawn on the Canvas shape. The passed angle is based on clockwise rotation only. |
| 2 | x The x co-ordinate of the gradient center. |
| 3 | y The y co-ordinate of the gradient center. |
Return value
Conic gradient is applied to the context inside the Canvas element and is rendered.
Example 1
The following gradient draws a simple conic gradient to the rectangle drawn inside the Canvas element using HTML Canvas createConicGradient() method.
<!DOCTYPE html>
<html lang="en">
   <head>
      <title>Reference API</title>
      <style>
         body {
            margin: 10px;
            padding: 10px;
         }
      </style>
   </head>
   <body>
      <canvas id="canvas" width="300" height="200" style="border: 1px solid black;"></canvas>
      <script>
         var canvas = document.getElementById('canvas');
         var context = canvas.getContext('2d');
         var congradient = context.createConicGradient(45, 95, 95);
         congradient.addColorStop(0, 'blue');
         congradient.addColorStop(0.75, 'brown');
         context.fillStyle = congradient;
         context.fillRect(25, 25, 200, 150);
      </script>
   </body>
</html>
Output
The output returned by the above code on the webpage as −
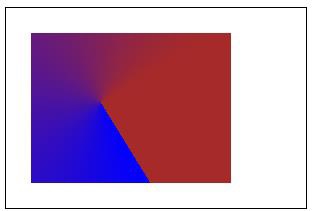
Example 2
The following example draws a conic gradient pattern onto the Canvas element by calling the method createConicGradient().
<!DOCTYPE html>
<html lang="en">
   <head>
      <title>Reference API</title>
      <style>
         body {
            margin: 10px;
            padding: 10px;
         }
      </style>
   </head>
   <body>
      <canvas id="canvas" width="300" height="200" style="border: 1px solid black;"></canvas>
      <script>
         var canvas = document.getElementById('canvas');
         var context = canvas.getContext('2d');
         var congradient = context.createConicGradient(60, 130, 100);
         congradient.addColorStop(0.05, 'violet');
         congradient.addColorStop(0.25, 'blue');
         congradient.addColorStop(0.55, 'green');
         congradient.addColorStop(0.85, 'yellow');
         context.fillStyle = congradient;
         context.fillRect(25, 25, 200, 150);
      </script>
   </body>
</html>
Output
The output returned by the above code on the webpage as −

HTML Canvas createLinearGradient() method
The HTML Canvas createLinearGradient() method of Canvas 2D API of the CanvasRenderingContext2D interface is used to create a gradient along the given co-ordinates.
Syntax
Following is the syntax of HTML Canvas createLinearGradient() method −
CanvasRenderingContext2D.createLinearGradient(x, y, x1, y1);
Parameters
Following is the list of parameters of this method −
| S.No | Parameter & Description |
|---|---|
| 1 | x The x co-ordinate of the starting point. |
| 2 | y The y co-ordinate of the starting point. |
| 3 | x1 The x co-ordinate of the end point. |
| 4 | y1 The y co-ordinate of the end point. |
Return value
A linear gradient is drawn with the specified line to the shape drawn inside the Canvas element.
Example
The following example draws a simple gradient pattern to the rectangle drawn onto the Canvas element using HTML Canvas createLinearGradient() method.
<!DOCTYPE html>
<html lang="en">
   <head>
      <title>Reference API</title>
      <style>
         body {
            margin: 10px;
            padding: 10px;
         }
      </style>
   </head>
   <body>
      <canvas id="canvas" width="300" height="200" style="border: 1px solid black;"></canvas>
      <script>
         var canvas = document.getElementById('canvas');
         var context = canvas.getContext('2d');
         var lineargrad = context.createLinearGradient(50, 50, 100, 100);
         context.fillStyle = lineargrad;
         lineargrad.addColorStop(0.05, 'red');
         lineargrad.addColorStop(0.95, 'orange');
         context.fillRect(25, 25, 150, 120);
      </script>
   </body>
</html>
Output
The output returned by the above code on the webpage as −
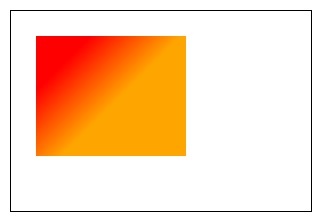
Example
The following example adds gradient style to the rectangle drawn by the context object using three colors on the Canvas element.
<!DOCTYPE html>
<html lang="en">
   <head>
      <title>Reference API</title>
      <style>
         body {
            margin: 10px;
            padding: 10px;
         }
      </style>
   </head>
   <body>
      <canvas id="canvas" width="300" height="200" style="border: 1px solid black;"></canvas>
      <script>
         var canvas = document.getElementById('canvas');
         var context = canvas.getContext('2d');
         var lineargrad = context.createLinearGradient(70, 50, 180, 110);
         context.fillStyle = lineargrad;
         lineargrad.addColorStop(0.25, 'yellow');
         lineargrad.addColorStop(0.5, 'orange');
         lineargrad.addColorStop(0.75, 'red');
         context.fillRect(25, 20, 200, 120);
      </script>
   </body>
</html>
Output
The output returned by the above code on the webpage as −
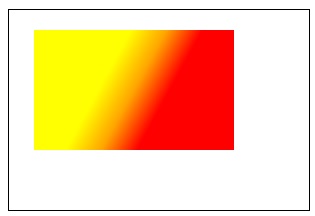
HTML Canvas createPattern() method
The HTML Canvas createPattern() method creates a pattern using the specific graphic and renders it onto the Canvas element by repeating it based on the parameters passed.
Syntax
Following is the syntax of HTML Canvas createPattern() method −
CanvasRenderingContext2D.createPattern(object, repetition);
Parameters
Following is the list of parameters of this method −
| S.No | Parameter & Description |
|---|---|
| 1 | object An image object or any available graphic from the Canvas element to use for the pattern. |
| 2 | repetition A string value indicating the pattern image. Accepted values are
|
Return value
The method when called by the context object renders a pattern onto the Canvas with the specified repetition value.
Example
The following example takes a logo and prints a pattern onto the Canvas element context until it spaces out using HTML Canvas createPattern() method.
<!DOCTYPE html>
<html lang="en">
   <head>
      <title>Reference API</title>
      <style>
         body {
            margin: 10px;
            padding: 10px;
         }
      </style>
   </head>
   <body>
      <canvas id="canvas" width="500" height="400" style="border: 1px solid black; background-color: black;"></canvas>
      <script>
         var canvas = document.getElementById('canvas');
         var context = canvas.getContext('2d');
         var image = new Image();
         image.src = 'https://www.tutorialspoint.com/green/images/diamond.png';
         image.onload = function() {
            var pattern = context.createPattern(image, 'repeat');
            context.fillStyle = pattern;
            context.fillRect(0, 0, canvas.width, canvas.height);
         }
      </script>
   </body>
</html>
Output
The output returned by the above code on the webpage as −
Example
The following example repeats the given image only on the horizontal side using the createPattern() method.
<!DOCTYPE html>
<html lang="en">
   <head>
      <title>Reference API</title>
      <style>
         body {
            margin: 10px;
            padding: 10px;
         }
      </style>
   </head>
   <body>
      <canvas id="canvas" width="700" height="400" style="border: 1px solid black; "></canvas>
      <script>
         var canvas = document.getElementById('canvas');
         var context = canvas.getContext('2d');
         var image = new Image();
         image.src = 'https://www.tutorialspoint.com/images/logo.png';
         image.onload = function() {
            var pattern = context.createPattern(image, 'repeat-x');
            context.fillStyle = pattern;
            context.fillRect(0, 0, canvas.width, canvas.height);
         }
      </script>
   </body>
</html>
Output
The output returned by the above code on the webpage as −
Example
The following example repeats the given image only on the vertical side using the createPattern() method.
<!DOCTYPE html>
<html lang="en">
   <head>
      <title>Reference API</title>
      <style>
         body {
            margin: 10px;
            padding: 10px;
         }
      </style>
   </head>
   <body>
      <canvas id="canvas" width="500" height="400" style="border: 1px solid black; "></canvas>
      <script>
         var canvas = document.getElementById('canvas');
         var context = canvas.getContext('2d');
         var image = new Image();
         image.src = 'https://www.tutorialspoint.com/images/logo.png';
         image.onload = function() {
            var pattern = context.createPattern(image, 'repeat-y');
            context.fillStyle = pattern;
            context.fillRect(0, 0, canvas.width, canvas.height);
         }
      </script>
   </body>
</html>
Output
The output returned by the above code on the webpage as −

HTML Canvas createRadialGradient() method
The HTML Canvas createRadialGradient() method of the CanvasRenderingContext2D interface can be used to create a radial gradient with the size and co-ordinates of two circles.
Syntax
Following is the syntax of HTML Canvas createRadialGradient() method −
CanvasRenderingContext2D.createRadialGradient(x, y, r, x1, y1, r1);
Parameters
Following is the list of parameters of this method −
| S.No | Parameter & Description |
|---|---|
| 1 | x The x co-ordinate of the starting circle. |
| 2 | y The y co-ordinate of the starting circle. |
| 3 | r The radius of the start circle. |
| 4 | x1 The x co-ordinate of the end circle. |
| 5 | y1 The y co-ordinate of the end circle. |
| 6 | r1 The radius of the end circle. |
Return value
A radial gradient is applied to the context object shape and is rendered to the Canvas element.
Example
The following example demonstrates radial gradient using two color stops by HTML Canvas createRadialGradient() method.
<!DOCTYPE html>
<html lang="en">
   <head>
      <title>Reference API</title>
      <style>
         body {
            margin: 10px;
            padding: 10px;
         }
      </style>
   </head>
   <body>
      <canvas id="canvas" width="300" height="200" style="border: 1px solid black;"></canvas>
      <script>
         var canvas = document.getElementById('canvas');
         var context = canvas.getContext('2d');
         var radialgrad = context.createRadialGradient(25, 25, 25, 50, 50, 25);
         radialgrad.addColorStop(0.9, 'pink');
         radialgrad.addColorStop(0.85, 'grey');
         context.fillStyle = radialgrad;
         context.fillRect(10, 10, 200, 150);
      </script>
   </body>
</html>
Output
The output returned by the above code on the webpage as −
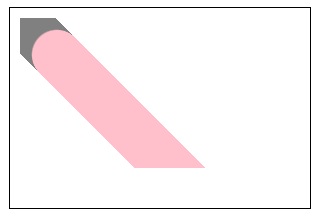
Example
The following example uses three color-stops and apply radial gradient to the context object available inside the Canvas element. The object to which the style is applied is rendered on the Canvas element.
<!DOCTYPE html>
<html lang="en">
   <head>
      <title>Reference API</title>
      <style>
         body {
            margin: 10px;
            padding: 10px;
         }
      </style>
   </head>
   <body>
      <canvas id="canvas" width="300" height="200" style="border: 1px solid black;"></canvas>
      <script>
         var canvas = document.getElementById('canvas');
         var context = canvas.getContext('2d');
         var radialgrad = context.createRadialGradient(25, 25, 50, 100, 80, 50);
         radialgrad.addColorStop(0, 'green');
         radialgrad.addColorStop(0.5, 'purple');
         radialgrad.addColorStop(1, 'cyan');
         context.fillStyle = radialgrad;
         context.fillRect(10, 10, 200, 150);
      </script>
   </body>
</html>
Output
The output returned by the above code on the webpage as −
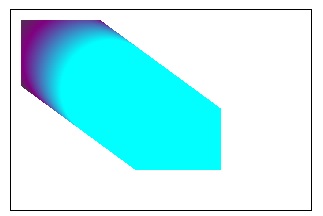
Images
Images are very important and primary requirement to generate attractive visual content. Canvas API has a wide variety of image manipulation features to take an input image as well as to manipulate them based on the requirement.
The interfaces CanvasRenderringContext2D and ImageData contains all the methods and properties to create attractive graphics using images on the Canvas element.
Properties
Following are the various properties available in HTML5 to deal with images −
| S.No | Property & Description |
|---|---|
| 1 | data This data property returns the pixel data of ImageData object. |
| 2 | imageSmoothingEnabled This property of the Canvas API determines whether the scaled images available are smoothed or not. It returns true if image is scaled and false if it is not scaled. |
| 3 | imageSmoothingQuality This property of the Canvas API lets us to set the quality of the image smoothing for an image drawn on Canvas. |
Methods
The methods available to create graphics based on images inside the Canvas element are given in the below table.
| S.No | Method & Description |
|---|---|
| 1 | createImageData() This method can be used to create a new ImageData object with given dimensions. The object formed is filled with black pixels unless changed. |
| 2 | drawImage() This method draws the image onto the Canvas element. |
| 3 | getImageData() The method getImageData() captures the image frame for the given co-ordinates passed as the parameters. The captured image is printed in the canvas element at given point. |
| 4 | ImageData() This constructor method returns newly created Image data object with the data passed as parameters. |
| 5 | putImageData() This method paints the data given by ImageData object onto the Canvas element. We can retrieve this data using getImageData() method. |
HTML Canvas data property
The HTML Canvas data property of ImageData interface returns an array containing all the pixel data of the ImageData object.
The data is stored in the one-dimensional array in RGBA color order and is accessed by the context object when applying color to the graphics rendered on the Canvas element.
Possible input values
It returns a single dimensional array containing pixel data of the object in RGBA color order with values between 0 and 255 (both inclusive).
Example 1: (Getting data length from console and window alert)
The following example creates a simple ImageData object and gets its length and array data using console and window alert.
<!DOCTYPE html>
<html lang="en">
   <head>
      <title>Reference API</title>
      <style>
         body {
            margin: 10px;
            padding: 10px;
         }
      </style>
   </head>
   <body>
      <canvas id="canvas" width="500" height="400" style="border: 1px solid black; "></canvas>
      <script>
         var canvas = document.getElementById('canvas');
         var context = canvas.getContext('2d');
         var imgdata = new ImageData(55, 55);
         window.alert('data length : ' + imgdata.data.length);
         console.log('data length : ' + imgdata.data.length);
      </script>
   </body>
</html>
Output
The output returned by the above code on the webpage as −
The output returned by the window alert is −
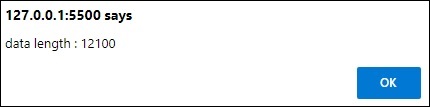
The output returned by the console is −
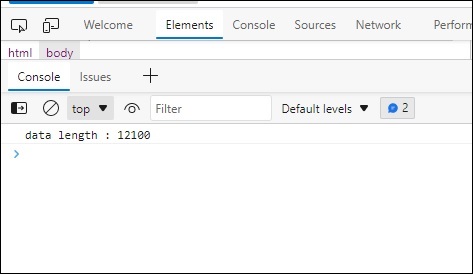
Example
The following example draws a simple rgba pattern using the data property on the Canvas element by using the image object created first.
<!DOCTYPE html>
<html lang="en">
   <head>
      <title>Reference API</title>
      <style>
         body {
            margin: 10px;
            padding: 10px;
         }
      </style>
   </head>
   <body>
      <canvas id="canvas" width="300" height="200" style="border: 1px solid black; "></canvas>
      <script>
         var canvas = document.getElementById('canvas');
         var context = canvas.getContext('2d');
         var imgdata = new ImageData(200, 150);
         for (let i = 0; i < imgdata.data.length; i += 4) {
            imgdata.data[i + 0] = 122;
            imgdata.data[i + 1] = 255;
            imgdata.data[i + 2] = 144;
            imgdata.data[i + 3] = 100;
         }
         context.putImageData(imgdata, 25, 25);
      </script>
   </body>
</html>
Output
The output returned by the image on the webpage as −
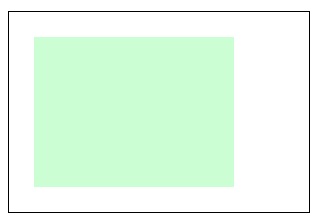
HTML Canvas imageSmoothingEnabled property
The HTML Canvas imageSmoothingEnabled property of Canvas API applies image smoothing based on the values passed.
This property is commonly used in pixel optimizations for developing games, it retains the sharpness of image when the property is set to false.
Possible input values
It takes Boolean values true or false and apply the smoothing to the referred image object. The default value is true.
Example
The following example takes an image and applies smoothing to the image with value being true by using HTML Canvas imageSmoothingEnabled property.
<!DOCTYPE html>
<html lang="en">
   <head>
      <title>Reference API</title>
      <style>
         body {
            margin: 10px;
            padding: 10px;
         }
      </style>
   </head>
   <body>
      <canvas id="canvas" width="450" height="150" style="border: 1px solid black;background-color: black;"></canvas>
      <script>
         var canvas = document.getElementById('canvas');
         var context = canvas.getContext('2d');
         const image = new Image()
         image.src = 'https://www.tutorialspoint.com/scripts/img/logo-footer.png';
         context.drawImage(image, 20, 20, 150, 100);
         context.imageSmoothingEnabled = true;
         context.drawImage(image, 250, 20, 150, 100);
      </script>
   </body>
</html>
Output
The output returned by the image on the webpage as −

Example
In this example, we take an image and apply the smoothing property as false to the context image object and render it on the Canvas element using imageSmoothingEnabled property.
<!DOCTYPE html>
<html lang="en">
   <head>
      <title>Reference API</title>
      <style>
         body {
            margin: 10px;
            padding: 10px;
         }
      </style>
   </head>
   <body>
      <canvas id="canvas" width="670" height="200" style="border: 1px solid black;background-color: black;"></canvas>
      <script>
         var canvas = document.getElementById('canvas');
         var context = canvas.getContext('2d');
         const image = new Image()
         image.src = 'https://www.tutorialspoint.com/scripts/img/logo-footer.png';
         context.drawImage(image, 20, 20, 300, 150);
         context.imageSmoothingEnabled = false;
         context.drawImage(image, 350, 20, 300, 150);
      </script>
   </body>
</html>
Output
The output returned by the image on the webpage as −

HTML Canvas imageSmoothingQuality property
The HTML Canvas imageSmoothingQuality property of the Canvas 2D API can be used to set the quality of the image smoothing.
Possible input values
The values accepted by the property are −
| S.No | Value & Description |
|---|---|
| 1 | low set quality as low. |
| 2 | medium set quality as medium. |
| 3 | high set quality as high. |
Example
The following example takes and image and applies low smoothing quality using the property HTML Canvas imageSmoothingQuality property.
<!DOCTYPE html>
<html lang="en">
   <head>
      <title>Reference API</title>
      <style>
         body {
            margin: 10px;
            padding: 10px;
         }
      </style>
   </head>
   <body>
      <canvas id="canvas" width="400" height="200" style="border: 1px solid black;background-color: grey;"></canvas>
      <script>
         var canvas = document.getElementById('canvas');
         var context = canvas.getContext('2d');
         const image = new Image()
         image.src = 'https://www.tutorialspoint.com/images/logo.png';
         context.imageSmoothingQuality = 'low';
         context.drawImage(image, 25, 20, 300, 150);
      </script>
   </body>
</html>
Output
The output returned by the above code on the webpage as −
Example
For the following example, an image is rendered on the Canvas element by setting the smoothing quality as medium using the property imageSmoothingQuality.
<!DOCTYPE html>
<html lang="en">
   <head>
      <title>Reference API</title>
      <style>
         body {
            margin: 10px;
            padding: 10px;
         }
      </style>
   </head>
   <body>
      <canvas id="canvas" width="400" height="200" style="border: 1px solid black;background-color: grey;"></canvas>
      <script>
         var canvas = document.getElementById('canvas');
         var context = canvas.getContext('2d');
         const image = new Image()
         image.src = 'https://www.tutorialspoint.com/images/logo.png';
         context.imageSmoothingQuality = 'medium';
         context.drawImage(image, 25, 20, 300, 150);
      </script>
   </body>
</html>
Output
The output returned by the above code on the webpage as −
Example
The following example sets the image smoothing quality as high for the image object inside the Canvas element using the property imageSmoothingQuality.
<!DOCTYPE html>
<html lang="en">
   <head>
      <title>Reference API</title>
      <style>
         body {
            margin: 10px;
            padding: 10px;
         }
      </style>
   </head>
   <body>
      <canvas id="canvas" width="400" height="200" style="border: 1px solid black;background-color: grey;"></canvas>
      <script>
         var canvas = document.getElementById('canvas');
         var context = canvas.getContext('2d');
         const image = new Image()
         image.src = 'https://www.tutorialspoint.com/images/logo.png';
         context.imageSmoothingQuality = 'high';
         context.drawImage(image, 25, 20, 300, 150);
      </script>
   </body>
</html>
Output
The output returned by the above code on the webpage as −
HTML Canvas createImageData() method
The HTML Canvas createImageData() method of Canvas 2D API creates an ImageData object in the Canvas element.
Syntax
Following is the syntax of HTML Canvas createImageData() method −
CanvasRenderingContext2D.createImageData(data, width, height);
Parameters
Following is the list of parameters of this method −
| S.No | Parameter & Description |
|---|---|
| 1 | width The width value which is given to the ImageData object. |
| 2 | height The width value which is passed to the ImageData object. |
| 3 | data This data object is an existing ImageData object from which the properties such as width and height are copied into new object. |
Return value
A new ImageData object is created with specified height and width. It is filled with transparent black pixels by default.
Example
The following example creates a blank ImageData object using the HTML Canvas createImageData() method and returns its values using window alert.
<!DOCTYPE html>
<html lang="en">
   <head>
      <title>Reference API</title>
      <style>
         body {
            margin: 10px;
            padding: 10px;
         }
      </style>
   </head>
   <body>
      <canvas id="canvas" width="400" height="200" style="border: 1px solid black;"></canvas>
      <script>
         var canvas = document.getElementById('canvas');
         var context = canvas.getContext('2d');
         var imgdata = context.createImageData(55, 55);
         console.log(imgdata);
      </script>
   </body>
</html>
Output
The output returned by the image on the webpage as −
The data shown in the console as −
Example
The following example demonstrates how an Image data object is created and styled inside the Canvas element using the HTML Canvas createImageData() method.
<!DOCTYPE html>
<html lang="en">
   <head>
      <title>Reference API</title>
      <style>
         body {
            margin: 10px;
            padding: 10px;
         }
      </style>
   </head>
   <body onload="Context();">
      <canvas id="canvas" width="300" height="200" style="border: 1px solid black;"></canvas>
      <script>
         function Context() {
            var canvas = document.getElementById('canvas');
            var context = canvas.getContext('2d');
            var i, imageData = context.createImageData(100, 100);
            for (i = 0; i < imageData.data.length; i += 4) {
               imageData.data[i + 0] = 200;
               imageData.data[i + 1] = 100;
               imageData.data[i + 2] = 100;
               imageData.data[i + 3] = 200;
            }
            context.putImageData(imageData, 15, 15);
         }
      </script>
   </body>
</html>
Output
The output returned by the image on the webpage as −
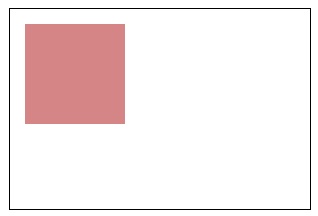
HTML Canvas drawImage() method
The HTML Canvas drawImage() method of Canvas 2D API provides different ways to draw/add an image onto the Canvas element.
Syntax
Following is the syntax of HTML Canvas drawImage() method −
CanvasRenderingContext2D.drawImage(image, sx, sy, s w, sh, dx, dy, dw, dh);
Parameters
Following is the list of parameters of this method −
| S.No | Parameter & Description |
|---|---|
| 1 | image An image element which is to be drawn onto the Canvas element by passing as a parameter to the method. |
| 2 | sx x co-ordinate position of the top-left corner of the source image in Canvas. |
| 3 | sy y co-ordinate position of the top-left corner of the source image in Canvas. |
| 4 | sw width of the source image. |
| 5 | sh height of the source image. |
| 6 | dx x co-ordinate position in the destination canvas at which to place the top-left corner of the source image in Canvas. |
| 7 | dy y co-ordinate position in the destination canvas at which to place the top-left corner of the source image in Canvas. |
| 8 | dw width of the image to draw in the destination canvas. |
| 9 | dh height of the image to draw in the destination canvas. |
Return value
An image is drawn onto the Canvas element by using the method drawImage() and image object created by the canvas context.
Example
The following example draws an image onto the Canvas element using the method HTML Canvas drawImage() method.
<!DOCTYPE html>
<html lang="en">
   <head>
      <title>Reference API</title>
      <style>
         body {
            margin: 10px;
            padding: 10px;
         }
      </style>
   </head>
   <body>
      <canvas id="canvas" width="400" height="200" style="border: 1px solid black;"></canvas>
      <script>
         var canvas = document.getElementById('canvas');
         var context = canvas.getContext('2d');
         var image = new Image();
         image.onload = function() {
            context.drawImage(image, 50, 50);
         };
         image.src = 'https://www.tutorialspoint.com/html5/images/logo.png';
      </script>
   </body>
</html>
Output
The output returned by the image on the webpage as −

Example
The following example draws a partial image onto the Canvas using the parameters of source and destination for the method drawImage().
<!DOCTYPE html>
<html lang="en">
   <head>
      <title>Reference API</title>
      <style>
         body {
            margin: 10px;
            padding: 10px;
         }
      </style>
   </head>
   <body>
      <canvas id="canvas" width="250" height="150" style="border: 1px solid black;"></canvas>
      <script>
         var canvas = document.getElementById('canvas');
         var context = canvas.getContext('2d');
         var image = new Image();
         image.onload = function() {
            context.drawImage(image, 10, 10, 150, 100, 25, 25, 150, 100);;
         };
         image.src = 'https://www.tutorialspoint.com/html5/images/logo.png';
      </script>
   </body>
</html>
Output
The output returned by the image on the webpage as −

HTML Canvas getImageData() method
The HTML Canvas getImageData() method of Canvas 2D API gets the data and returns ImageData object on the given portion of the Canvas element.
This method is not affected by any transform methods and returns the ImageData object only if the pixels are inside of the Canvas.
Syntax
Following is the syntax of HTML Canvas getImageData() method −
CanvasRenderingContext2D.getImageData(x, y, width, height);
Parameters
Following is the list of parameters of this method −
| S.No | Parameter & Methods |
|---|---|
| 1 | x The x co-ordinate of the top-left corner of the rectangle from which ImageData is to be extracted. |
| 2 | y The y co-ordinate of the top-left corner of the rectangle from which ImageData is to be extracted. |
| 3 | width The width of the rectangle from which ImageData is to be extracted. |
| 4 | height The width of the rectangle from which ImageData is to be extracted. |
Return value
A new ImageData object is returned using the existing ImageData object in the Canvas with the given size.
Example
The example creates a rectangle and gets the specified portion of ImageData using HTML Canvas getImageData method onto the Canvas element.
<!DOCTYPE html>
<html lang="en">
   <head>
      <title>Reference API</title>
      <style>
         body {
            margin: 10px;
            padding: 10px;
         }
      </style>
   </head>
   <body onload="Context();">
      <canvas id="canvas" width="350" height="200" style="border: 1px solid black;"></canvas>
      <script>
         function Context() {
            var canvas = document.getElementById("canvas");
            var context = canvas.getContext("2d");
            context.fillStyle = 'purple';
            context.fillRect(10, 10, 200, 150);
            var data = context.getImageData(50, 50, 50, 50);
            context.putImageData(data, 250, 10);
         }
      </script>
   </body>
</html>
Output
The output returned by the following code on the webpage as −
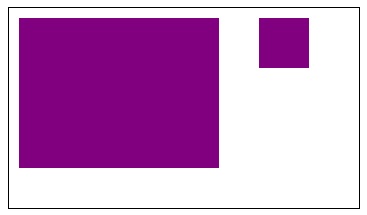
Example
The example draws text and gets the specified portion of ImageData using getImageData() method onto the Canvas element.
<!DOCTYPE html>
<html lang="en">
   <head>
      <title>Reference API</title>
      <style>
         body {
            margin: 10px;
            padding: 10px;
         }
      </style>
   </head>
   <body onload="Context();">
      <canvas id="canvas" width="600" height="200" style="border: 1px solid black;"></canvas>
      <script>
         function Context() {
            var canvas = document.getElementById("canvas");
            var context = canvas.getContext("2d");
            context.font = '55px Verdana';
            context.fillText('This text is filled', 10, 50);
            var data = context.getImageData(10, 10, 100, 50);
            context.putImageData(data, 10, 80);
            var data1 = context.getImageData(200, 10, 100, 50);
            context.putImageData(data1, 150, 80);
            var data2 = context.getImageData(300, 10, 100, 50);
            context.putImageData(data2, 300, 80);
         }
      </script>
   </body>
</html>
Output
The output returned by the following code on the webpage as −
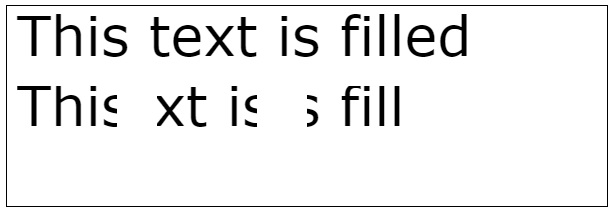
HTML Canvas ImageData() method
The ImageData interface contains pixel data of a particular area inside the Canvas element. To manipulate the pixel data, we can use ImageData() constructor on the CanvasRenderringContext2D> interface context object.
The HTML Canvas ImageData() method of Canvas 2D API is used when there is a need to draw graphics onto the canvas element using Image properties and methods.
Syntax
Following is the syntax of HTML Canvas ImageData method −
CanvasRenderringContext2D.ImageData(dataset, width, height, features);
Parameters
Following is the list of parameters of this method −
| S.No | Parameter & Description |
|---|---|
| 1 | Dataset
The dataset is an array representing 2D pixels of the required image which is given using one of the following values.
If none of the values are passed as the parameter, a transparent black rectangle is formed with the given width and height. |
| 2 | Width
An integer value which helps to determine the width of ImageData() object inside the Canvas element. |
| 3 | Height
An integer value which helps to determine the height of ImageData() object inside the Canvas element. |
| 4. | Features
The constructor accepts a color-palette feature which is used to draw inside the Canvas element. It accepts the following values.
|
Return values
A CanvasRenderringContext2D object is used to create a new ImageData() object.
Example
The following example demonstrates how we can add color to the HTML Canvas ImageData() method object using an index array.
<!DOCTYPE html>
<html lang="en">
   <head>
      <title>Reference API</title>
      <style>
         body {
            margin: 10px;
            padding: 10px;
         }
      </style>
   </head>
   <body onload="Imagedata();">
      <canvas id="canvas" width="300" height="200" style="border: 1px solid black;"></canvas>
      <script>
         function Imagedata() {
            var canvas = document.getElementById("canvas");
            var context = canvas.getContext("2d");
            const array = new Uint8ClampedArray(40000);
            for (let i = 0; i < array.length; i += 4) {
               array[i + 0] = 200;
               array[i + 1] = 190;
               array[i + 2] = 180;
               array[i + 3] = 170;
            }
            let img_data = new ImageData(array, 100);
            context.putImageData(img_data, 80, 50);
         }
      </script>
   </body>
</html>
Output
The output image object generated by the above code is −
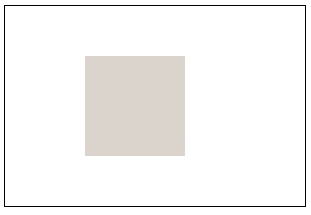
Example
The following program draws a rectangular solid color image onto the image using the method ImageData().
<!DOCTYPE html>
<html lang="en">
   <head>
      <title>Reference API</title>
      <style>
         body {
            margin: 10px;
            padding: 10px;
         }
      </style>
   </head>
   <body>
      <canvas id="canvas" width="220" height="180" style="border: 1px solid black;"></canvas>
      <script>
         var canvas = document.getElementById('canvas');
         var context = canvas.getContext('2d');
         const array = new Uint8ClampedArray(50000);
         for (let i = 0; i < array.length; i += 4) {
            array[i + 0] = 222;
            array[i + 1] = 111;
            array[i + 2] = 11;
            array[i + 3] = 500;
         }
         let imgdata = new ImageData(array, 100);
         context.putImageData(imgdata, 50, 20);
      </script>
   </body>
</html>
Output
The output returned by the image on the webpage as −
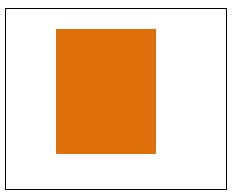
HTML Canvas putImageData() method
The HTML Canvas putImageData() method fetches the available data from ImageData object and paints it onto the Canvas element.
If a dirty graphic is provided, the pixels from the graphics are taken and printed on canvas element.
Syntax
Following is the syntax of HTML Canvas putImageData() method −
CanvasRenderingContext2D.putImageData(data, x, y, dx, dy, dwidth, dheight);
Parameters
Following is the list of parameters of this method −
| S.No | Parameter & Description |
|---|---|
| 1 | data An ImageData object holding pixel array values. |
| 2 | x x co-ordinate position of image data object in Canvas |
| 3 | y y co-ordinate position of image data object in Canvas |
| 4 | dx x co-ordinate position of the top-left corner from which image data object is to be extracted. |
| 5 | dy y co-ordinate position of the top-left corner from which image data object is to be extracted. |
| 6 | dwidth width of the rectangle to be painted onto canvas which takes image data object width by default. |
| 7 | dheight height of the rectangle to be painted onto canvas which takes image data object height by default. |
Return Value
A new Image data object is created and the available data is collected by the object and is painted onto the HTML Canvas element.
Example
The following example draws a circle on the canvas element and fetches a part of it using the method and draws the new ImageData object element on the canvas at the given co-ordinates.
<!DOCTYPE html>
<html lang="en">
   <head>
      <title>Reference API</title>
      <style>
         body {
            margin: 10px;
            padding: 10px;
         }
      </style>
   </head>
   <body onload="Context();">
      <canvas id="canvas" width="350" height="200" style="border: 1px solid black;"></canvas>
      <script>
         function Context() {
            var canvas = document.getElementById("canvas");
            var context = canvas.getContext("2d");
            context.arc(90, 90, 75, 1 * Math.PI, 5 * Math.PI);
            context.fillStyle = 'green';
            context.fill();
            var data = context.getImageData(100, 90, 50, 50);
            context.putImageData(data, 250, 25);
         }
      </script>
   </body>
</html>
Output
The output returned by the following code on the webpage as −
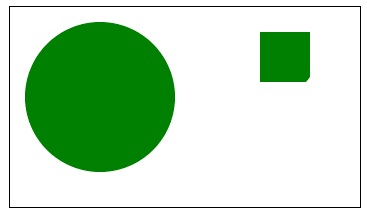
Example
The following example draws a rectangle on the canvas element and fetches a part of it using the method and draws the new ImageData object element on the canvas at the given co-ordinates.
<!DOCTYPE html>
<html lang="en">
   <head>
      <title>Reference API</title>
      <style>
         body {
            margin: 10px;
            padding: 10px;
         }
      </style>
   </head>
   <body onload="Context();">
      <canvas id="canvas" width="350" height="200" style="border: 1px solid black;"></canvas>
      <script>
         function Context() {
            var canvas = document.getElementById("canvas");
            var context = canvas.getContext("2d");
            context.fillRect(15, 15, 200, 150);
            var data = context.getImageData(100, 90, 50, 50);
            context.putImageData(data, 250, 25, 15, 15, 75, 75);
         }
      </script>
   </body>
</html>
Output
The output returned by the following code on the webpage as −
Shadows and Transformations
Canvas API also consists of some advanced graphic styling features which can be used to improve the appearance of the rendered graphics onto the Canvas element. Shadows and Transformations can be applied to the canvas context object by using the available methods and properties.
The interface CanvasRenderringContext2D contains almost all the methods and properties to create attractive graphics using shadows and transformations inside the Canvas element.
Properties
Following are various properties related to shadows and transformations available in HTML5.
| S.No | Property & Description |
|---|---|
| 1 | shadowBlur This property of the Canvas API applies blurred shadows to the Context object drawn inside canvas element. |
| 2 | shadowColor The property shadowColor specifies the color to be applied to the Context object shadow drawn inside the Canvas element. |
| 3 | shadowOffsetX We can set the horizontal shadow distance to be drawn for the context object using shadowOffsetX property. |
| 4 | shadowOffsetY We can set the vertical shadow distance to be drawn for the context object using shadowOffsetY property. |
Methods
The methods available to create graphics with shadows and transformations inside the Canvas element are given in the below table.
| S.No | Method & Description |
|---|---|
| 1 | getTransform() This method of CanvasRenderringContext2D interface retrieves the transforms applied to the current canvas element context. |
| 2 | resetTransform() This method resets the current transform into the identity matrix by transferring the current graphics into original shape or path inside the Canvas element. |
| 3 | restore() This method restores the most recently saved canvas state when called. |
| 4 | rotate() This method of Canvas API adds rotation to the transformation matrix of the context object. |
| 5 | save() This method saves the most recent canvas state when called by pushing it into the stack. |
| 6 | scale() This method scales the current context object horizontally/vertically when called. |
| 7 | setTransform() This method of the Canvas 2D API invokes a transformation matrix for the given shape and helps us to perform movement operations such as rotate, translate, and scale. |
| 8 | transform() This method changes the transformation matrix which allows us to scale, rotate, skew the context object. |
| 9 | translate() This method of the Canvas API adds the translation transformation to the current matrix. |
HTML Canvas shadowBlur property
The HTML Canvas shadowBlur property of Canvas 2D API is used to specify the blur amount to be applied to the graphic rendered inside the Canvas element.
Possible input values
The property takes positive float integer values where 0 represents no blur. The increase in number indicates more blur is to be applied.
Example
The following example draws a square onto the Canvas element and adds a shadow to it using the HTML Canvas shadowBlur property.
<!DOCTYPE html>
<html lang="en">
   <head>
      <title>Reference API</title>
      <style>
         body {
            margin: 10px;
            padding: 10px;
         }
      </style>
   </head>
   <body>
      <canvas id="canvas" width="300" height="200" style="border: 1px solid black;"></canvas>
      <script>
         var canvas = document.getElementById('canvas');
         var context = canvas.getContext('2d');
         context.shadowColor = 'green';
         context.shadowBlur = 20;
         context.fillStyle = 'blue';
         context.fillRect(50, 25, 200, 150);
      </script>
   </body>
</html>
Output
The output returned by the following code on the webpage as −
Example
The following example draws a circle onto the canvas element and adds a shadow to it using the property shadowBlur.
<!DOCTYPE html>
<html lang="en">
   <head>
      <title>Reference API</title>
      <style>
         body {
            margin: 10px;
            padding: 10px;
         }
      </style>
   </head>
   <body>
      <canvas id="canvas" width="200" height="150" style="border: 1px solid black;"></canvas>
      <script>
         var canvas = document.getElementById('canvas');
         var context = canvas.getContext('2d');
         context.shadowColor = 'green';
         context.shadowBlur = 50;
         context.fillStyle = 'grey';
         context.arc(100, 75, 50, 0, 2 * Math.PI);
         context.fill();
      </script>
   </body>
</html>
Output
The output returned by the following code on the webpage as −
HTML Canvas shadowColor property
The HTML Canvas shadowColor property is used to specify the shadow color for a graphic drawn inside the Canvas element.
Possible input values
It takes a string value containing color code which may be any of the following type −
Color-namea
Hex code
Rgb value
Rgba value
Example
The following example adds color to the drawn shadow using color name by the HTML Canvas shadowColor property.
<!DOCTYPE html>
<html lang="en">
   <head>
      <title>Reference API</title>
      <style>
         body {
            margin: 10px;
            padding: 10px;
         }
      </style>
   </head>
   <body>
      <canvas id="canvas" width="200" height="150" style="border: 1px solid black;"></canvas>
      <script>
         var canvas = document.getElementById('canvas');
         var context = canvas.getContext('2d');
         context.shadowColor = 'pink';
         context.shadowBlur = 100;
         context.fillRect(50, 20, 100, 100)
      </script>
   </body>
</html>
Output
The output returned by the following code on the webpage as −
Example
The following example takes hex color code and applies for the shadow applied to the shape inside the Canvas element.
<!DOCTYPE html>
<html lang="en">
   <head>
      <title>Reference API</title>
      <style>
         body {
            margin: 10px;
            padding: 10px;
         }
      </style>
   </head>
   <body>
      <canvas id="canvas" width="200" height="150" style="border: 1px solid black;"></canvas>
      <script>
         var canvas = document.getElementById('canvas');
         var context = canvas.getContext('2d');
         context.shadowColor = '#A020F0';
         context.shadowBlur = 100;
         context.fillRect(50, 20, 100, 100)
      </script>
   </body>
</html>
Output
The output returned by the following code on the webpage as −
Example
The following example draws a shape onto the Canvas element and applies shadow color to it using rgba coloring by the property shadowColor.
<!DOCTYPE html>
<html lang="en">
   <head>
      <title>Reference API</title>
      <style>
         body {
            margin: 10px;
            padding: 10px;
         }
      </style>
   </head>
   <body>
      <canvas id="canvas" width="200" height="150" style="border: 1px solid black;"></canvas>
      <script>
         var canvas = document.getElementById('canvas');
         var context = canvas.getContext('2d');
         context.shadowColor = 'rgb(0,255,255,1)';
         context.shadowBlur = 100;
         context.fillRect(50, 20, 100, 100)
      </script>
   </body>
</html>
Output
The output returned by the following code on the webpage as −
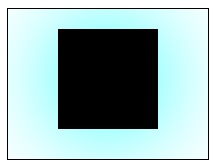
HTML Canvas shadowOffsetX property
The HTML Canvas shadowOffsetX property of Canvas 2D API uses the interface CanvasRenderingContext2D context object to specify the horizontal distance of the shadow to be drawn for the rendered graphic.
Possible input values
It takes a float integer value representing the shadow length horizontally to be needed from the graphic on the Canvas element.
Example
The following example draws a rectangle onto the Canvas element and adds a positive offset shadow to it by using the HTML Canvas shadowOffsetX property.
<!DOCTYPE html>
<html lang="en">
   <head>
      <title>Reference API</title>
      <style>
         body {
            margin: 10px;
            padding: 10px;
         }
      </style>
   </head>
   <body>
      <canvas id="canvas" width="400" height="200" style="border: 1px solid black;"></canvas>
      <script>
         var canvas = document.getElementById('canvas');
         var context = canvas.getContext('2d');
         context.shadowColor = 'brown';
         context.shadowBlur = 100;
         context.shadowOffsetX = 50;
         context.fillStyle = 'red';
         context.fillRect(20, 20, 200, 150)
      </script>
   </body>
</html>
Output
The output returned by the following code on the webpage as −
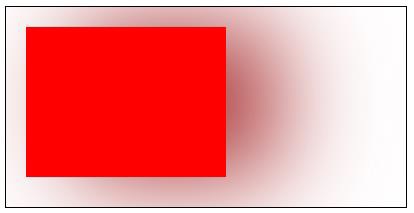
Example
The following example adds a shadow to the rectangle using negative offset x value by the shadowOffsetX property.
<!DOCTYPE html>
<html lang="en">
   <head>
      <title>Reference API</title>
      <style>
         body {
            margin: 10px;
            padding: 10px;
         }
      </style>
   </head>
   <body>
      <canvas id="canvas" width="400" height="200" style="border: 1px solid black;"></canvas>
      <script>
         var canvas = document.getElementById('canvas');
         var context = canvas.getContext('2d');
         context.shadowColor = 'brown';
         context.shadowBlur = 100;
         context.shadowOffsetX = -50;
         context.fillStyle = 'red';
         context.fillRect(180, 20, 200, 150)
      </script>
   </body>
</html>
Output
The output returned by the following code on the webpage as −
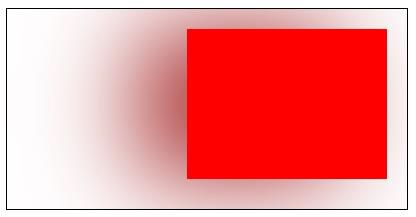
HTML Canvas shadowOffsetY property
The HTML Canvas shadowOffsetY property of Canvas 2D API from the CanvasRenderingContext2D interface is used to specify the vertical distance of the shadow to be drawn for the rendered graphic.
Possible input values
It takes a float integer value representing the shadow length vertically to be needed from the graphic on the Canvas element.
Example
The following example draws a circle onto the Canvas element and applies shadow to it with its offset Y-axis being positive by using the HTML Canvas shadowOffsetY property.
<!DOCTYPE html>
<html lang="en">
   <head>
      <title>Reference API</title>
      <style>
         body {
            margin: 10px;
            padding: 10px;
         }
      </style>
   </head>
   <body>
      <canvas id="canvas" width="200" height="250" style="border: 1px solid black;"></canvas>
      <script>
         var canvas = document.getElementById('canvas');
         var context = canvas.getContext('2d');
         context.shadowColor = 'blue';
         context.shadowBlur = 100;
         context.shadowOffsetY = 50;
         context.fillStyle = 'orange';
         context.arc(100, 100, 50, 0, 2 * Math.PI);
         context.fill();
      </script>
   </body>
</html>
Output
The output returned by the following code on the webpage as −
Example
The following example applies shadow to a circle drawn on the Canvas element with the shadow offset Y being negative so that the shadow moves upwards.
<!DOCTYPE html>
<html lang="en">
   <head>
      <title>Reference API</title>
      <style>
         body {
            margin: 10px;
            padding: 10px;
         }
      </style>
   </head>
   <body>
      <canvas id="canvas" width="200" height="250" style="border: 1px solid black;"></canvas>
      <script>
         var canvas = document.getElementById('canvas');
         var context = canvas.getContext('2d');
         context.shadowColor = 'blue';
         context.shadowBlur = 100;
         context.shadowOffsetY = -50;
         context.fillStyle = 'orange';
         context.arc(100, 150, 50, 0, 2 * Math.PI);
         context.fill();
      </script>
   </body>
</html>
Output
The output returned by the following code on the webpage as −
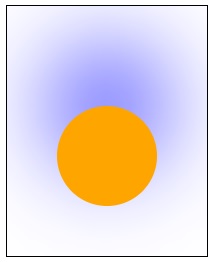
HTML Canvas getTransform() method
The HTML Canvas getTransform() method of Canvas 2D API gets the current transformation matrix applied to the context object of CanvasRenderingContext2D interface.
Syntax
Following is the syntax of HTML Canvas getTransform() method −
CanvasRenderingContext2D.getTransform();
Parameters
It does not take any parameters as it only returns the object data to which transformation matrix is applied.
Return value
It returns a transformation DOMMatrix object which is applied to the Canvas element.
Example
The following example returns transformation parameters on window alert of a CanvasRenderingContext2D interface context object of Canvas element using HTML Canvas getTransform() method.
<!DOCTYPE html>
<html lang="en">
   <head>
      <title>Reference API</title>
      <style>
         body {
            margin: 10px;
            padding: 10px;
         }
      </style>
   </head>
   <body onload="Context();">
      <canvas id="canvas" width="400" height="300" style="border: 1px solid black;"></canvas>
      <script>
         function Context() {
            var canvas = document.getElementById("canvas");
            var context = canvas.getContext("2d");
            context.setTransform(1, 0.5, 0.7, 0.9, 0.8, 0);
            context.fillRect(25, 25, 150, 100);
            var trans = context.getTransform();
            alert(trans);
         }
      </script>
   </body>
</html>
Output
The output returned by the following code on the webpage as −
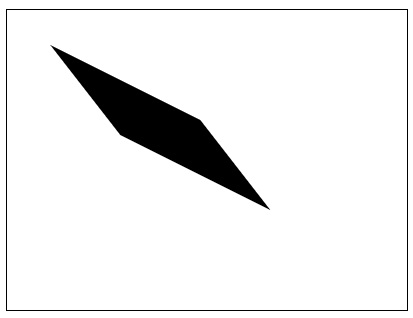
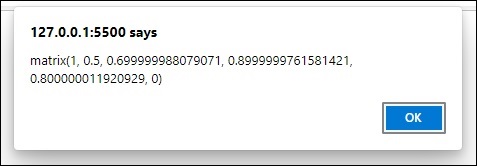
Example
The following example applies a transformation matrix to the graphic rendered inside the Canvas element and returns its properties by the console using getTransform() method.
<!DOCTYPE html>
<html lang="en">
   <head>
      <title>Reference API</title>
      <style>
         body {
            margin: 10px;
            padding: 10px;
         }
      </style>
   </head>
   <body>
      <canvas id="canvas" width="150" height="250" style="border: 1px solid black;"></canvas>
      <script>
         var canvas = document.getElementById('canvas');
         var context = canvas.getContext('2d');
         context.fillStyle = 'blue';
         context.setTransform(0, 0.2, 0.4, 0.6, 0.8, 1);
         context.fillRect(50, 50, 200, 200);
         var trans = context.getTransform();
         console.log(trans);
      </script>
   </body>
</html>
Output
The output returned by the following code on the webpage as
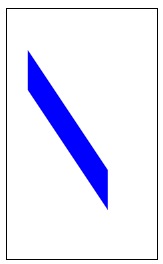
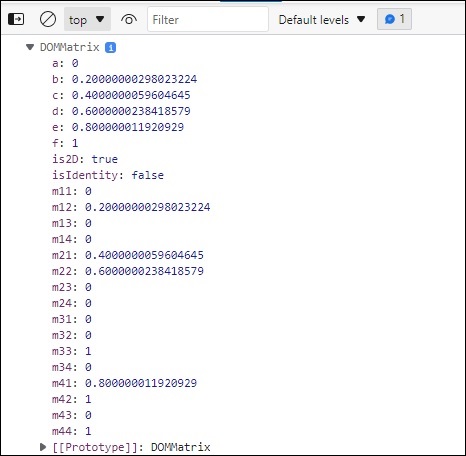
HTML Canvas resetTransform() method
The HTML Canvas resetTransform() method of Canvas 2D API completely resets the transformation methods applied to the interface context object of CanvasRenderingContext2D.
Syntax
Following is the syntax of HTML Canvas resetTransform() method −
CanvasRenderingContext2D.resetTransform();
Parameters
It does not take any parameters as it only resets the transformation matrix to the applied context object of CanvasRenderingContext2D interface.
Return Value
The current transformation matrix applied to the Context object is reset to the identity matrix when resetTransform() is called.
Example 1
The following example takes rectangle shape and rotates it by modifying the matrix, it is then reset to the identity matrix using HTML Canvas resetTransform() method.
<!DOCTYPE html>
<html lang="en">
   <head>
      <title>Reference API</title>
      <style>
         body {
            margin: 10px;
            padding: 10px;
         }
      </style>
   </head>
   <body onload="Context();">
      <canvas id="canvas" width="200" height="200" style="border: 1px solid black;"></canvas>
      <script>
         function Context() {
            var canvas = document.getElementById("canvas");
            var context = canvas.getContext("2d");
            context.rotate(75 * Math.PI / 180);
            context.fillStyle = 'blue';
            context.fillRect(45, -100, 150, 100);
            context.resetTransform();
         }
      </script>
   </body>
</html>
Output
The output returned by the following code on the webpage as −
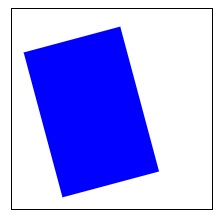
Example 2
The following example takes rectangle shape and rotates it by modifying the matrix, it is then reset to the identity matrix using resetTransform() method.
<!DOCTYPE html>
<html lang="en">
   <head>
      <title>Reference API</title>
      <style>
         body {
            margin: 10px;
            padding: 10px;
         }
      </style>
   </head>
   <body onload="Context();">
      <canvas id="canvas" width="400" height="200" style="border: 1px solid black;"></canvas>
      <script>
         function Context() {
            var canvas = document.getElementById("canvas");
            var context = canvas.getContext("2d");
            context.transform(1, 0, 1.7, 1, 0, 0);
            context.beginPath();
            context.fillStyle = 'gray';
            context.arc(100, 100, 50, 1 * Math.PI, 5 * Math.PI);
            context.fill();
            context.closePath();
            context.resetTransform();
            context.beginPath();
            context.fillStyle = 'red';
            context.arc(100, 100, 50, 1 * Math.PI, 5 * Math.PI);
            context.fill();
            context.closePath();
         }
      </script>
   </body>
</html>
Output
The output returned by the following code on the webpage as −
HTML Canvas restore() method
The HTML Canvas restore() method is used to restore the saved canvas state from the state stack only if there is a saved state available, otherwise this method does not do anything.
Syntax
Following is the syntax of HTML Canvas restore() method −
CanvasRenderingContext2D.restore();
Parameters
This method does not have any parameters as it just returns the previous canvas state if available.
Return value
This method returns a saved canvas state when called by the context object.
Example
The following example restores a saved rectangle onto the Canvas element using the HTML Canvas restore() method.
<!DOCTYPE html>
<html lang="en">
   <head>
      <title>Reference API</title>
      <style>
         body {
            margin: 10px;
            padding: 10px;
         }
      </style>
   </head>
   <body>
      <canvas id="canvas" width="500" height="250" style="border: 1px solid black;"></canvas>
      <script>
         var canvas = document.getElementById('canvas');
         var context = canvas.getContext('2d');
         context.save();
         context.fillStyle = 'cyan';
         context.fillRect(25, 20, 200, 150);
         context.restore();
         context.fillRect(250, 80, 200, 150);
      </script>
   </body>
</html>
Output
The output returned by the following code on the webpage as −
Example
The following example restores a circle which is saved in the stack using the method restore().
<!DOCTYPE html>
<html lang="en">
   <head>
      <title>Reference API</title>
      <style>
         body {
            margin: 10px;
            padding: 10px;
         }
      </style>
   </head>
   <body>
      <canvas id="canvas" width="350" height="250" style="border: 1px solid black;"></canvas>
      <script>
         var canvas = document.getElementById('canvas');
         var context = canvas.getContext('2d');
         context.beginPath();
         context.save();
         context.fillStyle = 'cyan';
         context.arc(100, 100, 55, 0, 2 * Math.PI);
         context.fill();
         context.closePath();
         context.beginPath();
         context.restore();
         context.arc(250, 180, 55, 0, 2 * Math.PI);
         context.fill();
         context.closePath();
      </script>
   </body>
</html>
Output
The output returned by the following code on the webpage as −
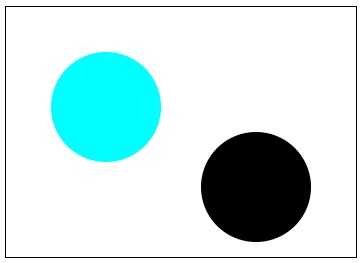
HTML Canvas rotate() method
The HTML Canvas rotate() method rotates available graphic to which context object is used at a certain angle for the transformation matrix.
Syntax
Following is the syntax of HTML Canvas restore() method −
CanvasRenderingContext2D.rotate(angle);
Parameters
Following is the parameters used by this method −
| S.No | Parameter & Description |
|---|---|
| 1 | angle The angle in radians to which the context object is to be rotated. |
Return value
It returns a rotated transform object which is used by the CanvasRenderingContext2D object.
Example
The following example takes a line drawn on the Canvas and rotates it at a certain angle passed as parameter to the HTML Canvas rotate() method.
<!DOCTYPE html>
<html lang="en">
   <head>
      <title>Reference API</title>
      <style>
         body {
            margin: 10px;
            padding: 10px;
         }
      </style>
   </head>
   <body>
      <canvas id="canvas" width="250" height="200" style="border: 1px solid black;"></canvas>
      <script>
         var canvas = document.getElementById('canvas');
         var context = canvas.getContext('2d');
         context.beginPath();
         context.moveTo(25, 25);
         context.lineTo(150, 25);
         context.stroke();
         context.closePath();
         context.beginPath();
         context.rotate(18 * Math.PI / 180);
         context.moveTo(100, 100);
         context.lineTo(225, 100);
         context.stroke();
         context.closePath();
      </script>
   </body>
</html>
Output
The output returned by the following code on the webpage as −
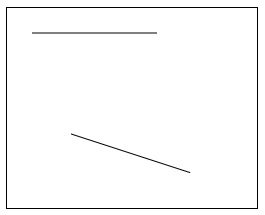
Example
The following example rotates a square drawn on the Canvas element using the method rotate().
<!DOCTYPE html>
<html lang="en">
   <head>
      <title>Reference API</title>
      <style>
         body {
            margin: 10px;
            padding: 10px;
         }
      </style>
   </head>
   <body>
      <canvas id="canvas" width="300" height="450" style="border: 1px solid black;"></canvas>
      <script>
         var canvas = document.getElementById('canvas');
         var context = canvas.getContext('2d');
         context.strokeRect(25, 20, 150, 100);
         context.rotate(50 * Math.PI / 180);
         context.strokeRect(250, 10, 150, 100);
      </script>
   </body>
</html>
Output
The output returned by the following code on the webpage as −
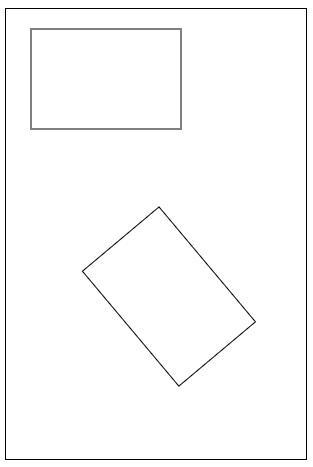
HTML Canvas save() method
The HTML Canvas save() method of Canvas 2D API is used to save the entire state of the Canvas element by pushing the current state onto the state stack.
Syntax
Following is the syntax of HTML Canvas save() method −
CanvasRenderingContext2D.save();
Parameters
Since this method just saves the canvas state when called, it does not accept any parameters.
Return value
It does not directly return anything, rather stores the current state onto the stack when called.
Example
The following example saves a square in the state stack using the HTML Canvas state() method.
<!DOCTYPE html>
<html lang="en">
   <head>
      <title>Reference API</title>
      <style>
         body {
            margin: 10px;
            padding: 10px;
         }
      </style>
   </head>
   <body>
      <canvas id="canvas" width="210" height="150" style="border: 1px solid black;"></canvas>
      <script>
         var canvas = document.getElementById('canvas');
         var context = canvas.getContext('2d');
         context.save();
         context.strokeRect(25, 20, 150, 100);
      </script>
   </body>
</html>
Output
The output returned by the following code on the webpage as −
Example
The following example saves a shape first and restores it onto the Canvas element using the HTML Canvas save() method.
<!DOCTYPE html>
<html lang="en">
   <head>
      <title>Reference API</title>
      <style>
         body {
            margin: 10px;
            padding: 10px;
         }
      </style>
   </head>
   <body>
      <canvas id="canvas" width="300" height="250" style="border: 1px solid black;"></canvas>
      <script>
         var canvas = document.getElementById('canvas');
         var context = canvas.getContext('2d');
         context.fillStyle = 'orange';
         context.fillRect(40, 40, 200, 150);
         context.save();
         context.fillStyle = 'white';
         context.fillRect(55, 55, 170, 120);
         context.save();
         context.fillStyle = 'green';
         context.fillRect(70, 70, 140, 90);
         context.restore();
         context.fillRect(85, 85, 110, 60);
         context.restore();
         context.fillRect(100, 100, 80, 30);
      </script>
   </body>
</html>
Output
The output returned by the following code on the webpage as −
HTML Canvas scale() method
The HTML Canvas scale() method of the Canvas 2D API adds a scaling transformation to the canvas horizontally/vertically.
By applying the scaling factor, the scale of the Canvas element pixels is changed which results in the change of context size.
Syntax
Following is the syntax of HTML Canvas scale() method −
CanvasRenderingContext2D.scale(x, y);
Parameters
Following is the list of parameters of this method −
| S.No | Parameter & Description |
|---|---|
| 1 | x Horizontal scaling value. |
| 2 | y Vertical scaling value. |
Return value
It applies scaling transformation to the context object inside the Canvas element.
Example
The following example draws a scaled rectangle onto the Canvas element using the HTML Canvas scale() method.
<!DOCTYPE html>
<html lang="en">
   <head>
      <title>Reference API</title>
      <style>
         body {
            margin: 10px;
            padding: 10px;
         }
      </style>
   </head>
   <body>
      <canvas id="canvas" width="400" height="300" style="border: 1px solid black;"></canvas>
      <script>
         var canvas = document.getElementById('canvas');
         var context = canvas.getContext('2d');
         context.scale(5, 5);
         context.fillStyle = 'blue';
         context.fillRect(5, 5, 70, 50);
      </script>
   </body>
</html>
Output
The output returned by the following code on the webpage as −
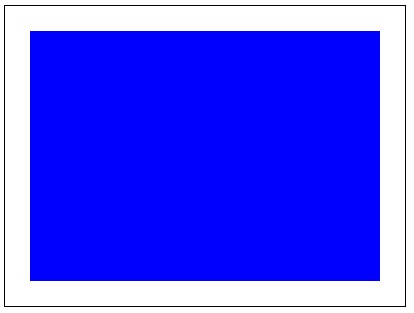
Example
The following methods scales a circle inside the Canvas element using the method scale().
<!DOCTYPE html>
<html lang="en">
<head>

    <title>Reference API</title>
    <style>
      body {
        margin: 10px;
        padding: 10px;
      }
   </style>
</head>

<body>
    <canvas id="canvas" width="250" height="450" style="border: 1px solid black;"></canvas>
    <script>
        var canvas=document.getElementById('canvas');
        var context=canvas.getContext('2d');
        context.scale(2,4);
        context.fillStyle = 'blue';
        context.arc(60,60,50,0,2*Math.PI);
        context.fill();
</script>
</body>
</html>
Output
The output returned by the following code on the webpage as −
HTML Canvas setTransform() method
The HTML Canvas setTransform() method of Canvas 2D API resets the current transformation matrix if applied to the identity matrix and then invokes a new transformation as given by the arguments of this method.
Syntax
Following is the syntax of HTML Canvas setTransform() method −
CanvasRenderingContext2D.setTransform(matrix, a, b, c, d, e, f);
Parameters
Following is the list of parameters of this method −
| S.No | Parameter & Description |
|---|---|
| 1 | matrix
This is a newer type of parameter which can be passed to the object. It represents a 2D transformation to set. The matrix is assigned as follows − a c e b d f 0 0 1 |
| 2 | a Horizontal scaling. |
| 3 | b Vertical skewing |
| 4 | c Horizantal skewing |
| 5 | d Vertical scaling |
| 6 | e Horizantal translation |
| 7 | f Vertical translation |
Return Value
A new transform applied to the context object of CanvasRenderingContext2D interface is drawn on the Canvas element.
Example 1
The following example applies the HTML Canvas setTransform() method to a rectangle and draws it onto the Canvas element.
<!DOCTYPE html>
<html lang="en">
<head>

    <title>Reference API</title>
    <style>
      body {
        margin: 10px;
        padding: 10px;
      }
   </style>
</head>

<body>
    <canvas id="canvas" width="250" height="200" style="border: 1px solid black;"></canvas>
    <script>
        var canvas=document.getElementById('canvas');
        var context=canvas.getContext('2d');
        context.fillStyle='purple';
        context.setTransform(1, 0.5, 0.7, 0.9, 0.8, 0);
        context.fillRect(15, 15, 100, 60);
</script>
</body>
</html>
Output
The output returned by the above code on the webpage as −
Example 2
The following example applies transformation matrix to circle drawn inside the Canvas element using the method setTransform().
<!DOCTYPE html>
<html lang="en">
   <head>
      <title>Reference API</title>
      <style>
         body {
            margin: 10px;
            padding: 10px;
         }
      </style>
   </head>
   <body>
      <canvas id="canvas" width="250" height="200" style="border: 1px solid black;"></canvas>
      <script>
         var canvas = document.getElementById('canvas');
         var context = canvas.getContext('2d');
         context.fillStyle = 'purple';
         context.setTransform(1, 0.5, 0.7, 0.9, 0.8, 0);
         context.arc(100, 50, 75, 0, 2 * Math.PI);
         context.fill();
      </script>
   </body>
</html>
Output
The output returned by the above code on the webpage as −
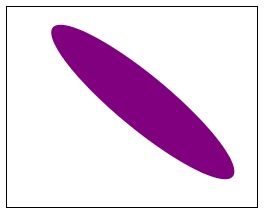
HTML Canvas transform() method
The HTML Canvas transform() method of Canvas API multiplies the current transformation by using the method arguments provided.
Syntax
Following is the syntax of HTML Canvas transform() method −
CanvasRenderingContext2D.transform(a, b, c, d, e, f);
Parameters
Following is the list of parameters of this method −
| S.No | Parameter & Description |
|---|---|
| 1 | a Horizantal scaling. |
| 2 | b Vertical skewing |
| 3 | c Horizantal skewing |
| 4 | d Vertical scaling |
| 5 | e Horizantal translation |
| 6 | f Vertical translation |
Return value
It applies transformation matrix to the current context object of CanvasRenderingContext2D interface inside the Canvas element.
Example 1
The following program applies transformation matrix to a square drawn onto the Canvas element using the HTML Canvas transform() method.
<!DOCTYPE html>
<html lang="en">
   <head>
      <title>Reference API</title>
      <style>
         body {
            margin: 10px;
            padding: 10px;
         }
      </style>
   </head>
   <body>
      <canvas id="canvas" width="250" height="200" style="border: 1px solid black;"></canvas>
      <script>
         var canvas = document.getElementById('canvas');
         var context = canvas.getContext('2d');
         context.setTransform(0.9, 0.8, 0.7, 0.6, 0.5, 0.4);
         context.fillRect(20, 20, 100, 100);
      </script>
   </body>
</html>
Output
The output returned by the following code on the webpage as −
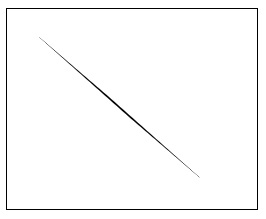
Example 2
The following example applies transformation matrix to a circle using the method transform().
<!DOCTYPE html>
<html lang="en">
   <head>
      <title>Reference API</title>
      <style>
         body {
            margin: 10px;
            padding: 10px;
         }
      </style>
   </head>
   <body>
      <canvas id="canvas" width="100" height="120" style="border: 1px solid black;"></canvas>
      <script>
         var canvas = document.getElementById('canvas');
         var context = canvas.getContext('2d');
         context.setTransform(0.1, 0.2, 0.3, 0.4, 0.5, 0.6);
         context.arc(100, 100, 100, 0, 2 * Math.PI);
         context.fill();
      </script>
   </body>
</html>
Output
The output returned by the following code on the webpage as −
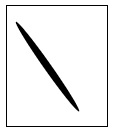
HTML Canvas translate() method
The HTML Canvas translate() method of Canvas API adds a translation matrix to the current matrix inside the Canvas element.
Syntax
Following is the syntax of HTML Canvas translate() method
CanvasRenderingContext2D.translate(x, y);
Parameters
Following is the list of parameters of this method −
| S.No | Parameter & Description |
|---|---|
| 1 | x Distance to move in the horizontal direction. |
| 2 | y Distance to move in the vertical direction. |
Return value
It returns the translated transformation matrix of the object when this method is called.
Example
The following example translates the Canvas co-ordinates and draws a rectangle onto the Canvas element using the HTML Canvas translate() method.
<!DOCTYPE html>
<html lang="en">
   <head>
      <title>Reference API</title>
      <style>
         body {
            margin: 10px;
            padding: 10px;
         }
      </style>
   </head>
   <body>
      <canvas id="canvas" width="250" height="200" style="border: 1px solid black;"></canvas>
      <script>
         var canvas = document.getElementById('canvas');
         var context = canvas.getContext('2d');
         context.translate(10, 10);
         context.fillStyle = 'blue';
         context.fillRect(25, 25, 150, 100);
      </script>
   </body>
</html>
Output
The output returned by the following code on the webpage as −
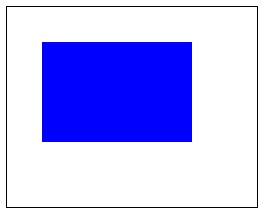
Example
The following example translates a line onto the Canvas element using the method translate().
<!DOCTYPE html>
<html lang="en">
   <head>
      <title>Reference API</title>
      <style>
         body {
            margin: 10px;
            padding: 10px;
         }
      </style>
   </head>
   <body>
      <canvas id="canvas" width="150" height="150" style="border: 1px solid black;"></canvas>
      <script>
         var canvas = document.getElementById('canvas');
         var context = canvas.getContext('2d');
         context.translate(10, 10);
         context.strokeStyle = 'blue';
         context.moveTo(10, 10);
         context.lineTo(100, 100);
         context.stroke();
      </script>
   </body>
</html>
Output
The output returned by the following code on the webpage as −

