- Laravel - Home
- Laravel - Overview
- Laravel - Installation
- Laravel - Application Structure
- Laravel - Configuration
- Laravel - Routing
- Laravel - Middleware
- Laravel - Namespaces
- Laravel - Controllers
- Laravel - Request
- Laravel - Cookie
- Laravel - Response
- Laravel - Views
- Laravel - Blade Templates
- Laravel - Redirections
- Laravel - Working With Database
- Laravel - Errors & Logging
- Laravel - Forms
- Laravel - Localization
- Laravel - Session
- Laravel - Validation
- Laravel - File Uploading
- Laravel - Sending Email
- Laravel - Ajax
- Laravel - Error Handling
- Laravel - Event Handling
- Laravel - Facades
- Laravel - Contracts
- Laravel - CSRF Protection
- Laravel - Authentication
- Laravel - Authorization
- Laravel - Artisan Console
- Laravel - Encryption
- Laravel - Hashing
- Understanding Release Process
- Laravel - Guest User Gates
- Laravel - Artisan Commands
- Laravel - Pagination Customizations
- Laravel - Dump Server
- Laravel - Action URL
Laravel - Validation
Validation is the most important aspect while designing an application. It validates the incoming data. By default, base controller class uses a ValidatesRequests trait which provides a convenient method to validate incoming HTTP requests with a variety of powerful validation rules.
Available Validation Rules in Laravel
Laravel will always check for errors in the session data, and automatically bind them to the view if they are available. So, it is important to note that a $errors variable will always be available in all of your views on every request, allowing you to conveniently assume the $errors variable is always defined and can be safely used. The following table shows all available validation rules in Laravel.
| Available Validation Rules in Laravel | ||
|---|---|---|
| Accepted | Active URL | After (Date) |
| Alpha | Alpha Dash | Alpha Numeric |
| Array | Before (Date) | Between |
| Boolean | Confirmed | Date |
| Date Format | Different | Digits |
| Digits Between | Exists (Database) | |
| Image (File) | In | Integer |
| IP Address | JSON | Max |
| MIME Types(File) | Min | Not In |
| Numeric | Regular Expression | Required |
| Required If | Required Unless | Required With |
| Required With All | Required Without | Required Without All |
| Same | Size | String |
| Timezone | Unique (Database) | URL |
The $errors variable will be an instance of Illuminate\Support\MessageBag. Error message can be displayed in view file by adding the code as shown below.
@if (count($errors) > 0)
   <div class = "alert alert-danger">
      <ul>
         @foreach ($errors->all() as $error)
            <li>{{ $error }}</li>
         @endforeach
      </ul>
   </div>
@endif
Example
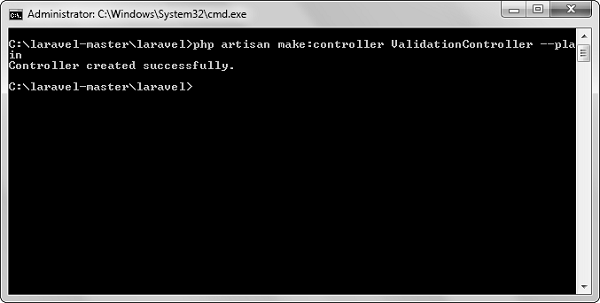
Step 1 − Create a controller called ValidationController by executing the following command.
php artisan make:controller ValidationController --plain
Step 2 − After successful execution, you will receive the following output −
Step 3 − Copy the following code in
app/Http/Controllers/ValidationController.php file.
app/Http/Controllers/ValidationController.php
<?php

namespace App\Http\Controllers;

use Illuminate\Http\Request;
use App\Http\Requests;
use App\Http\Controllers\Controller;

class ValidationController extends Controller {
   public function showform() {
      return view('login');
   }
   public function validateform(Request $request) {
      print_r($request->all());
      $this->validate($request,[
         'username'=>'required|max:8',
         'password'=>'required'
      ]);
   }
}
Step 4 − Create a view file called resources/views/login.blade.php and copy the following code in that file.
resources/views/login.blade.php
<html>

   <head>
      <title>Login Form</title>
   </head>

   <body>

      @if (count($errors) > 0)
         <div class = "alert alert-danger">
            <ul>
               @foreach ($errors->all() as $error)
                  <li>{{ $error }}</li>
               @endforeach
            </ul>
         </div>
      @endif

      <?php
         echo Form::open(array('url'=>'/validation'));
      ?>

      <table border = '1'>
         <tr>
            <td align = 'center' colspan = '2'>Login</td>
         </tr>
         <tr>
            <td>Username</td>
            <td><?php echo Form::text('username'); ?></td>
         </tr>
         <tr>
            <td>Password</td>
            <td><?php echo Form::password('password'); ?></td>
         </tr>
         <tr>
            <td align = 'center' colspan = '2'
               ><?php echo Form::submit('Login'); ?  ></td>
         </tr>
      </table>

      <?php
         echo Form::close();
      ?>

   </body>
</html>
Step 5 − Add the following lines in app/Http/routes.php.
app/Http/routes.php
Route::get('/validation','ValidationController@showform');
Route::post('/validation','ValidationController@validateform');
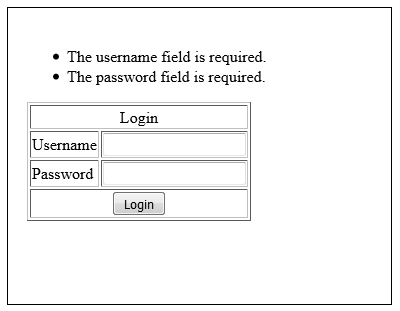
Step 6 − Visit the following URL to test the validation.
http://localhost:8000/validation
Step 7 − Click the Login button without entering anything in the text field. The output will be as shown in the following image.