
Article Categories
- All Categories
-
 Data Structure
-
 Networking
-
 RDBMS
RDBMS
-
 Operating System
-
 Java
Java
-
 MS Excel
-
 iOS
iOS
-
 HTML
HTML
-
 CSS
CSS
-
 Android
-
 Python
-
 C Programming
-
 C++
C++
-
 C#
C#
-
 MongoDB
-
 MySQL
MySQL
-
 Javascript
-
 PHP
PHP
-
 Economics & Finance
How to run single test in a TestNG class from IntelliJ IDE?
TestNG allows to run the test suites from IntelliJ IDE as well as command line. Usually, IntelliJ IDE is handy to run testng.xml for development purpose while command line (cmd) for actual execution. Apart from this, IntelliJ supports to run only single TestNG class as well as single test method inside a class. This feature helps while writing the code and debug it.
In this article we will discuss how to run a single testng class as well as single test method inside a testng class.
Approach/Algorithm to solve this problem
Step 1: Create a TestNG class &minus NewTestngClass.
Step 2: Write 2 different @Test method in the class &minus NewTestngClass as shown in below code:
Example
src/ NewTestngClass.java
import org.testng.annotations.Test;

public class NewTestngClass {

    @Test()
    public void testCase1() {
        System.out.println("in test case 1 of NewTestngClass");
    }
    @Test()
    public void testCase2() {
        System.out.println("in test case 2 of NewTestngClass");
    }
}
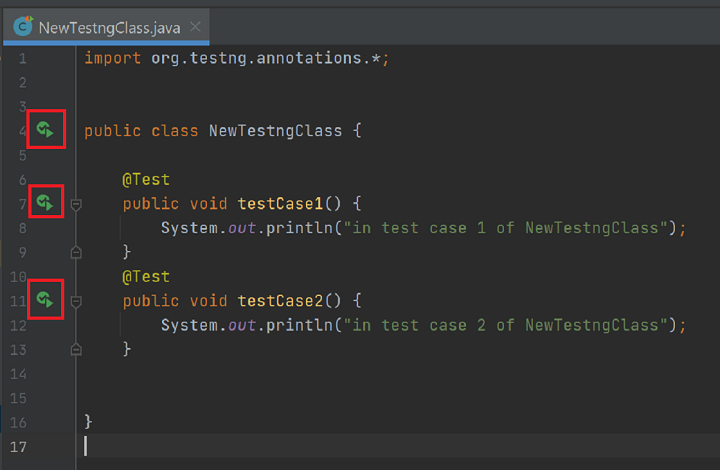
Step 3: User should navigate to IDE editor. There are 3 run symbol at left side &minus each symbol where @Test is written and one run symbol at class name as shown in below screenshot:
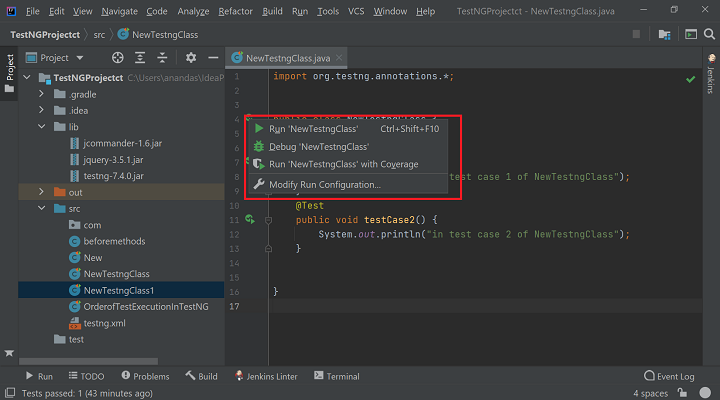
Step 4: The first symbol present at class name is used to run all @Test methods present in this class. If user clicks the symbol , it provides options to Run <ClassName> or Debug <ClassName> or Run <ClassName> with coverage or Modify Run Configuration.
User can click on Run <ClassName> to execute entire class. The shortcut of this execution is Ctrl+Shift+F10
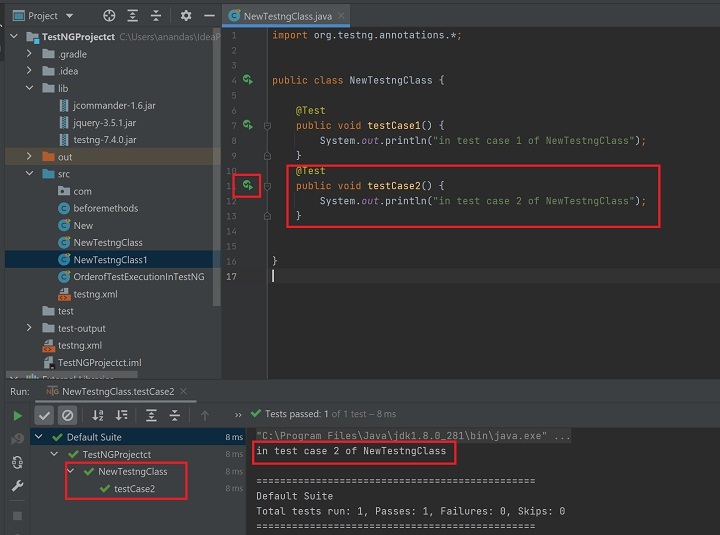
Similarly, if user wants to execute only specific @Test method, click on respective run symbol present at left side. In this example, 2nd and 3rd run symbol is referring to individual @Test method.
By clicking any of these run symbol (2nd or 3rd), it will provide same option and executes only that @Test method irrespective of number of @Test methods are available in the class.
Please note there is no keyboard shortcut to run individual @Test method. However, it displays Ctrl+Shift+F10 when user click on run symbol. This shortcut is used to run entire class.
Following screenshot displays how to run the entire class of a TestNG:
Following screenshot displays the run result after executing test2 method:

812 Views
