
Article Categories
- All Categories
-
 Data Structure
-
 Networking
-
 RDBMS
RDBMS
-
 Operating System
-
 Java
Java
-
 MS Excel
-
 iOS
iOS
-
 HTML
HTML
-
 CSS
CSS
-
 Android
-
 Python
-
 C Programming
-
 C++
C++
-
 C#
C#
-
 MongoDB
-
 MySQL
MySQL
-
 Javascript
-
 PHP
PHP
-
 Economics & Finance
How to Install Django 1.9 on Ubuntu
Django is an excessive stage Python internet framework that encourages speedy development, clean along with pragmatic layout. It takes a lot of care in building a trouble free web development programming language so that you can start writing your app in an easier manner without having to reinvent the wheel. It is an open-source software. This article provides the necessary instructions on – “How to install Django 1.9 on Ubuntu”.
Before we start with the Django installation, we should update the Ubuntu repository as shown in the below command-
$ sudo apt-get update
Installing Django
There are so many methods which are available to install Django. Here, we’re trying to give different approaches to installing Django with PIP.
PIP is a package management system for python. Python packages can be managed and installed easily with PIP. Python has its own central package repository server so that we can download the python packages from there which is called Python Package Index (PyPI). In this article, we will use Python version 3 for Django as recommended from the official Django site. To install python3-pip from the Ubuntu repository, use the following command-
In this article, we will be using Python version 3 for Django as recommended from the official Django site. To install python3-pip from the Ubuntu repository, use the following command-
$ sudo apt-get install python3-pip
To create a symlink for PIP3 to PIP, use the following commands –
$ which pip3
$ ln -s /usr/bin/pip3 /usr/bin/pip
Now verify the version of PIP using the following command –
$ pip -V
The sample output should be like this –
pip 1.5.6 from /usr/lib/python3/dist-packages (python 3.4)
Installing Django with PIP
To install Django with pip, use the following command –
$ sudo pip install django
The sample output should be like this –
Collecting django
   Downloading Django-1.9.6-py2.py3-none-any.whl (6.6MB)
      100% |????????????????????????????????| 6.6MB 179kB/s
Installing collected packages: django
Successfully installed django-1.9.6
To install Django-admin, use the following command –
$ sudo apt install python-django-common
The sample output should be like this –
Reading package lists... Done
Building dependency tree
Reading state information... Done
The following packages were automatically installed and are no longer required:
   apport-hooks-elementary contractor libgda-5.0-4 libgda-5.0-common
   libgranite-common libgranite3 libgsignon-glib1 libindicate5 libnoise-core0
   libtagc0 mysql-server-5.7 mysql-server-core-5.7
Use 'sudo apt autoremove' to remove them.
The following NEW packages will be installed:
   python-django-common
0 upgraded, 1 newly installed, 0 to remove and 187 not upgraded.
Need to get 1,182 kB of archives.
After this operation, 14.6 MB of additional disk space will be used.
Get:1 http://in.archive.ubuntu.com/ubuntu xenial/main amd64 python-django-common all 1.8.7-1ubuntu5 [1,182 kB]
.................................................................................................
When the installation is done, check the Django version with the following command-
# django-admin --version
The sample output should be like this-
1.9.6
Creating a New Project
To create a new project called ‘myblog’ with the django-admin, use the following command –
# django-admin startproject myblog
Now enter into the project using CD command as shown below –
# cd myblog/
Now run the ‘manage.py’ file as shown below –
~/myblog# python manage.py runserver
The sample output should be like this –
May 17, 2016 - 05:07:05
Django version 1.9.6, using settings 'myblog.settings'
Starting development server at http://127.0.0.1:8000/
Quit the server with CONTROL-C.
Now, open any favorite browser and enter the server URL. In our case it is http://127.0.0.1:8000. the sample output should be like this –

Now we will configure “Django admin”, wherein Django will automatically generate a database for a superuser.
But before we create a superuser, run the following command –
$ python manage.py migrate
The sample output should be like this –
Rendering model states... DONE
   Applying contenttypes.0001_initial... OK
   Applying auth.0001_initial... OK
   Applying admin.0001_initial... OK
   Applying admin.0002_logentry_remove_auto_add... OK
   Applying contenttypes.0002_remove_content_type_name... OK
   Applying auth.0002_alter_permission_name_max_length... OK
   Applying auth.0003_alter_user_email_max_length... OK
   Applying auth.0004_alter_user_username_opts... OK
   Applying auth.0005_alter_user_last_login_null... OK
   Applying auth.0006_require_contenttypes_0002... OK
   Applying auth.0007_alter_validators_add_error_messages... OK
   Applying sessions.0001_initial... OK
Now create the admin user as shown below –
$ python manage.py createsuperuser
The sample output should be like this –
Username (leave blank to use 'root'): tutorialspoint
Email address: sairamkrishna@tutorialspoint.com
Password:
Password (again):
Superuser created successfully.
The Django super user has been added, now you can use the runserver command to start Django admin. Open the browser and visit the Django admin page as shown below –
# python manage.py runserver
Open your browser and run server link, in this case, it should be like this –
http://127.0.0.1:8000/admin
The sample output should be like this –
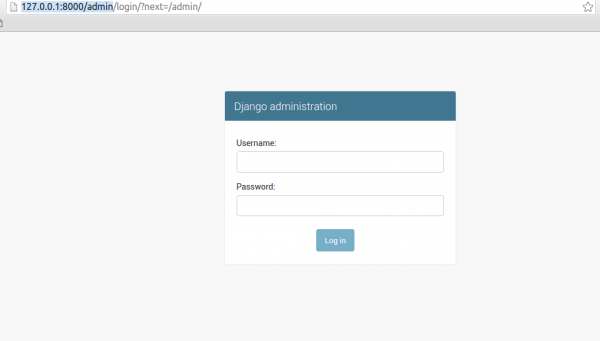
Enter your admin user name and password. Now the sample output should be like this –
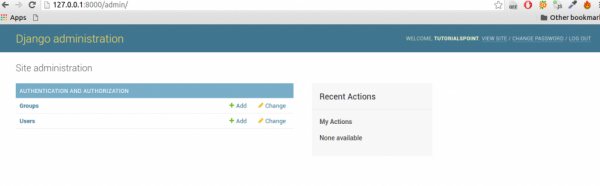
That’s it. After this article, you will be able to understand – How to Install Django 1.9 on Ubuntu, we will come up with more Linux based tricks and tips. Keep reading!

421 Views
