
Article Categories
- All Categories
-
 Data Structure
-
 Networking
-
 RDBMS
RDBMS
-
 Operating System
-
 Java
Java
-
 MS Excel
-
 iOS
iOS
-
 HTML
HTML
-
 CSS
CSS
-
 Android
-
 Python
-
 C Programming
-
 C++
C++
-
 C#
C#
-
 MongoDB
-
 MySQL
MySQL
-
 Javascript
-
 PHP
PHP
-
 Economics & Finance
How to host a web-service using IIS (windows) and .net
A web service is any piece of software which offers service to other systems. It makes itself available over the internet and uses a standardized XML or, JSON messaging system. A web service enables communication among various applications by using open standards such as HTML, XML, WSDL, and SOAP.
IIS
IIS stands for, Internet Information Services, it is a web service software create by Microsoft. It is available with the Windows (NT) operating systems, it supports HTTP, HTTP/2, HTTPS, FTP, FTPS, SMTP and NNTP.
Here we are going to discuss how create and launch a web service locally and send request to it.
Installing IIS
If your operating system is Windows NT IIS is available with in the operating system (else you need to download it manually). To install it −
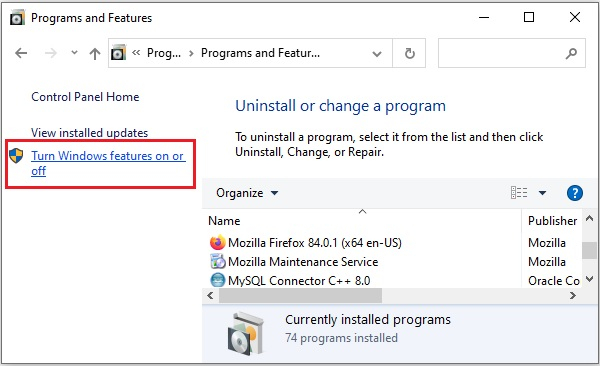
- Open Control Panel →(Programs) →Programs and Features and click on Turn Windows features on or off.
- In the Windows Features window make sure you turned the .Net Freamework Advanced featured Services and all the features in the Web management tools on.
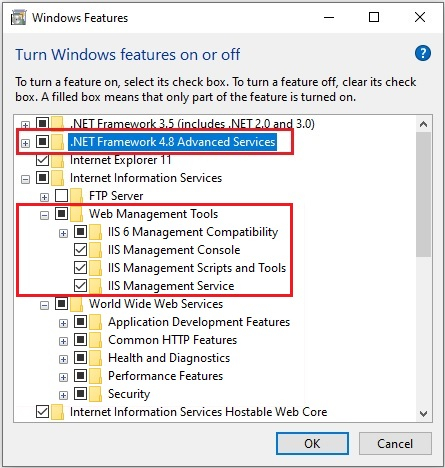
- On clicking OK the selected components will be installed.
Setting up IIS
Once you installed IIS you need to setup, to do so −
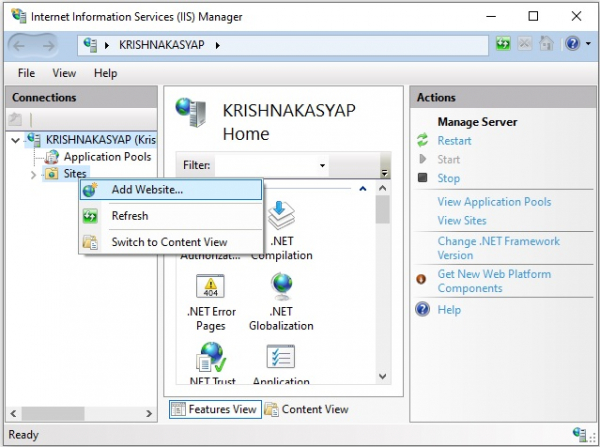
- Open IIs application, Expand the tree view on the left-hand side of the window.
- Right click on the Sites folder and click on Add Website.
- In the Add Web site wizard, add required name for the service in the Site name text box, set the Application Pool value to DefaultAppPool, add a four-digit number in the Port text box. Finally create a folder to store the application (with a sample HTML file) and choose the created location under Physical path: and click on
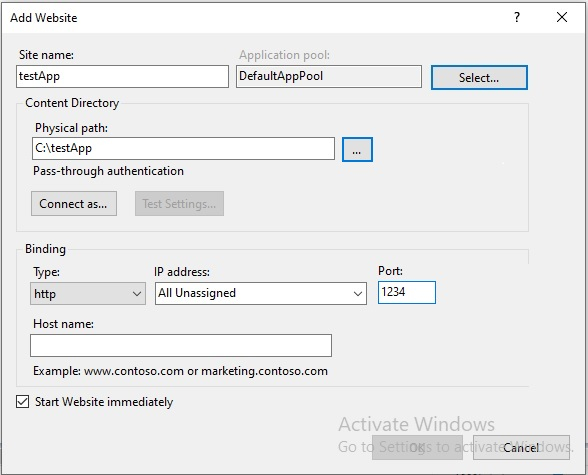
- This will create the specified website with given details and you can see the created folder under the Sites tree view.
Enable directory browsing
Finally, before sending request to a page in the created server, you need to enable directory browsing, to do so −
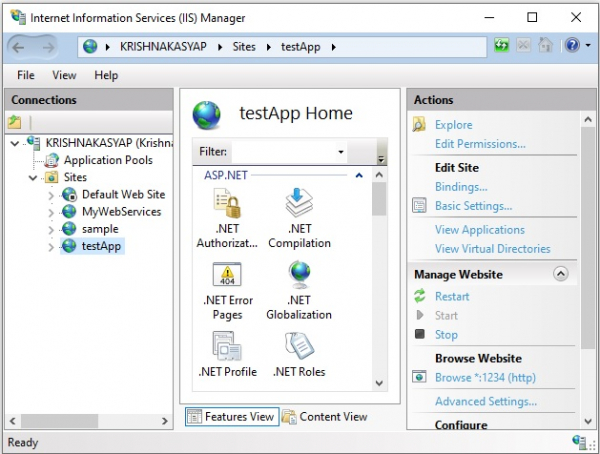
- Click on the created app (in this case testApp).
- On the right side under IIS double click Directory Browsing.
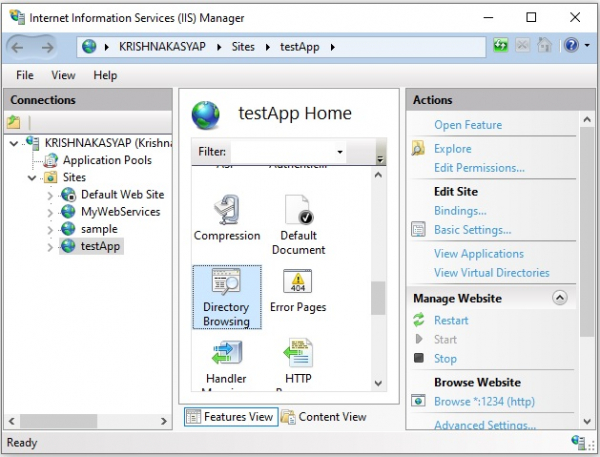
Finally, Click Enable under action and save the changes.
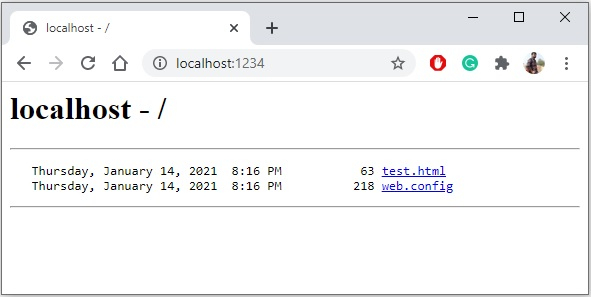
Sending request
If everything goes fine if you send request to the host along with the port you can see the contents of the created as shown below −
Example web service
Following web service have two methods −
- The getAge accepts a year, month and day representing the date of birth of a person and calculates the age (in days).
- And a SayHello method displaying a simple message
<%@ WebService language = "C#" class = "SampleService" %>
 using System;
using System.Web.Services;
using System.Xml.Serialization;
 [WebService(Namespace = "http://localhost/SampleWebService/")]
public class SampleService : WebService{
   [WebMethod]
   public int getAge(int year, int month, int day) {
      DateTime dob = new DateTime(year, month, day);
      DateTime today = DateTime.Now;

      //Getting the difference
      TimeSpan span = today.Subtract(dob);
      return span.Days;
   }
   [WebMethod]
   public String SayHello() {
      return "Hello World";
   }
}
You need to place this file in the created webservice folder.

6K+ Views
