 Data Structure
 Networking
 RDBMS
RDBMS Operating System
 Java
Java MS Excel
 iOS
iOS HTML
HTML CSS
CSS Android
 Python
 C Programming
 C++
C++ C#
C# MongoDB
 MySQL
MySQL Javascript
 PHP
PHP
- Selected Reading
- UPSC IAS Exams Notes
- Developer's Best Practices
- Questions and Answers
- Effective Resume Writing
- HR Interview Questions
- Computer Glossary
- Who is Who
How to Enlarge Image When Click on it in Excel?
Images are essential for improving the aesthetic appeal and informational effectiveness in today's digital world. With the help of the robust spreadsheet programme Microsoft Excel, you may not only arrange data but also include graphics in your workbooks. This guide will walk you through each step of expanding an image in Excel after clicking it.
So let's get started and discover how to use Excel's enlarge-on-click feature to make your photos more interactive and compelling! This can be very useful when working with intricate charts, graphics, or diagrams. You may make sure that your audience can see every detail by automatically expanding an image.
Enlarge Image When Click on it
Here we will assign a macro to the picture to complete the task. So let us see a simple process to know how you can enlarge an image when you click on it in Excel.
Step 1
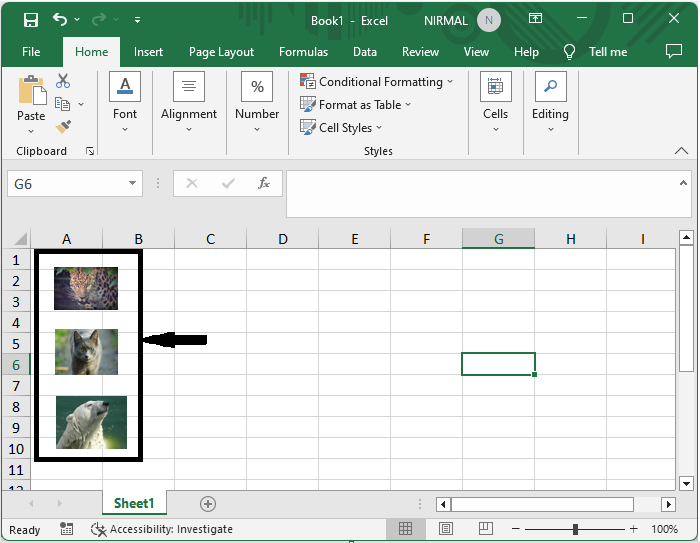
Consider an Excel sheet where you have images similar to the below image.

First, right-click on the picture and select assign macro.
Right-click > Assign Macro.
Step 2
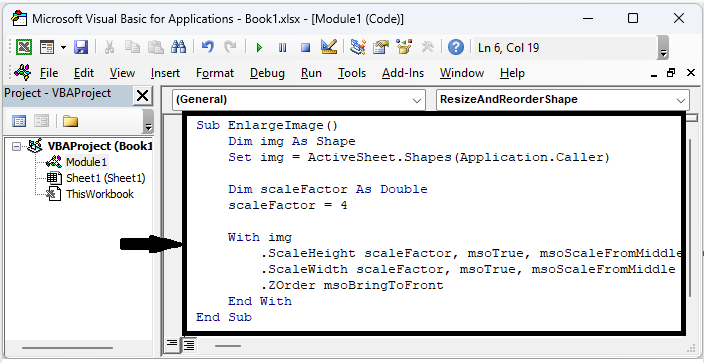
Then click on New and copy the below code into the text box.
New > Copy.
Code
Sub EnlargeImage()
   Dim img As Shape
   Set img = ActiveSheet.Shapes(Application.Caller)

   Dim scaleFactor As Double
   scaleFactor = 4

   With img
      .ScaleHeight scaleFactor, msoTrue, msoScaleFromMiddle
      .ScaleWidth scaleFactor, msoTrue, msoScaleFromMiddle
      .ZOrder msoBringToFront
   End With
End Sub

In the code scaleFactor = 4 represent the image size.
Step 3
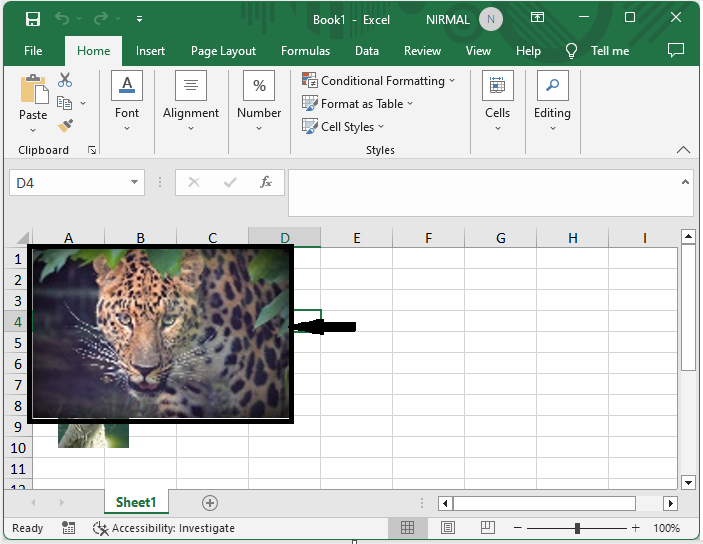
Then close VBA using Alt + Q. From now on, when you click on an image, it will be enlarged.

Conclusion
In this tutorial, we have used a simple example to demonstrate how you can enlarge an image when you click on it in Excel to highlight a particular set of data.

