
Article Categories
- All Categories
-
 Data Structure
-
 Networking
-
 RDBMS
RDBMS
-
 Operating System
-
 Java
Java
-
 MS Excel
-
 iOS
iOS
-
 HTML
HTML
-
 CSS
CSS
-
 Android
-
 Python
-
 C Programming
-
 C++
C++
-
 C#
C#
-
 MongoDB
-
 MySQL
MySQL
-
 Javascript
-
 PHP
PHP
-
 Economics & Finance
How To Create/Make A Shared Workbook In Excel?
A useful feature that enables simultaneous collaboration between numerous users on an Excel file is sharing workbooks. A shared worksheet can increase productivity and simplify your work process whether you're working on a team project, performing data analysis, or simply exchanging information with coworkers. In this lesson, we'll walk you through each step of creating a shared Excel workbook. From activating sharing options to controlling user access and settling issues, we'll go through everything you need to know. You'll have a firm grasp on how to efficiently work on Excel files with your coworkers or team members by the end of this session.
Please make sure Microsoft Excel is installed on your computer before we start. It's also advised to have a fundamental knowledge of Excel's capabilities and user interface. Let's get started and see how to make a shared worksheet in Excel!
Create/Make A Shared Workbook In Excel
Here we will make changes to the sheet before creating it. So let us see a simple process to learn how you can create or make a shared workbook in Excel.
Step 1
Consider any Excel sheet.
In order to start our procedure, you need to customise the ribbon and add Share workbook, Track changes, Protect sharing, and Compare and Merge workbook commands to the ribbon.
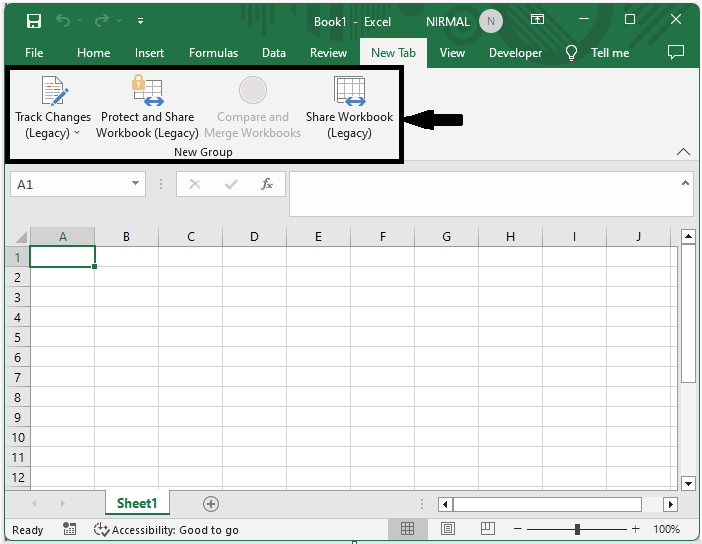
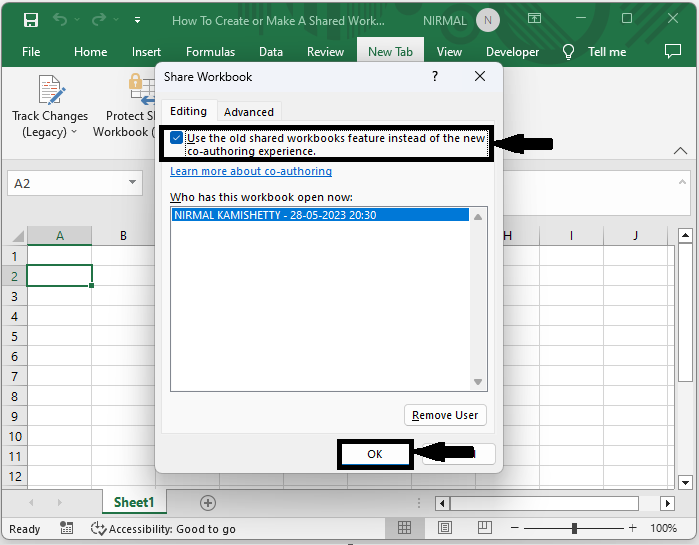
Step 2
Then, under the new tab, click on Share Workbook" to open a pop?up for "Share Workbook," then select the checkbox, click "OK," and save the workbook to complete the task.
New tab > Share workbook > Checkbox > Ok > Save.
Note
You can track the changes to the workbook using Track Changes.
Conclusion
In this tutorial, we have used a simple example to demonstrate how you can create or make a shared workbook in Excel to highlight a particular set of data.

683 Views
