
Article Categories
- All Categories
-
 Data Structure
-
 Networking
-
 RDBMS
RDBMS
-
 Operating System
-
 Java
Java
-
 MS Excel
-
 iOS
iOS
-
 HTML
HTML
-
 CSS
CSS
-
 Android
-
 Python
-
 C Programming
-
 C++
C++
-
 C#
C#
-
 MongoDB
-
 MySQL
MySQL
-
 Javascript
-
 PHP
PHP
-
 Economics & Finance
How to get the active workbook location/path in Excel?
In this article, the user will learn the process of getting the active worksheet location/path in excel by using the three possible methods. This article contains three examples. The first example is based on the user defined formula. While the second example is based on the use of VBA code, and finally third example makes use of kutool extension. All the three examples use the same excel sheet, to display the processing. The provided three examples will precisely perform the same task but use different approaches. The main purpose of this article is to understand the available different type of approach to perform the same task.
Example 1: To get the active workbook location in excel by using the user defined formula:
Step 1:
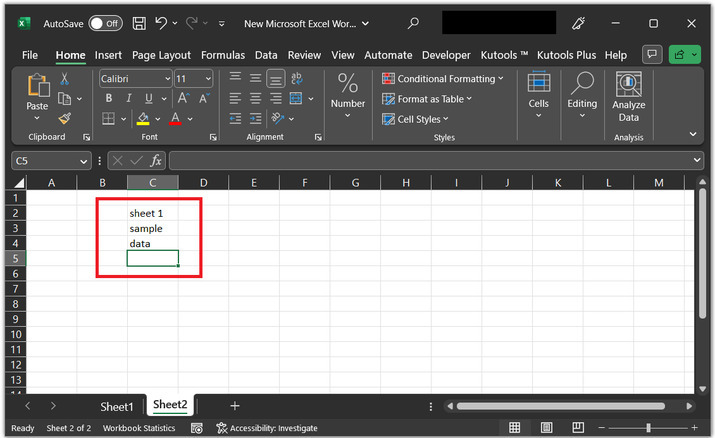
To understand the example and it?s working precisely consider the below given worksheet.
Step 2:
In this step the user will be able to determine the location of cell by using the user-defined formula. Type the below given formula "=LEFT(CELL("filename",C2),FIND("[",CELL("filename",C2))-1)". Consider the code snapshot to understand the processing of data.
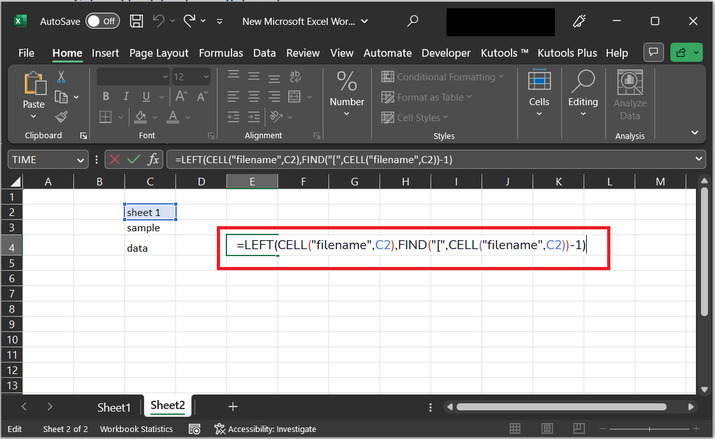
Explanation for formula:
CELL("filename",C2) returns the full path of the current workbook, including the workbook name and extension.
FIND("[",CELL("filename",C2)) finds the position of the opening square bracket ("[") in the file path. This is used to identify the start of the workbook name and exclude the path from the result.
LEFT(CELL("filename",C2),FIND("[",CELL("filename",C2))-1) extracts the leftmost characters of the full path up to the position of the opening square bracket minus one character. This effectively removes the workbook name and extension, leaving only the path.
Step 3:
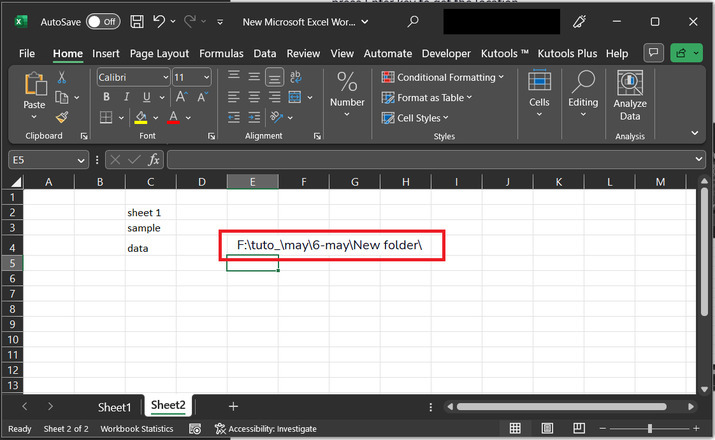
The provided snapshot contains the full path of the current workbook.
Step 4:
To obtain the required workbook location and workbook name, use the below provided formula ?
=SUBSTITUTE( LEFT(CELL("filename",c2),FIND("]",CELL("filename",c2))-1),"[","")
Consider snapshot for reference ?
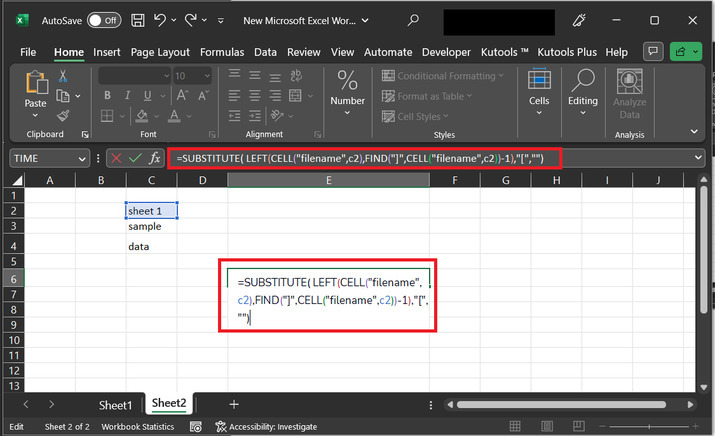
Explanation for formula:
The CELL function retrieves information about the cell containing the formula.
The "filename" argument specifies that the function should return the full path and filename of the current workbook.
The c2 argument tells the function to retrieve information about the cell in row 2 and column C.
The LEFT function retrieves the leftmost characters from the returned filename, till a particular number of characters.
The FIND function locates the position of the first occurrence of the "]" character within the extracted filename.
The "-1" argument is used to adjust the position returned by the FIND function by subtracting one, so that the "]" character is not included in the result.
The SUBSTITUTE function replaces the "[" character in the filename with an empty string, effectively removing it from the result.

Example 2: To get the active workbook location in excel by using the VBA code:
Step 1:
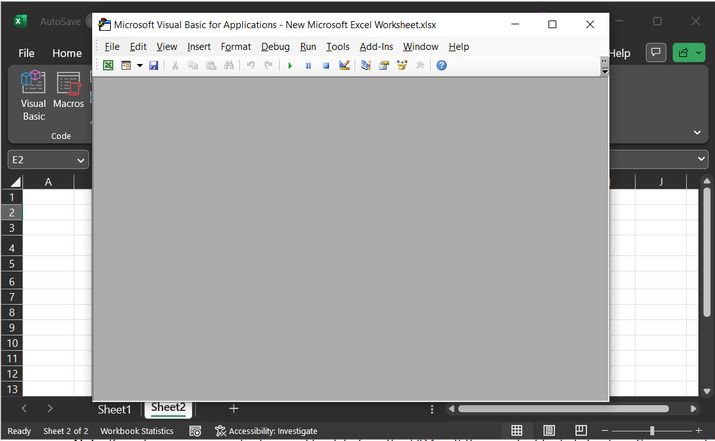
Use the same excel sheet, specified above. After that click on the Developer tab, and then under the "Code" section, click on "Visual Basic" option. This step will allow user to open a visual basic editor.

Step 2:
The above step will open a "Microsoft Visual Basic for Application " dialog box for user ?
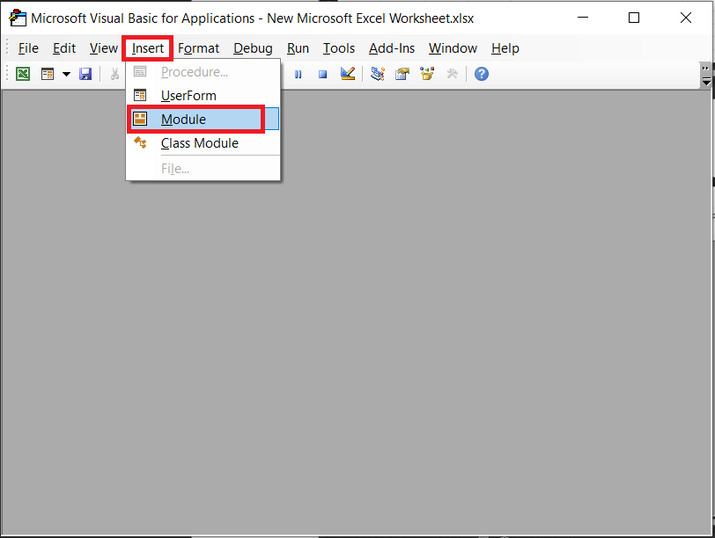
Step 3:
Go to the Insert tab, after that choose the option named Module. Consider image snapshot for reference ?
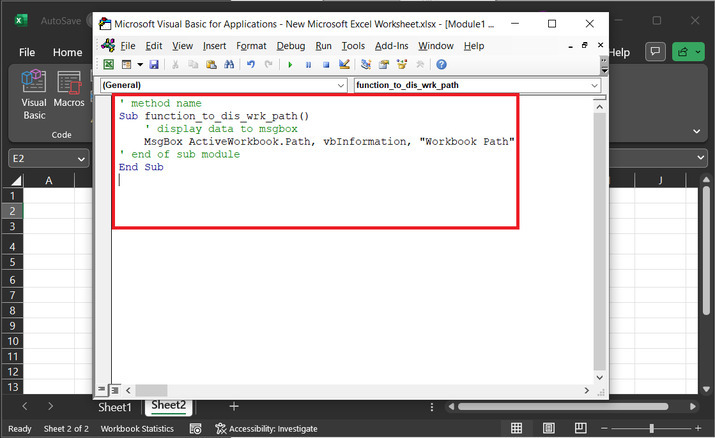
Step 4:
Consider below given code ?
' method name
Sub function_to_dis_wrk_path()
    ' display data to msgbox
    MsgBox ActiveWorkbook.Path, vbInformation, "Workbook Path"
' end of sub module
End Sub
Please write code with proper indentation to avoid syntax errors. Complete snapshot for coding window is provided below ?
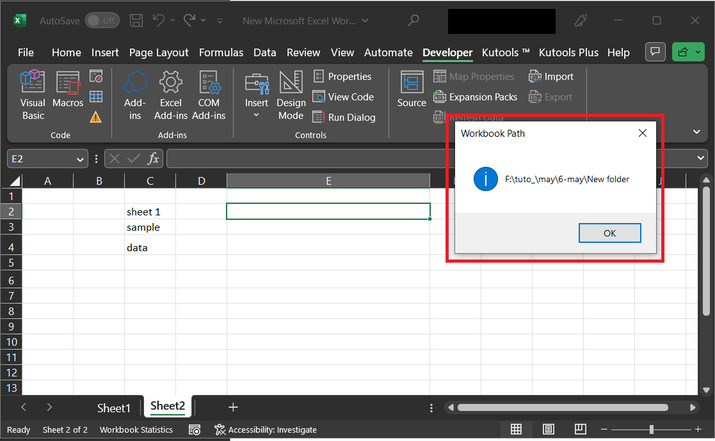
Step 5:
The above step will open the dialog box named "Macros". After that select the name of the module and click on "Run" button. To obtain the generated results.

Step 6:
The above step will display a dialog box, with the name "Workbook Path". This dialog box contains a workbook path. Finally, click on "OK" button.
Example 3: To get the active workbook location in excel by using the Kutools option:
Step 1:
To insert the workbook information in excel sheet. Go to the "Kutools Plus" tab and choose "Workbooks & Sheets". After that under the "Workbook" option, select the option for "Insert Workbook Information".
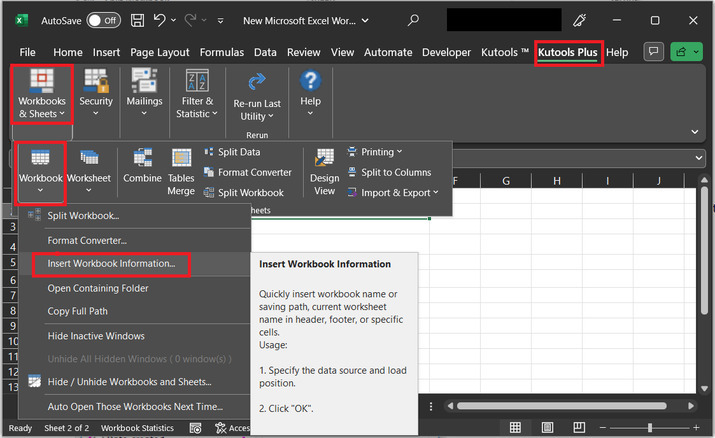
Step 2:
The above step will open a "Insert Workbook Information" dialog box. This option contains a label for "Worksheet name", and at the "Insert at" label, in the range option add a valid range to display data. For this example, under the range label, add "A1" value. In the header section, select the option for "Left". Finally, click on "OK" button. Consider below given snapshot for proper reference:

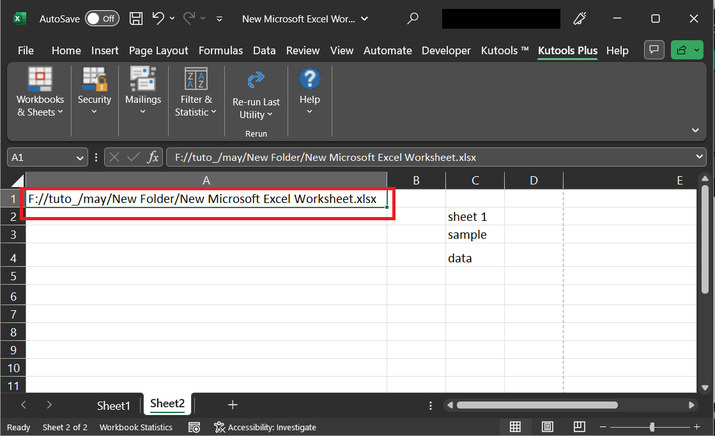
Step 3:
The final displayed path is shown at the A1 cell.
Conclusion
Sometimes, users forget to find the location of the active workbook. In this article, various user defined functions and VBA code are demonstrated in the examples to obtain the location of the active worksheet. Make sure that statements in the VBA code must be written carefully to run the program code successfully otherwise error may occur and may produce unwanted result.

9K+ Views
