
Article Categories
- All Categories
-
 Data Structure
-
 Networking
-
 RDBMS
RDBMS
-
 Operating System
-
 Java
Java
-
 MS Excel
-
 iOS
iOS
-
 HTML
HTML
-
 CSS
CSS
-
 Android
-
 Python
-
 C Programming
-
 C++
C++
-
 C#
C#
-
 MongoDB
-
 MySQL
MySQL
-
 Javascript
-
 PHP
PHP
-
 Economics & Finance
How to automatically compile your TypeScript files with Visual Studio Code on OS X?
TypeScript is a popular programming language that is widely used in the web development industry. It is an open-source, strongly typed, and object-oriented programming language that is a superset of JavaScript. TypeScript is very similar to JavaScript, but it has a few additional features that make it more powerful and efficient. One of the best things about TypeScript is that it can be compiled into JavaScript, which can be run in any browser or on any server.
In this article, we will discuss how to automatically compile TypeScript files with Visual Studio Code on OS X. Visual Studio Code is a popular code editor that is used by many developers worldwide. It is lightweight, fast, and has many features that make coding easier and more efficient.
Step-by-step Guide
Before we begin, make sure that you have installed the latest version of Visual Studio Code and TypeScript on your system.
You can download Visual Studio Code from their official website (https://code.visualstudio.com/).
Visual Studio Code (VS Code) includes TypeScript language support, but it does not include TypeScript compiler, tsc. You can install the TypeScript compiler either globally or in your workspace to transpile TypeScript source code to JavaScript. You can run any of the below commands to install tsc to your system.
Run this if you use npm,
npm install -g typescript
OR, if you use yarn,
yarn global add typescript
OR, if your use pnpm
pnpm install -g typescript
OR, you can just install it for your workspace (project) only by removing the global or -g options from the above commands.
Before we begin, let?s first make sure that you have correctly installed typescript on your system by running the following command ?
tsc -v
As long as you get anything that looks like this back, you are good to go with this journey ?

Now that you have your system setup let?s begin the journey to learn how to compile typescript files with Visual Studio Code on OS X.
It is important to keep in mind that VS Code's TypeScript language service is separate from your installed TypeScript compiler. You can see the VS Code's TypeScript version in the Status Bar when you open a TypeScript file.
Step 1: Create a TypeScript Project
The first step is to create a TypeScript project. Open Visual Studio Code and create a new directory named typescript-demo for your project. The name of the project is insignificant for this tutorial.
Next, open the terminal in Visual Studio Code by pressing Cmd + Shift + P and type "Terminal: Create New Integrated Terminal" in the command palette. You can also create a new terminal by pressing Ctrl + Shift + `.
Now, navigate to the project folder in the terminal and create a new TypeScript file with the following command ?
touch index.ts
Step 2: Create a Tsconfig.json File
The next step is to create a tsconfig.json file. This file tells the TypeScript compiler how to compile your TypeScript files. Create a new file in your project directory with the following command ?
touch tsconfig.json
Next, open the tsconfig.json file and add the following code ?
{
   "compilerOptions": {
      "target": "es5",
      "out": "js/script.js",
      "watch": true
   }
}
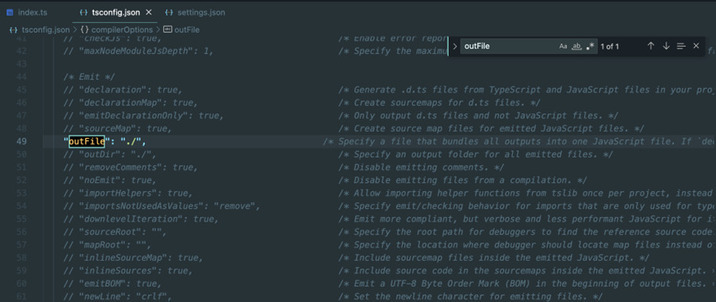
Here "target" option specifies the version of ECMAScript the spitted JavaScript should be. "out" option specifies the location of the transpiled JavaScript code. The "watch": true option instructs compiler to watch all the compiled files ?
Note that files array is omitted. So, by default, all *.ts files in all subdirectories will be compiled. You can provide any other parameters or change target/out, just make sure that watch is set to true.
There can be many other options that you can set in this file, like module, esModuleInterop, forceConsistentCasingInFileNames, strict, skipLibCheck, which can make your life easier as a typescript developer and about which you can refer to this documentation (https://www.typescriptlang.org/tsconfig).
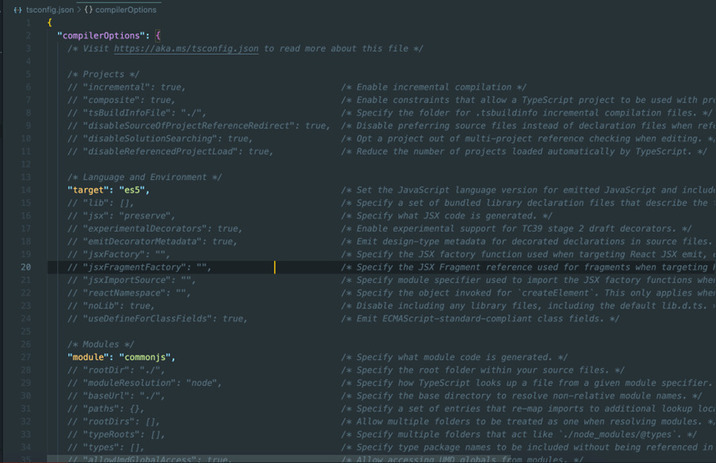
You can also just create a default tsconfig.json using
tsc --init
This creates a tsconfig.json with default parameter values. It will look kind of like this ?
Step 3: Configure Visual Studio Code to Compile TypeScript Files
Press Ctrl+Shift+B to open a list of tasks in VS Code and select tsc: watch - tsconfig.json.
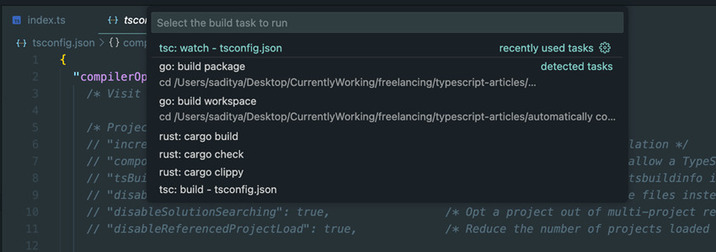
You will see that a terminal window opens up like this
Now the fantastic news is that you?re done! Now you can make changes to your index.ts file and see it transpired live to JavaScript code on every save.
Example
Split your VS Code editor screen into two by pressing Cmd + \ and copy-paste the below code to your index.ts file. Now, save the file using Cmd + s.
console.log("Live compilation of TypeScript files")

function add(x: number, y: number): number {
   return x+y
}
console.log(add(4, 5))
You can find the transpiled JS file in the location as specified in the tsconfig.json file.
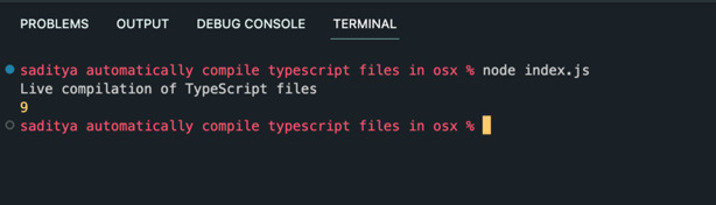
Output

You can run your transpiled JS source code by running
node index.js
Conclusion
In conclusion, automating the compilation of TypeScript files with Visual Studio Code on OSX can significantly improve your development workflow. By following the steps outlined in this article, you can easily set up Visual Studio Code to automatically compile your TypeScript files, enabling you to focus on writing code rather than worrying about manual compilation. With the popularity of TypeScript, it is essential to optimize your development process, and automating the compilation of your code is an excellent way to do just that.

1K+ Views
