- GraphQL - Home
- GraphQL - Introduction
- GraphQL - Environment Setup
- GraphQL - Architecture
- GraphQL - Application Components
- GraphQL - Example
- GraphQL - Type System
- GraphQL - Schema
- GraphQL - Resolver
- GraphQL - Query
- GraphQL - Mutation
- GraphQL - Validation
- GraphQL - JQuery Integration
- GraphQL - React Integration
- GraphQL - Apollo Client
- GraphQL - Authenticating Client
- GraphQL - Caching
GraphQL - Apollo Client
We have used Apollo Server to build graphql specification on server side. It is quick and easy to build production ready GraphQL server. Now let us understand the client side.
Apollo Client is the best way to use GraphQL to build client applications. The client is designed to help developer quickly build a UI that fetches data with GraphQL and can be used with any JavaScript front-end.
Apollo Client supports the following platforms −
| Sr.No. | Platform & Framework |
|---|---|
| 1 | Javascript React,Angular,Vue,Meteor,Ember |
| 2 | WebComponents Polymer, lit-apollo |
| 3 | Native Mobile Native Android with Java, Native iOS with Swift |
Caching is one of the major features of Apollo Client.apollo-boostis a convenience package which brings in a bunch of other dependencies.
Illustration
Let us see how to use Apollo Client to build client applications using the following steps −
Setting up Server
We have to follow the below steps for setting up a server −
Step 1 − Download and Install Required Dependencies for the Project
Create a folderapollo-server-app. Change your directory toapollo-server-appfrom the terminal. Then, follow steps 3 to 5 explained in the Environment Setup chapter.
Step 2 − Create a Schema
Add schema.graphql file in the project folderapollo-server-appand add the following code −
type Query
{
   students:[Student]
}

type Student {
   id:ID!
   firstName:String
   lastName:String
   college:College
}

type College {
   id:ID!
   name:String
   location:String
   rating:Float
}
Step 3 − Add Resolvers
Create a file resolvers.js in the project folder and add the following code −
const db = require('./db')

const Query = {
   //resolver function for students returns list
   students:() => db.students.list(),
}

const Student = {
   college:(root) => {
      return db.colleges.get(root.collegeId);
   }
}
module.exports = {Query,Student}
Step 4 − Run the Application
Create a server.js file. Refer step 8 in the Environment Setup Chapter. Execute the commandnpm startin the terminal. The server will be up and running on 9000 port. Here, we will use GraphiQL as a client to test the application.
Open browser and type the URLhttp://localhost:9000/graphiql. Type the following query in the editor.
{
   students{
      id
      firstName
      college{
         name
      }
   }
}
The response for the query is as given below −
{
   "data": {
      "students": [
         {
            "id": "S1001",
            "firstName": "Mohtashim",
            "college": {
               "name": "CUSAT"
            }
         },

         {
            "id": "S1002",
            "firstName": "Kannan",
            "college": {
               "name": "AMU"
            }
         },

         {
            "id": "S1003",
            "firstName": "Kiran",
            "college": {
               "name": "AMU"
            }
         }
      ]
   }
}
Setting up the Client
Open a new terminal for client. The server terminal should be kept running before executing the client application. React application will be running on port number 3000 and server application on port number 9000.
Step 1 − Create a React Application
In the client terminal, type the following command −
npx create-react-app hello-world-client
This will install everything needed for a typical react application. The npx utility and create-react-app tool create a project with name hello-world-client. Once the installation is completed, open the project in VSCode.
Step 2 − Start hello-world-client
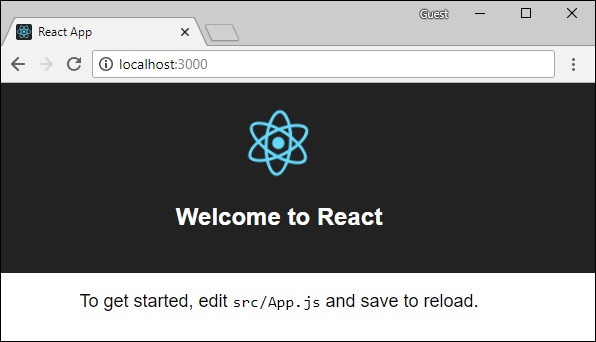
Change the current folder path in the terminal to hello-world-client. Typenpm startto launch the project. This will run a development server at port 3000 and will automatically open the browser and load the index page.
This is shown in the screenshot given below −
Step 3 − Install Apollo Client Libraries
To install an Apollo Client, open a new terminal and be in current project folder path. Type the following command −
npm install apollo-boost graphql
This will download the graphql libraries for client side and also the Apollo Boost package. We can cross check this by typingnpm view in apollo-boost dependencies. This will have many dependencies as shown below −
{
   'apollo-cache': '^1.1.15',
   'apollo-cache-inmemory': '^1.2.8',
   'apollo-client': '^2.4.0',
   'apollo-link': '^1.0.6',
   'apollo-link-error': '^1.0.3',
   'apollo-link-http': '^1.3.1',
   'apollo-link-state': '^0.4.0',
   'graphql-tag': '^2.4.2'
}
We can clearly see that Apollo-Client library is installed.
Step 4 − Modify the App Component in index.js File
With Apollo Client, we can directly call server without the use offetchAPI. Also, the queries and mutations should not be embedded in a string made with back tick notation. This is because, the gql function directly parses the queries. This means, a programmer can directly write queries in the same way when writing queries in GraphiQL tool.gqlis a tag function which will parse the template string written in back tick notation to graphql query object. The Apollo Client query method returns a promise.
Following code snippet shows how to import Apollo Client −
import {ApolloClient, HttpLink, InMemoryCache} from 'apollo-boost'

const endPointUrl = 'http://localhost:9000/graphql'
const client = new ApolloClient({
   link: new HttpLink({uri:endPointUrl}),
   cache:new InMemoryCache()
});
In the previous chapter, we discussed how to usefetchAPI for HTTP requests. The following code shows how to use gql function. The loadStudentsAsync function uses graphql client to query the server.
async function loadStudentsAsync() {
   const query = gql`
   {
      students{
         id
         firstName
         lastName
         college{
            name
         }
      }
   }`
   const {data} = await client.query({query}) ;
   return data.students;
}
You only need to keep the index.js in src folder and index.html in public folder; all other files that are auto generated can be removed.
The directory structure is given below −
hello-world-client /
   -->node_modules
   -->public
         index.html
   -->src
         index.js
   -->package.json
Following is theindex.jsin react application −
import React, {Component} from 'react';
import ReactDOM from 'react-dom';

// apollo client

import {ApolloClient, HttpLink, InMemoryCache} from 'apollo-boost'
import gql from 'graphql-tag'

const endPointUrl = 'http://localhost:9000/graphql'
const client = new ApolloClient({
   link: new HttpLink({uri:endPointUrl}),
   cache:new InMemoryCache()
});

async function loadStudentsAsync() {
   const query = gql`
   {
      students{
         id
         firstName
         lastName
         college{
            name
         }
      }
   }
   `
   const {data} = await client.query({query}) ;
   return data.students;
}
class  App  extends Component {
   constructor(props) {
      super(props);
      this.state = {
         students:[]
      }
      this.studentTemplate =  [];
   }
   async loadStudents() {
      const studentData =  await loadStudentsAsync();
      this.setState({
         students: studentData
      })
      console.log("loadStudents")
   }
   render() {
      return(
         <div>
            <input type = "button"  value = "loadStudents" onClick = {this.loadStudents.bind(this)}/>
            <div>
               <br/>
               <hr/>
               <table border = "3">
                  <thead>
                     <tr>
                        <td>First Name</td>
                        <td>Last Name</td>
                        <td>college Name</td>
                     </tr>
                  </thead>

                  <tbody>
                     {
                        this.state.students.map(s => {
                           return (
                              <tr key = {s.id}>
                                 <td>
                                    {s.firstName}
                                 </td>
                                 <td>
                                    {s.lastName}
                                 </td>
                                 <td>
                                    {s.college.name}
                                 </td>
                              </tr>
                           )
                        })
                     }
                  </tbody>
               </table>
            </div>
         </div>
      )
   }
}
ReactDOM.render(<App/>, document.getElementById('root'));
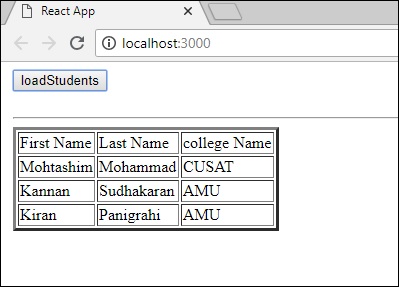
The react application will load students from GraphQL server, once we click on loadStudents button as shown below −