- Cucumber - Home
- Cucumber - Overview
- Cucumber - Environment
- Cucumber - Gherkins
- Cucumber - Features
- Cucumber - Scenarios
- Cucumber - Annotations
- Cucumber - Scenario Outline
- Cucumber - Tags
- Cucumber - Data Tables
- Cucumber - Comments
- Cucumber - Hooks
- Cucumber - Command Line Options
- Cucumber - JUnit Runner
- Cucumber - Reports
- Cucumber - Debugging
- Cucumber - Java Testing
- Cucumber - Ruby Testing
Cucumber - Scenario Outline
Scenario outline basically replaces variable/keywords with the value from the table. Each row in the table is considered to be a scenario.
Lets continue with the same example of Facebook login feature. So far we have been executing one scenario: Upon providing the correct user name, login is successful. Now, suppose we want to check if login is successful for all three possible types of inputs, which are username, email address, or phone number. To achieve this, we will need to write three different scenarios, where each scenario will vary with the type of input, login is successful. In this case, scenarios will look like the following.
Scenario:
Given user navigates to Facebook
When I enter correct username and password
Then login should be successful
Scenario:
Given user navigates to Facebook
When I enter correct email address and password
Then login should be successful
Scenario:
Given user navigates to Facebook
When I enter correct phone number and password
Then login should be successful
Here, if we see closely, for above three scenarios: statements are the same, only the input parameter (username/email address/phone number) is changing. Thats where the importance of scenario outline comes into picture.
When we define any scenario with scenario outline, we can specify one test scenario and at the bottom of it we can provide a number of inputs. The scenario will get executed as many times as the number of inputs provided.
Example
Lets create an example of a scenario outline −
Step 1 − Create a Maven Test Project named as ScenarioOutlineTest
Go to File → New → Others → Maven → Maven Project → Next.
Provide group Id (group Id will identify your project uniquely across all projects).
Provide artifact Id (artifact Id is the name of the jar without version. You can choose any name which is in lowercase).
Click on Finish.
Open pom.xml −
Go to package explorer on the left hand side of Eclipse.
Expand the project CucumberTest.
Locate pom.xml file.
Right-click and select the option, Open with Text Editor.
Add dependency for Selenium − This will indicate Maven, which Selenium jar files are to be downloaded from the central repository to the local repository.
Open pom.xml is in edit mode, create dependencies tag (<dependencies></dependencies>), inside the project tag.
Inside the dependencies tag, create dependency tag (<dependency></dependency>).
Provide the following information within the dependency tag.
<dependency>
   <groupId>org.seleniumhq.selenium</groupId>
   <artifactId>selenium-java</artifactId>
   <version>2.47.1</version>
</dependency>
Add dependency for Cucumber-Java: This will indicate Maven, which Cucumber files are to be downloaded from the central repository to the local repository.
Create one more dependency tag.
Provide following information within the dependency tag.
<dependency>
   <groupId>info.cukes</groupId>
   <artifactId>cucumber-java</artifactId>
   <version>1.0.2</version>
   <scope>test</scope>
</dependency>
Add dependency for Cucumber-JUnit: This will indicate Maven, which Cucumber JUnit files are to be downloaded from the central repository to the local repository.
Create one more dependency tag.
Provide the following information within the dependency tag.
<dependency>
   <groupId>info.cukes</groupId>
   <artifactId>cucumber-junit</artifactId>
   <version>1.0.2</version>
   <scope>test</scope>
</dependency>
Add dependency for JUnit - This will indicate Maven, which JUnit files are to be downloaded from the central repository to the local repository.
Create one more dependency tag.
Provide the following information within the dependency tag.
<dependency>
   <groupId>junit</groupId>
   <artifactId>junit</artifactId>
   <version>4.10</version>
   <scope>test</scope>
</dependency>
Verify binaries.
Once pom.xml is edited successfully, save it.
Go to Project → Clean − It will take a few minutes.
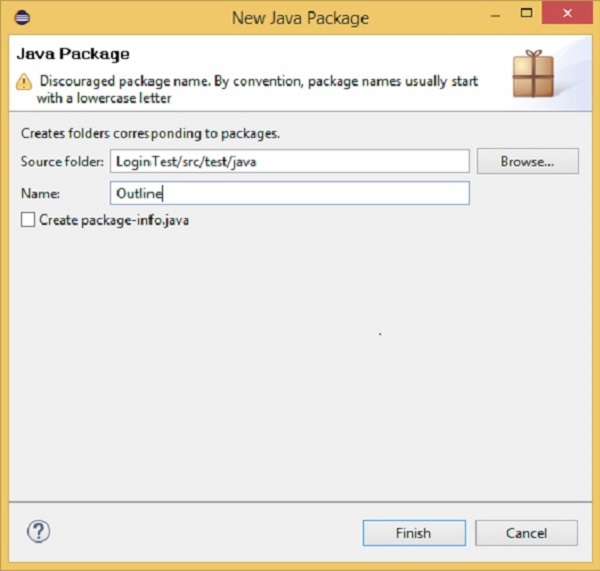
Step 2 − Create a package named outline under src/test/java
Step 3 − Create a feature file named outline.feature
Select and right-click on the package outline.
Click on New file.
Give the file name such as outline.feature
Write the following text within the file and save it.
Feature − Scenario Outline
Scenario Outline − Login functionality for a social networking site.
Given user navigates to Facebook
When I enter Username as "<username>" and Password as "<password>"
Then login should be unsuccessful
Example −
| username  | password  |
| username1 | password1 |
| username2 | password2 |
Note − Here, example annotation describes the range of input to be provided upon scenario execution. Test scenario will be executed for each of the input provided. So, in the given example, test scenario will be executed three times.
Step 4 − Create a step definition file.
Select and right-click on the package outline.
Click on New file.
Give the file name as stepdefinition.java
Write the following text within the file and save it.
package Outline;

import org.openqa.selenium.By;
import org.openqa.selenium.WebDriver;
import org.openqa.selenium.firefox.FirefoxDriver;

import cucumber.annotation.en.Given;
import cucumber.annotation.en.Then;
import cucumber.annotation.en.When;

public class stepdefinition {
   WebDriver driver = null;

   @Given("^user navigates to facebook$")
   public void goToFacebook() {
      driver = new FirefoxDriver();
      driver.navigate().to("https://www.facebook.com/");
   }

   @When("^I enter Username as \"([^\"]*)\" and Password as \"([^\"]*)\"$")
   public void I_enter_Username_as_and_Password_as(String arg1, String arg2) {
      driver.findElement(By.id("email")).sendKeys(arg1);
      driver.findElement(By.id("pass")).sendKeys(arg2);
      driver.findElement(By.id("u_0_v")).click();
   }

   @Then("^login should be unsuccessful$")
   public void validateRelogin() {
      if(driver.getCurrentUrl().equalsIgnoreCase(
      "https://www.facebook.com/login.php?login_attempt=1&lwv=110")){
         System.out.println("Test Pass");
      } else {
         System.out.println("Test Failed");
      }
      driver.close();
   }
}
Note − In the above code, we have to define a function having two input argument: one username and other will be for password. So for each set of input provided in the example tag, Set of GIVEN, WHEN and THEN will be executed.
Step 5 − Create a runner class file.
Select and right-click on the package outline.
Click on New file.
Give the file name such as runTest.java
Write the following text within the file and save it.
package Outline;

import org.junit.runner.RunWith;
import cucumber.junit.Cucumber;

@RunWith(Cucumber.class)
@Cucumber.Options(format = {"pretty", "html:target/cucumber"})

public class runTest { }
Run the test using option −
Select runTest.java file from package explorer.
Right-click and select the option Run as.
Select JUnit test.
You will observe the following things when you run this class file
Facebook opens in a new Firefox web-browser instance.
Username1 and password1 will be passed as an input to username and password field.
Login will be clicked.
Message will be displayed on the browser regarding unsuccessful login.
In the console, you will see Test Pass printed.
Step result 1 to 5 will be re-executed for username2 and password2.
In nutshell, when scenario does not change but only the data value gets changed, it is advisable to use scenario outline data tables.
