- Cucumber - Home
- Cucumber - Overview
- Cucumber - Environment
- Cucumber - Gherkins
- Cucumber - Features
- Cucumber - Scenarios
- Cucumber - Annotations
- Cucumber - Scenario Outline
- Cucumber - Tags
- Cucumber - Data Tables
- Cucumber - Comments
- Cucumber - Hooks
- Cucumber - Command Line Options
- Cucumber - JUnit Runner
- Cucumber - Reports
- Cucumber - Debugging
- Cucumber - Java Testing
- Cucumber - Ruby Testing
Cucumber - Environment
In this chapter, we will see the environment setup for Cucumber with Selenium WebDriver and Java, on Windows Machine.
Prerequisites for Environment Setup
Following are the prerequisites required to set up with −
Java
Why we need − Java is a robust programming language. Cucumber supports Java platform for the execution.
How to install −
Step 1 − Download jdk and jre from the following link http://www.oracle.com/technetwork/java/javase/downloads/index.html
Step 2 − Accept license agreement.
Step 3 − Install JDK and JRE.
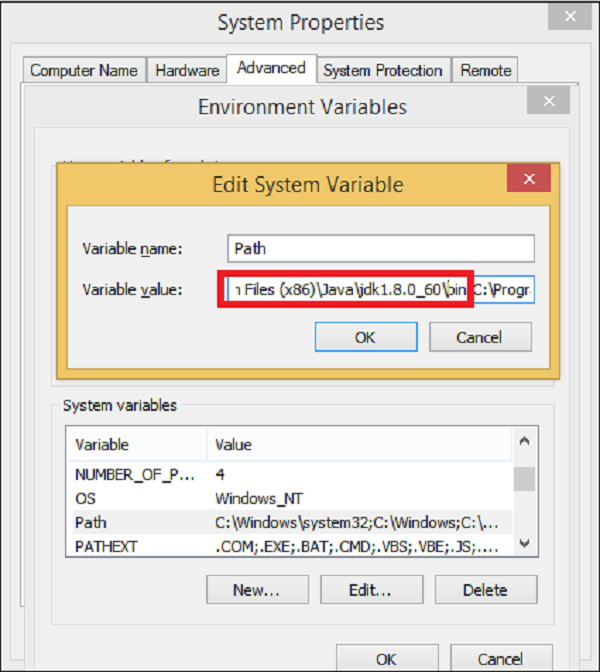
Step 4 − Set the environment variable as shown in the following screenshots.

Eclipse
Why we need − Eclipse is an Integrated Development Environment (IDE). It contains a base workspace and an extensible plug-in system for customizing the environment.
How to install −
Step 1 − Make sure JAVA is installed on your machine.
Step 2 − Download Eclipse from https://eclipse.org/downloads/
Step 3 − Unzip and Eclipse is installed.
Maven
Why we need − Maven is a build automation tool used primarily for Java projects. It provides a common platform to perform activities like generating source code, compiling code, packaging code to a jar, etc. Later if any of the software versions gets changed, Maven provides an easy way to modify the test project accordingly.
How to install −
Step 1 − Download Maven from the following link − https://maven.apache.org/download.cgi
Step 2 − Unzip the file and remember the location.
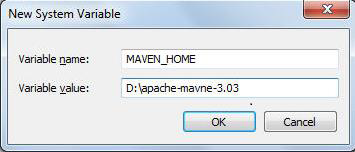
Step 3 − Create environment variable MAVEN_HOME as shown in the following screenshot.
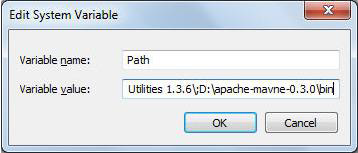
Step 4 − Edit Path variable and include Maven as shown in the following screenshot.
Step 5 − Download MAVEN plugin from Eclipse.
Step 6 − Open Eclipse.
Step 7 − Go to Help → Eclipse Marketplace → Search Maven → Maven Integration for Eclipse → INSTALL.
Configure Cucumber with Maven
Step 1 − Create a Maven project.
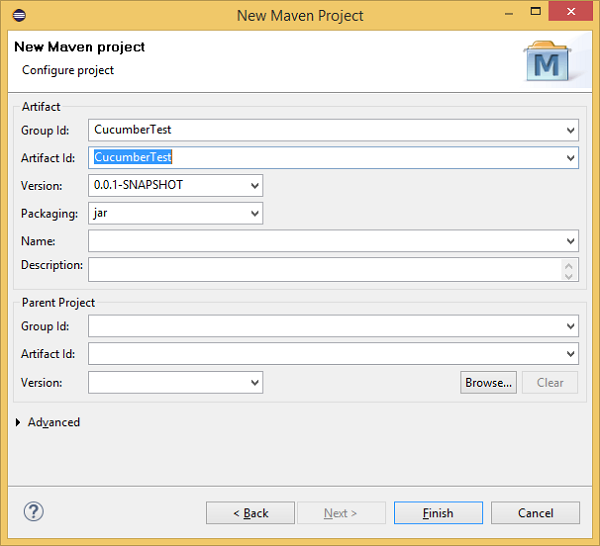
Go to File → New → Others → Maven → Maven Project → Next.
Provide group Id (group Id will identify your project uniquely across all projects).
Provide artifact Id (artifact Id is the name of the jar without version. You can choose any name, which is in lowercase). Click on Finish.
Step 2 − Open pom.xml.
Go to package explorer on the left hand side of Eclipse.
Expand the project CucumberTest.
Locate pom.xml file.
Right-click and select the option, open with Text Editor.
Step 3 − Add dependency for selenium: This will indicate Maven which Selenium jar files are to be downloaded from the central repository to the local repository.
Open pom.xml is in the edit mode, create dependencies tag (<dependencies></dependencies>), inside the project tag.
Inside the dependencies tag, create dependency tag (<dependency></dependency>).
Provide the following information within the dependency tag.
<dependency>
   <groupId>org.seleniumhq.selenium</groupId>
   <artifactId>selenium-java</artifactId>
   <version>2.47.1</version>
</dependency>
Step 4 − Add dependency for Cucumber-Java: This will indicate Maven, which Cucumber files are to be downloaded from the central repository to the local repository.
Create one more dependency tag.
Provide the following information within the dependency tag
<dependency>
   <groupId>info.cukes</groupId>
   <artifactId>cucumber-java</artifactId>
   <version>1.0.2</version>
   <scope>test</scope>
</dependency>
Step 5 − Add dependency for Cucumber-JUnit: This will indicate Maven, which Cucumber JUnit files are to be downloaded from the central repository to the local repository.
Create one more dependency tag.
Provide the following information within the dependency tag
<dependency>
   <groupId>info.cukes</groupId>
   <artifactId>cucumber-junit</artifactId>
   <version>1.0.2</version>
   <scope>test</scope>
</dependency>
Step 6 − Add dependency for JUnit: This will indicate Maven, which JUnit files are to be downloaded from the central repository to the local repository.
Create one more dependency tag.
Provide the following information within the dependency tag.
<dependency>
   <groupId>junit</groupId>
   <artifactId>junit</artifactId>
   <version>4.10</version>
   <scope>test</scope>
</dependency>
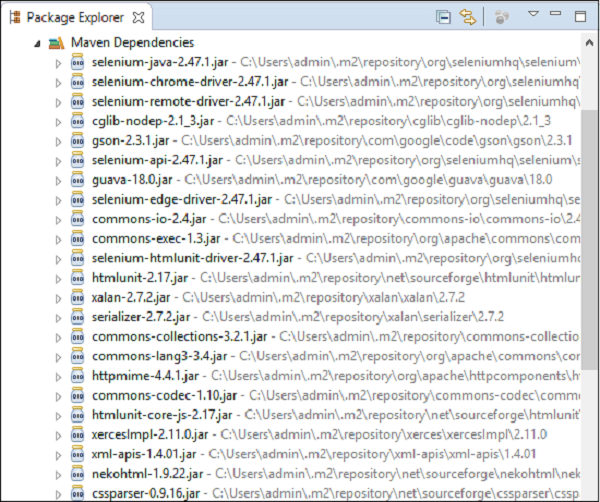
Step 7 − Verify binaries.
Once pom.xml is edited successfully, save it.
Go to Project → Clean − It will take a few minutes.
You will be able to see a Maven repository like shown in the following screenshot.
Create a feature file (to be covered later).
Create a step definition file (to be covered later).
Create a JUnit runner to run the test (to be covered later).
