- Web2py - Home
- Web2py - Introduction
- Web2py - Python Language
- Web2py - Framework Overview
- Web2py - Core
- Web2py - Views
- Web2py - Database Abstraction Layer
- Web2py - Forms & Validators
- Web2py - Email & SMS
- Web2py - Access Control
- Web2py - Services
- Web2py - Adding Ajax Effects
- Web2py - Components
- Web2py - Deployment
- Web2py - Security
Web2py - Deployment
Installation of web2py in Ubuntu (Linux)
The following steps are implemented for installation of web2py in the Ubuntu Desktop.
Step 1 − Download web2py
cd /home
mkdir www-dev

cd www-dev
wget http://www.web2py.com/examples/static/web2py_src.zip
Step 2 − After the download is complete, unzip it.
unzip -x web2py_src.zip
Step 3 − Optionally install the tk library for Python, if you need to access the GUI.
sudo apt-get install python-tk
Step 4 − To start web2py, access the web2py directory and run web2py.
cd web2py
python web2py.py
The GUI will appear as follows −

After installation, each time you run it, web2py will ask you to choose a password. This password is your administrative password. If the password is left blank, the administrative interface will be disabled.
Once the server is started, web2py will redirect to the screen with following mentioned URL − http://127.0.0.1:8000/
This will conclude that web2py is perfectly running in Ubuntu desktop.
Production Deployment in Ubuntu
Step 1 − Installation of all the modules needed to run web2py.
Installation of postgreSQL
sudo apt-get install postgresql
Unzip and open ssh-server
sudo apt-get install unzip
sudo apt-get install openssh-server
Installation of Apache 2 and mod-wsgi
sudo apt-get install apache2
sudo apt-get install libapache2-mod-wsgi
Step 2 − Installation of web2py in /home/www-data
This helps for proper deployment in production environment.
sudo apt-get install unzip
sudo apt-get install openssh-server
cd /home
sudo mkdir www-data
cd www-data
Get the web2py source from the web2py site −
sudo wget http://web2py.com/examples/static/web2py_src.zip
sudo unzip web2py_src.zip
sudo chown -R www-data:www-data web2py
Step 3 − Create a self-signed certificate. SSL certificates should be obtained from a trusted Certificate Authority. Maintain an SSL folder with the certificates in it.
Step 4 − Edit the apache configuration as per the requirement of production environment.
Step 5 − Restart the Apache server and verify if the production environment works for the given IP address.
Installing web2py on Windows
Although there is a binary distribution for Windows environments (packaging executables and standard libraries), web2py is open source, and can be used with a normal Python installation.
This method allows working with the latest releases of web2py, and customizing the python modules to be used.
Step 1 − Download the source package from web2py official website − http://www.web2py.com/examples/static/web2py_src.zip and unzip it.
As web2py does not require installation, the user can unzip it in any folder.
Step 2 − To start it, double-click web2py.py. From the console −
cd c:\web2py
c:\python27\python.exe web2py.py
Step 3 − Here command line parameters can be added (−a to set an admin password, −p to specify an alternate port). The startup options are visible through −
C:\web2py>c:\python27\python.exe web2py.py --help
Note
web2py is written in Python, a portable, interpreted and dynamic language that does not require compilation or complicated installation to run.
It uses a virtual machine (such as Java and .Net), and it can transparently byte-compile your source code on the fly when you run your scripts.
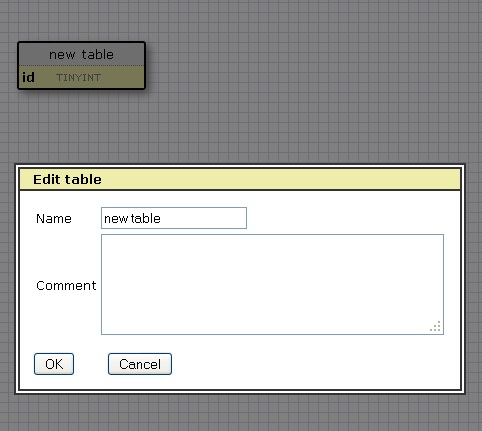
Functionalities in web2py for Database and Testing
It is a software called SQLDesigner which helps in making web2py models and generates the corresponding code. Given below are some of the screenshots −
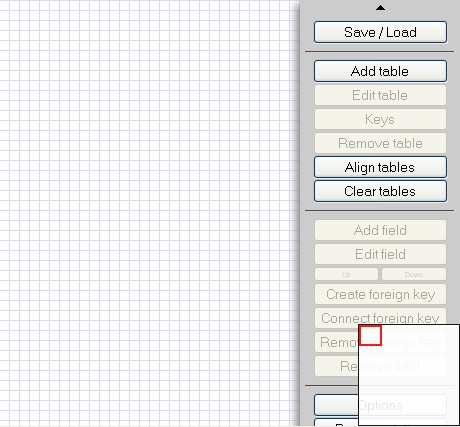
SQLDesigner helps in maintaining the relations of the tables in simple manner and generates the corresponding code in the models of given application.
Functional Testing
Functional testing involves testing of the functions of components or overall system. It can be based on requirement and business process.
web2py comes with a module gluon.contrib.webclient, which performs functional testing in remote and local web2py applications. It is basically designed to understand web2py session and postbacks.
All it requires is to import the package such that the functional testing would be implemented on the given module.
The syntax to import the package is as follows −
from gluon.contrib.webclient import WebClient
