- Sublime Text - Home
- Sublime Text – Introduction
- Sublime Text – Installation
- Sublime Text – Data Directory
- Creating First Document
- Editing First Text Document
- Patterns of Code Editing
- Sublime Text – Sublime Linter
- Sublime Text – Shortcuts
- Sublime Text – Snippets
- Sublime Text – Macros
- Sublime Text – Key Bindings
- Sublime Text – Column Selection
- Sublime Text – Indentation
- Sublime Text – Base Settings
- Sublime Text – Theme Management
- Understanding Vintage Mode
- Sublime Text – Vintage Commands
- Sublime Text – Testing Javascript
- Sublime Text – Testing Python Code
- Sublime Text – Spell Check
- Sublime Text – Packages
- Sublime Text – Menus
- Sublime Text – Sub Menus of Font
- Sublime Text – Developing Plugin
- Sublime Text – Command Palette
- Debugging PHP Application
- Debugging Javascript Application
- Sublime Text – Batch Processing
- Distraction Free Mode
- SublimeCodeIntel Plugin
Sublime Text - SublimeCodeIntel Plugin
SublimeCodeIntel is an important plugin for the Sublime Text editor. It offers the following features −
Jump to symbol feature, which helps the user to jump to the file and the specified line of the symbol.
Includes library of autocomplete and displays the modules/symbols in real time.
Tooltips display information in the status bar about the associated function.
Installation
You can install the SublimeCodeIntel plugin through the following steps −
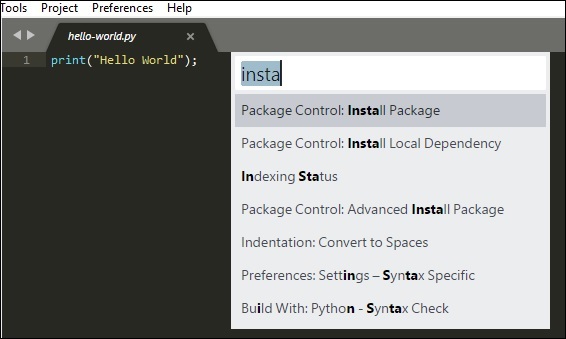
Step 1 − Get the install package functionality of Sublime Text editor using the shortcut Ctrl+Shift+P on Windows and Cmd+Shift+P for OSX system. Refer to the following screenshot for better understanding −
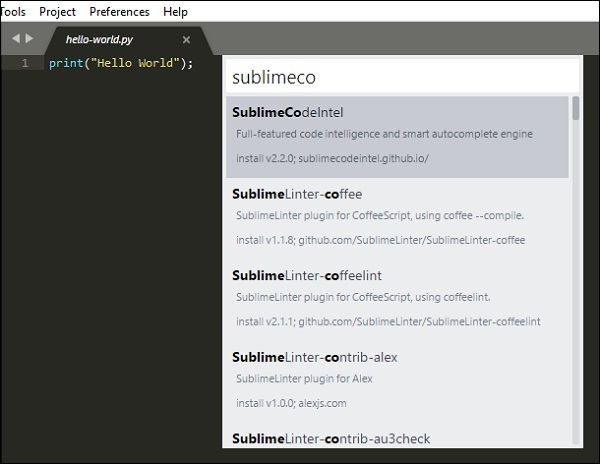
Step 2 − Now, select the plugin SublimeCodeIntel for installation and restart the Sublime Text editor.
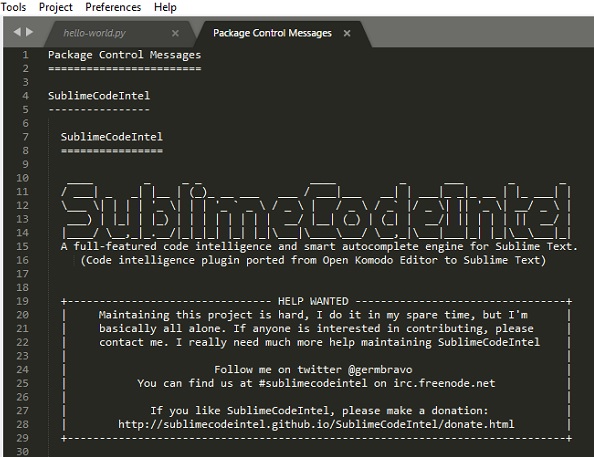
Step 3 − On successful installation of SublimeCodeIntel plugin, your screen will look like this −
Configuration
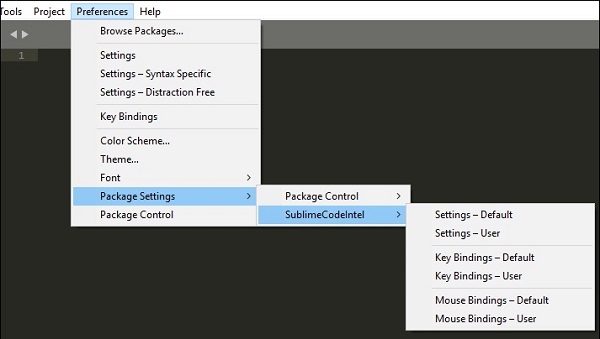
There are two in built configurations of SublimeCodeIntel −
- Settings − Default
- Settings − User
Refer to the following screenshot that shows these configurations −
The configuration for SublimeCodeIntel is included in the JSON file called SublimeCodeIntel.sublime-settings. The configuration needed for each language is included in SublimeCodeIntel plugin as below −
/*
   Defines a configuration for each language.
*/

"codeintel_language_settings": {
   "Python3": {
      "python3": "/usr/local/bin/python3.3",
      "codeintel_scan_extra_dir": [
         "/Applications/Sublime Text.app/Contents/MacOS",
         "~/Library/Application Support/Sublime Text 3/Packages/SublimeCodeIntel/arch",
         "~/Library/Application Support/Sublime Text 3/Packages/SublimeCodeIntel/libs"
      ],
      "codeintel_scan_files_in_project": true,
      "codeintel_selected_catalogs": []
   },

   "JavaScript": {
      "codeintel_scan_extra_dir": [],
      "codeintel_scan_exclude_dir":["/build/", "/min/"],
      "codeintel_scan_files_in_project": false,
      "codeintel_max_recursive_dir_depth": 2,
      "codeintel_selected_catalogs": ["jQuery"]
   },

   "PHP": {
      "php": "/Applications/MAMP/bin/php/php5.5.3/bin/php",
      "codeintel_scan_extra_dir": [],
      "codeintel_scan_files_in_project": true,
      "codeintel_max_recursive_dir_depth": 15,
      "codeintel_scan_exclude_dir":["/Applications/MAMP/bin/php/php5.5.3/"]
   }
}
These configurations can be customized as and when needed. It depends on the number of modules/libraries installed by the user with various parameters such as the size and complexity of the project a user is working on.
