 Data Structure
 Networking
 RDBMS
RDBMS Operating System
 Java
Java MS Excel
 iOS
iOS HTML
HTML CSS
CSS Android
 Python
 C Programming
 C++
C++ C#
C# MongoDB
 MySQL
MySQL Javascript
 PHP
PHP
- Selected Reading
- UPSC IAS Exams Notes
- Developer's Best Practices
- Questions and Answers
- Effective Resume Writing
- HR Interview Questions
- Computer Glossary
- Who is Who
Steps to Create a Servlet
Servlets are small Java modules that are used on the server side of a web connection to enhance the functionality of web server. All the methods and classes for creating a servlet are available in ?javax.servlet' and ?javax.servlet.http' packages. Hence, it is important to import them into your program before working with the servlet
They are useful when it comes to creating dynamic web pages and processing user inputs. This article aims to discuss all the necessary steps to create a servlet in detail.
Steps to create a Servlet
Before moving to the steps let's discuss briefly about servlets.
How does Servlets work?
Whenever we search for a particular URL through a web browser. It generates an HTTP request and sends it to the server. The server receives this request and retrieves the specific servlet and loads it on the browser. Then, the init() method is invoked by server. When a servlet is loaded into the memory for the first time, the init() method is called. Next, service() method of servlet is invoked to process the HTTP request for each client request. At last, destroy() method is called to release the allocated resources.
The benefits of using servlets are as follows
Just like the java programs it is also platform independent means once a servlet application is created, we can use it on any operating system.
All the resources of the servlet on web server are secured by the Java security manager.
A servlet can access all the Java class libraries.
Create and run a Simple servlet in Java:
Below are the steps to create and run a simple servlet in Java
Step 1 ? Install and configure an IDE like IntelliJ or NetBeans and also, a server that supports servlets like Apache Tomcat or Glassfish. For the sake of this article, we will use NetBeans IDE and Apache Tomcat server.
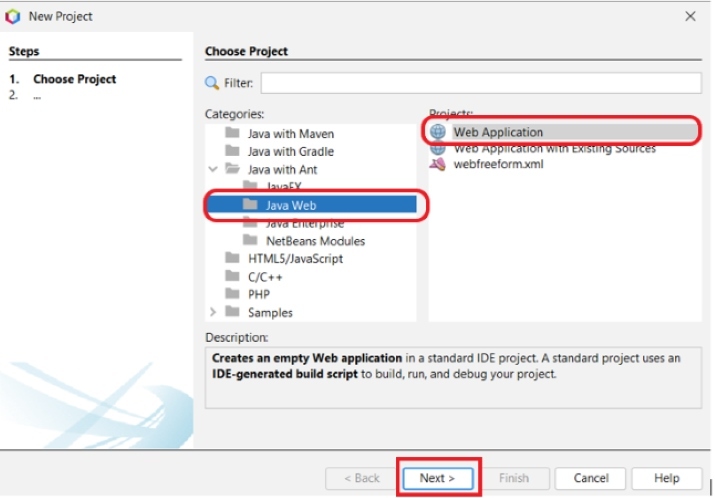
Step 2 ? Create a Java project. For this, open your Netbeans IDE and create a new Java Web Application through the following path: File ? New Project ? Java Web ? Java Web Application.

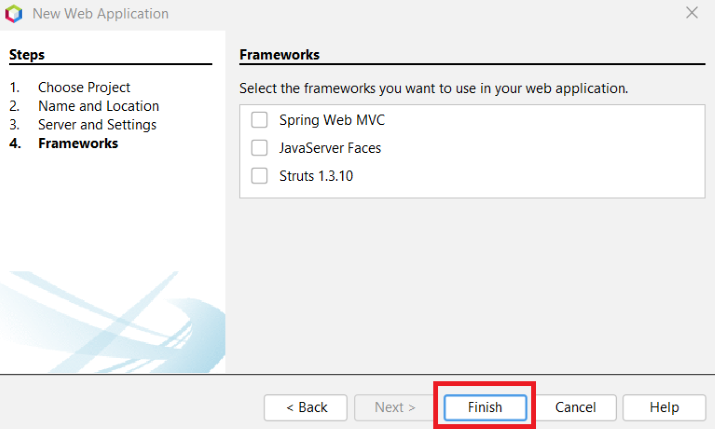
Step 3 ? When you click on next, the following interface will get opened. Now, give a Project Name of your choice and click Next. We have given it ?ExpServlet'. After clicking next choose the server from Server options.

Step 4 ? Leave everything as it is and click on Finish.

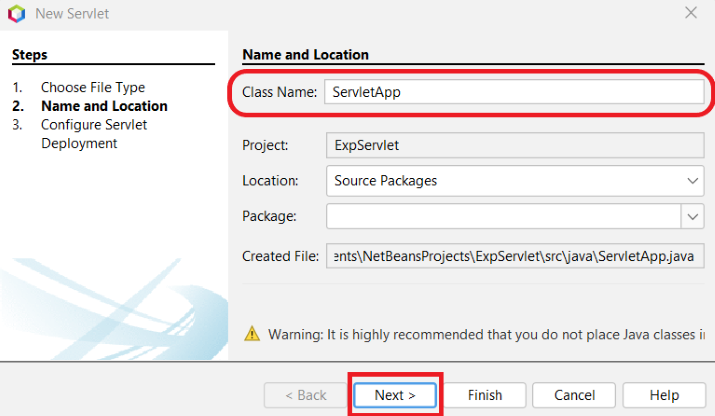
Step 5 ? Create a Servlet class that extends the ?javax.servlet.http.HttpServlet' abstract class by using the following path: source packages ? default package ? New ? Servlet.
Give a suitable name to the class and click Next.

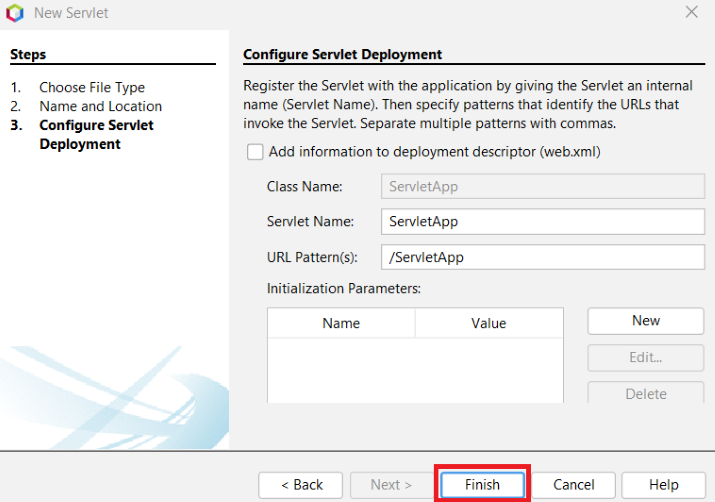
Step 6 ? Leave everything as it is and click on Finish.

Step 7 ? Now, go to your index.html file and change your code with the given code.
Example
<!DOCTYPE html>
<html>
   <head>
      <title>Tutorials Point</title>
      <meta charset="UTF-8">
      <meta name="viewport" content="width=device-width, initial-scale=1.0">
   </head>
   <body>
      <div> This is the Example Servlet </div>
   </body>
</html>
When you run this project, the following output will be displayed on your browser screen.
Conclusion
In this article, we understood the basic concept of servlet and created a servlet that prints a simple message on the screen. We have listed all the important steps for the same.

