- Sprint Security - Home
- Spring Security - Introduction
- Spring Security - Architecture
- Spring Security - Project Modules
- Spring Security - Environment Setup
- Spring Security - Form Login
- Spring Security - Custom Form Login
- Spring Security - Logout
- Spring Security - Remember Me
- Spring Security - Redirection
- Spring Security - Taglibs
- Spring Security - XML Configuration
- Spring Security - Authentication Provider
- Spring Security - Basic Authentication
- Spring Security - AuthenticationFailureHandler
- Spring Security - JWT
- Spring Security - Retrieve User Information
- Spring Security - Maven
- Spring Security - Default Password Encoder
- Spring Security – Password Encoding
- Spring Security - Methods Level
- Spring Security - Manual Authentication
- Spring Security - Extra Login Fields
- Spring Security - Prevent Brute Force
- Spring Security - Login Page with React
- Spring Security - Security Filter Chain
- Spring Security - Securing Spring Boot API
- Spring Security - Expressions
- Spring Security - Security none, Filters none, access permitAll
- Spring Security - Control the Session
- Spring Security Useful Resources
- Spring Security - Quick Guide
- Spring Security - Useful Resources
- Spring Security - Discussion
Spring Security - Quick Guide
What is Spring Security?
Spring Security is one of Spring Project or Module to secure a Spring based application. Spring security provides us many in-built features to implement authentication and authorization in our application. We can use these features with our changes to secure an application very quickly. In addition to this, Spring Security also allows plenty of customizations to the features mentioned before to implement our own complex authentications and authorizations.
In addition to providing various inbuilt authentication and authorization options, Spring Security allows us to customize our authentication process as much as we want. Starting from a custom login page to our very own customized authentication providers and authentication filters, we can pretty much customize every aspect of the authentication process. We can define our own authentication process which can range from basic authentication using a username and a password to a complex one such as two-factor authentication using tokens and OTPs. Also, we can use various databases both relational and non-relational, use various password encoders, lock malicious users out of their accounts, and so on.
Authentication and Authorization
Authentication and Authorization are two main components of Spring Security.
Authentication − Authentication is to ensure that the user or the client is who they claim to be. There are many ways in which Spring Security enables us to perform authentication. Spring Security supports Basic Authentication, LDAP authentication, JDBC authentication, etc.
Authorization − Authorization ensures whether the user has permission for the action or not. If our application is a complex one, with different kinds of users such as admins, regular users, other less privileged users, we need to maintain access control in our application. For example, a guest user should not be able to access admin content. So, to control access to various resources within our application, we need to check if a user has permission to access that resource. Spring Security supports roles, claims etc. to provide user level authorization.
Spring Security supports a large set of authentication models. Most of these authentication models are developed by third parties or by Internet Engineering Task Force, IETF as a standard body. Being able to integrate with wide set of third parties autentication models, spring security becomes very popular among developers to integrate in their projects. Spring provides its own authentication features as well. Following list shows the various authentication methods supported by Spring security.
HTTP BASIC authentication headers
HTTP Digest authentication headers
HTTP X.509 client certificate exchange
LDAP
Form-based authentication
OpenID authentication
Authentication based on pre-established request headers
JA-SIG Central Authentication Service, a open source single sign on system
Transparent authentication context propagation for Remote Method Invocation (RMI) and HttpInvoker
Remember Me
Anonymous authentication
Run-as authentication
Java Authentication and Authorization Service (JAAS)
JEE container autentication
Kerberos
Java Open Source Single Sign On (JOSSO)
OpenNMS Network Management Platform
AppFuse
AndroMDA
Mule ESB
Direct Web Request (DWR)
Grails
Tapestry
JTrac
Jasypt
Roller
Elastic Path
Atlassian Crowd
We can integrate own custom authentication mechanism as well with Spring Security.
History of Spring Security
Spring Security started in late 2003 as The Acegi Security System for Spring as a simple Spring based security implementation. Later as spring community members enquired for an existing framework, it was assigned to one of the community member to work and by Jan 2004, a team of 20+ people started working in this project which was later established as a SourceForge project in Mar 2004. Initially spring security had not its authentication module and it was relying completely on Container managed security and Acegi security system was focusing only on authorization modules.
In following year, 2005, Acegi Security specific Authentication services were introduced and Acegi Security System became an official Spring sub-project. In May 2006, after being used in numerous production softwares, community improvements and bug fixes, 1.0.0 was released. By the end of 2007, Acegi Security System was rebranded as Spring Security and it became an Official Spring Portfolio Project.
Spring Security - Architecture
Spring Security is one of Spring Project or Module to secure a Spring based application. Spring security provides us many in-built features to implement authentication and authorization in our application. We can use these features with our changes to secure an application very quickly. In addition to this, Spring Security also allows plenty of customizations to the features mentioned before to implement our own complex authentications and authorizations.
Spring Security Architecture
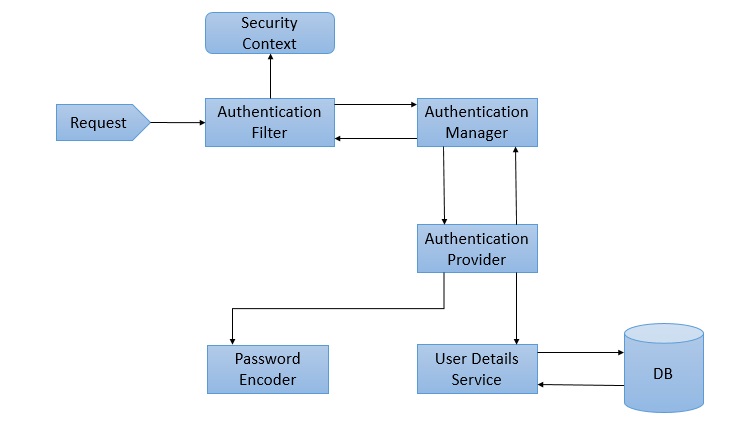
Spring Security Architecture starts with servlet filters. These filters intercept requests, perform operations on them, and then pass the requests on to next filters in the filter chain or request handlers or block them if they do not meet certain conditions. It is during this process that Spring Security can authenticate requests and perform various authentication checks on the requests. It can also prevent unauthenticated or malicious requests from accessing our protected resources by not allowing them to pass through. Thus our application and resources stay protected.
Components of Spring Security Architecture
The basic components of Spring Security, as we can see in the above diagram are given below. We shall discuss them briefly as we go along. We shall also discuss their roles in the authentication and authorization process.
The basic components of Spring Security, as we can see in the above diagram are given below. We shall discuss them briefly as we go along. We shall also discuss their roles in the authentication and authorization process.
AuthenticationFilter
This is the filter that intercepts requests and attempts to authenticate it. In Spring Security, it converts the request to an Authentication Object and delegates the authentication to the AuthenticationManager.
AuthenticationManager
It is the main strategy interface for authentication. It uses the lone method authenticate() to authenticate the request. The authenticate() method performs the authentication and returns an Authentication Object on successful authentication or throw an AuthenticationException in case of authentication failure. If the method cant decide, it will return null. The process of authentication in this process is delegated to the AuthenticationProvider which we will discuss next.
AuthenticationProvider
The AuthenticationManager is implemented by the ProviderManager which delegates the process to one or more AuthenticationProvider instances. Any class implementing the AuthenticationProvider interface must implement the two methods authenticate() and supports(). First, let us talk about the supports() method. It is used to check if the particular authentication type is supported by our AuthenticationProvider implementation class. If it is supported it returns true or else false. Next, the authenticate() method. Here is where the authentication occurs. If the authentication type is supported, the process of authentication is started. Here is this class can use the loadUserByUsername() method of the UserDetailsService implementation. If the user is not found, it can throw a UsernameNotFoundException.
On the other hand, if the user is found, then the authentication details of the user are used to authenticate the user. For example, in the basic authentication scenario, the password provided by the user may be checked with the password in the database. If they are found to match with each other, it is a success scenario. Then we can return an Authentication object from this method which will be stored in the Security Context, which we will discuss later.
UserDetailsService
It is one of the core interfaces of Spring Security. The authentication of any request mostly depends on the implementation of the UserDetailsService interface. It is most commonly used in database backed authentication to retrieve user data. The data is retrieved with the implementation of the lone loadUserByUsername() method where we can provide our logic to fetch the user details for a user. The method will throw a UsernameNotFoundException if the user is not found.
PasswordEncoder
Until Spring Security 4, the use of PasswordEncoder was optional. The user could store plain text passwords using in-memory authentication. But Spring Security 5 has mandated the use of PasswordEncoder to store passwords. This encodes the users password using one its many implementations. The most common of its implementations is the BCryptPasswordEncoder. Also, we can use an instance of the NoOpPasswordEncoder for our development purposes. It will allow passwords to be stored in plain text. But it is not supposed to be used for production or real-world applications.
Spring Security Context
This is where the details of the currently authenticated user are stored on successful authentication. The authentication object is then available throughout the application for the session. So, if we need the username or any other user details, we need to get the SecurityContext first. This is done with the SecurityContextHolder, a helper class, which provides access to the security context. We can use the setAuthentication() and getAuthentication() methods for storing and retrieving the user details respectively.
Moving on, lets now discuss the three custom implementations we are going to use for our application.
Form Login
When we add Spring Security to an existing Spring application it adds a login form and sets up a dummy user. This is Spring Security in auto-configuration mode. In this mode, it also sets up the default filters, authentication-managers, authentication-providers, and so on. This setup is an in-memory authentication setup. We can override this auto-configuration to set up our own users and authentication process. We can also set up our custom login method like a custom login form. Spring Security only has to made aware of the details of the login form like the URI of the login form, the login processing URL, etc.. It will then render our login form for the application and carry out the process of authentication along with the other provided configurations or Springs own implementation.
A custom form setup will only have to abide by certain rules to be integrated with Spring Security. We need to have a username parameter and a password parameter and the parameter names should be username and password since those are the default names. In case, we use our own parameter names for these fields in the custom we have to inform Spring Security of those changes using the usernameParameter() and passwordParameter() methods. Similarly, for every change we do to the login form or the form login method, we will have to inform Spring Security of those changes with appropriate methods so that it can integrate them with the authentication process.
Spring Security - Project Modules
Spring Security codebase is divided into multiple jars based on different functionalities and their dependencies on third party libraries. In case of Maven, we need to set the required dependencies accordingly. Following is the list of jars that constitutes the Spring Security project.
Core − spring-security-core.jar
Web − spring-security-web.jar
Config − spring-security-config.jar
LDAP − spring-security-ldap.jar
ACL − spring-security-acl.jar
CAS − spring-security-cas-client.jar
OpenID − spring-security-openid.jar
OpenID − spring-security-web.jar
Let's explore details of each jar of Spring Security.
Core − spring-security-core.jar
Core jar contains top level packages required by any application using Spring Security. It supports standalone applications, remote clients, service layer for method security and user provisioning using JDBC. Following packages are part of core jar containing core classes for authentication, access control, remoting support and basic provisioning classes.
org.springframework.security.core
org.springframework.security.access
org.springframework.security.authentication
org.springframework.security.provisioning
org.springframework.security.remoting
Web − spring-security-web.jar
Web jar provides web authentication services, URL based access control. It supports Servlet API. Following package is part of web jar containing filter classes and other web security related classes.
org.springframework.security.web
Config − spring-security-config.jar
Config jar carries security namespace parsing codebase, It is needed in case of Spring Security XML namespace is used for configuration. Following package is part of config jar.
org.springframework.security.config
LDAP − spring-security-ldap.jar
LDAP jar provides ldap authentication services and ldap provisioning code. It is required when we're to use LDAP authentication or LDAP managed entries are to be used. Following package is part of ldap jar.
org.springframework.security.ldap
ACL − spring-security-acl.jar
ACL jar provides specialized Domain Object ACL implementation. It is used to provide securty to domain specific object instances in the application. Following package is part of acl jar.
org.springframework.security.acl
CAS − spring-security-cas-client.jar
CAS jar provides CAS client integration classes. It is required in case of CAS Single Sign-on Server is to be integrated with Spring Security Web authentication. Following package is part of cas jar.
org.springframework.security.cas
OpenId − spring-security-openid.jar
OpenId jar provides OpenId web authentication services, and is used to authenticate users against external OpenId server. Following package is part of openid jar.
org.springframework.security.openid
Spring Security - Environment Setup
This chapter will guide you on how to prepare a development environment to start your work with Spring Framework and Spring Security. It will also teach you how to set up JDK, Maven and Eclipse on your machine before you set up Spring Framework −
Step 1 - Setup Java Development Kit (JDK)
You can download the latest version of SDK from Oracle's Java site − Java SE Downloads. You will find instructions for installing JDK in downloaded files, follow the given instructions to install and configure the setup. Finally set PATH and JAVA_HOME environment variables to refer to the directory that contains java and javac, typically java_install_dir/bin and java_install_dir respectively.
If you are running Windows and have installed the JDK in C:\Program Files\Java\jdk-21, you would have to put the following line in your C:\autoexec.bat file.
set PATH=C:\Program Files\Java\jdk-21;%PATH%
set JAVA_HOME=C:\Program Files\Java\jdk-21
Alternatively, on Windows NT/2000/XP, you will have to right-click on My Computer, select Properties → Advanced → Environment Variables. Then, you will have to update the PATH value and click the OK button.
On Unix (Solaris, Linux, etc.), if the SDK is installed in /usr/local/jdk-21 and you use the C shell, you will have to put the following into your .cshrc file.
setenv PATH /usr/local/jdk-21/bin:$PATH
setenv JAVA_HOME /usr/local/jdk-21
Alternatively, if you use an Integrated Development Environment (IDE) like Borland JBuilder, Eclipse, IntelliJ IDEA, or Sun ONE Studio, you will have to compile and run a simple program to confirm that the IDE knows where you have installed Java. Otherwise, you will have to carry out a proper setup as given in the document of the IDE.
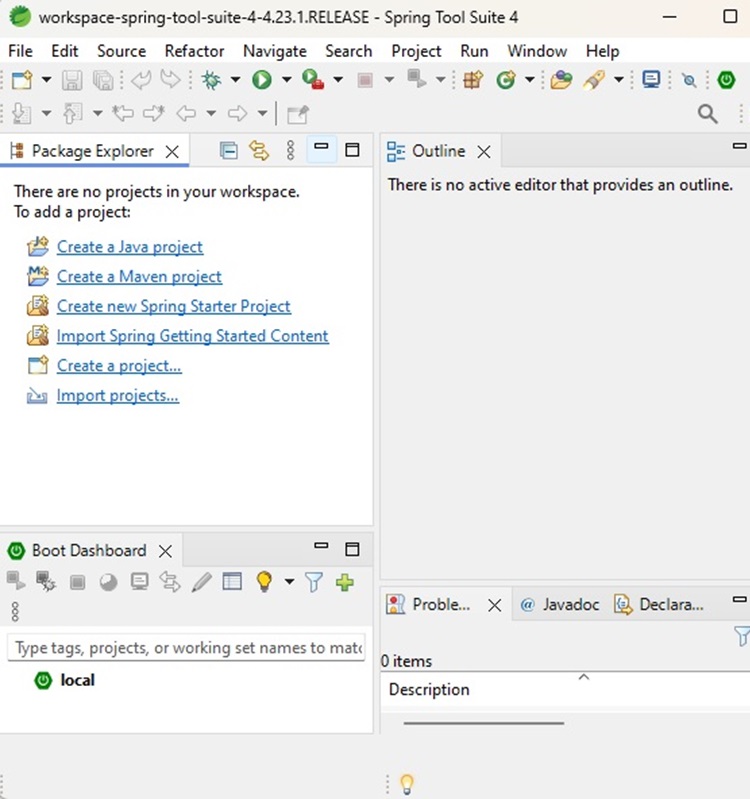
Step 2 - Setup Spring Tool Suite
All the examples in this tutorial have been written using Spring Tool Suite. So we would suggest you should have the latest version of Spring Tool Suite installed on your machine.
To install Spring Tools IDE, download the latest Spring Tools binaries from https://spring.io/tools. Once you download the installation, unpack the binary distribution into a convenient location. For example, in C:\sts on Windows, or /usr/local/sts on Linux/Unix and finally set PATH variable appropriately.
String Tool Suite can be started by executing the following commands on Windows machine, or you can simply double-click on eclipse.exe
%C:\sts\SpringToolSuite4.exe
SpringToolSuite4 can be started by executing the following commands on Unix (Solaris, Linux, etc.) machine −
$/usr/local/sts/SpringToolSuite4
After a successful startup, if everything is fine then it should display the following result −
Step 3 - Download Maven Archive
Download Maven 3.9.8 from https://maven.apache.org/download.cgi.
| OS | Archive name |
|---|---|
| Windows | apache-maven-3.9.8-bin.zip |
| Linux | apache-maven-3.9.8-bin.tar.gz |
| Mac | apache-maven-3.9.8-bin.tar.gz |
Step 4 - Extract the Maven Archive
Extract the archive, to the directory you wish to install Maven 3.9.8. The subdirectory apache-maven-3.9.8 will be created from the archive.
| OS | Location (can be different based on your installation) |
|---|---|
| Windows | C:\Program Files\Apache\apache-maven-3.9.8 |
| Linux | /usr/local/apache-maven |
| Mac | /usr/local/apache-maven |
Step 5 - Set Maven Environment Variables
Add M2_HOME, M2, MAVEN_OPTS to environment variables.
| OS | Output |
|---|---|
| Windows |
Set the environment variables using system properties. M2_HOME=C:\Program Files\Apache\apache-maven-3.9.8 M2=%M2_HOME%\bin MAVEN_OPTS=-Xms256m -Xmx512m |
| Linux |
Open command terminal and set environment variables. export M2_HOME=/usr/local/apache-maven/apache-maven-3.9.8 export M2=$M2_HOME/bin export MAVEN_OPTS=-Xms256m -Xmx512m |
| Mac |
Open command terminal and set environment variables. export M2_HOME=/usr/local/apache-maven/apache-maven-3.9.8 export M2=$M2_HOME/bin export MAVEN_OPTS=-Xms256m -Xmx512m |
Step 6 - Add Maven bin Directory Location to System Path
Now append M2 variable to System Path.
| OS | Output |
|---|---|
| Windows | Append the string ;%M2% to the end of the system variable, Path. |
| Linux | export PATH=$M2:$PATH |
| Mac | export PATH=$M2:$PATH |
Step 7 - Verify Maven Installation
Now open console and execute the following mvn command.
| OS | Task | Command |
|---|---|---|
| Windows | Open Command Console | c:\> mvn --version |
| Linux | Open Command Terminal | $ mvn --version |
| Mac | Open Terminal | machine:~ joseph$ mvn --version |
Finally, verify the output of the above commands, which should be as follows −
| OS | Output |
|---|---|
| Windows |
Apache Maven 3.9.8 (36645f6c9b5079805ea5009217e36f2cffd34256) Maven home: C:\Program Files\Apache\apache-maven-3.9.8 Java version: 21.0.2, vendor: Oracle Corporation, runtime: C:\Program Files\Java\jdk-21 Default locale: en_IN, platform encoding: UTF-8 OS name: "windows 11", version: "10.0", arch: "amd64", family: "windows" |
| Linux |
Apache Maven 3.9.8 (36645f6c9b5079805ea5009217e36f2cffd34256) Java version: 21.0.2 Java home: /usr/local/java-current/jre |
| Mac |
Apache Maven 3.9.8 (36645f6c9b5079805ea5009217e36f2cffd34256) Java version: 21.0.2 Java home: /Library/Java/Home/jre |
Spring Security - Form Login
Form-based login is one form of Username/password authentication that Spring Security provides support for. This is provided through an Html form.
Whenever a user requests a protected resource, Spring Security checks for the authentication of the request. If the request is not authenticated/authorized, the user will be redirected to the login page. The login page must be somehow rendered by the application. Spring Security provides that login form by default.
Moreover, any other configuration, if needed, must be explicitly provided as given below −
protected void configure(HttpSecurity http) throws Exception {
http
   // ...
   .authorizeHttpRequests(
      request -> request.requestMatchers("/login").permitAll()
      .requestMatchers("/**").authenticated()
   )
   .formLogin(Customizer.withDefaults())
}
Let us start actual programming with Spring Security. Before you start writing your first example using Spring framework, you have to make sure that you have set up your Spring environment properly as explained in Spring Security - Environment Setup Chapter. We also assume that you have a bit of working knowledge on Spring Tool Suite IDE.
Now let us proceed to write a Spring MVC based Application managed by Maven, which will ask user to login, authenticate user and then provide option to logout using Spring Security Form Login Feature.
Create Project using Spring Initializr
Spring Initializr is great way to start with Spring Boot project. It provides a easy to use User Interface to create a project, add dependencies, select java runtime etc. It generates a skeleton project structure which once downloaded can be imported in spring tool suite and we can proceed with our readymade project structure.
We're choosing a maven project, naming the project as formlogin, with java version as 21. Following dependencies are added:
Spring Web
Spring Security
Spring Boot DevTools
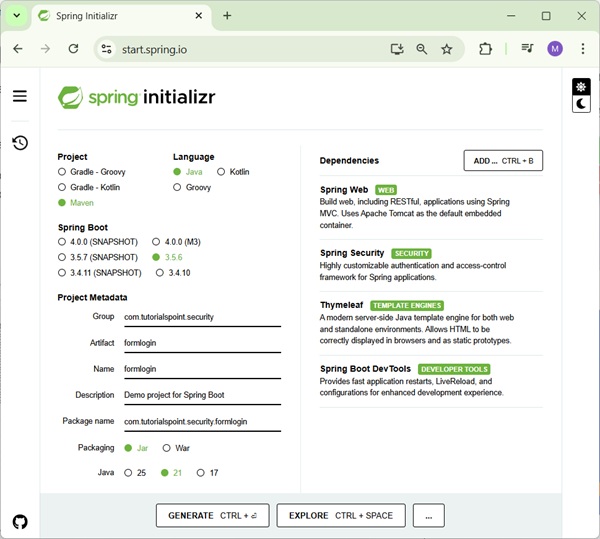
Thymeleaf is a templating engine for Java. It allows us to quickly develop static or dynamic web pages for rendering in the browser. It is extremely extensible and allows us to define and customize the processing of our templates in fine detail. In addition to this, we can learn more about Thymeleaf by clicking this link.
Let's move on to generate our project and download it. We then extract it to a folder of our choice and use any IDE to open it. I shall be using Spring Tools Suite 4. It is available for free downloading from the https://spring.io/tools website and is optimized for spring applications.
pom.xml with all relevant dependencies
Let's take a look at our pom.xml file. It should look something similar to this −
pom.xml
<?xml version="1.0" encoding="UTF-8"?>
<project xmlns="http://maven.apache.org/POM/4.0.0" xmlns:xsi="http://www.w3.org/2001/XMLSchema-instance"
xsi:schemaLocation="http://maven.apache.org/POM/4.0.0 https://maven.apache.org/xsd/maven-4.0.0.xsd">
   <modelVersion>4.0.0</modelVersion>
   <parent>
      <groupId>org.springframework.boot</groupId>
      <artifactId>spring-boot-starter-parent</artifactId>
      <version>3.5.6</version>
      <relativePath/> <!-- lookup parent from repository -->
   </parent>
   <groupId>com.tutorialspoint.security</groupId>
   <artifactId>formlogin</artifactId>
   <version>0.0.1-SNAPSHOT</version>
   <name>formlogin</name>
   <description>Demo project for Spring Boot</description>
   <url/>
   <licenses>
      <license/>
   </licenses>
   <developers>
      <developer/>
   </developers>
   <scm>
      <connection/>
      <developerConnection/>
      <tag/>
      <url/>
   </scm>
   <properties>
      <java.version>21</java.version>
   </properties>
   <dependencies>
      <dependency>
         <groupId>org.springframework.boot</groupId>
         <artifactId>spring-boot-starter-security</artifactId>
      </dependency>
      <dependency>
         <groupId>org.springframework.boot</groupId>
         <artifactId>spring-boot-starter-thymeleaf</artifactId>
      </dependency>
      <dependency>
         <groupId>org.springframework.boot</groupId>
         <artifactId>spring-boot-starter-web</artifactId>
      </dependency>
      <dependency>
         <groupId>org.thymeleaf.extras</groupId>
         <artifactId>thymeleaf-extras-springsecurity6</artifactId>
      </dependency>
      <dependency>
         <groupId>org.springframework.boot</groupId>
         <artifactId>spring-boot-devtools</artifactId>
         <scope>runtime</scope>
         <optional>true</optional>
      </dependency>
      <dependency>
         <groupId>org.springframework.boot</groupId>
         <artifactId>spring-boot-starter-test</artifactId>
         <scope>test</scope>
      </dependency>
      <dependency>
         <groupId>org.springframework.security</groupId>
         <artifactId>spring-security-test</artifactId>
         <scope>test</scope>
      </dependency>
   </dependencies>
   <build>
      <plugins>
         <plugin>
            <groupId>org.springframework.boot</groupId>
            <artifactId>spring-boot-maven-plugin</artifactId>
         </plugin>
      </plugins>
   </build>
</project>
Spring Security Configuration Class
Inside of our config package, we have created the WebSecurityConfig class. We shall be using this class for our security configurations, so let's annotate it with an @Configuration annotation and @EnableWebSecurity. As a result, Spring Security knows to treat this class a configuration class. As we can see, configuring applications have been made very easy by Spring.
WebSecurityConfig
package com.tutorialspoint.security.formlogin.config;

import org.springframework.context.annotation.Bean;
import org.springframework.context.annotation.Configuration;
import org.springframework.security.config.Customizer;
import org.springframework.security.config.annotation.web.builders.HttpSecurity;
import org.springframework.security.config.annotation.web.configuration.EnableWebSecurity;
import org.springframework.security.config.annotation.web.configurers.AbstractHttpConfigurer;
import org.springframework.security.core.userdetails.User;
import org.springframework.security.core.userdetails.UserDetails;
import org.springframework.security.core.userdetails.UserDetailsService;
import org.springframework.security.crypto.bcrypt.BCryptPasswordEncoder;
import org.springframework.security.crypto.password.PasswordEncoder;
import org.springframework.security.provisioning.InMemoryUserDetailsManager;
import org.springframework.security.web.SecurityFilterChain;

@Configuration
@EnableWebSecurity
public class WebSecurityConfig  {

   @Bean
   protected UserDetailsService userDetailsService() {
      UserDetails user = User.builder()
         .username("user")
         .password(passwordEncoder().encode("user123"))
         .roles("USER")
         .build();
      UserDetails admin = User.builder()
         .username("admin")
         .password(passwordEncoder().encode("admin123"))
         .roles("USER", "ADMIN")
         .build();
      return new InMemoryUserDetailsManager(user, admin);
   }

   @Bean
   protected PasswordEncoder passwordEncoder() {
      return new BCryptPasswordEncoder();
   }

   @Bean
   protected SecurityFilterChain filterChain(HttpSecurity http) throws Exception {
      return http
         .csrf(AbstractHttpConfigurer::disable)
         .authorizeHttpRequests(
            request -> request.requestMatchers("/login").permitAll()
            .requestMatchers("/**").authenticated()
         )
         .formLogin(Customizer.withDefaults())
         .logout(config -> config
         .logoutUrl("/logout")
         .logoutSuccessUrl("/login"))
         .build();
   }
}
Configuration Class Details
Let's take a look at our configuration class.
First, we shall create a bean of our UserDetailsService class by using the userDetailsService() method. We shall be using this bean for managing our users for this application. Here, to keep things simple, we shall use an InMemoryUserDetailsManager instance to create users. These users, along with our given username and password, are mapped to User and Admin roles respectively.
Password Encoder
-
Now, let's look at our PasswordEncoder. We shall be using a BCryptPasswordEncoder instance for this example. Hence, while creating the user, we used the passwordEncoder to encode our plaintext password like this:
.password(passwordEncoder().encode("user123"))
Http Security Configuration
After the above steps, we move on to our next configuration. Here, we've defined the filterChain method. This method takes HttpSecurity as a parameter. We shall be configuring this to use our form login and logout function.
We can observe that all these functionalities are available in Spring Security. Lets study the below section in detail −
http
   .csrf(AbstractHttpConfigurer::disable)
   .authorizeHttpRequests(
      request -> request.requestMatchers("/login").permitAll()
      .requestMatchers("/**").authenticated()
    )
   .formLogin(Customizer.withDefaults())
   .logout(config -> config
      .logoutUrl("/logout")
      .logoutSuccessUrl("/login"))
   .build();
There are a few points to note here −
We have disabled csrf or Cross-Site Request Forgery protection As this is a simple application only for demonstration purposes, we can safely disable this for now.
Then we add configuration which requires all requests to be authenticated. As we shall see later, we will have a single "/" endpoint for the index page of this application, for simplicity.
After that, we shall be using the formLogin() functionality of Spring Security as mentioned above. This generates a default login page.
-
And lastly, we have the logout() functionality. For this too, a default functionality has been provided by Spring security. Here it performs two important functions −
Invalidates the Http session, and unbinds objects bound to the session.
Removes the authentication from Springs Security context.
We also, provided a logoutSuccessUrl(), so that the application comes back to the login page after logout. This completes our application configuration.
Controller Class
In this class, we've created a mapping for single "/" endpoint for the index page of this application, for simplicity. This will redirect to index.html.
AuthController
package com.tutorialspoint.security.formlogin.controllers;

import org.springframework.stereotype.Controller;
import org.springframework.web.bind.annotation.GetMapping;

@Controller
public class AuthController {
   @GetMapping("/")
   public String home() {
      return "index";
   }
}
Views
Create index.html in /src/main/resources/templates folder with following content to act as a home page.
index.html
<!DOCTYPE html>
<html xmlns="http://www.w3.org/1999/xhtml"
   xmlns:th="https://www.thymeleaf.org"
   xmlns:sec="https://www.thymeleaf.org/thymeleaf-extras-springsecurity6">
   <head>
      <title>
         Hello World!
      </title>
   </head>
   <body>
      <h1 th:inline="text">Hello World!</h1>
      <form th:action="@{/logout}" method="post">
         <input type="submit" value="Sign Out"/>
      </form>
   </body>
<html>
Running the Application
As we've all component ready, let's run the Application. Right Click on the project, select Run As and then Spring Boot App as shown in image below:

It will boot up the application and once application is started, we can run localhost:8080 to check the changes.
  .   ____          _            __ _ _
 /\\ / ___'_ __ _ _(_)_ __  __ _ \ \ \ \
( ( )\___ | '_ | '_| | '_ \/ _` | \ \ \ \
 \\/  ___)| |_)| | | | | || (_| |  ) ) ) )
  '  |____| .__|_| |_|_| |_\__, | / / / /
 =========|_|==============|___/=/_/_/_/

[32m :: Spring Boot :: [39m              [2m (v3.5.6)[0;39m

[2m2025-10-17T10:56:20.371+05:30[0;39m [32m INFO[0;39m [35m21848[0;39m [2m--- [formlogin] [  restartedMain] [0;39m[36mc.t.s.formlogin.FormloginApplication    [0;39m [2m:[0;39m Starting FormloginApplication using Java 21.0.6 with PID 21848 (D:\Projects\formlogin\target\classes started by mahes in D:\Projects\formlogin)
[2m2025-10-17T10:56:20.373+05:30[0;39m [32m INFO[0;39m [35m21848[0;39m [2m--- [formlogin] [  restartedMain] [0;39m[36mc.t.s.formlogin.FormloginApplication    [0;39m [2m:[0;39m No active profile set, falling back to 1 default profile: "default"
[2m2025-10-17T10:56:20.426+05:30[0;39m [32m INFO[0;39m [35m21848[0;39m [2m--- [formlogin] [  restartedMain] [0;39m[36m.e.DevToolsPropertyDefaultsPostProcessor[0;39m [2m:[0;39m Devtools property defaults active! Set 'spring.devtools.add-properties' to 'false' to disable
[2m2025-10-17T10:56:20.426+05:30[0;39m [32m INFO[0;39m [35m21848[0;39m [2m--- [formlogin] [  restartedMain] [0;39m[36m.e.DevToolsPropertyDefaultsPostProcessor[0;39m [2m:[0;39m For additional web related logging consider setting the 'logging.level.web' property to 'DEBUG'
[2m2025-10-17T10:56:21.315+05:30[0;39m [32m INFO[0;39m [35m21848[0;39m [2m--- [formlogin] [  restartedMain] [0;39m[36mo.s.b.w.embedded.tomcat.TomcatWebServer [0;39m [2m:[0;39m Tomcat initialized with port 8080 (http)
[2m2025-10-17T10:56:21.326+05:30[0;39m [32m INFO[0;39m [35m21848[0;39m [2m--- [formlogin] [  restartedMain] [0;39m[36mo.apache.catalina.core.StandardService  [0;39m [2m:[0;39m Starting service [Tomcat]
[2m2025-10-17T10:56:21.326+05:30[0;39m [32m INFO[0;39m [35m21848[0;39m [2m--- [formlogin] [  restartedMain] [0;39m[36mo.apache.catalina.core.StandardEngine   [0;39m [2m:[0;39m Starting Servlet engine: [Apache Tomcat/10.1.46]
[2m2025-10-17T10:56:21.377+05:30[0;39m [32m INFO[0;39m [35m21848[0;39m [2m--- [formlogin] [  restartedMain] [0;39m[36mo.a.c.c.C.[Tomcat].[localhost].[/]      [0;39m [2m:[0;39m Initializing Spring embedded WebApplicationContext
[2m2025-10-17T10:56:21.377+05:30[0;39m [32m INFO[0;39m [35m21848[0;39m [2m--- [formlogin] [  restartedMain] [0;39m[36mw.s.c.ServletWebServerApplicationContext[0;39m [2m:[0;39m Root WebApplicationContext: initialization completed in 950 ms
[2m2025-10-17T10:56:21.503+05:30[0;39m [32m INFO[0;39m [35m21848[0;39m [2m--- [formlogin] [  restartedMain] [0;39m[36mo.s.b.a.w.s.WelcomePageHandlerMapping   [0;39m [2m:[0;39m Adding welcome page template: index
[2m2025-10-17T10:56:21.763+05:30[0;39m [32m INFO[0;39m [35m21848[0;39m [2m--- [formlogin] [  restartedMain] [0;39m[36mr$InitializeUserDetailsManagerConfigurer[0;39m [2m:[0;39m Global AuthenticationManager configured with UserDetailsService bean with name userDetailsService
[2m2025-10-17T10:56:21.946+05:30[0;39m [32m INFO[0;39m [35m21848[0;39m [2m--- [formlogin] [  restartedMain] [0;39m[36mo.s.b.d.a.OptionalLiveReloadServer      [0;39m [2m:[0;39m LiveReload server is running on port 35729
[2m2025-10-17T10:56:21.975+05:30[0;39m [32m INFO[0;39m [35m21848[0;39m [2m--- [formlogin] [  restartedMain] [0;39m[36mo.s.b.w.embedded.tomcat.TomcatWebServer [0;39m [2m:[0;39m Tomcat started on port 8080 (http) with context path '/'
[2m2025-10-17T10:56:21.984+05:30[0;39m [32m INFO[0;39m [35m21848[0;39m [2m--- [formlogin] [  restartedMain] [0;39m[36mc.t.s.formlogin.FormloginApplication    [0;39m [2m:[0;39m Started FormloginApplication in 1.974 seconds (process running for 2.529)
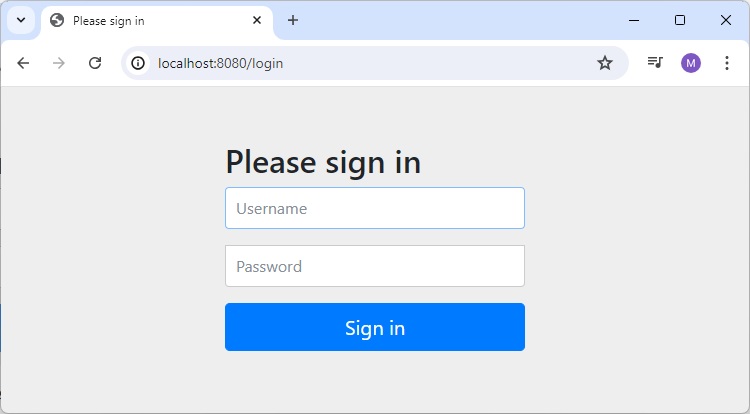
Output
Now open localhost:8080, you can see a nice looking default login page.
Login Page
Login Page for Bad Credentials
Enter any invalid credential and it will show error.

Home Page
Enter valid credential. Use username as user and password as user123 as specified in WebSecurityConfig class above.
and it will load home page.

After Logout
Now click on sign-out button, which will load the login page again.
Spring Security - Custom Form Login
Form-based login is one form of Username/password authentication that Spring Security provides support for. This is provided through an Html form.
Whenever a user requests a protected resource, Spring Security checks for the authentication of the request. If the request is not authenticated/authorized, the user will be redirected to the login page. The login page must be somehow rendered by the application. Spring Security provides that login form by default as we've seen in Spring Security - Form Login chapter.
In most of the production cases, login pages are customized and must be explicitly provided as given below −
protected void configure(HttpSecurity http) throws Exception {
http
   // ...
   .authorizeHttpRequests(
      request -> request.requestMatchers("/login").permitAll()
      .requestMatchers("/**").authenticated()
   )
   .formLogin(form -> form.loginPage("/login").permitAll())
}
Let us start actual programming with Spring Security. Before you start writing your example using Spring framework, you have to make sure that you have set up your Spring environment properly as explained in Spring Security - Environment Setup Chapter. We also assume that you have a bit of working knowledge on Spring Tool Suite IDE.
Now let us proceed to write a Spring MVC based Application managed by Maven, which will ask user to login, authenticate user and then provide option to logout using Spring Security Form Login Feature.
Create Project using Spring Initializr
Spring Initializr is great way to start with Spring Boot project. It provides a easy to use User Interface to create a project, add dependencies, select java runtime etc. It generates a skeleton project structure which once downloaded can be imported in spring tool suite and we can proceed with our readymade project structure.
We're choosing a maven project, naming the project as formlogin, with java version as 21. Following dependencies are added:
Spring Web
Spring Security
Spring Boot DevTools
Thymeleaf is a templating engine for Java. It allows us to quickly develop static or dynamic web pages for rendering in the browser. It is extremely extensible and allows us to define and customize the processing of our templates in fine detail. In addition to this, we can learn more about Thymeleaf by clicking this link.
Let's move on to generate our project and download it. We then extract it to a folder of our choice and use any IDE to open it. I shall be using Spring Tools Suite 4. It is available for free downloading from the https://spring.io/tools website and is optimized for spring applications.
pom.xml with all relevant dependencies
Let's take a look at our pom.xml file. It should look something similar to this −
pom.xml
<?xml version="1.0" encoding="UTF-8"?>
<project xmlns="http://maven.apache.org/POM/4.0.0" xmlns:xsi="http://www.w3.org/2001/XMLSchema-instance"
xsi:schemaLocation="http://maven.apache.org/POM/4.0.0 https://maven.apache.org/xsd/maven-4.0.0.xsd">
   <modelVersion>4.0.0</modelVersion>
   <parent>
      <groupId>org.springframework.boot</groupId>
      <artifactId>spring-boot-starter-parent</artifactId>
      <version>3.5.6</version>
      <relativePath/> <!-- lookup parent from repository -->
   </parent>
   <groupId>com.tutorialspoint.security</groupId>
   <artifactId>formlogin</artifactId>
   <version>0.0.1-SNAPSHOT</version>
   <name>formlogin</name>
   <description>Demo project for Spring Boot</description>
   <url/>
   <licenses>
      <license/>
   </licenses>
   <developers>
      <developer/>
   </developers>
   <scm>
      <connection/>
      <developerConnection/>
      <tag/>
      <url/>
   </scm>
   <properties>
      <java.version>21</java.version>
   </properties>
   <dependencies>
      <dependency>
         <groupId>org.springframework.boot</groupId>
         <artifactId>spring-boot-starter-security</artifactId>
      </dependency>
      <dependency>
         <groupId>org.springframework.boot</groupId>
         <artifactId>spring-boot-starter-thymeleaf</artifactId>
      </dependency>
      <dependency>
         <groupId>org.springframework.boot</groupId>
         <artifactId>spring-boot-starter-web</artifactId>
      </dependency>
      <dependency>
         <groupId>org.thymeleaf.extras</groupId>
         <artifactId>thymeleaf-extras-springsecurity6</artifactId>
      </dependency>
      <dependency>
         <groupId>org.springframework.boot</groupId>
         <artifactId>spring-boot-devtools</artifactId>
         <scope>runtime</scope>
         <optional>true</optional>
      </dependency>
      <dependency>
         <groupId>org.springframework.boot</groupId>
         <artifactId>spring-boot-starter-test</artifactId>
         <scope>test</scope>
      </dependency>
      <dependency>
         <groupId>org.springframework.security</groupId>
         <artifactId>spring-security-test</artifactId>
         <scope>test</scope>
      </dependency>
   </dependencies>
   <build>
      <plugins>
         <plugin>
            <groupId>org.springframework.boot</groupId>
            <artifactId>spring-boot-maven-plugin</artifactId>
         </plugin>
      </plugins>
   </build>
</project>
Login.html
This code requires a login.html file to be present in the mapped folder which would be returned on hitting the /login. This HTML file should contain a login form. Furthermore, the request should be a post request to /login. The parameter names should be "username" and "password" for username and password respectively.
Create login.html in /src/main/resources/templates folder with following content to act as a login page.
login.html
<!DOCTYPE html>
   <html xmlns="http://www.w3.org/1999/xhtml"
   xmlns:th="https://www.thymeleaf.org"
   xmlns:sec="https://www.thymeleaf.org/thymeleaf-extras-springsecurity3">
   <head>
      <title>Spring Security Example</title>
   </head>
   <body>
      <div th:if="${param.error}">
         <p>Bad Credentials</p>
      </div>
      <div th:if="${param.logout}">You have been logged out.</div>
      <form th:action="@{/login}" method="post">
         <div>
            <h1>Please sign in</h1>
            <label for="username"><b>Username</b></label>
            <input type="text" placeholder="Enter Username" name="username" id="username" required>
            <label for="password"><b>Password</b></label>
            <input type="password" placeholder="Enter Password" name="password" id="password" required>
            <input type="submit"  value="Sign In" />
          </div>
      </form>
   </body>
</html>
Update Spring Security Configuration Class
Inside of our config package, we have WebSecurityConfig class as defined in Spring Security - Form Login chapter. Let's update its filterChain() method for our custom login page
http.
//...
   .formLogin(form -> form.loginPage("/login")
   .defaultSuccessUrl("/")
   .failureUrl("/login?error=true")
   .permitAll())
//...
.build();
Following is the complete code of the Spring Security Configuration class
WebSecurityConfig.java
package com.tutorialspoint.security.formlogin.config;

import org.springframework.context.annotation.Bean;
import org.springframework.context.annotation.Configuration;
import org.springframework.security.config.annotation.web.builders.HttpSecurity;
import org.springframework.security.config.annotation.web.configuration.EnableWebSecurity;
import org.springframework.security.config.annotation.web.configurers.AbstractHttpConfigurer;
import org.springframework.security.core.userdetails.User;
import org.springframework.security.core.userdetails.UserDetails;
import org.springframework.security.core.userdetails.UserDetailsService;
import org.springframework.security.crypto.bcrypt.BCryptPasswordEncoder;
import org.springframework.security.crypto.password.PasswordEncoder;
import org.springframework.security.provisioning.InMemoryUserDetailsManager;
import org.springframework.security.web.SecurityFilterChain;

@Configuration
@EnableWebSecurity
public class WebSecurityConfig  {

   @Bean
   protected UserDetailsService userDetailsService() {
      UserDetails user = User.builder()
         .username("user")
         .password(passwordEncoder().encode("user123"))
         .roles("USER")
         .build();
      UserDetails admin = User.builder()
         .username("admin")
         .password(passwordEncoder().encode("admin123"))
         .roles("USER", "ADMIN")
         .build();
      return new InMemoryUserDetailsManager(user, admin);
   }

   @Bean
   protected PasswordEncoder passwordEncoder() {
      return new BCryptPasswordEncoder();
   }

   @Bean
   protected SecurityFilterChain filterChain(HttpSecurity http) throws Exception {
      return http
         .csrf(AbstractHttpConfigurer::disable)
         .authorizeHttpRequests(
            request -> request.requestMatchers("/login").permitAll()
            .requestMatchers("/**").authenticated()
         )
         .formLogin(form -> form.loginPage("/login")
            .defaultSuccessUrl("/")
            .failureUrl("/login?error=true")
            .permitAll())
         .logout(config -> config
         .logoutUrl("/logout")
         .logoutSuccessUrl("/login"))
         .build();
   }
}
There are a few points to note here −
defaultSuccessUrl ("/") − This endpoint will serve the index page as well as success page of our application. As we have configured earlier, we shall be protecting this page and allow only authenticated users will be able to access this page.
failureUrl ("/login?error=true") − This endpoint will load the login page with error flag to show the error message.
logoutUrl ("/logout") − This will be used to logout from our application.
logoutSuccessUrl ("/login") − This will be used to load login page once user is successfully logged out.
Controller Class
In this class, we've created a mapping for "/" endpoint and for "/login" for the index page and login page of this application.
AuthController.java
package com.tutorialspoint.security.formlogin.controllers;

import org.springframework.stereotype.Controller;
import org.springframework.web.bind.annotation.GetMapping;

@Controller
public class AuthController {
   @GetMapping("/")
   public String home() {
      return "index";
   }
   @GetMapping("/login")
   public String login() {
      return "login";
   }
}
Views
Let's update index.html in /src/main/resources/templates folder with following content to act as a home page and to display logged in user name.
index.html
<!DOCTYPE html>
<html xmlns="http://www.w3.org/1999/xhtml"
   xmlns:th="https://www.thymeleaf.org"
   xmlns:sec="https://www.thymeleaf.org/thymeleaf-extras-springsecurity6">
   <head>
      <title>
         Hello World!
      </title>
   </head>
   <body>
      <h1 th:inline="text">Hello <span sec:authentication="name"></span>!</h1>
      <form th:action="@{/logout}" method="post">
         <input type="submit" value="Sign Out"/>
      </form>
   </body>
<html>
login.html
Let's create the login.html in /src/main/resources/templates folder with following content to act as a login page. We're using default name username and password for text fields. In case of other name, we need to set the same in spring security config class as well.
<!DOCTYPE html>
<html xmlns="http://www.w3.org/1999/xhtml"
   xmlns:th="https://www.thymeleaf.org"
   xmlns:sec="https://www.thymeleaf.org/thymeleaf-extras-springsecurity6">
   <head>
      <title>Spring Security Example</title>
   </head>
   <body>
      <div th:if="${param.error}">
         <p>Bad Credentials</p>
      </div>
      <div th:if="${param.logout}">You have been logged out.</div>
      <form th:action="@{/login}" method="post">
         <div>
            <h1>Please sign in</h1>
            <label for="username">
               <b>Username</b>
            </label>
            <input type="text" placeholder="Enter Username" name="username" id="username" required>
            <label for="password"><b>Password</b></label>
            <input type="password" placeholder="Enter Password" name="password" id="password" required>
            <input type="submit"  value="Sign In" />
         </div>
      </form>
   </body>
</html>
In login.html, we're reading request parameter error using ${param.error}. If it is true, then an error message is printed as Bad Credential. Similarly, we're reading request parameter logout using ${param.logout}. If it is true, then logout message is printed.
In login form, we're using POST method to login while using input fields with name and id as username and password.
Running the Application
As we've all component ready, let's run the Application. Right Click on the project, select Run As and then Spring Boot App.
It will boot up the application and once application is started, we can run localhost:8080 to check the changes.
Output
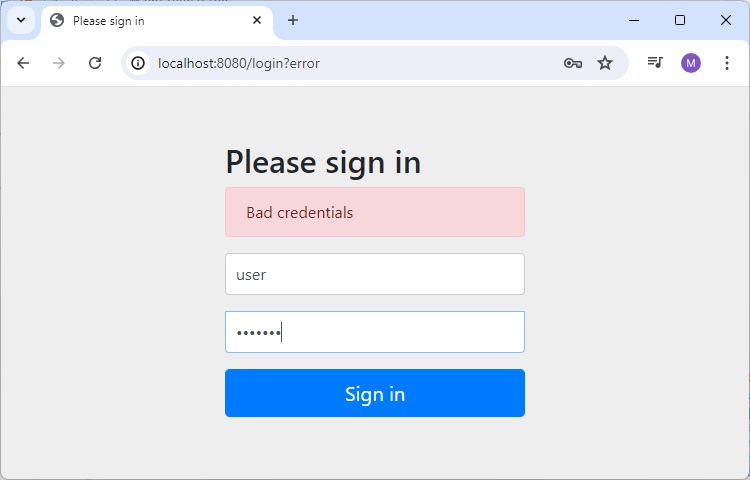
Now open localhost:8080, you can see our custom login page.
Login Page

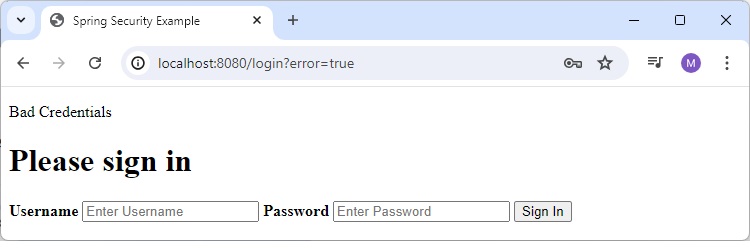
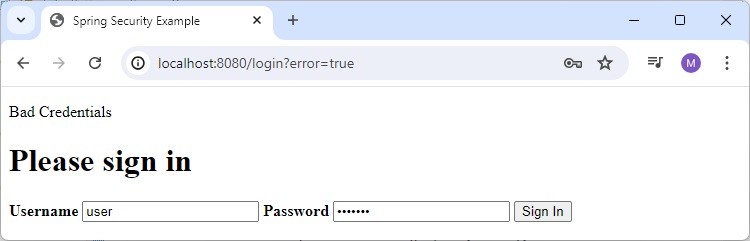
Login Page for Bad Credentials
Enter any invalid credential and it will show error.
Home Page
Enter valid credential
and it will load home page.

After Logout
Now click on sign-out button, which will load the login page again.
Spring Security - Logout
Logout is an important function, so that a user is required to login to access any secured resource once user has logged out or signed out or its current session is invalidated for any reason.
Spring security provides a default logout functionality as we've seen in Spring Security - Form Login chapter.
A logout functionality performs following important functions.
Invalidates the Http session, and unbinds objects bound to the session.
It clears the remember-me cookie.
Removes the authentication from Springs Security context.
A logout can be explicitly configured as given below −
protected void configure(HttpSecurity http) throws Exception {
http
   // ...
   .logout(config -> config
      .logoutUrl("/logout")
      .logoutSuccessUrl("/login"))
   .build();
}
Important Methods
Following are important methods that we can configure in logout() method.
logoutUrl ("/logout") − This will be used to logout from our application. It has default value as logout and can be changed to any other custom value.
logoutSuccessUrl ("/login") − This will be used to load login page once user is successfully logged out.
invalidateHttpSession ("true") − This is used to invalidate the session. By default, it is true so that when user it logged out, its session is invalidated. We can mark it false to keep the session alive even after logout.
deleteCookies ("JSESSIONID") − This is used to clear remember-me cookie.
logoutSuccessHandler(logoutSuccessHandler()); − This method is used when we need to perform some action at the time user logs out from the application.
Let us start actual programming with Spring Security. Before you start writing your first example using Spring framework, you have to make sure that you have set up your Spring environment properly as explained in Spring Security - Environment Setup Chapter. We also assume that you have a bit of working knowledge on Spring Tool Suite IDE.
Now let us proceed to write a Spring MVC based Application managed by Maven, which will ask user to login, authenticate user and then provide option to logout using Spring Security Form Login Feature.
Create Project using Spring Initializr
Spring Initializr is great way to start with Spring Boot project. It provides a easy to use User Interface to create a project, add dependencies, select java runtime etc. It generates a skeleton project structure which once downloaded can be imported in spring tool suite and we can proceed with our readymade project structure.
We're choosing a maven project, naming the project as formlogin, with java version as 21. Following dependencies are added:
Spring Web
Spring Security
Spring Boot DevTools
Thymeleaf is a templating engine for Java. It allows us to quickly develop static or dynamic web pages for rendering in the browser. It is extremely extensible and allows us to define and customize the processing of our templates in fine detail. In addition to this, we can learn more about Thymeleaf by clicking this link.
Let's move on to generate our project and download it. We then extract it to a folder of our choice and use any IDE to open it. I shall be using Spring Tools Suite 4. It is available for free downloading from the https://spring.io/tools website and is optimized for spring applications.
pom.xml with all relevant dependencies
Let's take a look at our pom.xml file. It should look something similar to this −
pom.xml
<?xml version="1.0" encoding="UTF-8"?>
<project xmlns="http://maven.apache.org/POM/4.0.0" xmlns:xsi="http://www.w3.org/2001/XMLSchema-instance"
xsi:schemaLocation="http://maven.apache.org/POM/4.0.0 https://maven.apache.org/xsd/maven-4.0.0.xsd">
   <modelVersion>4.0.0</modelVersion>
   <parent>
      <groupId>org.springframework.boot</groupId>
      <artifactId>spring-boot-starter-parent</artifactId>
      <version>3.3.1</version>
      <relativePath/> <!-- lookup parent from repository -->
   </parent>
   <groupId>com.tutorialspoint.security</groupId>
   <artifactId>formlogin</artifactId>
   <version>0.0.1-SNAPSHOT</version>
   <name>formlogin</name>
   <description>Demo project for Spring Boot</description>
   <url/>
   <licenses>
      <license/>
   </licenses>
   <developers>
      <developer/>
   </developers>
   <scm>
      <connection/>
      <developerConnection/>
      <tag/>
      <url/>
   </scm>
   <properties>
      <java.version>21</java.version>
   </properties>
   <dependencies>
      <dependency>
         <groupId>org.springframework.boot</groupId>
         <artifactId>spring-boot-starter-security</artifactId>
      </dependency>
      <dependency>
         <groupId>org.springframework.boot</groupId>
         <artifactId>spring-boot-starter-thymeleaf</artifactId>
      </dependency>
      <dependency>
         <groupId>org.springframework.boot</groupId>
         <artifactId>spring-boot-starter-web</artifactId>
      </dependency>
      <dependency>
         <groupId>org.thymeleaf.extras</groupId>
         <artifactId>thymeleaf-extras-springsecurity6</artifactId>
      </dependency>
      <dependency>
         <groupId>org.springframework.boot</groupId>
         <artifactId>spring-boot-devtools</artifactId>
         <scope>runtime</scope>
         <optional>true</optional>
      </dependency>
      <dependency>
         <groupId>org.springframework.boot</groupId>
         <artifactId>spring-boot-starter-test</artifactId>
         <scope>test</scope>
      </dependency>
      <dependency>
         <groupId>org.springframework.security</groupId>
         <artifactId>spring-security-test</artifactId>
         <scope>test</scope>
      </dependency>
   </dependencies>
   <build>
      <plugins>
         <plugin>
            <groupId>org.springframework.boot</groupId>
            <artifactId>spring-boot-maven-plugin</artifactId>
         </plugin>
      </plugins>
   </build>
</project>
Spring Security Configuration Class
Inside of our config package, we have created the WebSecurityConfig class. We shall be using this class for our security configurations, so let's annotate it with an @Configuration annotation and @EnableWebSecurity. As a result, Spring Security knows to treat this class a configuration class. As we can see, configuring applications have been made very easy by Spring.
WebSecurityConfig
package com.tutorialspoint.security.formlogin.config;

import org.springframework.context.annotation.Bean;
import org.springframework.context.annotation.Configuration;
import org.springframework.security.config.annotation.web.builders.HttpSecurity;
import org.springframework.security.config.annotation.web.configuration.EnableWebSecurity;
import org.springframework.security.config.annotation.web.configurers.AbstractHttpConfigurer;
import org.springframework.security.core.userdetails.User;
import org.springframework.security.core.userdetails.UserDetails;
import org.springframework.security.core.userdetails.UserDetailsService;
import org.springframework.security.crypto.bcrypt.BCryptPasswordEncoder;
import org.springframework.security.crypto.password.PasswordEncoder;
import org.springframework.security.provisioning.InMemoryUserDetailsManager;
import org.springframework.security.web.SecurityFilterChain;

@Configuration
@EnableWebSecurity
public class WebSecurityConfig  {

   @Bean
   protected UserDetailsService userDetailsService() {
      UserDetails user = User.builder()
         .username("user")
         .password(passwordEncoder().encode("user123"))
         .roles("USER")
         .build();
      UserDetails admin = User.builder()
         .username("admin")
         .password(passwordEncoder().encode("admin123"))
         .roles("USER", "ADMIN")
         .build();
      return new InMemoryUserDetailsManager(user, admin);
   }

   @Bean
   protected PasswordEncoder passwordEncoder() {
      return new BCryptPasswordEncoder();
   }

   @Bean
   protected SecurityFilterChain filterChain(HttpSecurity http) throws Exception {
      return http
         .csrf(AbstractHttpConfigurer::disable)
         .authorizeHttpRequests(
            request -> request.requestMatchers("/login").permitAll()
            .requestMatchers("/**").authenticated()
         )
         .formLogin(form -> form.loginPage("/login")
            .defaultSuccessUrl("/")
            .failureUrl("/login?error=true")
            .permitAll())
         .logout(config -> config
            .logoutUrl("/logout")
            .logoutSuccessUrl("/login")
            .invalidateHttpSession(true)
            .deleteCookies("JSESSIONID"))
         .build();
   }
}
Here we've mentioned the logout url to be used logout which is a default url provided by spring security. We are not required to create a special logout page for it. Similarly once user is logged out, user will be shown the login page which is standard practice.
Controller Class
In this class, we've created a mapping for "/" endpoint and for "/login" for the index page and login page of this application.
AuthController.java
package com.tutorialspoint.security.formlogin.controllers;

import org.springframework.stereotype.Controller;
import org.springframework.web.bind.annotation.GetMapping;

@Controller
public class AuthController {
   @GetMapping("/")
   public String home() {
      return "index";
   }
   @GetMapping("/login")
   public String login() {
      return "login";
   }
}
Views
Let's create index.html in /src/main/resources/templates folder with following content to act as a home page and to display logged in user name.
index.html
<!DOCTYPE html>
<html xmlns="http://www.w3.org/1999/xhtml"
   xmlns:th="https://www.thymeleaf.org"
   xmlns:sec="https://www.thymeleaf.org/thymeleaf-extras-springsecurity3">
   <head>
      <title>
         Hello World!
      </title>
   </head>
   <body>
      <h1 th:inline="text">Hello <span sec:authentication="name"></span>!</h1>
      <form th:action="@{/logout}" method="post">
         <input type="submit" value="Sign Out"/>
      </form>
   </body>
<html>
Here we've used a form with a submit button to logout the user.
<form th:action="@{/logout}" method="post">
   <input type="submit" value="Sign Out"/>
</form>
We can use a link as well as well as shown below:
<a href="/logout" alt="logout">Sign Out</a>
login.html
Let's create the login.html in /src/main/resources/templates folder with following content to act as a login page. We're using default name username and password for text fields. In case of other name, we need to set the same in spring security config class as well.
<!DOCTYPE html>
<html xmlns="http://www.w3.org/1999/xhtml"
   xmlns:th="https://www.thymeleaf.org"
   xmlns:sec="https://www.thymeleaf.org/thymeleaf-extras-springsecurity3">
   <head>
      <title>Spring Security Example</title>
   </head>
   <body>
      <div th:if="${param.error}">
         <p>Bad Credentials</p>
      </div>
      <div th:if="${param.logout}">You have been logged out.</div>
      <form th:action="@{/login}" method="post">
         <div>
            <h1>Please sign in</h1>
            <label for="username">
               <b>Username</b>
            </label>
            <input type="text" placeholder="Enter Username" name="username" id="username" required>
            <label for="password"><b>Password</b></label>
            <input type="password" placeholder="Enter Password" name="password" id="password" required>
            <input type="submit"  value="Sign In" />
         </div>
      </form>
   </body>
</html>
In login.html, we're reading request parameter error using ${param.error}. If it is true, then an error message is printed as Bad Credential. Similarly, we're reading request parameter logout using ${param.logout}. If it is true, then logout message is printed.
In login form, we're using POST method to login while using input fields with name and id as username and password.
Running the Application
As we've all component ready, let's run the Application. Right Click on the project, select Run As and then Spring Boot App.
It will boot up the application and once application is started, we can run localhost:8080 to check the changes.
Output
Now open localhost:8080, you can see our custom login page.
Login Page
Home Page
Enter valid credential and it will load home page.
After Logout
Now click on sign-out button, which will load the login page again.
Spring Security - Remember Me
Remember Me is an important function of Spring Security, so that a user can remain logged in the application even when session is expired. We'll demonstrate the use of Remember Me functionality provided by Spring security in following sections.
A Remember Me functionality performs following important functions.
Firstly, it will add a "Remember Me" checkbox to default login form that we generated using formLogin().
-
In case of custom login form, we need to add a checkbox named "remember-me" to the form. In case of different name to be used, we need to configure the new name during Spring Security configuration as shown below:
.rememberMe().rememberMeParameter("remember") And, secondly, ticking the checkbox generates the remember-me cookie. The cookie stores the identity of the user and the browser stores it.
Spring Security detects the cookie in future sessions to automate the login. As a result, the user can access the application again without logging in again.
A remember-me can be explicitly configured as given below −
protected void configure(HttpSecurity http) throws Exception {
http
   // ...
   // key should be unique
   .rememberMe(config -> config.key("123456")
   .tokenValiditySeconds(3600))
   .build();
}
Important Methods
Following are important methods that we can configure in logout() method.
rememberMe () − This will be used to implement remember me functionality. The key passed to remember-me function should be unique and secret. This key is application specific and is used to generate remember me token content.
tokenValiditySeconds () − This will be used to set the expiry of the remember me cookie. By default it has validity of 2 weeks. We can customize it any time as in above code snippet, we've set it as 1 hour using 3600 seconds.
rememberMeParameter () − This is used to mark an input check box to be remember-me checkbox. By default, its value is remember-me.
Let us start actual programming with Spring Security. Before you start writing your example using Spring framework, you have to make sure that you have set up your Spring environment properly as explained in Spring Security - Environment Setup Chapter. We also assume that you have a bit of working knowledge on Spring Tool Suite IDE.
Now let us proceed to write a Spring MVC based Application managed by Maven, which will ask user to login, authenticate user and then provide option to logout using Spring Security Form Login Feature.
Create Project using Spring Initializr
Spring Initializr is great way to start with Spring Boot project. It provides a easy to use User Interface to create a project, add dependencies, select java runtime etc. It generates a skeleton project structure which once downloaded can be imported in spring tool suite and we can proceed with our readymade project structure.
We're choosing a maven project, naming the project as formlogin, with java version as 21. Following dependencies are added:
Spring Web
Spring Security
Spring Boot DevTools
Thymeleaf is a templating engine for Java. It allows us to quickly develop static or dynamic web pages for rendering in the browser. It is extremely extensible and allows us to define and customize the processing of our templates in fine detail. In addition to this, we can learn more about Thymeleaf by clicking this link.
Let's move on to generate our project and download it. We then extract it to a folder of our choice and use any IDE to open it. I shall be using Spring Tools Suite 4. It is available for free downloading from the https://spring.io/tools website and is optimized for spring applications.
pom.xml with all relevant dependencies
Let's take a look at our pom.xml file. It should look something similar to this −
pom.xml
<?xml version="1.0" encoding="UTF-8"?>
<project xmlns="http://maven.apache.org/POM/4.0.0" xmlns:xsi="http://www.w3.org/2001/XMLSchema-instance"
xsi:schemaLocation="http://maven.apache.org/POM/4.0.0 https://maven.apache.org/xsd/maven-4.0.0.xsd">
   <modelVersion>4.0.0</modelVersion>
   <parent>
      <groupId>org.springframework.boot</groupId>
      <artifactId>spring-boot-starter-parent</artifactId>
      <version>3.5.6</version>
      <relativePath/> <!-- lookup parent from repository -->
   </parent>
   <groupId>com.tutorialspoint.security</groupId>
   <artifactId>formlogin</artifactId>
   <version>0.0.1-SNAPSHOT</version>
   <name>formlogin</name>
   <description>Demo project for Spring Boot</description>
   <url/>
   <licenses>
      <license/>
   </licenses>
   <developers>
      <developer/>
   </developers>
   <scm>
      <connection/>
      <developerConnection/>
      <tag/>
      <url/>
   </scm>
   <properties>
      <java.version>21</java.version>
   </properties>
   <dependencies>
      <dependency>
         <groupId>org.springframework.boot</groupId>
         <artifactId>spring-boot-starter-security</artifactId>
      </dependency>
      <dependency>
         <groupId>org.springframework.boot</groupId>
         <artifactId>spring-boot-starter-thymeleaf</artifactId>
      </dependency>
      <dependency>
         <groupId>org.springframework.boot</groupId>
         <artifactId>spring-boot-starter-web</artifactId>
      </dependency>
      <dependency>
         <groupId>org.thymeleaf.extras</groupId>
         <artifactId>thymeleaf-extras-springsecurity6</artifactId>
      </dependency>
      <dependency>
         <groupId>org.springframework.boot</groupId>
         <artifactId>spring-boot-devtools</artifactId>
         <scope>runtime</scope>
         <optional>true</optional>
      </dependency>
      <dependency>
         <groupId>org.springframework.boot</groupId>
         <artifactId>spring-boot-starter-test</artifactId>
         <scope>test</scope>
      </dependency>
      <dependency>
         <groupId>org.springframework.security</groupId>
         <artifactId>spring-security-test</artifactId>
         <scope>test</scope>
      </dependency>
   </dependencies>
   <build>
      <plugins>
         <plugin>
            <groupId>org.springframework.boot</groupId>
            <artifactId>spring-boot-maven-plugin</artifactId>
         </plugin>
      </plugins>
   </build>
</project>
Spring Security Configuration Class
Inside of our config package, we have created the WebSecurityConfig class. We shall be using this class for our security configurations, so let's annotate it with an @Configuration annotation and @EnableWebSecurity. As a result, Spring Security knows to treat this class a configuration class. As we can see, configuring applications have been made very easy by Spring.
WebSecurityConfig
package com.tutorialspoint.security.formlogin.config;

import org.springframework.context.annotation.Bean;
import org.springframework.context.annotation.Configuration;
import org.springframework.security.config.annotation.web.builders.HttpSecurity;
import org.springframework.security.config.annotation.web.configuration.EnableWebSecurity;
import org.springframework.security.config.annotation.web.configurers.AbstractHttpConfigurer;
import org.springframework.security.core.userdetails.User;
import org.springframework.security.core.userdetails.UserDetails;
import org.springframework.security.core.userdetails.UserDetailsService;
import org.springframework.security.crypto.bcrypt.BCryptPasswordEncoder;
import org.springframework.security.crypto.password.PasswordEncoder;
import org.springframework.security.provisioning.InMemoryUserDetailsManager;
import org.springframework.security.web.SecurityFilterChain;

@Configuration
@EnableWebSecurity
public class WebSecurityConfig  {

   @Bean
   protected UserDetailsService userDetailsService() {
      UserDetails user = User.builder()
         .username("user")
         .password(passwordEncoder().encode("user123"))
         .roles("USER")
         .build();
      UserDetails admin = User.builder()
         .username("admin")
         .password(passwordEncoder().encode("admin123"))
         .roles("USER", "ADMIN")
         .build();
      return new InMemoryUserDetailsManager(user, admin);
   }

   @Bean
   protected PasswordEncoder passwordEncoder() {
      return new BCryptPasswordEncoder();
   }

   @Bean
   protected SecurityFilterChain filterChain(HttpSecurity http) throws Exception {
      return http
         .csrf(AbstractHttpConfigurer::disable)
         .authorizeHttpRequests(
            request -> request.requestMatchers("/login").permitAll()
            .requestMatchers("/**").authenticated()
         )
         .formLogin(form -> form.loginPage("/login")
            .defaultSuccessUrl("/")
            .failureUrl("/login?error=true")
            .permitAll())
         .rememberMe(config -> config.key("123456")
         .tokenValiditySeconds(3600))
         .logout(config -> config
            .logoutUrl("/logout")
            .logoutSuccessUrl("/login")
			.invalidateHttpSession(true)
            .deleteCookies("JSESSIONID"))
         .build();
   }
}
Here we've mentioned the rememberMe() with a secure key for spring security.
Controller Class
In this class, we've created a mapping for "/" endpoint and for "/login" for the index page and login page of this application.
AuthController.java
package com.tutorialspoint.security.formlogin.controllers;

import org.springframework.stereotype.Controller;
import org.springframework.web.bind.annotation.GetMapping;

@Controller
public class AuthController {
   @GetMapping("/")
   public String home() {
      return "index";
   }
   @GetMapping("/login")
   public String login() {
      return "login";
   }
}
Views
Let's create index.html in /src/main/resources/templates folder with following content to act as a home page and to display logged in user name.
index.html
<!DOCTYPE html>
<html xmlns="http://www.w3.org/1999/xhtml"
   xmlns:th="https://www.thymeleaf.org"
   xmlns:sec="https://www.thymeleaf.org/thymeleaf-extras-springsecurity3">
   <head>
      <title>
         Hello World!
      </title>
   </head>
   <body>
      <h1 th:inline="text">Hello <span sec:authentication="name"></span>!</h1>
      <form th:action="@{/logout}" method="post">
         <input type="submit" value="Sign Out"/>
      </form>
   </body>
<html>
login.html
Let's create the login.html in /src/main/resources/templates folder with following content to act as a login page. We're using default name username, password and remember-me for text fields. In case of other name, we need to set the same in spring security config class as well.
<!DOCTYPE html>
<html xmlns="http://www.w3.org/1999/xhtml"
   xmlns:th="https://www.thymeleaf.org"
   xmlns:sec="https://www.thymeleaf.org/thymeleaf-extras-springsecurity3">
   <head>
      <title>Spring Security Example</title>
   </head>
   <body>
      <div th:if="${param.error}">
         <p>Bad Credentials</p>
      </div>
      <div th:if="${param.logout}">You have been logged out.</div>
      <form th:action="@{/login}" method="post">
         <h1>Please sign in</h1>
         <table>
            <tr>
               <td><label for="username"><b>Username</b></label></td>
               <td><input type="text" placeholder="Enter Username" name="username" id="username" required></td>
            </tr>
            <tr>
               <td><label for="password"><b>Password</b></label></td>
               <td><input type="password" placeholder="Enter Password" name="password" id="password" required></td>
            </tr>
            <tr>
               <td><label for="remember-me"><b>Remember Me</b></label> </td>
               <td><input type="checkbox" name="remember-me" /></td>
            </tr>
            <tr>
               <td> </td>
               <td><input type="submit"  value="Sign In" /></td>
            </tr>
         </table>
      </form>
   </body>
</html>
In login form, we're using POST method to login while using input fields with name and id as username, password and remember-me checkbox. If checkbox is selected, a remember-me Cookie will be created when user logs in the application.
Running the Application
As we've all component ready, let's run the Application. Right Click on the project, select Run As and then Spring Boot App.
It will boot up the application and once application is started, we can run localhost:8080 to check the changes.
Output
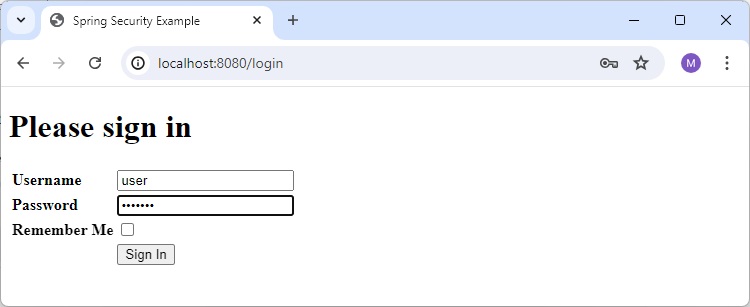
Now open localhost:8080, you can see our login page with Remember Me Checkbox.
Login Page with Remember Me Checkbox

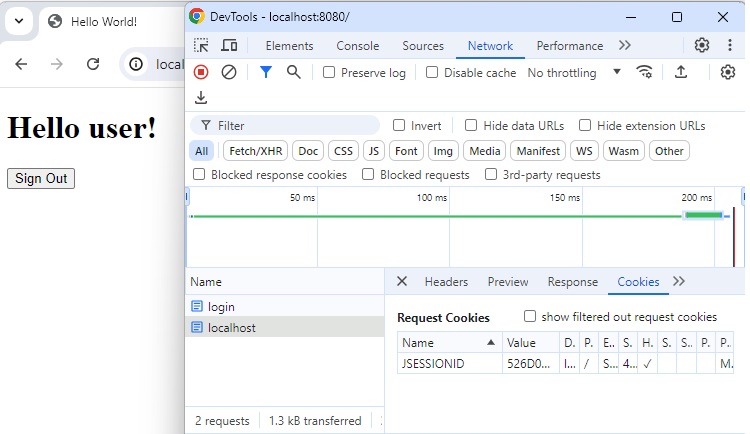
Home Page without Remember Me Checked
Enter valid credential and do not check the remember me checkbox.
and it will load home page. We can verify that remember me cookie is not available.
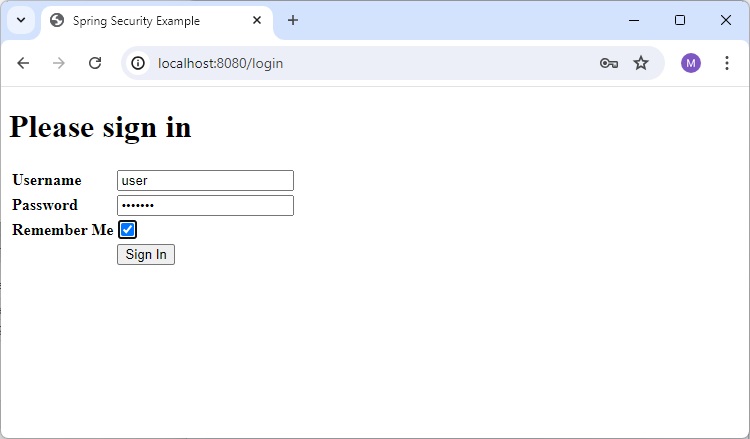
Login with Remember Me Checked
Now click on sign-out button, which will load the login page again. Check the remember-me checkbox and log-in.
Home Page with Remember Me Checked
Now we can check that remember me cookie is now available.
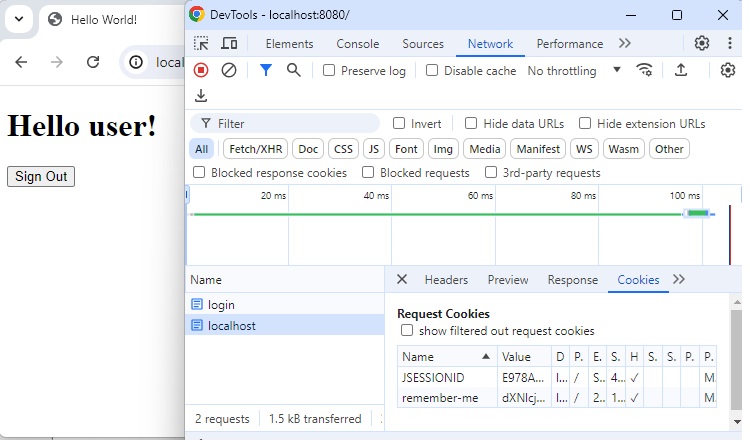
Remember Me Cookie
Remember Me cookie contains following details:
username - to identify the logged-in user. Can be used to retrieve username
expirationTime - expiry of the cookie. Default is 2 weeks.
Hash - MD5 encoded hash of username, expirationTime, password and the private key used to create cookie.
In case, username or password is changed, cookie gets invalidated and it has to created again.
If Remember Me cookie is not set, then refreshing a page will load the login page after session being timed out. Whereas if Remember Me cookie is set and active, then refreshing page will simply refresh the page and create a new session using token from Remember Me Cookie.
Spring Security - Redirection
In web application, we're often required to land to different pages based on user profile. For example, a normal user may land on user home page whereas an admin may land on Admin console. We can achieve this requirement very easily using spring security which provides supports to handle login success and based on user role, we can decide which page to be shown to the user or simply redirect the user to the required page.
In order to achieve redirection, we need to handle successHandler of formLogin in Spring Security Configuration as shown below:
protected void configure(HttpSecurity http) throws Exception {
http
   // ...
   // key should be unique
   .formLogin(form -> form.loginPage("/login")
      .defaultSuccessUrl("/")
      .failureUrl("/login?error=true")
      .successHandler(authenticationSuccessHandler())
      .permitAll())
   //
   .build();
}
Here authenticationSuccessHandler() method is another bean to handle login success and redirect user to the required page.
@Bean
public AuthenticationSuccessHandler authenticationSuccessHandler() {
   return new AuthenticationHandler();
}
AuthenticationSuccessHandler
In order to achieve redirection, we first need to create a class by implementing AuthenticationSuccessHandler as shown below. In this class, we've to implement onAuthenticationSuccess() method. onAuthenticationSuccess() method is called once user is logged in successfully. Now using Authentication object, we can check the role of the logged in user and then determine the redirection url. Using HttpServletResponse.sendRedirect() method, we can then redirect user to the required page.
public class AuthenticationHandler implements AuthenticationSuccessHandler {

   @Override
   public void onAuthenticationSuccess(HttpServletRequest request, HttpServletResponse response,
      Authentication authentication) throws IOException, ServletException {
      String redirect = request.getContextPath();

      if (authentication.getAuthorities().stream().anyMatch(a -> a.getAuthority().equals("ROLE_ADMIN"))) {
         redirect = "/admin";
      } else if (authentication.getAuthorities().stream().anyMatch(a -> a.getAuthority().equals("ROLE_USER"))) {
         redirect = "/user";
      }

      response.sendRedirect(redirect);
   }
}
Let us start actual programming with Spring Security. Before you start writing your first example using Spring framework, you have to make sure that you have set up your Spring environment properly as explained in Spring Security - Environment Setup Chapter. We also assume that you have a bit of working knowledge on Spring Tool Suite IDE.
Now let us proceed to write a Spring MVC based Application managed by Maven, which will ask user to login, authenticate user and then provide option to logout using Spring Security Form Login Feature.
Create Project using Spring Initializr
Spring Initializr is great way to start with Spring Boot project. It provides a easy to use User Interface to create a project, add dependencies, select java runtime etc. It generates a skeleton project structure which once downloaded can be imported in spring tool suite and we can proceed with our readymade project structure.
We're choosing a maven project, naming the project as formlogin, with java version as 21. Following dependencies are added:
Spring Web
Spring Security
Spring Boot DevTools
Thymeleaf is a templating engine for Java. It allows us to quickly develop static or dynamic web pages for rendering in the browser. It is extremely extensible and allows us to define and customize the processing of our templates in fine detail. In addition to this, we can learn more about Thymeleaf by clicking this link.
Let's move on to generate our project and download it. We then extract it to a folder of our choice and use any IDE to open it. I shall be using Spring Tools Suite 4. It is available for free downloading from the https://spring.io/tools website and is optimized for spring applications.
pom.xml with all relevant dependencies
Let's take a look at our pom.xml file. It should look something similar to this −
pom.xml
<?xml version="1.0" encoding="UTF-8"?>
<project xmlns="http://maven.apache.org/POM/4.0.0" xmlns:xsi="http://www.w3.org/2001/XMLSchema-instance"
xsi:schemaLocation="http://maven.apache.org/POM/4.0.0 https://maven.apache.org/xsd/maven-4.0.0.xsd">
   <modelVersion>4.0.0</modelVersion>
   <parent>
      <groupId>org.springframework.boot</groupId>
      <artifactId>spring-boot-starter-parent</artifactId>
      <version>3.5.6</version>
      <relativePath/> <!-- lookup parent from repository -->
   </parent>
   <groupId>com.tutorialspoint.security</groupId>
   <artifactId>formlogin</artifactId>
   <version>0.0.1-SNAPSHOT</version>
   <name>formlogin</name>
   <description>Demo project for Spring Boot</description>
   <url/>
   <licenses>
      <license/>
   </licenses>
   <developers>
      <developer/>
   </developers>
   <scm>
      <connection/>
      <developerConnection/>
      <tag/>
      <url/>
   </scm>
   <properties>
      <java.version>21</java.version>
   </properties>
   <dependencies>
      <dependency>
         <groupId>org.springframework.boot</groupId>
         <artifactId>spring-boot-starter-security</artifactId>
      </dependency>
      <dependency>
         <groupId>org.springframework.boot</groupId>
         <artifactId>spring-boot-starter-thymeleaf</artifactId>
      </dependency>
      <dependency>
         <groupId>org.springframework.boot</groupId>
         <artifactId>spring-boot-starter-web</artifactId>
      </dependency>
      <dependency>
         <groupId>org.thymeleaf.extras</groupId>
         <artifactId>thymeleaf-extras-springsecurity6</artifactId>
      </dependency>
      <dependency>
         <groupId>org.springframework.boot</groupId>
         <artifactId>spring-boot-devtools</artifactId>
         <scope>runtime</scope>
         <optional>true</optional>
      </dependency>
      <dependency>
         <groupId>org.springframework.boot</groupId>
         <artifactId>spring-boot-starter-test</artifactId>
         <scope>test</scope>
      </dependency>
      <dependency>
         <groupId>org.springframework.security</groupId>
         <artifactId>spring-security-test</artifactId>
         <scope>test</scope>
      </dependency>
   </dependencies>
   <build>
      <plugins>
         <plugin>
            <groupId>org.springframework.boot</groupId>
            <artifactId>spring-boot-maven-plugin</artifactId>
         </plugin>
      </plugins>
   </build>
</project>
Spring Security Configuration Class
Inside of our config package, we have created the WebSecurityConfig class. We shall be using this class for our security configurations, so let's annotate it with an @Configuration annotation and @EnableWebSecurity. As a result, Spring Security knows to treat this class a configuration class. As we can see, configuring applications have been made very easy by Spring.
WebSecurityConfig
package com.tutorialspoint.security.formlogin.config;

import org.springframework.context.annotation.Bean;
import org.springframework.context.annotation.Configuration;
import org.springframework.security.config.annotation.web.builders.HttpSecurity;
import org.springframework.security.config.annotation.web.configuration.EnableWebSecurity;
import org.springframework.security.config.annotation.web.configurers.AbstractHttpConfigurer;
import org.springframework.security.core.userdetails.User;
import org.springframework.security.core.userdetails.UserDetails;
import org.springframework.security.core.userdetails.UserDetailsService;
import org.springframework.security.crypto.bcrypt.BCryptPasswordEncoder;
import org.springframework.security.crypto.password.PasswordEncoder;
import org.springframework.security.provisioning.InMemoryUserDetailsManager;
import org.springframework.security.web.SecurityFilterChain;
import org.springframework.security.web.authentication.AuthenticationSuccessHandler;

@Configuration
@EnableWebSecurity
public class WebSecurityConfig  {

   @Bean
   protected UserDetailsService userDetailsService() {
      UserDetails user = User.builder()
         .username("user")
         .password(passwordEncoder().encode("user123"))
         .roles("USER")
         .build();
      UserDetails admin = User.builder()
         .username("admin")
         .password(passwordEncoder().encode("admin123"))
         .roles("USER", "ADMIN")
         .build();
      return new InMemoryUserDetailsManager(user, admin);
   }

   @Bean
   protected PasswordEncoder passwordEncoder() {
      return new BCryptPasswordEncoder();
   }

   @Bean
   protected SecurityFilterChain filterChain(HttpSecurity http) throws Exception {
      return http
         .csrf(AbstractHttpConfigurer::disable)
         .authorizeHttpRequests(
            request -> request.requestMatchers("/login").permitAll()
            .requestMatchers("/**").authenticated()
         )
         .formLogin(form -> form.loginPage("/login")
            .defaultSuccessUrl("/")
            .failureUrl("/login?error=true")
            .successHandler(authenticationSuccessHandler())
            .permitAll())
         .rememberMe(config -> config.key("123456")
         .tokenValiditySeconds(3600))
         .logout(config -> config
            .logoutUrl("/logout")
            .logoutSuccessUrl("/login")
            .invalidateHttpSession(true)
            .deleteCookies("JSESSIONID"))
         .build();
   }

   @Bean
   public AuthenticationSuccessHandler authenticationSuccessHandler() {
      return new AuthenticationHandler();
   }
}
Here we've used the authenticationSuccessHandler() in successHandler() method to do the required redirection. The AuthenticationHandler class should be in same package.
AuthenticationHandler class
Following class implements AuthenticationSuccessHandler as shown below. In this class, we've implemented onAuthenticationSuccess() method. onAuthenticationSuccess() method is called once user is logged in successfully.
AuthenticationHandler
package com.tutorialspoint.security.formlogin.config;

import java.io.IOException;
import org.springframework.security.core.Authentication;
import org.springframework.security.web.authentication.AuthenticationSuccessHandler;
import jakarta.servlet.ServletException;
import jakarta.servlet.http.HttpServletRequest;
import jakarta.servlet.http.HttpServletResponse;

public class AuthenticationHandler implements AuthenticationSuccessHandler {

   @Override
   public void onAuthenticationSuccess(HttpServletRequest request, HttpServletResponse response,
      Authentication authentication) throws IOException, ServletException {
      String redirect = request.getContextPath();

      if (authentication.getAuthorities().stream().anyMatch(a -> a.getAuthority().equals("ROLE_ADMIN"))) {
         redirect = "/admin";
      } else if (authentication.getAuthorities().stream().anyMatch(a -> a.getAuthority().equals("ROLE_USER"))) {
         redirect = "/user";
      }

      response.sendRedirect(redirect);
   }
}
Controller Class
In this class, we've created a mapping for "/" endpoint and for "/login" for the index page and login page of this application. For user.html and admin.html we've two methods user() and admin() added.
AuthController.java
package com.tutorialspoint.security.formlogin.controllers;

import org.springframework.stereotype.Controller;
import org.springframework.web.bind.annotation.GetMapping;

@Controller
public class AuthController {
   @GetMapping("/")
   public String home() {
      return "index";
   }
   @GetMapping("/login")
   public String login() {
      return "login";
   }
   @GetMapping("/user")
   public String user() {
      return "user";
   }
   @GetMapping("/admin")
   public String admin() {
      return "admin";
   }
}
Views
Let's create index.html in /src/main/resources/templates folder with following content to act as a home page and to display logged in user name.
index.html
<!DOCTYPE html>
<html xmlns="http://www.w3.org/1999/xhtml"
   xmlns:th="https://www.thymeleaf.org"
   xmlns:sec="https://www.thymeleaf.org/thymeleaf-extras-springsecurity3">
   <head>
      <title>
         Hello World!
      </title>
   </head>
   <body>
      <h1 th:inline="text">Hello <span sec:authentication="name"></span>!</h1>
      <form th:action="@{/logout}" method="post">
         <input type="submit" value="Sign Out"/>
      </form>
   </body>
<html>
login.html
Let's create the login.html in /src/main/resources/templates folder with following content to act as a login page. We're using default name username, password and remember-me for text fields. In case of other name, we need to set the same in spring security config class as well.
<!DOCTYPE html>
<html xmlns="http://www.w3.org/1999/xhtml"
   xmlns:th="https://www.thymeleaf.org"
   xmlns:sec="https://www.thymeleaf.org/thymeleaf-extras-springsecurity3">
   <head>
      <title>Spring Security Example</title>
   </head>
   <body>
      <div th:if="${param.error}">
         <p>Bad Credentials</p>
      </div>
      <div th:if="${param.logout}">You have been logged out.</div>
      <form th:action="@{/login}" method="post">
         <h1>Please sign in</h1>
         <table>
            <tr>
               <td><label for="username"><b>Username</b></label></td>
               <td><input type="text" placeholder="Enter Username" name="username" id="username" required></td>
            </tr>
            <tr>
               <td><label for="password"><b>Password</b></label></td>
               <td><input type="password" placeholder="Enter Password" name="password" id="password" required></td>
            </tr>
            <tr>
               <td><label for="remember-me"><b>Remember Me</b></label> </td>
               <td><input type="checkbox" name="remember-me" /></td>
            </tr>
            <tr>
               <td> </td>
               <td><input type="submit"  value="Sign In" /></td>
            </tr>
         </table>
      </form>
   </body>
</html>
In login form, we're using POST method to login while using input fields with name and id as username, password and remember-me checkbox. If checkbox is selected, a remember-me Cookie will be created when user logs in the application.
admin.html
Let's create the admin.html in /src/main/resources/templates folder with following content to act as a home page for user when logged using ADMIN Role credentials.
<!DOCTYPE html>
<html xmlns="http://www.w3.org/1999/xhtml"
   xmlns:th="https://www.thymeleaf.org"
   xmlns:sec="https://www.thymeleaf.org/thymeleaf-extras-springsecurity3">
   <head>
      <title>
         Hello Admin!
      </title>
   </head>
   <body>
      <p>Admin Console</p>
      <h1 th:inline="text">Welcome <span sec:authentication="name"></span>!</h1>
      <a href="/logout" alt="logout">Sign Out</a>
   </body>
<html>
user.html
Let's create the user.html in /src/main/resources/templates folder with following content to act as a home page for user when logged using USER Role credentials.
<!DOCTYPE html>
<html xmlns="http://www.w3.org/1999/xhtml"
   xmlns:th="https://www.thymeleaf.org"
   xmlns:sec="https://www.thymeleaf.org/thymeleaf-extras-springsecurity3">
   <head>
      <title>
         Hello User!
      </title>
   </head>
   <body>
      <p>User Dashboard</p>
      <h1 th:inline="text">Hello <span sec:authentication="name"></span>!</h1>
      <a href="/logout" alt="logout">Sign Out</a>
   </body>
<html>
Running the Application
As we've all component ready, let's run the Application. Right Click on the project, select Run As and then Spring Boot App.
It will boot up the application and once application is started, we can run localhost:8080 to check the changes.
Output
Now open localhost:8080, you can see our login page.
Login Page with User Details entered
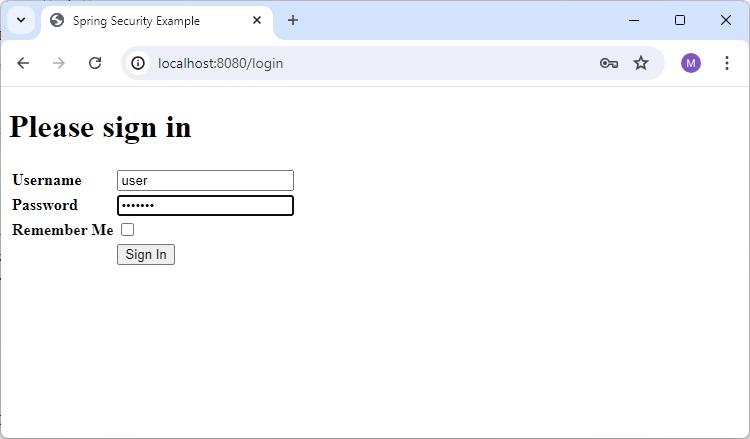
Home Page for User
When we enter valid credential for a User and it will load home page for User as user.html

Now click on Sign out link to logout and on login Page use Admin Details.
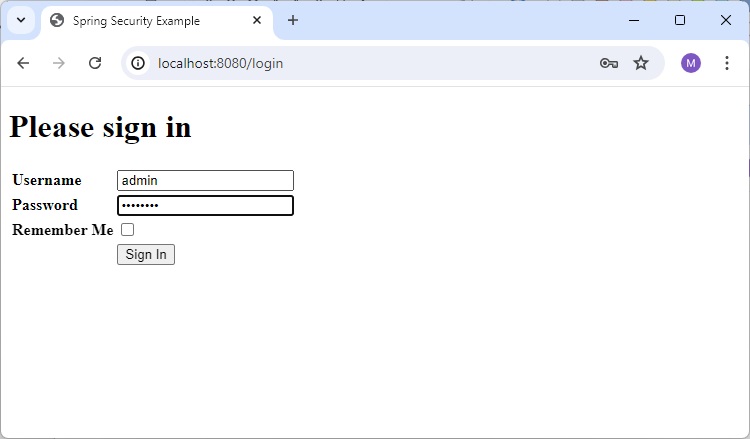
Home Page for Admin
When we enter valid credential for a Admin and it will load home page for Admin as admin.html
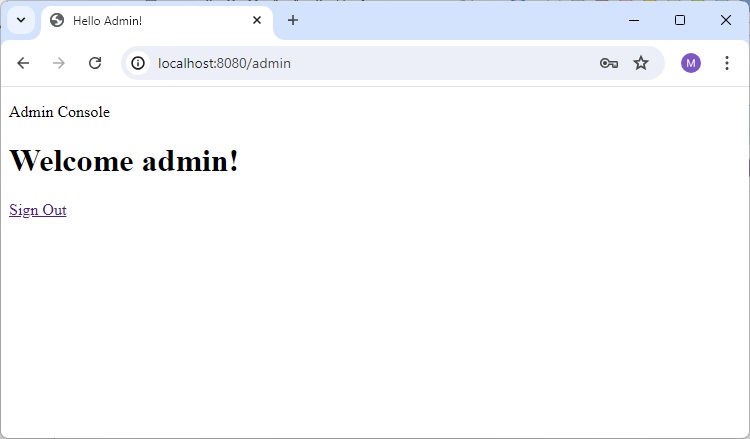
Spring Security - Taglibs
In Spring MVC applications using JSP, we can use the Spring Security tags for applying security constraints as well as for accessing security information. Spring Security Tag library provides basic support for such operations. Using such tags, we can control the information displayed to the user based on his roles or permissions. Also, we can include CSRF protection features in our forms.
To use Spring security tags, we must have the security taglib declared in our JSP file.
<%@ taglib prefix="sec" uri="http://www.springframework.org/security/tags" %>
Now, we can use Spring Security tags with the sec prefix. Let's now see the usage of the tags.
The authorize Tag
The first tag we will be discussing is the authorize tag. Lets check out some usage examples.
<sec:authorize access="!isAuthenticated()"> Login </sec:authorize>
<sec:authorize access="isAuthenticated()"> Logout </sec:authorize>
<sec:authorize access="hasRole('ADMIN')"> Hello Admin. </sec:authorize>
As we can see, we can use this tag to hide or show sections of information based on access or roles.
hasRole(ADMIN) − evaluates to true if the current user has the admin role.
hasAnyRole(ADMIN,USER) − evaluates to true if the current user has any of the listed roles
isAnonymous() − evaluates to true if the current user is an anonymous user
isRememberMe() − evaluates to true if the current user is a remember-me user
isFullyAuthenticated() − evaluates to true if the user is authenticated and is neither anonymous nor a remember-me user
As we can see, the access attribute is where the web-security expression is specified. Then, Spring Security evaluates the expression. The evaluation is generally delegated to SecurityExpressionHandler<FilterInvocation>, which is defined in the application context. If it returns true, then the user can get access to the information given in that section.
If we use the authorize tag with Spring Security s Permission Evaluator, we can also check user permissions as given below −
<p sec:authorize="hasPermission(#domain,'read') or hasPermission(#domain,'write')">
   This content is visible to users who have read or write permission.
</p>
We can also allow or restrict the user from clicking on certain links within our content.
<a sec:authorize href="/admin">
   This content will only be visible to users who are authorized to send requests to the "/admin" URL.
</agt;
The authentication tag
When we want access to the current Authentication object stored in the Spring Security Context, we can use the authentication tag. Then we can use it to render properties of the object directly in our JSP page. For example, if we want to render the principal property of the Authentication object in our page, we can do it as follows −
<p sec:authentication="name" />
The csrfInput Tag
We can use the csrfInput tag to insert a hidden form field with the correct values for the CSRF protection token when CSRF protection is enabled. If CSRF protection is not enabled, this tag outputs nothing.
We can place the tag within the HTML <form></form> block along with other input fields. However, we must not place the tag within the <form:form></form:form> block as Spring Security automatically inserts a CSRF form field within those tags and also takes care of Spring forms automatically.
<form method="post" action="/do/something">
   <sec:csrfInput />
   Username:<br />
   <input type="text" username="username" />
   ...
</form>
The csrfMetaTags Tag
We can use this tag to insert meta tags which contain the CSRF protection token form field and header names and CSRF protection token value. These meta tags can be useful for employing CSRF protection within Javascript in our application. However, this tag only works when we have enabled CSRF protection in our application, otherwise, this tag outputs nothing.
<html>
   <head>
      <title>CSRF Protection in Javascript</title>
      <sec:csrfMetaTags />
      <script type="text/javascript" language="javascript">
         var csrfParam = $("meta[name='_csrf_param']").attr("content");
         var csrfToken = $("meta[name='_csrf']").attr("content");
      </script>
   </head>
   <body>
      ...
   </body>
</html>
Let us start actual programming with Spring Security. Before you start writing your example using Spring framework, you have to make sure that you have set up your Spring environment properly as explained in Spring Security - Environment Setup Chapter. We also assume that you have a bit of working knowledge on Spring Tool Suite IDE.
Now let us proceed to write a Spring MVC based Application managed by Maven, which will ask user to login, authenticate user and then provide option to logout using Spring Security Form Login Feature.
Create Project using Spring Initializr
Spring Initializr is great way to start with Spring Boot project. It provides a easy to use User Interface to create a project, add dependencies, select java runtime etc. It generates a skeleton project structure which once downloaded can be imported in spring tool suite and we can proceed with our readymade project structure.
We're choosing a maven project, naming the project as formlogin, with java version as 21. Following dependencies are added:
Spring Web
Spring Security
Spring Boot DevTools
Thymeleaf is a templating engine for Java. It allows us to quickly develop static or dynamic web pages for rendering in the browser. It is extremely extensible and allows us to define and customize the processing of our templates in fine detail. In addition to this, we can learn more about Thymeleaf by clicking this link.
Let's move on to generate our project and download it. We then extract it to a folder of our choice and use any IDE to open it. I shall be using Spring Tools Suite 4. It is available for free downloading from the https://spring.io/tools website and is optimized for spring applications.
pom.xml with all relevant dependencies
Let's take a look at our pom.xml file. It should look something similar to this −
pom.xml
<?xml version="1.0" encoding="UTF-8"?>
<project xmlns="http://maven.apache.org/POM/4.0.0" xmlns:xsi="http://www.w3.org/2001/XMLSchema-instance"
xsi:schemaLocation="http://maven.apache.org/POM/4.0.0 https://maven.apache.org/xsd/maven-4.0.0.xsd">
   <modelVersion>4.0.0</modelVersion>
   <parent>
      <groupId>org.springframework.boot</groupId>
      <artifactId>spring-boot-starter-parent</artifactId>
      <version>3.5.6</version>
      <relativePath/> <!-- lookup parent from repository -->
   </parent>
   <groupId>com.tutorialspoint.security</groupId>
   <artifactId>formlogin</artifactId>
   <version>0.0.1-SNAPSHOT</version>
   <name>formlogin</name>
   <description>Demo project for Spring Boot</description>
   <url/>
   <licenses>
      <license/>
   </licenses>
   <developers>
      <developer/>
   </developers>
   <scm>
      <connection/>
      <developerConnection/>
      <tag/>
      <url/>
   </scm>
   <properties>
      <java.version>21</java.version>
   </properties>
   <dependencies>
      <dependency>
         <groupId>org.springframework.boot</groupId>
         <artifactId>spring-boot-starter-security</artifactId>
      </dependency>
      <dependency>
         <groupId>org.springframework.boot</groupId>
         <artifactId>spring-boot-starter-thymeleaf</artifactId>
      </dependency>
      <dependency>
         <groupId>org.springframework.boot</groupId>
         <artifactId>spring-boot-starter-web</artifactId>
      </dependency>
      <dependency>
         <groupId>org.thymeleaf.extras</groupId>
         <artifactId>thymeleaf-extras-springsecurity6</artifactId>
      </dependency>
      <dependency>
         <groupId>org.springframework.boot</groupId>
         <artifactId>spring-boot-devtools</artifactId>
         <scope>runtime</scope>
         <optional>true</optional>
      </dependency>
      <dependency>
         <groupId>org.springframework.boot</groupId>
         <artifactId>spring-boot-starter-test</artifactId>
         <scope>test</scope>
      </dependency>
      <dependency>
         <groupId>org.springframework.security</groupId>
         <artifactId>spring-security-test</artifactId>
         <scope>test</scope>
      </dependency>
   </dependencies>
   <build>
      <plugins>
         <plugin>
            <groupId>org.springframework.boot</groupId>
            <artifactId>spring-boot-maven-plugin</artifactId>
         </plugin>
      </plugins>
   </build>
</project>
Spring Security Configuration Class
Inside of our config package, we have created the WebSecurityConfig class. We shall be using this class for our security configurations, so let's annotate it with an @Configuration annotation and @EnableWebSecurity. As a result, Spring Security knows to treat this class a configuration class. As we can see, configuring applications have been made very easy by Spring.
WebSecurityConfig
package com.tutorialspoint.security.formlogin.config;

import org.springframework.context.annotation.Bean;
import org.springframework.context.annotation.Configuration;
import org.springframework.security.config.annotation.web.builders.HttpSecurity;
import org.springframework.security.config.annotation.web.configuration.EnableWebSecurity;
import org.springframework.security.config.annotation.web.configurers.AbstractHttpConfigurer;
import org.springframework.security.core.userdetails.User;
import org.springframework.security.core.userdetails.UserDetails;
import org.springframework.security.core.userdetails.UserDetailsService;
import org.springframework.security.crypto.bcrypt.BCryptPasswordEncoder;
import org.springframework.security.crypto.password.PasswordEncoder;
import org.springframework.security.provisioning.InMemoryUserDetailsManager;
import org.springframework.security.web.SecurityFilterChain;

@Configuration
@EnableWebSecurity
public class WebSecurityConfig  {

   @Bean
   protected UserDetailsService userDetailsService() {
      UserDetails user = User.builder()
         .username("user")
         .password(passwordEncoder().encode("user123"))
         .roles("USER")
         .build();
      UserDetails admin = User.builder()
         .username("admin")
         .password(passwordEncoder().encode("admin123"))
         .roles("USER", "ADMIN")
         .build();
      return new InMemoryUserDetailsManager(user, admin);
   }

   @Bean
   protected PasswordEncoder passwordEncoder() {
      return new BCryptPasswordEncoder();
   }

   @Bean
   protected SecurityFilterChain filterChain(HttpSecurity http) throws Exception {
      return http
         .csrf(AbstractHttpConfigurer::disable)
         .authorizeHttpRequests(
            request -> request.requestMatchers("/login").permitAll()
            .requestMatchers("/**").authenticated()
         )
         .formLogin(form -> form.loginPage("/login")
            .defaultSuccessUrl("/")
            .failureUrl("/login?error=true")
            .permitAll())
         .logout(config -> config
         .logoutUrl("/logout")
         .logoutSuccessUrl("/login"))
         .build();
   }
}
Controller Class
In this class, we've created a mapping for "/" endpoint, "/login" and "/admin" for the index page, login page and admin page of this application respectively.
AuthController.java
package com.tutorialspoint.security.formlogin.controllers;

import org.springframework.stereotype.Controller;
import org.springframework.web.bind.annotation.GetMapping;

@Controller
public class AuthController {
   @GetMapping("/")
   public String home() {
      return "index";
   }
   @GetMapping("/login")
   public String login() {
      return "login";
   }
   @GetMapping("/admin")
   public String admin() {
      return "admin";
   }
}
Views
Create index.html in /src/main/resources/templates folder with following content to act as a home page.
index.html
<!DOCTYPE html>
<html xmlns="http://www.w3.org/1999/xhtml"
   xmlns:th="https://www.thymeleaf.org"
   xmlns:sec="https://www.thymeleaf.org/thymeleaf-extras-springsecurity3">
   <head>
      <title>
         Hello World!
      </title>
   </head>
   <body>
      <h1 th:inline="text">Hello World!</h1>
      <form th:action="@{/logout}" method="post">
         <input type="submit" value="Sign Out"/>
      </form>
   </body>
<html>
Let's create the login.html in /src/main/resources/templates folder with following content to act as a login page. We're using default name username, password and remember-me for text fields. In case of other name, we need to set the same in spring security config class as well.
login.html
<!DOCTYPE html>
<html xmlns="http://www.w3.org/1999/xhtml"
   xmlns:th="https://www.thymeleaf.org"
   xmlns:sec="https://www.thymeleaf.org/thymeleaf-extras-springsecurity3">
   <head>
      <title>Spring Security Example</title>
   </head>
   <body>
      <div th:if="${param.error}">
         <p>Bad Credentials</p>
      </div>
      <div th:if="${param.logout}">You have been logged out.</div>
      <form th:action="@{/login}" method="post">
         <h1>Please sign in</h1>
         <table>
            <tr>
               <td><label for="username"><b>Username</b></label></td>
               <td><input type="text" placeholder="Enter Username" name="username" id="username" required></td>
            </tr>
            <tr>
               <td><label for="password"><b>Password</b></label></td>
               <td><input type="password" placeholder="Enter Password" name="password" id="password" required></td>
            </tr>
            <tr>
               <td><label for="remember-me"><b>Remember Me</b></label> </td>
               <td><input type="checkbox" name="remember-me" /></td>
            </tr>
            <tr>
               <td> </td>
               <td><input type="submit"  value="Sign In" /></td>
            </tr>
         </table>
      </form>
   </body>
</html>
Let's create admin.html to use authorize tag. Here, we have added <%@ taglib uri="http://www.springframework.org/security/tags" prefix="sec"%>. This is going to let us the Spring security tag libs as discussed before.
admin.html
<!DOCTYPE html>
<html xmlns="http://www.w3.org/1999/xhtml"
xmlns:th="https://www.thymeleaf.org"
xmlns:sec="https://www.thymeleaf.org/thymeleaf-extras-springsecurity6">
   <head>
      <title>
         Hello Admin!
      </title>
   </head>
   <body>
      <p>Admin Console</p>
      <h1 th:inline="text">Welcome <span sec:authentication="name"></span>!</h1>
      <p sec:authorize="hasRole('ADMIN')"> Control Panel </p>
      <a href="/logout" alt="logout">Sign Out</a>
   </body>
<html>
As we can see, we have the added the authorize tag around the content. This content is will be only accessible by our admin. Any other user accessing this page will not be able to view this content. Another tag authentication is used to get the principal in order to retrieve the username of the user logged in.
Running the Application
Once we've all component ready let's run the Application. Right Click on the project, select Run As and then Spring Boot App.
It will boot up the application and once application is started, we can run localhost:8080 to check the changes.
Output
Now open localhost:8080, you can see our login page.
Login Page with Admin Details entered
Admin Page
When we enter valid credential for a Admin and it will load home page. Now open localhost:8080/admin. You can see the Control Panel text visible for admin user.
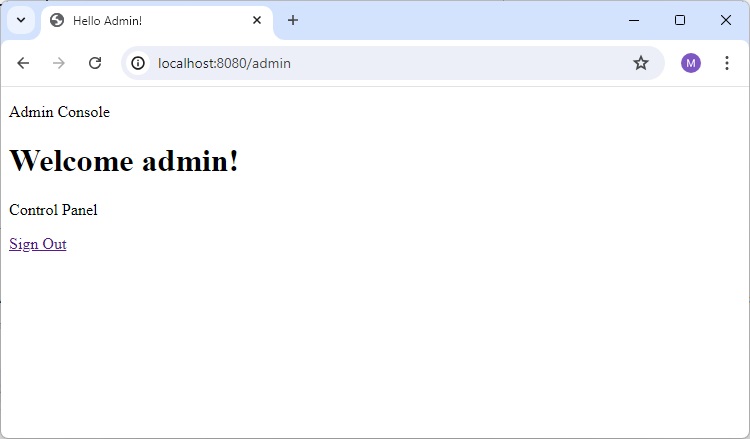
Login Page with User Details entered
Now logout from the application by clicking the signout link and login using user credential.
Admin Page for User
When we enter valid credential for a User and it will load home page. Now load localhost:8080/admin to open admin page. You can see the Control Panel text is not visible for normal user.
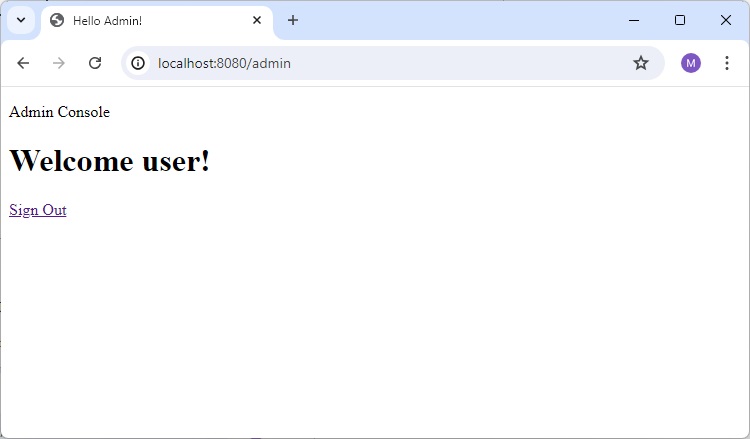
Spring Security - XML Based Configuration
In Spring boot based projects, java based configuration are preferred but we've equivalent XML Configurations as well. In this article, we'll used XML based Spring Security Configurations as shown below:
<beans:beans //...
   <http auto-config="true">
      <intercept-url pattern="/admin" access="hasRole('ROLE_ADMIN')" />
      <intercept-url pattern="/**" access="hasRole('ROLE_ADMIN')"/>
   </http>
   <authentication-manager>
      <authentication-provider>
         <user-service>
            <user name="admin" password="{noop}1234" authorities="ROLE_ADMIN" />
         </user-service>
      </authentication-provider>
   </authentication-manager>
   <beans:bean id ="passwordEncoder"
      class = "org.springframework.security.crypto.password.NoOpPasswordEncoder"
      factory-method = "getInstance">
   </beans:bean>
</beans:beans>
http − The parent of all web-related namespace functionality. Here, we can configure which URLs to intercept, what permissions are required, which type of login to use, and all such configuration.
auto-config − Setting this attribute to true automatically sets up form-login, basic login, and logout functionalities. Spring Security generates them by using standard values and the features enabled.
intercept-url − It sets the pattern of the URLs that we want to protecte, using the access attribute.
access − It specifies which users are permitted to access the URL specified by the pattern attribute. It is done on the basis of the roles and permissions of a user. We can use SPEL with this attribute.
authentication-manager − The <authentication-manager> is used to configure users, their passwords, and roles in the application. These users will be one who can access the protected parts of the application given they have the appropriate roles. A DaoAuthenticationProvider bean will be created by the <authentication-provider> and the <user-service> element will create an InMemoryDaoImpl. All authentication-provider elements will allow the users to be authenticated by providing the user information to the authentication-manager.
password-encoder − This will register a password encoder bean. To keep things simple here we have used the NoOpPasswordEncoder.
In order to register this security-config.xml in Spring Boot Application, we can import it as shown below:
@SpringBootApplication
@ImportResource("classpath:/spring/spring-security.xml")
public class FormloginApplication {
   public static void main(String[] args) {
      SpringApplication.run(FormloginApplication.class, args);
   }
}
Let us start actual programming with Spring Security. Before you start writing your example using Spring framework, you have to make sure that you have set up your Spring environment properly as explained in Spring Security - Environment Setup Chapter. We also assume that you have a bit of working knowledge on Spring Tool Suite IDE.
Now let us proceed to write a Spring MVC based Application managed by Maven, which will ask user to login, authenticate user and then provide option to logout using Spring Security Form Login Feature.
Create Project using Spring Initializr
Spring Initializr is great way to start with Spring Boot project. It provides a easy to use User Interface to create a project, add dependencies, select java runtime etc. It generates a skeleton project structure which once downloaded can be imported in spring tool suite and we can proceed with our readymade project structure.
We're choosing a maven project, naming the project as formlogin, with java version as 21. Following dependencies are added:
Spring Web
Spring Security
Spring Boot DevTools
Thymeleaf is a templating engine for Java. It allows us to quickly develop static or dynamic web pages for rendering in the browser. It is extremely extensible and allows us to define and customize the processing of our templates in fine detail. In addition to this, we can learn more about Thymeleaf by clicking this link.
Let's move on to generate our project and download it. We then extract it to a folder of our choice and use any IDE to open it. I shall be using Spring Tools Suite 4. It is available for free downloading from the https://spring.io/tools website and is optimized for spring applications.
pom.xml with all relevant dependencies
Let's take a look at our pom.xml file. It should look something similar to this −
pom.xml
<?xml version="1.0" encoding="UTF-8"?>
<project xmlns="http://maven.apache.org/POM/4.0.0" xmlns:xsi="http://www.w3.org/2001/XMLSchema-instance"
xsi:schemaLocation="http://maven.apache.org/POM/4.0.0 https://maven.apache.org/xsd/maven-4.0.0.xsd">
   <modelVersion>4.0.0</modelVersion>
   <parent>
      <groupId>org.springframework.boot</groupId>
      <artifactId>spring-boot-starter-parent</artifactId>
      <version>3.5.6</version>
      <relativePath/> <!-- lookup parent from repository -->
   </parent>
   <groupId>com.tutorialspoint.security</groupId>
   <artifactId>formlogin</artifactId>
   <version>0.0.1-SNAPSHOT</version>
   <name>formlogin</name>
   <description>Demo project for Spring Boot</description>
   <url/>
   <licenses>
      <license/>
   </licenses>
   <developers>
      <developer/>
   </developers>
   <scm>
      <connection/>
      <developerConnection/>
      <tag/>
      <url/>
   </scm>
   <properties>
      <java.version>21</java.version>
   </properties>
   <dependencies>
      <dependency>
         <groupId>org.springframework.boot</groupId>
         <artifactId>spring-boot-starter-security</artifactId>
      </dependency>
      <dependency>
         <groupId>org.springframework.boot</groupId>
         <artifactId>spring-boot-starter-thymeleaf</artifactId>
      </dependency>
      <dependency>
         <groupId>org.springframework.boot</groupId>
         <artifactId>spring-boot-starter-web</artifactId>
      </dependency>
      <dependency>
         <groupId>org.thymeleaf.extras</groupId>
         <artifactId>thymeleaf-extras-springsecurity6</artifactId>
      </dependency>
      <dependency>
         <groupId>org.springframework.boot</groupId>
         <artifactId>spring-boot-devtools</artifactId>
         <scope>runtime</scope>
         <optional>true</optional>
      </dependency>
      <dependency>
         <groupId>org.springframework.boot</groupId>
         <artifactId>spring-boot-starter-test</artifactId>
         <scope>test</scope>
      </dependency>
      <dependency>
         <groupId>org.springframework.security</groupId>
         <artifactId>spring-security-test</artifactId>
         <scope>test</scope>
      </dependency>
   </dependencies>
   <build>
      <plugins>
         <plugin>
            <groupId>org.springframework.boot</groupId>
            <artifactId>spring-boot-maven-plugin</artifactId>
         </plugin>
      </plugins>
   </build>
</project>
Spring Security Configuration XML
Following is the complete code of spring security configuration file created in /src/main/resources/spring/ folder as spring-security.xml.
spring-security.xml
<?xml version="1.0" encoding="UTF-8"?>
<beans:beans xmlns="http://www.springframework.org/schema/security"
   xmlns:beans="http://www.springframework.org/schema/beans"
   xmlns:xsi="http://www.w3.org/2001/XMLSchema-instance"
   xsi:schemaLocation="http://www.springframework.org/schema/beans
   http://www.springframework.org/schema/beans/spring-beans.xsd
   http://www.springframework.org/schema/security
   http://www.springframework.org/schema/security/spring-security.xsd">
   <http auto-config="true">
   <intercept-url pattern="/admin" access="hasRole('ROLE_ADMIN')" />
   <intercept-url pattern="/**" access="hasRole('ROLE_ADMIN')"/> </http>
   <authentication-manager>
      <authentication-provider>
         <user-service>
            <user name="admin" password="{noop}1234" authorities="ROLE_ADMIN" />
         </user-service>
      </authentication-provider> </authentication-manager>
      <beans:bean id ="passwordEncoder"
         class = "org.springframework.security.crypto.password.NoOpPasswordEncoder"
         factory-method = "getInstance">
      </beans:bean>
</beans:beans>
Spring Boot Application
Following is the content of FormloginApplication class where we've imported the spring-security.xml from classpath.
FormloginApplication.java
package com.tutorialspoint.security.formlogin;

import org.springframework.boot.SpringApplication;
import org.springframework.boot.autoconfigure.SpringBootApplication;
import org.springframework.context.annotation.ImportResource;

@SpringBootApplication
@ImportResource("classpath:/spring/spring-security.xml")
public class FormloginApplication {
   public static void main(String[] args) {
      SpringApplication.run(FormloginApplication.class, args);
   }
}
Controller Class
In this class, we've created a mapping for "/" endpoint, for "/admin" for the index page, and admin page of this application.
AuthController.java
package com.tutorialspoint.security.formlogin.controllers;

import org.springframework.stereotype.Controller;
import org.springframework.web.bind.annotation.GetMapping;

@Controller
public class AuthController {
   @GetMapping("/")
   public String home() {
      return "index";
   }
   @GetMapping("/admin")
   public String admin() {
      return "admin";
   }
}
Views
Create index.html in /src/main/resources/templates folder with following content to act as a home page.
index.html
<!DOCTYPE html>
<html xmlns="http://www.w3.org/1999/xhtml"
   xmlns:th="https://www.thymeleaf.org"
   xmlns:sec="https://www.thymeleaf.org/thymeleaf-extras-springsecurity3">
   <head>
      <title>
         Hello World!
      </title>
   </head>
   <body>
      <h1 th:inline="text">Hello World!</h1>
      <a href="/logout" alt="logout">Sign Out</a>
   </body>
<html>
Let's create admin.html in /src/main/resources/templates folder with following content to act as a Admin page.
admin.html
<!DOCTYPE html>
<html xmlns="http://www.w3.org/1999/xhtml"
xmlns:th="https://www.thymeleaf.org"
xmlns:sec="https://www.thymeleaf.org/thymeleaf-extras-springsecurity6">
   <head>
      <title>
         Hello Admin!
      </title>
   </head>
   <body>
      <p>Admin Console</p>
      <a href="/logout" alt="logout">Sign Out</a>
   </body>
<html>
Running the Application
Once we've all component ready let's run the Application. Right Click on the project, select Run As and then Spring Boot App.
It will boot up the application and once application is started, we can run localhost:8080 to check the changes.
Output
Now open localhost:8080, you can see our login page.
Login Page with Admin Details entered
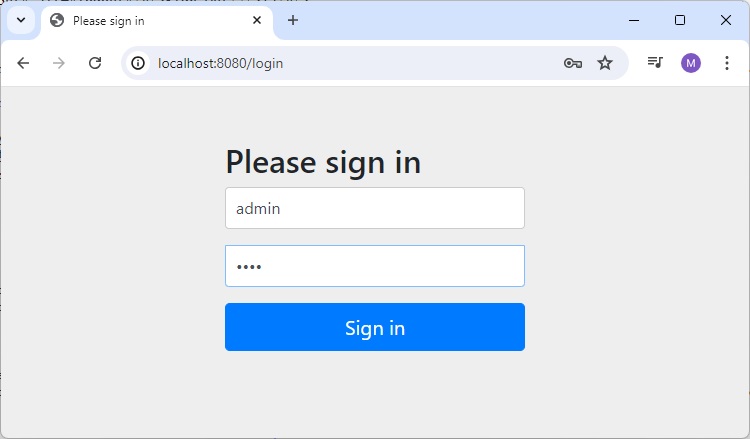
Home Page for Admin
When we enter valid credential for a Admin and it will load home page as index.html.
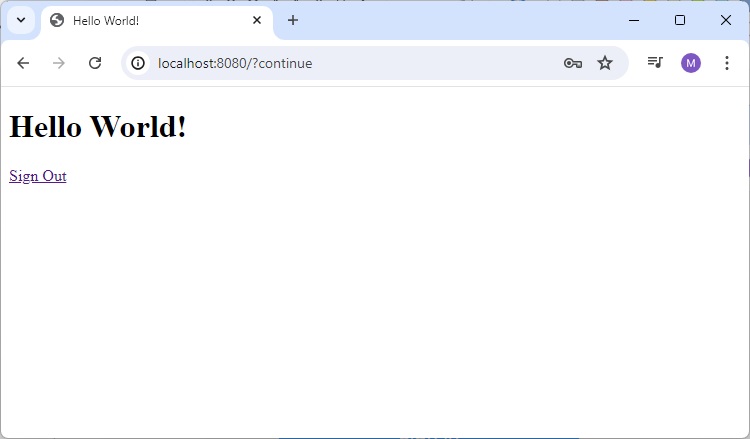
Open Admin Page
Now open localhost:8080/admin, you can see the admin page.
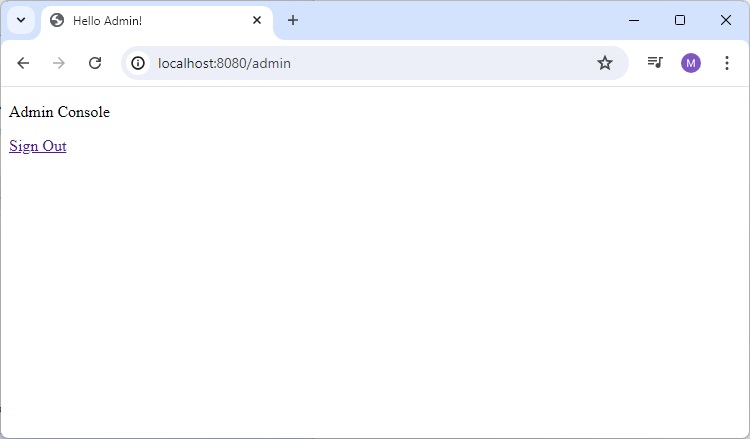
Logout
Click on Signout link, and it will ask for Logout.
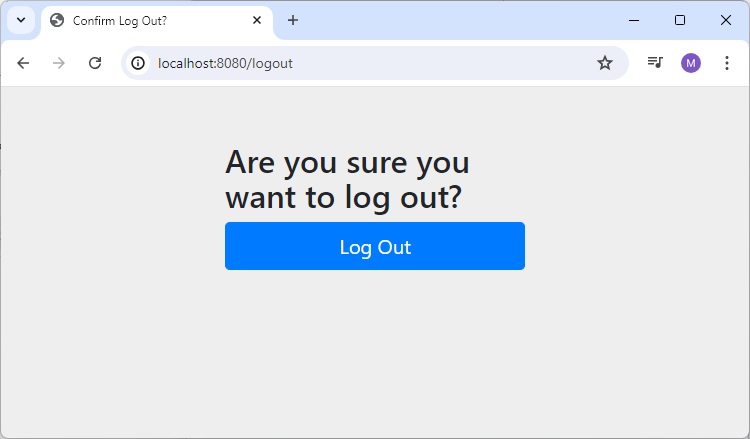
Click on logout button, and it will show the login page.
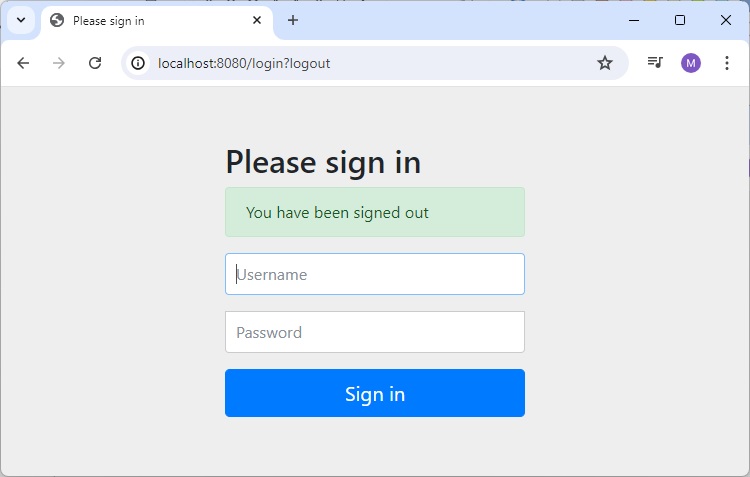
Spring Security - Authentication Provider
Spring Security allows us to customize our authentication process as much as we want. Starting from a custom login page to our very own customized authentication providers and authentication filters, we can pretty much customize every aspect of the authentication process. We can define our own authentication process which can range from basic authentication using a username and a password to a complex one such as two-factor authentication using tokens and OTPs. Also, we can use various databases both relational and non-relational, use various password encoders, lock malicious users out of their accounts, and so on.
Spring Security Architecture
The basic components of Spring Security, as we can see in the above diagram are given below. We shall discuss them briefly as we go along. We shall also discuss their roles in the authentication and authorization process.
AuthenticationFilter
This is the filter that intercepts requests and attempts to authenticate it. In Spring Security, it converts the request to an Authentication Object and delegates the authentication to the AuthenticationManager.
AuthenticationManager
It is the main strategy interface for authentication. It uses the lone method authenticate() to authenticate the request. The authenticate() method performs the authentication and returns an Authentication Object on successful authentication or throw an AuthenticationException in case of authentication failure. If the method cant decide, it will return null. The process of authentication in this process is delegated to the AuthenticationProvider which we will discuss next.
AuthenticationProvider
The AuthenticationManager is implemented by the ProviderManager which delegates the process to one or more AuthenticationProvider instances. Any class implementing the AuthenticationProvider interface must implement the two methods authenticate() and supports(). First, let us talk about the supports() method. It is used to check if the particular authentication type is supported by our AuthenticationProvider implementation class. If it is supported it returns true or else false. Next, the authenticate() method. Here is where the authentication occurs. If the authentication type is supported, the process of authentication is started. Here is this class can use the loadUserByUsername() method of the UserDetailsService implementation. If the user is not found, it can throw a UsernameNotFoundException.
On the other hand, if the user is found, then the authentication details of the user are used to authenticate the user. For example, in the basic authentication scenario, the password provided by the user may be checked with the password in the database. If they are found to match with each other, it is a success scenario. Then we can return an Authentication object from this method which will be stored in the Security Context, which we will discuss later.
Spring Security provides following major implementations of AuthenticationProvider.
DaoAuthenticationProvider − This provider is used to provide database based authentication.
LdapAuthenticationProvider − This provider is specialized for LDAP(Lightweight Directory Access Protocol) based authentication.
OpenIDAuthenticationProvider − This provider is used for OpenID based authentication and can be used with OpenID authentication providers like Google/Facebook etc.
JwtAuthenticationProvider − For JWT(Java Web Token) based authentication, we can use JwtAuthenticationProvider class.
RememberMeAuthenticationProvider − This class is used for user authentication based on remember me token of user.
We'll be creating our own AuthenticationProvider in coming section.
UserDetailsService
It is one of the core interfaces of Spring Security. The authentication of any request mostly depends on the implementation of the UserDetailsService interface. It is most commonly used in database backed authentication to retrieve user data. The data is retrieved with the implementation of the lone loadUserByUsername() method where we can provide our logic to fetch the user details for a user. The method will throw a UsernameNotFoundException if the user is not found.
PasswordEncoder
Until Spring Security 4, the use of PasswordEncoder was optional. The user could store plain text passwords using in-memory authentication. But Spring Security 5 has mandated the use of PasswordEncoder to store passwords. This encodes the users password using one its many implementations. The most common of its implementations is the BCryptPasswordEncoder. Also, we can use an instance of the NoOpPasswordEncoder for our development purposes. It will allow passwords to be stored in plain text. But it is not supposed to be used for production or real-world applications.
Spring Security Context
This is where the details of the currently authenticated user are stored on successful authentication. The authentication object is then available throughout the application for the session. So, if we need the username or any other user details, we need to get the SecurityContext first. This is done with the SecurityContextHolder, a helper class, which provides access to the security context. We can use the setAuthentication() and getAuthentication() methods for storing and retrieving the user details respectively.
Custom Authenticator
We can create a custom Authenticator by implementing AuthenticationProvider interface. AuthenticatorProvider interface has two methods authenticate() and supports().
authenticate() method
@Override
public Authentication authenticate(Authentication authentication) throws AuthenticationException {
   String username = authentication.getName();
   String password = authentication.getCredentials().toString();

   UserDetails user = userDetailsService.loadUserByUsername(username);

   if (user == null || !password.equals(user.getPassword())) {
      throw new BadCredentialsException("Invalid username or password");
   }

   List<GrantedAuthority> authorities = new ArrayList();
   authorities.add(new SimpleGrantedAuthority("ROLE_USER"));
   return new UsernamePasswordAuthenticationToken(username, password, authorities);
}
Here in authenticate() method, we're getting username and password using authentication object and we're comparing username/password with the user credentials. In case user details are invalid, we're throwing an exception as BadCredentialsException. Otherwise, a new role is prepared and UsernamePasswordAuthenticationToken is returned with required role.
supports() method
@Override
public boolean supports(Class<?> authentication) {
   return authentication.equals(UsernamePasswordAuthenticationToken.class);
}
Spring Security Configuration
Use the AuthenticationProvider created in the AuthenticationManager and mark it as managed bean.
@Bean
public AuthenticationManager authManager(HttpSecurity http) throws Exception {
   AuthenticationManagerBuilder authenticationManagerBuilder =
      http.getSharedObject(AuthenticationManagerBuilder.class);
   WebAuthenticationProvider authProvider = new WebAuthenticationProvider(userDetailsService());
   authenticationManagerBuilder.authenticationProvider(authProvider);
   return authenticationManagerBuilder.build();
}
That's all we need. Now let's see the complete code in action.
Before you start writing your first example using Spring framework, you have to make sure that you have set up your Spring environment properly as explained in Spring Security - Environment Setup Chapter. We also assume that you have a bit of working knowledge on Spring Tool Suite IDE.
Now let us proceed to write a Spring MVC based Application managed by Maven, which will ask user to login, authenticate user and then provide option to logout using Spring Security Form Login Feature.
Create Project using Spring Initializr
Spring Initializr is great way to start with Spring Boot project. It provides a easy to use User Interface to create a project, add dependencies, select java runtime etc. It generates a skeleton project structure which once downloaded can be imported in spring tool suite and we can proceed with our readymade project structure.
We're choosing a maven project, naming the project as formlogin, with java version as 21. Following dependencies are added:
Spring Web
Spring Security
Spring Boot DevTools
Thymeleaf is a templating engine for Java. It allows us to quickly develop static or dynamic web pages for rendering in the browser. It is extremely extensible and allows us to define and customize the processing of our templates in fine detail. In addition to this, we can learn more about Thymeleaf by clicking this link.
Let's move on to generate our project and download it. We then extract it to a folder of our choice and use any IDE to open it. I shall be using Spring Tools Suite 4. It is available for free downloading from the https://spring.io/tools website and is optimized for spring applications.
pom.xml with all relevant dependencies
Let's take a look at our pom.xml file. It should look something similar to this −
pom.xml
<?xml version="1.0" encoding="UTF-8"?>
<project xmlns="http://maven.apache.org/POM/4.0.0" xmlns:xsi="http://www.w3.org/2001/XMLSchema-instance"
xsi:schemaLocation="http://maven.apache.org/POM/4.0.0 https://maven.apache.org/xsd/maven-4.0.0.xsd">
   <modelVersion>4.0.0</modelVersion>
   <parent>
      <groupId>org.springframework.boot</groupId>
      <artifactId>spring-boot-starter-parent</artifactId>
      <version>3.5.6</version>
      <relativePath/> <!-- lookup parent from repository -->
   </parent>
   <groupId>com.tutorialspoint.security</groupId>
   <artifactId>formlogin</artifactId>
   <version>0.0.1-SNAPSHOT</version>
   <name>formlogin</name>
   <description>Demo project for Spring Boot</description>
   <url/>
   <licenses>
      <license/>
   </licenses>
   <developers>
      <developer/>
   </developers>
   <scm>
      <connection/>
      <developerConnection/>
      <tag/>
      <url/>
   </scm>
   <properties>
      <java.version>21</java.version>
   </properties>
   <dependencies>
      <dependency>
         <groupId>org.springframework.boot</groupId>
         <artifactId>spring-boot-starter-security</artifactId>
      </dependency>
      <dependency>
         <groupId>org.springframework.boot</groupId>
         <artifactId>spring-boot-starter-thymeleaf</artifactId>
      </dependency>
      <dependency>
         <groupId>org.springframework.boot</groupId>
         <artifactId>spring-boot-starter-web</artifactId>
      </dependency>
      <dependency>
         <groupId>org.thymeleaf.extras</groupId>
         <artifactId>thymeleaf-extras-springsecurity6</artifactId>
      </dependency>
      <dependency>
         <groupId>org.springframework.boot</groupId>
         <artifactId>spring-boot-devtools</artifactId>
         <scope>runtime</scope>
         <optional>true</optional>
      </dependency>
      <dependency>
         <groupId>org.springframework.boot</groupId>
         <artifactId>spring-boot-starter-test</artifactId>
         <scope>test</scope>
      </dependency>
      <dependency>
         <groupId>org.springframework.security</groupId>
         <artifactId>spring-security-test</artifactId>
         <scope>test</scope>
      </dependency>
   </dependencies>
   <build>
      <plugins>
         <plugin>
            <groupId>org.springframework.boot</groupId>
            <artifactId>spring-boot-maven-plugin</artifactId>
         </plugin>
      </plugins>
   </build>
</project>
Authenticator Provider
Inside of our config package, we have created the WebAuthenticationProvider class by implementing AuthenticationProvider interface. As in authenticate() method, we've to compare username along with password, we've used UserDetailsService instance to get the user details.
package com.tutorialspoint.security.formlogin.config;

import java.util.ArrayList;
import java.util.List;

import org.springframework.security.authentication.AuthenticationProvider;
import org.springframework.security.authentication.BadCredentialsException;
import org.springframework.security.authentication.UsernamePasswordAuthenticationToken;
import org.springframework.security.core.Authentication;
import org.springframework.security.core.AuthenticationException;
import org.springframework.security.core.GrantedAuthority;
import org.springframework.security.core.authority.SimpleGrantedAuthority;
import org.springframework.security.core.userdetails.UserDetails;
import org.springframework.security.core.userdetails.UserDetailsService;
import org.springframework.stereotype.Component;

@Component
public class WebAuthenticationProvider implements AuthenticationProvider {

   private final UserDetailsService userDetailsService;
   public WebAuthenticationProvider(UserDetailsService userDetailsService) {
      this.userDetailsService = userDetailsService;
   }

   @Override
   public boolean supports(Class<?> authentication) {
      return authentication.equals(UsernamePasswordAuthenticationToken.class);
   }

   @Override
   public Authentication authenticate(Authentication authentication) throws AuthenticationException {
      String username = authentication.getName();
      String password = authentication.getCredentials().toString();

      UserDetails user = userDetailsService.loadUserByUsername(username);

      if (user == null || !password.equals(user.getPassword())) {
         throw new BadCredentialsException("Invalid username or password");
      }

      List<GrantedAuthority> authorities = new ArrayList();
      authorities.add(new SimpleGrantedAuthority("ROLE_USER"));
      return new UsernamePasswordAuthenticationToken(username, password, authorities);

   }
}
Spring Security Configuration Class
Inside of our config package, we have created the WebSecurityConfig class. We shall be using this class for our security configurations, so let's annotate it with an @Configuration annotation and @EnableWebSecurity. As a result, Spring Security knows to treat this class a configuration class. As we can see, configuring applications have been made very easy by Spring.
WebSecurityConfig.java
package com.tutorialspoint.security.formlogin.config;

import org.springframework.context.annotation.Bean;
import org.springframework.context.annotation.Configuration;
import org.springframework.security.authentication.AuthenticationManager;
import org.springframework.security.config.Customizer;
import org.springframework.security.config.annotation.authentication.builders.AuthenticationManagerBuilder;
import org.springframework.security.config.annotation.web.builders.HttpSecurity;
import org.springframework.security.config.annotation.web.configuration.EnableWebSecurity;
import org.springframework.security.config.annotation.web.configurers.AbstractHttpConfigurer;
import org.springframework.security.core.userdetails.User;
import org.springframework.security.core.userdetails.UserDetails;
import org.springframework.security.core.userdetails.UserDetailsService;
import org.springframework.security.provisioning.InMemoryUserDetailsManager;
import org.springframework.security.web.SecurityFilterChain;

@Configuration
@EnableWebSecurity
public class WebSecurityConfig {

   @Bean
   public AuthenticationManager authManager(HttpSecurity http) throws Exception {
      AuthenticationManagerBuilder authenticationManagerBuilder =
         http.getSharedObject(AuthenticationManagerBuilder.class);
      WebAuthenticationProvider authProvider = new WebAuthenticationProvider(userDetailsService());
      authenticationManagerBuilder.authenticationProvider(authProvider);
      return authenticationManagerBuilder.build();
   }

   @Bean
   protected UserDetailsService userDetailsService() {
      UserDetails user = User.builder()
         .username("user")
         .password("user123")
         .roles("USER")
         .build();
      UserDetails admin = User.builder()
         .username("admin")
         .password("admin123")
         .roles("USER", "ADMIN")
         .build();
      return new InMemoryUserDetailsManager(user, admin);
   }

   @Bean
   protected SecurityFilterChain filterChain(HttpSecurity http) throws Exception {
      return http
         .csrf(AbstractHttpConfigurer::disable)
         .authorizeHttpRequests(
            request -> request.requestMatchers("/login").permitAll()
            .requestMatchers("/**").authenticated()
         )
         .formLogin(Customizer.withDefaults())
         .logout(config -> config
         .logoutUrl("/logout")
         .logoutSuccessUrl("/login"))
         .build();
   }
}
Configuration Class Details
Let's take a look at our configuration class.
First, we shall create a bean of our UserDetailsService class by using the userDetailsService() method. We shall be using this bean for managing our users for this application. Here, to keep things simple, we shall use an InMemoryUserDetailsManager instance to create users. These users, along with our given username and password, are mapped to User and Admin roles respectively.
Http Security Configuration
After the above steps, we move on to our next configuration. Here, we've defined the filterChain method. This method takes HttpSecurity as a parameter. We shall be configuring this to use our form login and logout function.
We can observe that all these functionalities are available in Spring Security. Lets study the below section in detail −
return http
   .csrf(AbstractHttpConfigurer::disable)
   .authorizeHttpRequests(
      request -> request.requestMatchers("/login").permitAll()
         .requestMatchers("/**").authenticated()
    )
    .formLogin(Customizer.withDefaults())
    .logout(config -> config
    .logoutUrl("/logout")
    .logoutSuccessUrl("/login"))
    .build();
There are a few points to note here −
We have disabled csrf or Cross-Site Request Forgery protection As this is a simple application only for demonstration purposes, we can safely disable this for now.
Then we add configuration which requires all requests to be authenticated.
After that, we're using formLogin() functionality of Spring Security as mentioned above. This makes browser to ask for a default login form for username/password and logout() to provide logout functionality.
Authentication Manager Configuration
Let's take a look at our custom AuthenticationProvider configuration.
AuthenticationManagerBuilder authenticationManagerBuilder =
   http.getSharedObject(AuthenticationManagerBuilder.class);
WebAuthenticationProvider authProvider = new WebAuthenticationProvider(userDetailsService());
authenticationManagerBuilder.authenticationProvider(authProvider);
return authenticationManagerBuilder.build();
We've first built a AuthenticationManagerBuilder instance and pass it a authenticationProvider. WebAuthenticationProvider instance is created as custom authentication provider with a userDetailsService object.
Controller Class
In this class, we've created a mapping for single "/" endpoint for the index page of this application, for simplicity. This will redirect to index.html.
AuthController
package com.tutorialspoint.security.formlogin.controllers;

import org.springframework.stereotype.Controller;
import org.springframework.web.bind.annotation.GetMapping;

@Controller
public class AuthController {
   @GetMapping("/")
   public String home() {
      return "index";
   }
}
Views
Create index.html in /src/main/resources/templates folder with following content to act as a home page.
index.html
<!DOCTYPE html>
<html xmlns="http://www.w3.org/1999/xhtml"
   xmlns:th="https://www.thymeleaf.org"
   xmlns:sec="https://www.thymeleaf.org/thymeleaf-extras-springsecurity6">
   <head>
      <title>
         Hello World!
      </title>
   </head>
   <body>
      <h1 th:inline="text">Hello World!</h1>
      <a href="/logout" alt="logout">Sign Out</a>
   </body>
<html>
Running the Application
As we've all component ready, let's run the Application. Right Click on the project, select Run As and then Spring Boot App.
It will boot up the application and once application is started, we can run localhost:8080 to check the changes.
Output
Now open localhost:8080, you can see that browser is asking for username/password via system dialog.
Browser's dialog for username/password
Enter Invalid Credential
If we enter invalid credential, then same dialog will popup again.
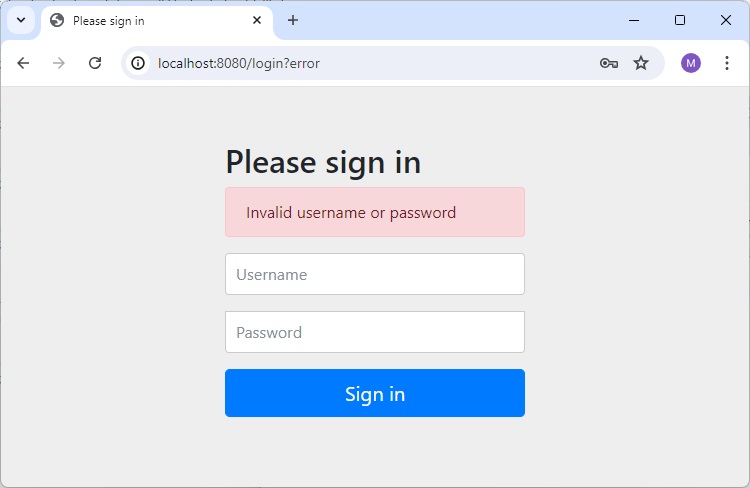
Home Page for User
If we enter valid credential for a User and it will load home page for User
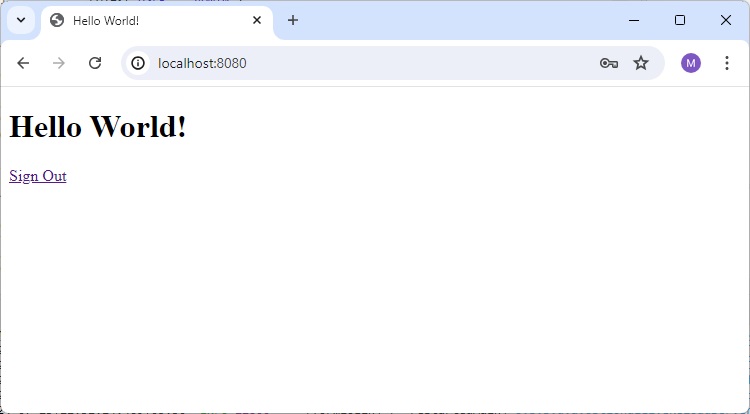
Spring Security - Basic Authentication
We've seen form based login so far where an html based form is used for Username/password authentication. We can either create our own custom login form or use spring security provided default login form. There is another way to ask username/password where we can ask user to pass username/password in the url itself using basic authentication.
In case of Web browse, whenever a user requests a protected resource, Spring Security checks for the authentication of the request. If the request is not authenticated/authorized, the user will be asked for username/password using default dialog as shown below:

Spring Security provides following configuration to achieve basic authentication −
protected void configure(HttpSecurity http) throws Exception {
http
   // ...
   .authorizeHttpRequests(request -> request.anyRequest().authenticated())
   .httpBasic(Customizer.withDefaults())
   .build();
}
Here we're configuring spring security for every request to be authenticated using basic authentication mechanism.
Let us start actual programming with Spring Security. Before you start writing your first example using Spring framework, you have to make sure that you have set up your Spring environment properly as explained in Spring Security - Environment Setup Chapter. We also assume that you have a bit of working knowledge on Spring Tool Suite IDE.
Now let us proceed to write a Spring MVC based Application managed by Maven, which will ask user to login, authenticate user and then provide option to logout using Spring Security Form Login Feature.
Create Project using Spring Initializr
Spring Initializr is great way to start with Spring Boot project. It provides a easy to use User Interface to create a project, add dependencies, select java runtime etc. It generates a skeleton project structure which once downloaded can be imported in spring tool suite and we can proceed with our readymade project structure.
We're choosing a maven project, naming the project as formlogin, with java version as 21. Following dependencies are added:
Spring Web
Spring Security
Spring Boot DevTools
Thymeleaf is a templating engine for Java. It allows us to quickly develop static or dynamic web pages for rendering in the browser. It is extremely extensible and allows us to define and customize the processing of our templates in fine detail. In addition to this, we can learn more about Thymeleaf by clicking this link.
Let's move on to generate our project and download it. We then extract it to a folder of our choice and use any IDE to open it. I shall be using Spring Tools Suite 4. It is available for free downloading from the https://spring.io/tools website and is optimized for spring applications.
pom.xml with all relevant dependencies
Let's take a look at our pom.xml file. It should look something similar to this −
pom.xml
<?xml version="1.0" encoding="UTF-8"?>
<project xmlns="http://maven.apache.org/POM/4.0.0" xmlns:xsi="http://www.w3.org/2001/XMLSchema-instance"
xsi:schemaLocation="http://maven.apache.org/POM/4.0.0 https://maven.apache.org/xsd/maven-4.0.0.xsd">
   <modelVersion>4.0.0</modelVersion>
   <parent>
      <groupId>org.springframework.boot</groupId>
      <artifactId>spring-boot-starter-parent</artifactId>
      <version>3.5.6</version>
      <relativePath/> <!-- lookup parent from repository -->
   </parent>
   <groupId>com.tutorialspoint.security</groupId>
   <artifactId>formlogin</artifactId>
   <version>0.0.1-SNAPSHOT</version>
   <name>formlogin</name>
   <description>Demo project for Spring Boot</description>
   <url/>
   <licenses>
      <license/>
   </licenses>
   <developers>
      <developer/>
   </developers>
   <scm>
      <connection/>
      <developerConnection/>
      <tag/>
      <url/>
   </scm>
   <properties>
      <java.version>21</java.version>
   </properties>
   <dependencies>
      <dependency>
         <groupId>org.springframework.boot</groupId>
         <artifactId>spring-boot-starter-security</artifactId>
      </dependency>
      <dependency>
         <groupId>org.springframework.boot</groupId>
         <artifactId>spring-boot-starter-thymeleaf</artifactId>
      </dependency>
      <dependency>
         <groupId>org.springframework.boot</groupId>
         <artifactId>spring-boot-starter-web</artifactId>
      </dependency>
      <dependency>
         <groupId>org.thymeleaf.extras</groupId>
         <artifactId>thymeleaf-extras-springsecurity6</artifactId>
      </dependency>
      <dependency>
         <groupId>org.springframework.boot</groupId>
         <artifactId>spring-boot-devtools</artifactId>
         <scope>runtime</scope>
         <optional>true</optional>
      </dependency>
      <dependency>
         <groupId>org.springframework.boot</groupId>
         <artifactId>spring-boot-starter-test</artifactId>
         <scope>test</scope>
      </dependency>
      <dependency>
         <groupId>org.springframework.security</groupId>
         <artifactId>spring-security-test</artifactId>
         <scope>test</scope>
      </dependency>
   </dependencies>
   <build>
      <plugins>
         <plugin>
            <groupId>org.springframework.boot</groupId>
            <artifactId>spring-boot-maven-plugin</artifactId>
         </plugin>
      </plugins>
   </build>
</project>
Spring Security Configuration Class
Inside of our config package, we have created the WebSecurityConfig class. We shall be using this class for our security configurations, so let's annotate it with an @Configuration annotation and @EnableWebSecurity. As a result, Spring Security knows to treat this class a configuration class. As we can see, configuring applications have been made very easy by Spring.
WebSecurityConfig
package com.tutorialspoint.security.formlogin.config;

import org.springframework.context.annotation.Bean;
import org.springframework.context.annotation.Configuration;
import org.springframework.security.config.Customizer;
import org.springframework.security.config.annotation.web.builders.HttpSecurity;
import org.springframework.security.config.annotation.web.configuration.EnableWebSecurity;
import org.springframework.security.config.annotation.web.configurers.AbstractHttpConfigurer;
import org.springframework.security.core.userdetails.User;
import org.springframework.security.core.userdetails.UserDetails;
import org.springframework.security.core.userdetails.UserDetailsService;
import org.springframework.security.crypto.bcrypt.BCryptPasswordEncoder;
import org.springframework.security.crypto.password.PasswordEncoder;
import org.springframework.security.provisioning.InMemoryUserDetailsManager;
import org.springframework.security.web.SecurityFilterChain;

@Configuration
@EnableWebSecurity
public class WebSecurityConfig  {

   @Bean
   protected UserDetailsService userDetailsService() {
      UserDetails user = User.builder()
         .username("user")
         .password(passwordEncoder().encode("user123"))
         .roles("USER")
         .build();
      UserDetails admin = User.builder()
         .username("admin")
         .password(passwordEncoder().encode("admin123"))
         .roles("USER", "ADMIN")
         .build();
      return new InMemoryUserDetailsManager(user, admin);
   }

   @Bean
   protected PasswordEncoder passwordEncoder() {
      return new BCryptPasswordEncoder();
   }

   @Bean
   protected SecurityFilterChain filterChain(HttpSecurity http) throws Exception {
      return http
         .csrf(AbstractHttpConfigurer::disable)
         .authorizeHttpRequests(request -> request.anyRequest().authenticated())
         .httpBasic(Customizer.withDefaults())
         .build();
   }
}
Configuration Class Details
Let's take a look at our configuration class.
First, we shall create a bean of our UserDetailsService class by using the userDetailsService() method. We shall be using this bean for managing our users for this application. Here, to keep things simple, we shall use an InMemoryUserDetailsManager instance to create users. These users, along with our given username and password, are mapped to User and Admin roles respectively.
Password Encoder
-
Now, let's look at our PasswordEncoder. We shall be using a BCryptPasswordEncoder instance for this example. Hence, while creating the user, we used the passwordEncoder to encode our plaintext password like this:
.password(passwordEncoder().encode("user123"))
Http Security Configuration
After the above steps, we move on to our next configuration. Here, we've defined the filterChain method. This method takes HttpSecurity as a parameter. We shall be configuring this to use our form login and logout function.
We can observe that all these functionalities are available in Spring Security. Lets study the below section in detail −
http
   .csrf(AbstractHttpConfigurer::disable)
   .authorizeHttpRequests(request -> request.anyRequest().authenticated())
   .httpBasic(Customizer.withDefaults())
   .build();
There are a few points to note here −
We have disabled csrf or Cross-Site Request Forgery protection As this is a simple application only for demonstration purposes, we can safely disable this for now.
Then we add configuration which requires all requests to be authenticated.
After that, we're using httpBasic() functionality of Spring Security as mentioned above. This makes browser to ask for username/password. In case of rest API, we'can set authetication as Basic Auth as we shall see later in this section.
Controller Class
In this class, we've created a mapping for single "/" endpoint for the index page of this application, for simplicity. This will redirect to index.html.
AuthController
package com.tutorialspoint.security.formlogin.controllers;

import org.springframework.stereotype.Controller;
import org.springframework.web.bind.annotation.GetMapping;

@Controller
public class AuthController {
   @GetMapping("/")
   public String home() {
      return "index";
   }
}
Views
Create index.html in /src/main/resources/templates folder with following content to act as a home page.
index.html
<!DOCTYPE html>
<html xmlns="http://www.w3.org/1999/xhtml"
   xmlns:th="https://www.thymeleaf.org"
   xmlns:sec="https://www.thymeleaf.org/thymeleaf-extras-springsecurity6">
   <head>
      <title>
         Hello World!
      </title>
   </head>
   <body>
      <h1 th:inline="text">Hello World!</h1>
      <a href="/logout" alt="logout">Sign Out</a>
   </body>
<html>
Running the Application
As we've all component ready, let's run the Application. Right Click on the project, select Run As and then Spring Boot App.
It will boot up the application and once application is started, we can run localhost:8080 to check the changes.
Output
Now open localhost:8080, you can see that browser is asking for username/password via system dialog.
Browser's dialog for username/password
Enter Invalid Credential
If we enter invalid credential, then same dialog will popup again.
Home Page for User
If we enter valid credential for a User and it will load home page for User
Using Postman
We can use postmant to set authentication as Basic Auth and set username/password and then make the request as shown below:
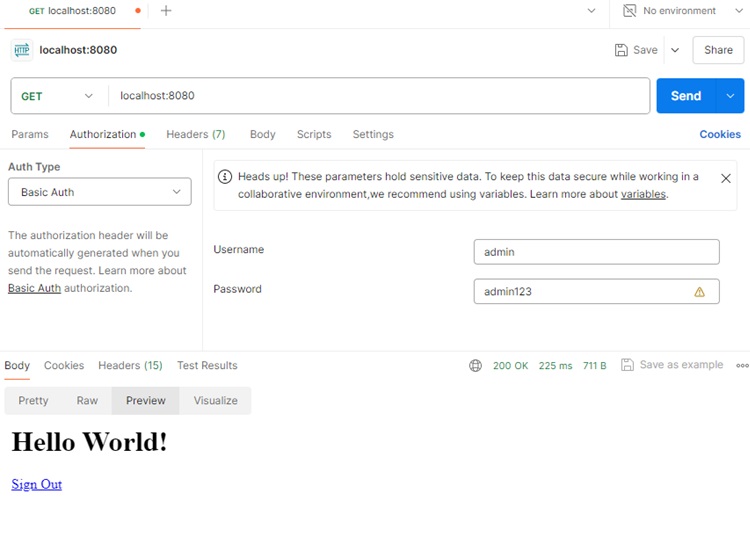
Please explore Postman Tutorial to setup and learn postman.
Spring Security - Authentication Failure Handler
Spring Security allows us to customize our authentication process as much as we want. Starting from a custom login page to our very own customized authentication providers and authentication filters, we can pretty much customize every aspect of the authentication process. We can define our own authentication process which can range from basic authentication using a username and a password to a complex one such as two-factor authentication using tokens and OTPs. We can customize authentication failure handling as well. By default, spring security redirects user to login page where HttpRequest object contains the error information.
Authentication Failure Handler
Spring Security provides AuthenticationFailureHandler interface with onAuthenticationFailure() method. We can use inbuilt handler implementations or create our own handler to customize the onAuthenticationFailure() method implementation.
public class CustomAuthenticationFailureHandler implements AuthenticationFailureHandler {
   @Override
   public void onAuthenticationFailure(HttpServletRequest request, HttpServletResponse response,
      AuthenticationException exception) throws IOException, ServletException {
      response.setStatus(HttpStatus.UNAUTHORIZED.value());
      response.sendRedirect("/error");
   }
}
Here we're sending http status UNAUTHORIZED or 401 and redirecting user to the error page.
AuthenticationFailureHandler Implementations
Spring Security provides following major implementations of AuthenticationFailureHandler.
SimpleUrlAuthenticationFailureHandler − This is the default authentication failure handler. It redirects user to the failureUrl if specified, otherwise 401 response is returned as UNAUTHORIZED.
ForwardAuthenticationFailureHandler − This authentication failure handler forwards the user to provided url.
ExceptionMappingAuthenticationFailureHandler − This authentication failure handler forwards the user to provided url on the basis of name of the AuthenticationException.
DelegatingAuthenticationFailureHandler − This authentication failure handler allows to use other AuthenticationFailureHandler implementations on the basis of the AuthenticationException instances.
We'll be creating our own AuthenticationFailureHandler in coming section.
Spring Security Configuration
We need to configure the CustomAuthenticationFailureHandler in spring securty configuration
http
//...
.formLogin(form -> form.loginPage("/login")
   .defaultSuccessUrl("/")
   .failureHandler(new CustomAuthenticationFailureHandler())
   .permitAll())
...
}
That's all we need. Now let's see the complete code in action.
Before you start writing your first example using Spring framework, you have to make sure that you have set up your Spring environment properly as explained in Spring Security - Environment Setup Chapter. We also assume that you have a bit of working knowledge on Spring Tool Suite IDE.
Now let us proceed to write a Spring MVC based Application managed by Maven, which will ask user to login, authenticate user and then provide option to logout using Spring Security Form Login Feature.
Create Project using Spring Initializr
Spring Initializr is great way to start with Spring Boot project. It provides a easy to use User Interface to create a project, add dependencies, select java runtime etc. It generates a skeleton project structure which once downloaded can be imported in spring tool suite and we can proceed with our readymade project structure.
We're choosing a maven project, naming the project as formlogin, with java version as 21. Following dependencies are added:
Spring Web
Spring Security
Spring Boot DevTools
Thymeleaf is a templating engine for Java. It allows us to quickly develop static or dynamic web pages for rendering in the browser. It is extremely extensible and allows us to define and customize the processing of our templates in fine detail. In addition to this, we can learn more about Thymeleaf by clicking this link.
Let's move on to generate our project and download it. We then extract it to a folder of our choice and use any IDE to open it. I shall be using Spring Tools Suite 4. It is available for free downloading from the https://spring.io/tools website and is optimized for spring applications.
pom.xml with all relevant dependencies
Let's take a look at our pom.xml file. It should look something similar to this −
pom.xml
<?xml version="1.0" encoding="UTF-8"?>
<project xmlns="http://maven.apache.org/POM/4.0.0" xmlns:xsi="http://www.w3.org/2001/XMLSchema-instance"
xsi:schemaLocation="http://maven.apache.org/POM/4.0.0 https://maven.apache.org/xsd/maven-4.0.0.xsd">
   <modelVersion>4.0.0</modelVersion>
   <parent>
      <groupId>org.springframework.boot</groupId>
      <artifactId>spring-boot-starter-parent</artifactId>
      <version>3.5.6</version>
      <relativePath/> <!-- lookup parent from repository -->
   </parent>
   <groupId>com.tutorialspoint.security</groupId>
   <artifactId>formlogin</artifactId>
   <version>0.0.1-SNAPSHOT</version>
   <name>formlogin</name>
   <description>Demo project for Spring Boot</description>
   <url/>
   <licenses>
      <license/>
   </licenses>
   <developers>
      <developer/>
   </developers>
   <scm>
      <connection/>
      <developerConnection/>
      <tag/>
      <url/>
   </scm>
   <properties>
      <java.version>21</java.version>
   </properties>
   <dependencies>
      <dependency>
         <groupId>org.springframework.boot</groupId>
         <artifactId>spring-boot-starter-security</artifactId>
      </dependency>
      <dependency>
         <groupId>org.springframework.boot</groupId>
         <artifactId>spring-boot-starter-thymeleaf</artifactId>
      </dependency>
      <dependency>
         <groupId>org.springframework.boot</groupId>
         <artifactId>spring-boot-starter-web</artifactId>
      </dependency>
      <dependency>
         <groupId>org.thymeleaf.extras</groupId>
         <artifactId>thymeleaf-extras-springsecurity6</artifactId>
      </dependency>
      <dependency>
         <groupId>org.springframework.boot</groupId>
         <artifactId>spring-boot-devtools</artifactId>
         <scope>runtime</scope>
         <optional>true</optional>
      </dependency>
      <dependency>
         <groupId>org.springframework.boot</groupId>
         <artifactId>spring-boot-starter-test</artifactId>
         <scope>test</scope>
      </dependency>
      <dependency>
         <groupId>org.springframework.security</groupId>
         <artifactId>spring-security-test</artifactId>
         <scope>test</scope>
      </dependency>
   </dependencies>
   <build>
      <plugins>
         <plugin>
            <groupId>org.springframework.boot</groupId>
            <artifactId>spring-boot-maven-plugin</artifactId>
         </plugin>
      </plugins>
   </build>
</project>
AuthenticationFailureHandler
Inside of our config package, we have created the CustomAuthenticationFailureHandler class by implementing AuthenticationFailureHandler interface. As in onAuthenticationFailure() method, we're setting HTTP Status as UNAUTHORIZED and redirecting user to the error page.
package com.tutorialspoint.security.formlogin.config;

import java.io.IOException;

import org.springframework.http.HttpStatus;
import org.springframework.security.core.AuthenticationException;
import org.springframework.security.web.authentication.AuthenticationFailureHandler;

import jakarta.servlet.ServletException;
import jakarta.servlet.http.HttpServletRequest;
import jakarta.servlet.http.HttpServletResponse;

public class CustomAuthenticationFailureHandler implements AuthenticationFailureHandler {
   @Override
   public void onAuthenticationFailure(HttpServletRequest request, HttpServletResponse response,
      AuthenticationException exception) throws IOException, ServletException {
      response.setStatus(HttpStatus.UNAUTHORIZED.value());
      response.sendRedirect("/error");
   }
}
Spring Security Configuration Class
Inside of our config package, we have created the WebSecurityConfig class. We shall be using this class for our security configurations, so let's annotate it with an @Configuration annotation and @EnableWebSecurity. As a result, Spring Security knows to treat this class a configuration class. As we can see, configuring applications have been made very easy by Spring.
WebSecurityConfig
package com.tutorialspoint.security.formlogin.config;

import java.io.IOException;
import java.util.HashMap;
import java.util.Map;

import org.springframework.beans.factory.annotation.Autowired;
import org.springframework.context.annotation.Bean;
import org.springframework.context.annotation.Configuration;
import org.springframework.http.HttpStatus;
import org.springframework.security.authentication.AuthenticationManager;
import org.springframework.security.config.Customizer;
import org.springframework.security.config.annotation.authentication.builders.AuthenticationManagerBuilder;
import org.springframework.security.config.annotation.web.builders.HttpSecurity;
import org.springframework.security.config.annotation.web.configuration.EnableWebSecurity;
import org.springframework.security.config.annotation.web.configurers.AbstractHttpConfigurer;
import org.springframework.security.core.AuthenticationException;
import org.springframework.security.core.userdetails.User;
import org.springframework.security.core.userdetails.UserDetails;
import org.springframework.security.core.userdetails.UserDetailsService;
import org.springframework.security.crypto.bcrypt.BCryptPasswordEncoder;
import org.springframework.security.crypto.password.PasswordEncoder;
import org.springframework.security.provisioning.InMemoryUserDetailsManager;
import org.springframework.security.web.SecurityFilterChain;
import org.springframework.security.web.authentication.AuthenticationFailureHandler;

import jakarta.servlet.ServletException;
import jakarta.servlet.http.HttpServletRequest;
import jakarta.servlet.http.HttpServletResponse;

@Configuration
@EnableWebSecurity
public class WebSecurityConfig {

   @Bean
   protected UserDetailsService userDetailsService() {
      UserDetails user = User.builder()
         .username("user")
         .password(passwordEncoder().encode("user123"))
         .roles("USER")
         .build();
      UserDetails admin = User.builder()
         .username("admin")
         .password(passwordEncoder().encode("admin123"))
         .roles("USER", "ADMIN")
         .build();
      return new InMemoryUserDetailsManager(user, admin);
   }

   @Bean
   protected PasswordEncoder passwordEncoder() {
      return new BCryptPasswordEncoder();
   }

   @Bean
   protected SecurityFilterChain filterChain(HttpSecurity http) throws Exception {
      return http
         .csrf(AbstractHttpConfigurer::disable)
         .authorizeHttpRequests(
            request -> request.requestMatchers("/login").permitAll()
            .requestMatchers("/error").permitAll()
            .requestMatchers("/**").authenticated()
         )
         .formLogin(form -> form.loginPage("/login")
            .defaultSuccessUrl("/")
            .failureHandler(new CustomAuthenticationFailureHandler())
            .permitAll())
            .logout(config -> config
            .logoutUrl("/logout")
            .logoutSuccessUrl("/login"))
      .build();
   }
}
Configuration Class Details
Let's take a look at our configuration class.
First, we shall create a bean of our UserDetailsService class by using the userDetailsService() method. We shall be using this bean for managing our users for this application. Here, to keep things simple, we shall use an InMemoryUserDetailsManager instance to create users. These users, along with our given username and password, are mapped to User and Admin roles respectively.
Http Security Configuration
After the above steps, we move on to our next configuration. Here, we've defined the filterChain method. This method takes HttpSecurity as a parameter. We shall be configuring this to use our form login and logout function.
We can observe that all these functionalities are available in Spring Security. Lets study the below section in detail −
return http
//...
 .failureHandler(new CustomAuthenticationFailureHandler())
//...
    .build();
Here we're added a authentication failure handler as CustomAuthenticationFailureHandler instance.
Controller Class
In this class, we've created a mapping for single "/" endpoint for the index page of this application, for simplicity. This will redirect to index.html.
AuthController
package com.tutorialspoint.security.formlogin.controllers;

import org.springframework.stereotype.Controller;
import org.springframework.web.bind.annotation.GetMapping;

@Controller
public class AuthController {
   @GetMapping("/")
   public String home() {
      return "index";
   }
}
Views
Create index.html in /src/main/resources/templates folder with following content to act as a home page.
index.html
<!DOCTYPE html>
<html xmlns="http://www.w3.org/1999/xhtml"
   xmlns:th="https://www.thymeleaf.org"
   xmlns:sec="https://www.thymeleaf.org/thymeleaf-extras-springsecurity6">
   <head>
      <title>
         Hello World!
      </title>
   </head>
   <body>
      <h1 th:inline="text">Hello World!</h1>
      <a href="/logout" alt="logout">Sign Out</a>
   </body>
<html>
Create error.html in /src/main/resources/templates folder with following content to act as an error page.
error.html
<!DOCTYPE html>
<html xmlns="http://www.w3.org/1999/xhtml"
   xmlns:th="https://www.thymeleaf.org"
   xmlns:sec="https://www.thymeleaf.org/thymeleaf-extras-springsecurity6">
   <head>
      <title>
      Invalid Credentials
      </title>
   </head>
   <body>
      <h1>Invalid Credentials.</h1>
   </body>
<html>
Running the Application
As we've all component ready, let's run the Application. Right Click on the project, select Run As and then Spring Boot App.
It will boot up the application and once application is started, we can run localhost:8080 to check the changes.
Output
Now open localhost:8080, you can see the login page.
Enter Invalid Credential
Error Page
If we enter invalid credential, then user will be redirected to error page.

Spring Security - JWT
Overview
JSON Web Token or JWT, as it is more commonly called, is an open Internet standard (RFC 7519) for securely transmitting trusted information between parties in a compact way. The tokens contain claims that are encoded as a JSON object and are digitally signed using a private secret or a public key/private key pair. They are self-contained and verifiable as they are digitally signed. JWTs can be signed and/or encrypted. The signed tokens verify the integrity of the claims contained in the token, while the encrypted ones hide the claims from other parties.
JWT's can also be used for the exchange of information though they more commonly used for authorization as they offer a lot of advantages over session management using in-memory random tokens. The biggest of them being the enabling the delegation of authentication logic to a third-party server like AuthO etc.
A JWT token is divided into 3 parts namely header, payload, and signature in the format of
[Header].[Payload].[Signature]
-
Header − The Header of a JWT token contains the list cryptographic operations that are applied to the JWT. This can be the signing technique, metadata information about the content-type and so on. The header is presented as a JSON object which is encoded to a base64URL. An example of a valid JWT header would be
{ "alg": "HS256", "typ": "JWT" }Here, "alg" gives us information about the type of algorithm used and "typ gives us the type of the information.
Payload − The payload part of JWT contains the actual data to be transferred using the token. This part is also known as the "claims" part of the JWT token. The claims can be of three types registered, public and private.
The registered claims are the ones which are recommended but not mandatory claims such as iss(issuer), sub(subject), aud(audience) and others.
Public claims are those that are defined by those using the JWTs.
-
Private claims or custom claims are user-defined claims created for the purpose of sharing the information between the concerned parties.
Example of a payload object could be.
{ "sub": "12345", "name": "Johnny Hill", "admin": false }The payload object, like the header object is base64Url encoded as well and this string forms the second part of the JWT.
-
Signature− The signature part of the JWT is used for the verification that the message wasnt changed along the way. If the tokens are signed with private key, it also verifies that the sender is who it says it is. It is created using the encoded header, encoded payload, a secret and the algorithm specified in the header. An example of a signature would be.
HMACSHA256( base64UrlEncode(header) + "." + base64UrlEncode(payload), secret)
If we put the header, payload and signature we get a token as given below.
eyJhbGciOiJSUzI1NiIsInR5cCI6IkpXVCJ9.eyJzdWIiOiIxMjM0NTY3ODkwIiwibmFtZSI6I
kpvaG4gRG9lIiwiYWRtaW4iOmZhbHNlfQ.gWDlJdpCTIHVYKkJSfAVNUn0ZkAjMxskDDm-5Fhe
WJ7xXgW8k5CllcGk4C9qPrfa1GdqfBrbX_1x1E39JY8BYLobAfAg1fs_Ky8Z7U1oCl6HL63yJq_
wVNBHp49hWzg3-ERxkqiuTv0tIuDOasIdZ5FtBdtIP5LM9Oc1tsuMXQXCGR8GqGf1Hl2qv8MCyn
NZJuVdJKO_L3WGBJouaTpK1u2SEleVFGI2HFvrX_jS2ySzDxoO9KjbydK0LNv_zOI7kWv-gAmA
j-v0mHdJrLbxD7LcZJEGRScCSyITzo6Z59_jG_97oNLFgBKJbh12nvvPibHpUYWmZuHkoGvuy5RLUA
Now, this token can be used in the Authorization header using the Bearer schema as Authorization − Bearer <token>
The use of JWT token for authorization is the most common of its applications. The token is usually generated in the server and sent to the client where it is stored in the session storage or local storage. To access a protected resource the client would send the JWT in the header as given above. We will see the JWT implementation in Spring Security in the section below.
Let us start actual programming with Spring Security. Before you start writing your first example using Spring framework, you have to make sure that you have set up your Spring environment properly as explained in Spring Security - Environment Setup Chapter. We also assume that you have a bit of working knowledge on Spring Tool Suite IDE.
Now let us proceed to write a Spring MVC based Application managed by Maven, which will ask user to login, authenticate user and then provide option to logout using Spring Security Form Login Feature.
Create Project using Spring Initializr
Spring Initializr is great way to start with Spring Boot project. It provides a easy to use User Interface to create a project, add dependencies, select java runtime etc. It generates a skeleton project structure which once downloaded can be imported in spring tool suite and we can proceed with our readymade project structure.
We're choosing a maven project, naming the project as formlogin, with java version as 21. Following dependencies are added:
Spring Web
Spring Security
Spring Boot DevTools
Thymeleaf is a templating engine for Java. It allows us to quickly develop static or dynamic web pages for rendering in the browser. It is extremely extensible and allows us to define and customize the processing of our templates in fine detail. In addition to this, we can learn more about Thymeleaf by clicking this link.
Let's move on to generate our project and download it. We then extract it to a folder of our choice and use any IDE to open it. I shall be using Spring Tools Suite 4. It is available for free downloading from the https://spring.io/tools website and is optimized for spring applications.
pom.xml with all relevant dependencies
Let's take a look at our pom.xml file. It should look something similar to this −
pom.xml
<?xml version="1.0" encoding="UTF-8"?>
<project xmlns="http://maven.apache.org/POM/4.0.0" xmlns:xsi="http://www.w3.org/2001/XMLSchema-instance"
xsi:schemaLocation="http://maven.apache.org/POM/4.0.0 https://maven.apache.org/xsd/maven-4.0.0.xsd">
   <modelVersion>4.0.0</modelVersion>
   <parent>
      <groupId>org.springframework.boot</groupId>
      <artifactId>spring-boot-starter-parent</artifactId>
      <version>3.5.6</version>
      <relativePath/> <!-- lookup parent from repository -->
   </parent>
   <groupId>com.tutorialspoint.security</groupId>
   <artifactId>formlogin</artifactId>
   <version>0.0.1-SNAPSHOT</version>
   <name>formlogin</name>
   <description>Demo project for Spring Boot</description>
   <url/>
   <licenses>
      <license/>
   </licenses>
   <developers>
      <developer/>
   </developers>
   <scm>
      <connection/>
      <developerConnection/>
      <tag/>
      <url/>
   </scm>
   <properties>
      <java.version>21</java.version>
   </properties>
   <dependencies>
      <dependency>
         <groupId>org.springframework.boot</groupId>
         <artifactId>spring-boot-starter-security</artifactId>
      </dependency>
      <dependency>
         <groupId>org.springframework.boot</groupId>
         <artifactId>spring-boot-starter-thymeleaf</artifactId>
      </dependency>
      <dependency>
         <groupId>org.springframework.boot</groupId>
         <artifactId>spring-boot-starter-web</artifactId>
      </dependency>
      <dependency>
         <groupId>org.thymeleaf.extras</groupId>
         <artifactId>thymeleaf-extras-springsecurity6</artifactId>
      </dependency>
      <dependency>
         <groupId>org.springframework.boot</groupId>
         <artifactId>spring-boot-devtools</artifactId>
         <scope>runtime</scope>
         <optional>true</optional>
      </dependency>
      <dependency>
         <groupId>org.springframework.boot</groupId>
         <artifactId>spring-boot-starter-test</artifactId>
         <scope>test</scope>
      </dependency>
      <dependency>
         <groupId>org.springframework.security</groupId>
         <artifactId>spring-security-test</artifactId>
         <scope>test</scope>
      </dependency>
      <dependency>
         <groupId>io.jsonwebtoken</groupId>
         <artifactId>jjwt-api</artifactId>
         <version>0.11.5</version>
      </dependency>
      <dependency>
         <groupId>io.jsonwebtoken</groupId>
         <artifactId>jjwt-impl</artifactId>
         <version>0.11.5</version>
         <scope>runtime</scope>
      </dependency>
      <dependency>
         <groupId>io.jsonwebtoken</groupId>
         <artifactId>jjwt-jackson</artifactId>
         <version>0.11.5</version>
         <scope>runtime</scope>
      </dependency>
   </dependencies>
   <build>
      <plugins>
         <plugin>
            <groupId>org.springframework.boot</groupId>
            <artifactId>spring-boot-maven-plugin</artifactId>
         </plugin>
      </plugins>
   </build>
</project>
JWT Secret
The JWT includes a secret which we will define in our application.properties file as given below.
application.properties
spring.application.name=formlogin
secret=somerandomsecretsomerandomsecretsomerandomsecretsomerandomsecret
JWT Related Classes
Now lets create a package called jwtutils. This package is going to contain all classes and interface related to JWT operations, which will include.
- Generating token
- Validating token
- Checking the signature
- Verifying claims and permissions
In this package, we create our first class called Token Manager. This class will be responsible for the creation and validation of tokens using io.jsonwebtoken.Jwts.
TokenManager.java
package com.tutorialspoint.security.formlogin.jwtutils;

import java.security.Key;
import java.util.Date;
import java.util.HashMap;
import java.util.Map;

import org.springframework.beans.factory.annotation.Value;
import org.springframework.security.core.userdetails.UserDetails;
import org.springframework.stereotype.Component;

import io.jsonwebtoken.Claims;
import io.jsonwebtoken.Jwts;
import io.jsonwebtoken.SignatureAlgorithm;
import io.jsonwebtoken.io.Decoders;
import io.jsonwebtoken.security.Keys;

@Component
public class TokenManager {

   private static final long serialVersionUID = 7008375124389347049L;
   public static final long TOKEN_VALIDITY = 10 * 60 * 60;

   @Value("${secret}")
   private String jwtSecret;

   // Generates a token on successful authentication by the user
   // using username, issue date of token and the expiration date of the token.
   public String generateJwtToken(UserDetails userDetails) {
      Map<String, Object> claims = new HashMap<>();
      return Jwts
         .builder()
         .setClaims(claims)  // set the claims
         .setSubject(userDetails.getUsername())  // set the username as subject in payload
         .setIssuedAt(new Date(System.currentTimeMillis()))
         .setExpiration(new Date(System.currentTimeMillis() + TOKEN_VALIDITY * 1000))
         .signWith(getKey(), SignatureAlgorithm.HS256)  // signature part
         .compact();
   }

   // Validates the token
   // Checks if user is an authenticatic one and using the token is the one that was generated and sent to the user.
   // Token is parsed for the claims such as username, roles, authorities, validity period etc.
   public Boolean validateJwtToken(String token, UserDetails userDetails) {
      final String username = getUsernameFromToken(token);
      final Claims claims = Jwts
         .parserBuilder()
         .setSigningKey(getKey())
         .build()
         .parseClaimsJws(token).getBody();
      Boolean isTokenExpired = claims.getExpiration().before(new Date());
      return (username.equals(userDetails.getUsername())) && !isTokenExpired;
   }

   // get the username by checking subject of JWT Token
   public String getUsernameFromToken(String token) {
      final Claims claims = Jwts
         .parserBuilder()
         .setSigningKey(getKey())
         .build()
         .parseClaimsJws(token).getBody();
      return claims.getSubject();
   }

   // create a signing key based on secret
   private Key getKey() {
      byte[] keyBytes = Decoders.BASE64.decode(jwtSecret);
      Key key = Keys.hmacShaKeyFor(keyBytes);
      return key;
   }
}
JwtUserDetailsService.java
package com.tutorialspoint.security.formlogin.jwtutils;

import java.util.ArrayList;
import org.springframework.security.core.userdetails.User;
import org.springframework.security.core.userdetails.UserDetails;
import org.springframework.security.core.userdetails.UserDetailsService;
import org.springframework.security.core.userdetails.UsernameNotFoundException;
import org.springframework.stereotype.Service;

@Service
public class JwtUserDetailsService implements UserDetailsService {
   @Override
   public UserDetails loadUserByUsername(String username) throws UsernameNotFoundException {
      // create a user for "randomuser123"/"password".
      if ("randomuser123".equals(username)) {
         return new User("randomuser123", // username
            "$2a$10$slYQmyNdGzTn7ZLBXBChFOC9f6kFjAqPhccnP6DxlWXx2lPk1C3G6", // encoded password
            new ArrayList<>());
      } else {
         throw new UsernameNotFoundException("User not found with username: " + username);
      }
   }
}
Now its time we created our Filter. The filter class will be used to track our requests and detect if they contain the valid token in the header. If the token is valid we let the request proceed otherwise we send a 401 error (Unauthorized).
JwtFilter.java
package com.tutorialspoint.security.formlogin.jwtutils;

import java.io.IOException;
import jakarta.servlet.FilterChain;
import jakarta.servlet.ServletException;
import jakarta.servlet.http.HttpServletRequest;
import jakarta.servlet.http.HttpServletResponse;
import org.springframework.beans.factory.annotation.Autowired;
import org.springframework.security.authentication.UsernamePasswordAuthenticationToken;
import org.springframework.security.core.context.SecurityContextHolder;
import org.springframework.security.core.userdetails.UserDetails;
import org.springframework.security.web.authentication.WebAuthenticationDetailsSource;
import org.springframework.stereotype.Component;
import org.springframework.web.filter.OncePerRequestFilter;
import io.jsonwebtoken.ExpiredJwtException;


// filter to run for every request
@Component
public class JwtFilter extends OncePerRequestFilter {
   @Autowired
   private JwtUserDetailsService userDetailsService;
   @Autowired
   private TokenManager tokenManager;
   @Override
   protected void doFilterInternal(HttpServletRequest request,
      HttpServletResponse response, FilterChain filterChain)
      throws ServletException, IOException {

      String tokenHeader = request.getHeader("Authorization");
      String username = null;
      String token = null;
      // if bearer token is provided, get the username
      if (tokenHeader != null && tokenHeader.startsWith("Bearer ")) {
         token = tokenHeader.substring(7);
         try {
            username = tokenManager.getUsernameFromToken(token);
         } catch (IllegalArgumentException e) {
            System.out.println("Unable to get JWT Token");
         } catch (ExpiredJwtException e) {
            System.out.println("JWT Token has expired");
         }
      } else {
         System.out.println("Bearer String not found in token");
      }
      // validate the JWT Token and create a new authentication token and set in security context
      if (null != username && SecurityContextHolder.getContext().getAuthentication() == null) {
         UserDetails userDetails = userDetailsService.loadUserByUsername(username);
         if (tokenManager.validateJwtToken(token, userDetails)) {
            UsernamePasswordAuthenticationToken
               authenticationToken = new UsernamePasswordAuthenticationToken(
                  userDetails, null, userDetails.getAuthorities());
               authenticationToken.setDetails(new
                  WebAuthenticationDetailsSource().buildDetails(request));
            SecurityContextHolder.getContext().setAuthentication(authenticationToken);
         }
      }
      filterChain.doFilter(request, response);
   }
}
Having created the filter for our requests, we now create the JwtAutheticationEntryPoint class. This class extends Springs AuthenticationEntryPoint class and rejects every unauthenticated request with an error code 401 sent back to the client. We have overridden the commence() method of AuthenticationEntryPoint class to do that.
JwtAuthenticationEntryPoint.java
package com.tutorialspoint.security.formlogin.jwtutils;

import java.io.IOException;
import java.io.Serializable;
import jakarta.servlet.ServletException;
import jakarta.servlet.http.HttpServletRequest;
import jakarta.servlet.http.HttpServletResponse;
import org.springframework.security.core.AuthenticationException;
import org.springframework.security.web.AuthenticationEntryPoint;
import org.springframework.stereotype.Component;

@Component
public class JwtAuthenticationEntryPoint implements AuthenticationEntryPoint, Serializable {

   private static final long serialVersionUID = 1L;

   @Override
   public void commence(HttpServletRequest request, HttpServletResponse response,
      AuthenticationException authException) throws IOException, ServletException {
      response.sendError(HttpServletResponse.SC_UNAUTHORIZED, "Unauthorized");
   }
}
Next, we create classes for our Request and Response models under package models. These models determine how our request and response formats would be for authentication.
JwtRequestModel.java
package com.tutorialspoint.security.formlogin.jwtutils.models;

import java.io.Serializable;
public class JwtRequestModel implements Serializable {
   /**
   *
   */
   private static final long serialVersionUID = 2636936156391265891L;
   private String username;
   private String password;
   public JwtRequestModel() {
   }
   public JwtRequestModel(String username, String password) {
      super();
      this.username = username; this.password = password;
   }
   public String getUsername() {
      return username;
   }
   public void setUsername(String username) {
      this.username = username;
   }
   public String getPassword() {
      return password;
   }
   public void setPassword(String password) {
      this.password = password;
   }
}
JwtResponseModel.java
package com.tutorialspoint.security.formlogin.jwtutils.models;

import java.io.Serializable;
public class JwtResponseModel implements Serializable {
   /**
   *
   */
   private static final long serialVersionUID = 1L;
   private final String token;
   public JwtResponseModel(String token) {
      this.token = token;
   }
   public String getToken() {
      return token;
   }
}
Now, we're creating a controller class to create a JWT Token once user is logged in using POST /login call.
JwtController.java
package com.tutorialspoint.security.formlogin.jwtutils;

import org.springframework.beans.factory.annotation.Autowired;
import org.springframework.http.ResponseEntity;
import org.springframework.security.authentication.AuthenticationManager;
import org.springframework.security.authentication.BadCredentialsException;
import org.springframework.security.authentication.DisabledException;
import org.springframework.security.authentication.UsernamePasswordAuthenticationToken;
import org.springframework.security.core.userdetails.UserDetails;
import org.springframework.web.bind.annotation.CrossOrigin;
import org.springframework.web.bind.annotation.PostMapping;
import org.springframework.web.bind.annotation.RequestBody;
import org.springframework.web.bind.annotation.RestController;

import com.tutorialspoint.security.formlogin.jwtutils.models.JwtRequestModel;
import com.tutorialspoint.security.formlogin.jwtutils.models.JwtResponseModel;

@RestController
@CrossOrigin
public class JwtController {
   @Autowired
   private JwtUserDetailsService userDetailsService;
   @Autowired
   private AuthenticationManager authenticationManager;
   @Autowired
   private TokenManager tokenManager;

   // Get a JWT Token once user is authenticated, otherwise throw BadCredentialsException
   @PostMapping("/login")
   public ResponseEntity<JwtResponseModel> createToken(@RequestBody JwtRequestModel
      request) throws Exception {
      try {
         authenticationManager.authenticate(
            new UsernamePasswordAuthenticationToken(request.getUsername(), request.getPassword()));
      } catch (DisabledException e) {
         throw new Exception("USER_DISABLED", e);
      } catch (BadCredentialsException e) {
         throw new Exception("INVALID_CREDENTIALS", e);
      }
      final UserDetails userDetails = userDetailsService.loadUserByUsername(request.getUsername());
      final String jwtToken = tokenManager.generateJwtToken(userDetails);
      return ResponseEntity.ok(new JwtResponseModel(jwtToken));
   }
}
Spring Security Configuration Class
Inside of our config package, we have created the WebSecurityConfig class. We shall be using this class for our security configurations, so let's annotate it with an @Configuration annotation and @EnableWebSecurity. As a result, Spring Security knows to treat this class a configuration class. As we can see, configuring applications have been made very easy by Spring.
WebSecurityConfig
package com.tutorialspoint.security.formlogin.config;

import org.springframework.beans.factory.annotation.Autowired;
import org.springframework.context.annotation.Bean;
import org.springframework.context.annotation.Configuration;
import org.springframework.security.authentication.AuthenticationManager;
import org.springframework.security.authentication.UsernamePasswordAuthenticationToken;
import org.springframework.security.config.Customizer;
import org.springframework.security.config.annotation.web.builders.HttpSecurity;
import org.springframework.security.config.annotation.web.configuration.EnableWebSecurity;
import org.springframework.security.config.annotation.web.configurers.AbstractHttpConfigurer;
import org.springframework.security.config.http.SessionCreationPolicy;
import org.springframework.security.core.userdetails.UserDetailsService;
import org.springframework.security.crypto.bcrypt.BCryptPasswordEncoder;
import org.springframework.security.crypto.password.PasswordEncoder;
import org.springframework.security.web.SecurityFilterChain;
import org.springframework.security.web.authentication.UsernamePasswordAuthenticationFilter;

import com.tutorialspoint.security.formlogin.jwtutils.JwtAuthenticationEntryPoint;
import com.tutorialspoint.security.formlogin.jwtutils.JwtFilter;

@Configuration
@EnableWebSecurity
public class WebSecurityConfig {

   @Autowired
   private JwtAuthenticationEntryPoint authenticationEntryPoint;
   @Autowired
   private JwtFilter filter;

   @Bean
   protected PasswordEncoder passwordEncoder() {
      return new BCryptPasswordEncoder();
   }

   @Bean
   protected SecurityFilterChain filterChain(HttpSecurity http) throws Exception {
      return http
         .csrf(AbstractHttpConfigurer::disable)
         .authorizeHttpRequests(request -> request.requestMatchers("/login").permitAll()
         .anyRequest().authenticated())
         // Send a 401 error response if user is not authentic.
         .exceptionHandling(exception -> exception.authenticationEntryPoint(authenticationEntryPoint))
         // no session management
         .sessionManagement(session -> session.sessionCreationPolicy(SessionCreationPolicy.STATELESS))
         // filter the request and add authentication token
         .addFilterBefore(filter,  UsernamePasswordAuthenticationFilter.class)
         .build();
   }

   @Bean
   AuthenticationManager customAuthenticationManager() {
      return authentication -> new UsernamePasswordAuthenticationToken("randomuser123","password");
   }
}
Controller Class
In this class, we've created a mapping for single GET "/hello" endpoint.
HelloController
package com.tutorialspoint.security.formlogin.controllers;

import org.springframework.web.bind.annotation.GetMapping;
import org.springframework.web.bind.annotation.RestController;

@RestController
public class HelloController {
   @GetMapping("/hello")
   public String hello() {
      return "hello";
   }
}
Output
As we can see, we have done all of that, and now our application is ready to go. Lets start the application and use postman for making our requests.
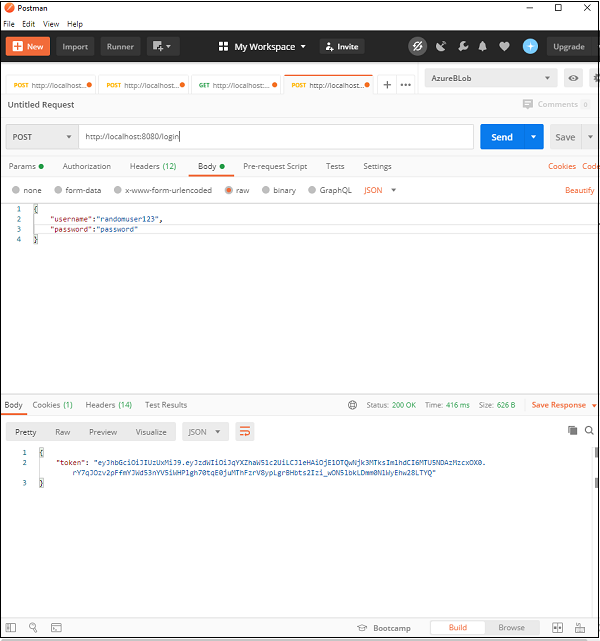
Here we have made our first request to get the token, and as we can see on providing the correct username/password combination we get back our token.
Now using that token in our header, lets call the /hello endpoint.
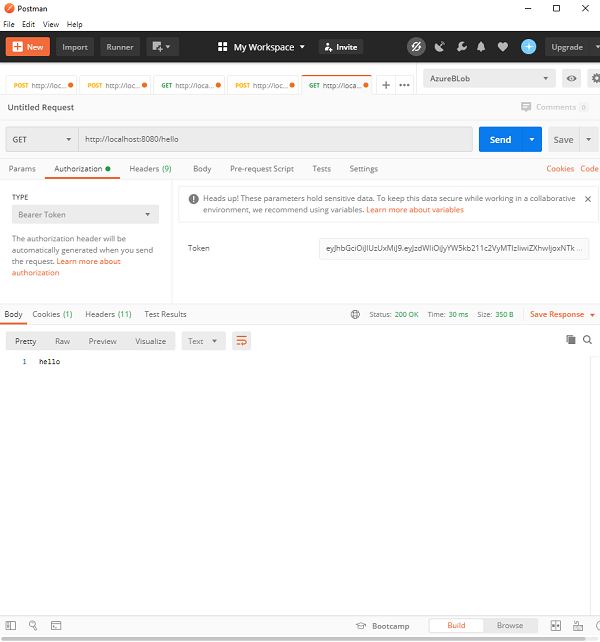
As we can see, since the request is authenticated, we get the desired response back. Now, if we tamper with the token or do not send the Authorization header, we will get a 401 error as configured in our application. This ensures that the protection our request using the JWT.
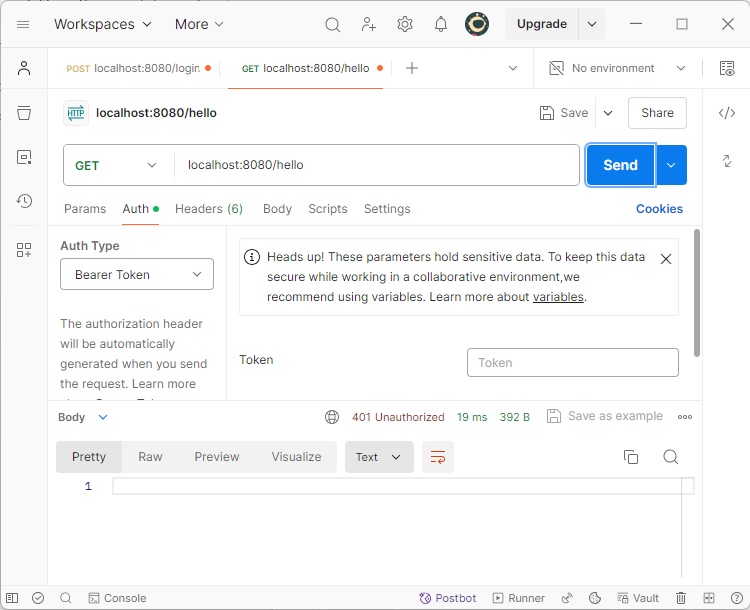
Spring Security - Retrieve User Information
Spring Security provides user information in SecurityContext once user is authenticated. We can retrieve user details in couple of ways. Let's discuss them one by one.
Using SecurityContextHolder
SecurityContextHolder provides static access to the security context and can be used to get the Authentication instance. Once Authentication instance is available, we can get the username easily as shown below:
Authentication authentication = SecurityContextHolder.getContext().getAuthentication();
String username = authentication.getName();
This approch is useful for any class to retrieve the user details and is not limited to controller classes.
Using Principal
We can use Principal as an argument to a controller class method which then can be used to get the name of the user as shown below:
@Controller
public class AuthController {
...
@GetMapping("/admin")
public String admin(Principal principal) {
   String username = principal.getName();
   System.out.println("AuthController.admin()::Username: " + username);
   ...
}
Using Authetication
We can use Authentication as an argument to a controller class method which then can be used to get the name of the user and role as shown below:
@Controller
public class AuthController {
...
@GetMapping("/admin")
public String admin(Authentication authentication) {
   String username = authentication.getName();
   System.out.println("AuthController.admin()::Username: " + username);

   UserDetails userDetails = (UserDetails) authentication.getPrincipal();
   System.out.println("User Role: " + userDetails.getAuthorities());
   ...
}
Using HttpServletRequest
We can use HttpServletRequest as an argument to a controller class method to get the UserPrincipal which then can be used to get the name of the user as shown below:
@Controller
public class AuthController {
...
@GetMapping("/admin")
public String admin(HttpServletRequest request) {
   Principal principal = request.getUserPrincipal();
   String username = principal.getName();
   System.out.println("AuthController.admin()::Username: " + username);
   ...
}
Using @AuthenticationPrincipal to inject UserDetails
We can use @AuthenticationPrincipal annotation in a controller class method to get the UserDetails which then can be used to get the name of the user as shown below:
@Controller
public class AuthController {
...
@GetMapping("/admin")
public String admin(@AuthenticationPrincipal UserDetails userDetails) {
   String username = userDetails.getUsername();
   System.out.println("AuthController.admin()::Username: " + username);
   ...
}
Using Thymeleaf templating engine
Thymeleaf is a server side web templating engine and provides an easy integration with Spring MVC. We can specify authentication tag to get the username as shown below:
<!DOCTYPE html>
<html xmlns="http://www.w3.org/1999/xhtml"
   xmlns:th="https://www.thymeleaf.org"
   xmlns:sec="https://www.thymeleaf.org/thymeleaf-extras-springsecurity6">
   ...
      <h1 th:inline="text">Hello <span sec:authentication="name"></span>!</h1>
   ...
<html>
We need to add following thymeleaf spring dependencies to integrate thymeleaf with Spring security.
<dependency>
   <groupId>org.springframework.boot</groupId>
   <artifactId>spring-boot-starter-thymeleaf</artifactId>
</dependency>
<dependency>
   <groupId>org.thymeleaf.extras</groupId>
   <artifactId>thymeleaf-extras-springsecurity6</artifactId>
</dependency>
Now let's see various options with following complete code in action.
Before you start writing your first example using Spring framework, you have to make sure that you have set up your Spring environment properly as explained in Spring Security - Environment Setup Chapter. We also assume that you have a bit of working knowledge on Spring Tool Suite IDE.
Now let us proceed to write a Spring MVC based Application managed by Maven, which will ask user to login, authenticate user and then provide option to logout using Spring Security Form Login Feature.
Create Project using Spring Initializr
Spring Initializr is great way to start with Spring Boot project. It provides a easy to use User Interface to create a project, add dependencies, select java runtime etc. It generates a skeleton project structure which once downloaded can be imported in spring tool suite and we can proceed with our readymade project structure.
We're choosing a maven project, naming the project as formlogin, with java version as 21. Following dependencies are added:
Spring Web
Spring Security
Spring Boot DevTools
Thymeleaf is a templating engine for Java. It allows us to quickly develop static or dynamic web pages for rendering in the browser. It is extremely extensible and allows us to define and customize the processing of our templates in fine detail. In addition to this, we can learn more about Thymeleaf by clicking this link.
Let's move on to generate our project and download it. We then extract it to a folder of our choice and use any IDE to open it. I shall be using Spring Tools Suite 4. It is available for free downloading from the https://spring.io/tools website and is optimized for spring applications.
pom.xml with all relevant dependencies
Let's take a look at our pom.xml file. It should look something similar to this −
pom.xml
<?xml version="1.0" encoding="UTF-8"?>
<project xmlns="http://maven.apache.org/POM/4.0.0" xmlns:xsi="http://www.w3.org/2001/XMLSchema-instance"
xsi:schemaLocation="http://maven.apache.org/POM/4.0.0 https://maven.apache.org/xsd/maven-4.0.0.xsd">
   <modelVersion>4.0.0</modelVersion>
   <parent>
      <groupId>org.springframework.boot</groupId>
      <artifactId>spring-boot-starter-parent</artifactId>
      <version>3.5.6</version>
      <relativePath/> <!-- lookup parent from repository -->
   </parent>
   <groupId>com.tutorialspoint.security</groupId>
   <artifactId>formlogin</artifactId>
   <version>0.0.1-SNAPSHOT</version>
   <name>formlogin</name>
   <description>Demo project for Spring Boot</description>
   <url/>
   <licenses>
      <license/>
   </licenses>
   <developers>
      <developer/>
   </developers>
   <scm>
      <connection/>
      <developerConnection/>
      <tag/>
      <url/>
   </scm>
   <properties>
      <java.version>21</java.version>
   </properties>
   <dependencies>
      <dependency>
         <groupId>org.springframework.boot</groupId>
         <artifactId>spring-boot-starter-security</artifactId>
      </dependency>
      <dependency>
         <groupId>org.springframework.boot</groupId>
         <artifactId>spring-boot-starter-thymeleaf</artifactId>
      </dependency>
      <dependency>
         <groupId>org.springframework.boot</groupId>
         <artifactId>spring-boot-starter-web</artifactId>
      </dependency>
      <dependency>
         <groupId>org.thymeleaf.extras</groupId>
         <artifactId>thymeleaf-extras-springsecurity6</artifactId>
      </dependency>
      <dependency>
         <groupId>org.springframework.boot</groupId>
         <artifactId>spring-boot-devtools</artifactId>
         <scope>runtime</scope>
         <optional>true</optional>
      </dependency>
      <dependency>
         <groupId>org.springframework.boot</groupId>
         <artifactId>spring-boot-starter-test</artifactId>
         <scope>test</scope>
      </dependency>
      <dependency>
         <groupId>org.springframework.security</groupId>
         <artifactId>spring-security-test</artifactId>
         <scope>test</scope>
      </dependency>
   </dependencies>
   <build>
      <plugins>
         <plugin>
            <groupId>org.springframework.boot</groupId>
            <artifactId>spring-boot-maven-plugin</artifactId>
         </plugin>
      </plugins>
   </build>
</project>
Spring Security Configuration Class
Inside of our config package, we have created the WebSecurityConfig class. We shall be using this class for our security configurations, so let's annotate it with an @Configuration annotation and @EnableWebSecurity. As a result, Spring Security knows to treat this class a configuration class. As we can see, configuring applications have been made very easy by Spring.
WebSecurityConfig
package com.tutorialspoint.security.formlogin.config;

import org.springframework.context.annotation.Bean;
import org.springframework.context.annotation.Configuration;
import org.springframework.security.config.annotation.web.builders.HttpSecurity;
import org.springframework.security.config.annotation.web.configuration.EnableWebSecurity;
import org.springframework.security.config.annotation.web.configurers.AbstractHttpConfigurer;
import org.springframework.security.core.userdetails.User;
import org.springframework.security.core.userdetails.UserDetails;
import org.springframework.security.core.userdetails.UserDetailsService;
import org.springframework.security.crypto.bcrypt.BCryptPasswordEncoder;
import org.springframework.security.crypto.password.PasswordEncoder;
import org.springframework.security.provisioning.InMemoryUserDetailsManager;
import org.springframework.security.web.SecurityFilterChain;

@Configuration
@EnableWebSecurity
public class WebSecurityConfig  {

   @Bean
   protected UserDetailsService userDetailsService() {
      UserDetails user = User.builder()
         .username("user")
         .password(passwordEncoder().encode("user123"))
         .roles("USER")
         .build();
      UserDetails admin = User.builder()
         .username("admin")
         .password(passwordEncoder().encode("admin123"))
         .roles("USER", "ADMIN")
         .build();
      return new InMemoryUserDetailsManager(user, admin);
   }

   @Bean
   protected PasswordEncoder passwordEncoder() {
      return new BCryptPasswordEncoder();
   }

   @Bean
   protected SecurityFilterChain filterChain(HttpSecurity http) throws Exception {
      return http
         .csrf(AbstractHttpConfigurer::disable)
         .authorizeHttpRequests(
            request -> request.requestMatchers("/login").permitAll()
         .requestMatchers("/**").authenticated()
      )
      .formLogin(form -> form.loginPage("/login")
      .defaultSuccessUrl("/")
      .failureUrl("/login?error=true")
      .permitAll())
      .logout(config -> config
      .logoutUrl("/logout")
      .logoutSuccessUrl("/login"))
      .build();
   }
}
Controller Class
In this class, we've created a mapping for multiple endpoints for the index, login, admin pages of this application.
AuthController
package com.tutorialspoint.security.formlogin.controllers;

import java.security.Principal;

import org.springframework.security.core.Authentication;
import org.springframework.security.core.annotation.AuthenticationPrincipal;
import org.springframework.security.core.context.SecurityContextHolder;
import org.springframework.security.core.userdetails.UserDetails;
import org.springframework.stereotype.Controller;
import org.springframework.web.bind.annotation.GetMapping;

import jakarta.servlet.http.HttpServletRequest;

@Controller
public class AuthController {
   @GetMapping("/")
   public String home(Authentication authentication, HttpServletRequest request) {
      // get username from Authetication instance
      String username = authentication.getName();
      System.out.println("AuthController.home()::Username: " + username);

      // get principal instance from Authentication instance to get user role
      UserDetails userDetails = (UserDetails) authentication.getPrincipal();
      System.out.println("User Role: " + userDetails.getAuthorities());

      // get principal instance from HTTP Request
      Principal principal = request.getUserPrincipal();
      // get username
      username = principal.getName();

      System.out.println("AuthController.home()::principal.getName(): " + username);
      return "index";
   }

   @GetMapping("/login")
   public String login() {
      return "login";
   }
   @GetMapping("/user")
   public String user() {
      // get authentication instance from Security Context
      Authentication authentication = SecurityContextHolder.getContext().getAuthentication();
      // get the user name
      String username = authentication.getName();
      System.out.println("AuthController.user()::Username: " + username);
      return "user";
   }
   @GetMapping("/admin")
   public String admin(Principal principal, @AuthenticationPrincipal UserDetails userDetails) {
      // get the username from principal instance
      String username = principal.getName();
      System.out.println("AuthController.admin()::Username: " + username);

      // get the username from userdetails instance
      username = userDetails.getUsername();
      System.out.println("AuthController.admin()::userDetails.getUsername(): " + username);
      return "admin";
   }
}
Views
Create index.html in /src/main/resources/templates folder with following content to act as a home page.
index.html
<!DOCTYPE html>
<html xmlns="http://www.w3.org/1999/xhtml"
   xmlns:th="https://www.thymeleaf.org"
   xmlns:sec="https://www.thymeleaf.org/thymeleaf-extras-springsecurity6">
   <head>
      <title>
         Hello World!
      </title>
   </head>
   <body>
      <h1 th:inline="text">Hello World!</h1>
      <a href="/logout" alt="logout">Sign Out</a>
   </body>
<html>
Create user.html in /src/main/resources/templates folder with following content to act as user page.
user.html
<!DOCTYPE html>
<html xmlns="http://www.w3.org/1999/xhtml"
   xmlns:th="https://www.thymeleaf.org"
   xmlns:sec="https://www.thymeleaf.org/thymeleaf-extras-springsecurity6">
   <head>
      <title>
         Hello User!
      </title>
   </head>
   <body>
      <p>User Dashboard</p>
      <h1 th:inline="text">Hello <span sec:authentication="name"></span>!</h1>
      <a href="/logout" alt="logout">Sign Out</a>
   </body>
<html>
Create admin.html in /src/main/resources/templates folder with following content to act as admin page.
admin.html
<!DOCTYPE html>
<html xmlns="http://www.w3.org/1999/xhtml"
   xmlns:th="https://www.thymeleaf.org"
   xmlns:sec="https://www.thymeleaf.org/thymeleaf-extras-springsecurity6">
   <head>
      <title>
         Hello User!
      </title>
   </head>
   <body>
      <p>User Dashboard</p>
      <h1 th:inline="text">Hello <span sec:authentication="name"></span>!</h1>
      <a href="/logout" alt="logout">Sign Out</a>
   </body>
<html>
Running the Application
As we've all component ready, let's run the Application. Right Click on the project, select Run As and then Spring Boot App.
It will boot up the application and once application is started, we can run localhost:8080 to check the changes.
Output
Now open localhost:8080, you can see the login page.
Home Page
Check the logs for Home Page
Now check the application logs. It will have following entries apart from Spring boot logs:
AuthController.home()::Username: user
User Role: [ROLE_USER]
AuthController.home()::principal.getName(): user
User Page
Now open localhost:8080/user, you can check the following logs in application logs.
AuthController.user()::Username: user
You can check the username being shown in html as well.
Admin Page
Now open localhost:8080/admin, you can check the following logs in application logs.
AuthController.admin()::Username: user
AuthController.admin()::userDetails.getUsername(): user
Spring Security - Maven
Spring Security is a modular framework similar to Spring framework. We've three major module of spring security as shown below:
Spring Security Core − Provides authentication and access control functionality. This module is required for all projects/modules of spring security.
Spring Security Web − Provides spring security support for web based project.
Spring Security Config − Provides spring security XML namespace and annotations.
For other APIs support like LDAP, OpenID, ACL, CAS and OAuth, spring security provides corresponding modules as following:
LDAP − Spring Security LDAP
OpenID − Spring Security OpenID
ACL − Spring Security ACL
CAS − Spring Security CAS
OAuth2 − Spring Security OAuth
Maven Modules
To start with Spring security and spring integration in maven, we can define properties with their version as shown below:
Properties
<properties>
...
   <spring.security.version>5.3.4.RELEASE</spring.security.version>
   <spring.version>5.2.8.RELEASE</spring.version>
</properties>
Spring Security and Spring frameworks versions are independent and are on different release cycles so their compatible versions can be different.
Dependencies
Maven projects for Spring security follows spring-security-* naming and spring projects are like spring-*. For above discussed project, following is the list of maven dependencies:
Spring Security Core − spring-security-core
Spring Security Web − spring-security-web
Spring Security Config − spring-security-config
LDAP − spring-security-ldap
OpenID − spring-security-openid
ACL − spring-security-acl
CAS − spring-security-cas
OAuth2 − spring-security-oauth2
For Spring, we can use spring-webmvc project as a top level dependency and maven will resolve following relevant dependencies automatically.
Spring Core − spring-core
Spring Context − spring-context
Spring Beans − spring-beans
Spring AOP − spring-aop
Spring Expressions − spring-expression
Spring JCL − spring-jcl
Spring Web − spring-web
Spring WebMVC − spring-webmvc
Example - POM for Spring
Following is a sample POM.XML where we've use spring and spring security dependencies using maven.
<project xmlns="http://maven.apache.org/POM/4.0.0" xmlns:xsi="http://www.w3.org/2001/XMLSchema-instance"
   xsi:schemaLocation="http://maven.apache.org/POM/4.0.0 https://maven.apache.org/xsd/maven-4.0.0.xsd">
   <modelVersion>4.0.0</modelVersion>
   <groupId>com.tutorialspoint</groupId>
   <artifactId>SpringSecurityFormLogin</artifactId>
   <version>0.0.1-SNAPSHOT</version>
   <name>Spring Security Form Login</name>
   <description>A Sample Spring Security Form Login Project</description>
   <packaging>war</packaging>
   <properties>
      <maven.compiler.target>1.8</maven.compiler.target>
      <maven.compiler.source>1.8</maven.compiler.source>
      <spring.security.version>5.3.4.RELEASE</spring.security.version>
      <spring.version>5.2.8.RELEASE</spring.version>
   </properties>
   <dependencies>
      <dependency>
         <groupId>org.springframework</groupId>
         <artifactId>spring-webmvc</artifactId>
         <version>${spring.version}</version>
      </dependency>
      <dependency>
         <groupId>org.springframework.security</groupId>
         <artifactId>spring-security-web</artifactId>
         <version>${spring.security.version}</version>
      </dependency>
      <dependency>
         <groupId>org.springframework.security</groupId>
         <artifactId>spring-security-core</artifactId>
         <version>${spring.security.version}</version>
      </dependency>
      <dependency>
         <groupId>org.springframework.security</groupId>
         <artifactId>spring-security-config</artifactId>
         <version>${spring.security.version}</version>
      </dependency>
      <dependency>
         <groupId>javax.servlet</groupId>
         <artifactId>javax.servlet-api</artifactId>
         <version>3.1.0</version>
         <scope>provided</scope>
      </dependency>
      <dependency>
         <groupId>javax.servlet</groupId>
         <artifactId>jstl</artifactId>
         <version>1.2</version>
      </dependency>
   </dependencies>
   <build>
      <plugins>
         <plugin>
            <groupId>org.apache.maven.plugins</groupId>
            <artifactId>maven-war-plugin</artifactId>
            <version>2.6</version>
            <configuration>
               <failOnMissingWebXml>false</failOnMissingWebXml>
            </configuration>
         </plugin>
      </plugins>
   </build>
</project>
Spring Boot - Spring Security Integration
Spring Boot provides much simpler and easier integration with Spring Security using spring-boot-starter-security as a starter dependency. It will automatically resolve all the relevant dependencies.
<dependency>
   <groupId>org.springframework.boot</groupId>
   <artifactId>spring-boot-starter-security</artifactId>
</dependency>
Example - POM for Spring Boot
Following is a sample POM.XML where we've used spring boot and spring security dependencies using maven.
<?xml version="1.0" encoding="UTF-8"?>
<project xmlns="http://maven.apache.org/POM/4.0.0" xmlns:xsi="http://www.w3.org/2001/XMLSchema-instance"
xsi:schemaLocation="http://maven.apache.org/POM/4.0.0 https://maven.apache.org/xsd/maven-4.0.0.xsd">
   <modelVersion>4.0.0</modelVersion>
   <parent>
      <groupId>org.springframework.boot</groupId>
      <artifactId>spring-boot-starter-parent</artifactId>
      <version>3.5.6</version>
      <relativePath/> <!-- lookup parent from repository -->
   </parent>
   <groupId>com.tutorialspoint.security</groupId>
   <artifactId>formlogin</artifactId>
   <version>0.0.1-SNAPSHOT</version>
   <name>formlogin</name>
   <description>Demo project for Spring Boot</description>
   <url/>
   <licenses>
      <license/>
   </licenses>
   <developers>
      <developer/>
   </developers>
   <scm>
      <connection/>
      <developerConnection/>
      <tag/>
      <url/>
   </scm>
   <properties>
      <java.version>21</java.version>
   </properties>
   <dependencies>
      <dependency>
         <groupId>org.springframework.boot</groupId>
         <artifactId>spring-boot-starter-security</artifactId>
      </dependency>
      <dependency>
         <groupId>org.springframework.boot</groupId>
         <artifactId>spring-boot-starter-thymeleaf</artifactId>
      </dependency>
      <dependency>
         <groupId>org.springframework.boot</groupId>
         <artifactId>spring-boot-starter-web</artifactId>
      </dependency>
      <dependency>
         <groupId>org.thymeleaf.extras</groupId>
         <artifactId>thymeleaf-extras-springsecurity6</artifactId>
      </dependency>
      <dependency>
         <groupId>org.springframework.boot</groupId>
         <artifactId>spring-boot-devtools</artifactId>
         <scope>runtime</scope>
         <optional>true</optional>
      </dependency>
      <dependency>
         <groupId>org.springframework.boot</groupId>
         <artifactId>spring-boot-starter-test</artifactId>
         <scope>test</scope>
      </dependency>
      <dependency>
         <groupId>org.springframework.security</groupId>
         <artifactId>spring-security-test</artifactId>
         <scope>test</scope>
      </dependency>
   </dependencies>
   <build>
      <plugins>
         <plugin>
            <groupId>org.springframework.boot</groupId>
            <artifactId>spring-boot-maven-plugin</artifactId>
         </plugin>
      </plugins>
   </build>
</project>
Spring Security - Default Password Encoder
Without Password Encoder
Prior to Spring Security 5, developers could use in memory password as plain text but with password related enhancements in spring security, now plain text password is not supported by spring security. Consider following configuration snippet to understand it better.
Plain Text Password
@Bean
protected UserDetailsService userDetailsService() {
   UserDetails user = User.builder()
      .username("user")
      .password("user123")    // password stored as plain text
      .roles("USER")
      .build();
   UserDetails admin = User.builder()
      .username("admin")
      .password("admin123")
      .roles("USER", "ADMIN") // password stored as plain text
      .build();
   return new InMemoryUserDetailsManager(user, admin);
}
Output
Above spring security configuration is used to create a In Memory Userbase of two users identified by plain text passwords. If we try to use this InMemoryUserDetailsManager to validate users then app server will throw exception. Following is a stacktrace when a user tries to login and user will be show the login page again
java.lang.IllegalArgumentException: You have entered a password with no PasswordEncoder. If that is your intent, it should be prefixed with `{noop}`.
	at org.springframework.security.crypto.password.DelegatingPasswordEncoder$UnmappedIdPasswordEncoder.matches(DelegatingPasswordEncoder.java:296) ~[spring-security-crypto-6.3.1.jar:6.3.1]
	...
Plain Text Password using {noop}
Above stacktrace is stating that plain text in memory password are not supported. In case, we need to achieve it intentionally then we need to use '{noop}' as prefix. Let's update the spring security configuration again and see the result.
@Bean
protected UserDetailsService userDetailsService() {
   UserDetails user = User.builder()
      .username("user")
      .password("{noop}user123") // password stored as plain text
      .roles("USER")
      .build();
   UserDetails admin = User.builder()
      .username("admin")
      .password("{noop}admin123")
      .roles("USER", "ADMIN") // password stored as plain text
      .build();
   return new InMemoryUserDetailsManager(user, admin);
}
Now it you run the application and login and user will be able to login to the application. Here Spring security is using NoOpPasswordEncoder as a default password encoder to validate the configured user.
As a note, this approach is not advisable for production as NoOpPasswordEncoder is deprecated and is insecure.
With Password Encoder
It is always advised to use a good password encoder to encrypt the in memory password. BCryptPasswordEncoder is one such inbuilt password encoder which password will be stored in memory in BCrypt encoded format.
@Bean
protected UserDetailsService userDetailsService() {
   UserDetails user = User.builder()
      .username("user")
      .password(passwordEncoder().encode("user123")) // encode the password
      .roles("USER")
      .build();
   UserDetails admin = User.builder()
      .username("admin")
      .password(passwordEncoder().encode("admin123")) // encode the password
      .roles("USER", "ADMIN")
      .build();
   return new InMemoryUserDetailsManager(user, admin);
}

// Create a new Password Encoder
@Bean
protected PasswordEncoder passwordEncoder() {
   return new BCryptPasswordEncoder();
}
Let us start actual programming with Spring Security. Before you start writing your example using Spring framework, you have to make sure that you have set up your Spring environment properly as explained in Spring Security - Environment Setup Chapter. We also assume that you have a bit of working knowledge on Spring Tool Suite IDE.
Now let us proceed to write a Spring MVC based Application managed by Maven, which will ask user to login, authenticate user and then provide option to logout using Spring Security Form Login Feature.
Create Project using Spring Initializr
Spring Initializr is great way to start with Spring Boot project. It provides a easy to use User Interface to create a project, add dependencies, select java runtime etc. It generates a skeleton project structure which once downloaded can be imported in spring tool suite and we can proceed with our readymade project structure.
We're choosing a maven project, naming the project as formlogin, with java version as 21. Following dependencies are added:
Spring Web
Spring Security
Spring Boot DevTools
Thymeleaf is a templating engine for Java. It allows us to quickly develop static or dynamic web pages for rendering in the browser. It is extremely extensible and allows us to define and customize the processing of our templates in fine detail. In addition to this, we can learn more about Thymeleaf by clicking this link.
Let's move on to generate our project and download it. We then extract it to a folder of our choice and use any IDE to open it. I shall be using Spring Tools Suite 4. It is available for free downloading from the https://spring.io/tools website and is optimized for spring applications.
pom.xml with all relevant dependencies
Let's take a look at our pom.xml file. It should look something similar to this −
pom.xml
<?xml version="1.0" encoding="UTF-8"?>
<project xmlns="http://maven.apache.org/POM/4.0.0" xmlns:xsi="http://www.w3.org/2001/XMLSchema-instance"
xsi:schemaLocation="http://maven.apache.org/POM/4.0.0 https://maven.apache.org/xsd/maven-4.0.0.xsd">
   <modelVersion>4.0.0</modelVersion>
   <parent>
      <groupId>org.springframework.boot</groupId>
      <artifactId>spring-boot-starter-parent</artifactId>
      <version>3.5.6</version>
      <relativePath/> <!-- lookup parent from repository -->
   </parent>
   <groupId>com.tutorialspoint.security</groupId>
   <artifactId>formlogin</artifactId>
   <version>0.0.1-SNAPSHOT</version>
   <name>formlogin</name>
   <description>Demo project for Spring Boot</description>
   <url/>
   <licenses>
      <license/>
   </licenses>
   <developers>
      <developer/>
   </developers>
   <scm>
      <connection/>
      <developerConnection/>
      <tag/>
      <url/>
   </scm>
   <properties>
      <java.version>21</java.version>
   </properties>
   <dependencies>
      <dependency>
         <groupId>org.springframework.boot</groupId>
         <artifactId>spring-boot-starter-security</artifactId>
      </dependency>
      <dependency>
         <groupId>org.springframework.boot</groupId>
         <artifactId>spring-boot-starter-thymeleaf</artifactId>
      </dependency>
      <dependency>
         <groupId>org.springframework.boot</groupId>
         <artifactId>spring-boot-starter-web</artifactId>
      </dependency>
      <dependency>
         <groupId>org.thymeleaf.extras</groupId>
         <artifactId>thymeleaf-extras-springsecurity6</artifactId>
      </dependency>
      <dependency>
         <groupId>org.springframework.boot</groupId>
         <artifactId>spring-boot-devtools</artifactId>
         <scope>runtime</scope>
         <optional>true</optional>
      </dependency>
      <dependency>
         <groupId>org.springframework.boot</groupId>
         <artifactId>spring-boot-starter-test</artifactId>
         <scope>test</scope>
      </dependency>
      <dependency>
         <groupId>org.springframework.security</groupId>
         <artifactId>spring-security-test</artifactId>
         <scope>test</scope>
      </dependency>
   </dependencies>
   <build>
      <plugins>
         <plugin>
            <groupId>org.springframework.boot</groupId>
            <artifactId>spring-boot-maven-plugin</artifactId>
         </plugin>
      </plugins>
   </build>
</project>
Spring Security Configuration Class
Inside of our config package, we have created the WebSecurityConfig class. We shall be using this class for our security configurations, so let's annotate it with an @Configuration annotation and @EnableWebSecurity. As a result, Spring Security knows to treat this class a configuration class. As we can see, configuring applications have been made very easy by Spring.
WebSecurityConfig
package com.tutorialspoint.security.formlogin.config;

import org.springframework.context.annotation.Bean;
import org.springframework.context.annotation.Configuration;
import org.springframework.security.config.annotation.web.builders.HttpSecurity;
import org.springframework.security.config.annotation.web.configuration.EnableWebSecurity;
import org.springframework.security.config.annotation.web.configurers.AbstractHttpConfigurer;
import org.springframework.security.core.userdetails.User;
import org.springframework.security.core.userdetails.UserDetails;
import org.springframework.security.core.userdetails.UserDetailsService;
import org.springframework.security.crypto.bcrypt.BCryptPasswordEncoder;
import org.springframework.security.crypto.password.PasswordEncoder;
import org.springframework.security.provisioning.InMemoryUserDetailsManager;
import org.springframework.security.web.SecurityFilterChain;

@Configuration
@EnableWebSecurity
public class WebSecurityConfig  {

   @Bean
   protected UserDetailsService userDetailsService() {
      UserDetails user = User.builder()
         .username("user")
         .password(passwordEncoder().encode("user123"))
         .roles("USER")
         .build();
      UserDetails admin = User.builder()
         .username("admin")
         .password(passwordEncoder().encode("admin123"))
         .roles("USER", "ADMIN")
         .build();
      return new InMemoryUserDetailsManager(user, admin);
   }

   @Bean
   protected PasswordEncoder passwordEncoder() {
      return new BCryptPasswordEncoder();
   }

   @Bean
   protected SecurityFilterChain filterChain(HttpSecurity http) throws Exception {
      return http
         .csrf(AbstractHttpConfigurer::disable)
         .authorizeHttpRequests(
            request -> request.requestMatchers("/login").permitAll()
            .requestMatchers("/**").authenticated()
         )
         .formLogin(form -> form.loginPage("/login")
            .defaultSuccessUrl("/")
            .failureUrl("/login?error=true")
            .permitAll())
         .rememberMe(config -> config.key("123456")
         .tokenValiditySeconds(3600))
         .logout(config -> config
            .logoutUrl("/logout")
            .logoutSuccessUrl("/login")
			.invalidateHttpSession(true)
            .deleteCookies("JSESSIONID"))
         .build();
   }
}
Controller Class
In this class, we've created a mapping for "/" endpoint and for "/login" for the index page and login page of this application.
AuthController.java
package com.tutorialspoint.security.formlogin.controllers;

import org.springframework.stereotype.Controller;
import org.springframework.web.bind.annotation.GetMapping;

@Controller
public class AuthController {
   @GetMapping("/")
   public String home() {
      return "index";
   }
   @GetMapping("/login")
   public String login() {
      return "login";
   }
}
Views
Let's create index.html in /src/main/resources/templates folder with following content to act as a home page and to display logged in user name.
index.html
<!DOCTYPE html>
<html xmlns="http://www.w3.org/1999/xhtml"
   xmlns:th="https://www.thymeleaf.org"
   xmlns:sec="https://www.thymeleaf.org/thymeleaf-extras-springsecurity3">
   <head>
      <title>
         Hello World!
      </title>
   </head>
   <body>
      <h1 th:inline="text">Hello <span sec:authentication="name"></span>!</h1>
      <form th:action="@{/logout}" method="post">
         <input type="submit" value="Sign Out"/>
      </form>
   </body>
<html>
login.html
Let's create the login.html in /src/main/resources/templates folder with following content to act as a login page. We're using default name username, password and remember-me for text fields. In case of other name, we need to set the same in spring security config class as well.
<!DOCTYPE html>
<html xmlns="http://www.w3.org/1999/xhtml"
   xmlns:th="https://www.thymeleaf.org"
   xmlns:sec="https://www.thymeleaf.org/thymeleaf-extras-springsecurity3">
   <head>
      <title>Spring Security Example</title>
   </head>
   <body>
      <div th:if="${param.error}">
         <p>Bad Credentials</p>
      </div>
      <div th:if="${param.logout}">You have been logged out.</div>
      <form th:action="@{/login}" method="post">
         <h1>Please sign in</h1>
         <table>
            <tr>
               <td><label for="username"><b>Username</b></label></td>
               <td><input type="text" placeholder="Enter Username" name="username" id="username" required></td>
            </tr>
            <tr>
               <td><label for="password"><b>Password</b></label></td>
               <td><input type="password" placeholder="Enter Password" name="password" id="password" required></td>
            </tr>
            <tr>
               <td><label for="remember-me"><b>Remember Me</b></label> </td>
               <td><input type="checkbox" name="remember-me" /></td>
            </tr>
            <tr>
               <td> </td>
               <td><input type="submit"  value="Sign In" /></td>
            </tr>
         </table>
      </form>
   </body>
</html>
In login form, we're using POST method to login while using input fields with name and id as username, password and remember-me checkbox. If checkbox is selected, a remember-me Cookie will be created when user logs in the application.
Running the Application
As we've all component ready, let's run the Application. Right Click on the project, select Run As and then Spring Boot App.
It will boot up the application and once application is started, we can run localhost:8080 to check the changes.
Output
Now open localhost:8080, you can see our login page with Remember Me Checkbox.
Login Page
Home Page
Enter valid credential.
Spring Security - Password Encoding
Prior to Spring Security 5, developers could use in memory password as plain text but with password related enhancements in spring security, now plain text password is not supported by spring security. In case, we need to achieve it intentionally then we need to use '{noop}' as prefix. Consider the following security configuration.
@Bean
protected UserDetailsService userDetailsService() {
   UserDetails user = User.builder()
      .username("user")
      .password("{noop}user123") // password stored as plain text
      .roles("USER")
      .build();
   UserDetails admin = User.builder()
      .username("admin")
      .password("{noop}admin123")
      .roles("USER", "ADMIN") // password stored as plain text
      .build();
   return new InMemoryUserDetailsManager(user, admin);
}
Here Spring security is using NoOpPasswordEncoder as a default password encoder to validate the configured user. But this approach is not advisable for production as NoOpPasswordEncoder is deprecated and is insecure.
With Password Encoder
It is always advised to use a good password encoder to encrypt the in memory password. BCryptPasswordEncoder is one such inbuilt password encoder which password will be stored in memory in BCrypt encoded format.
@Bean
protected UserDetailsService userDetailsService() {
   UserDetails user = User.builder()
      .username("user")
      .password(passwordEncoder().encode("user123")) // encode the password
      .roles("USER")
      .build();
   UserDetails admin = User.builder()
      .username("admin")
      .password(passwordEncoder().encode("admin123")) // encode the password
      .roles("USER", "ADMIN")
      .build();
   return new InMemoryUserDetailsManager(user, admin);
}

// Create a new Password Encoder
@Bean
protected PasswordEncoder passwordEncoder() {
   return new BCryptPasswordEncoder();
}
In case of persistent password storage, we should use the password encoder to encode the password and then store in the database.BCryptPasswordEncoder uses a random salt and creates an encoded password of length 60. Following is a sample of a BCrypt Encoded Password:
$2a$10$acaXGauv/3buNdwQWeOgu.iab3LLDclrH64xVMsSxd9Lp/otgUfMm
Here each field is divided by a $ symbol. Following are the details of each field.
2a - represents the encoding algorithm as bcrypt
10 - represents the strenth of the algorithm
first 22 characters - salt
remaining 31 characters - hashed version of plain text password
Let us start actual programming with Spring Security. Before you start writing your example using Spring framework, you have to make sure that you have set up your Spring environment properly as explained in Spring Security - Environment Setup Chapter. We also assume that you have a bit of working knowledge on Spring Tool Suite IDE.
Now let us proceed to write a Spring MVC based Application managed by Maven, which will ask user to login, authenticate user and then provide option to logout using Spring Security Form Login Feature.
Create Project using Spring Initializr
Spring Initializr is great way to start with Spring Boot project. It provides a easy to use User Interface to create a project, add dependencies, select java runtime etc. It generates a skeleton project structure which once downloaded can be imported in spring tool suite and we can proceed with our readymade project structure.
We're choosing a maven project, naming the project as formlogin, with java version as 21. Following dependencies are added:
Spring Web
Spring Security
Spring Boot DevTools
Thymeleaf is a templating engine for Java. It allows us to quickly develop static or dynamic web pages for rendering in the browser. It is extremely extensible and allows us to define and customize the processing of our templates in fine detail. In addition to this, we can learn more about Thymeleaf by clicking this link.
Let's move on to generate our project and download it. We then extract it to a folder of our choice and use any IDE to open it. I shall be using Spring Tools Suite 4. It is available for free downloading from the https://spring.io/tools website and is optimized for spring applications.
pom.xml with all relevant dependencies
Let's take a look at our pom.xml file. It should look something similar to this −
pom.xml
<?xml version="1.0" encoding="UTF-8"?>
<project xmlns="http://maven.apache.org/POM/4.0.0" xmlns:xsi="http://www.w3.org/2001/XMLSchema-instance"
xsi:schemaLocation="http://maven.apache.org/POM/4.0.0 https://maven.apache.org/xsd/maven-4.0.0.xsd">
   <modelVersion>4.0.0</modelVersion>
   <parent>
      <groupId>org.springframework.boot</groupId>
      <artifactId>spring-boot-starter-parent</artifactId>
      <version>3.5.6</version>
      <relativePath/> <!-- lookup parent from repository -->
   </parent>
   <groupId>com.tutorialspoint.security</groupId>
   <artifactId>formlogin</artifactId>
   <version>0.0.1-SNAPSHOT</version>
   <name>formlogin</name>
   <description>Demo project for Spring Boot</description>
   <url/>
   <licenses>
      <license/>
   </licenses>
   <developers>
      <developer/>
   </developers>
   <scm>
      <connection/>
      <developerConnection/>
      <tag/>
      <url/>
   </scm>
   <properties>
      <java.version>21</java.version>
   </properties>
   <dependencies>
      <dependency>
         <groupId>org.springframework.boot</groupId>
         <artifactId>spring-boot-starter-security</artifactId>
      </dependency>
      <dependency>
         <groupId>org.springframework.boot</groupId>
         <artifactId>spring-boot-starter-thymeleaf</artifactId>
      </dependency>
      <dependency>
         <groupId>org.springframework.boot</groupId>
         <artifactId>spring-boot-starter-web</artifactId>
      </dependency>
      <dependency>
         <groupId>org.thymeleaf.extras</groupId>
         <artifactId>thymeleaf-extras-springsecurity6</artifactId>
      </dependency>
      <dependency>
         <groupId>org.springframework.boot</groupId>
         <artifactId>spring-boot-devtools</artifactId>
         <scope>runtime</scope>
         <optional>true</optional>
      </dependency>
      <dependency>
         <groupId>org.springframework.boot</groupId>
         <artifactId>spring-boot-starter-test</artifactId>
         <scope>test</scope>
      </dependency>
      <dependency>
         <groupId>org.springframework.security</groupId>
         <artifactId>spring-security-test</artifactId>
         <scope>test</scope>
      </dependency>
   </dependencies>
   <build>
      <plugins>
         <plugin>
            <groupId>org.springframework.boot</groupId>
            <artifactId>spring-boot-maven-plugin</artifactId>
         </plugin>
      </plugins>
   </build>
</project>
Spring Security Configuration Class
Inside of our config package, we have created the WebSecurityConfig class. We shall be using this class for our security configurations, so let's annotate it with an @Configuration annotation and @EnableWebSecurity. As a result, Spring Security knows to treat this class a configuration class. As we can see, configuring applications have been made very easy by Spring.
WebSecurityConfig
package com.tutorialspoint.security.formlogin.config;

import org.springframework.context.annotation.Bean;
import org.springframework.context.annotation.Configuration;
import org.springframework.security.config.annotation.web.builders.HttpSecurity;
import org.springframework.security.config.annotation.web.configuration.EnableWebSecurity;
import org.springframework.security.config.annotation.web.configurers.AbstractHttpConfigurer;
import org.springframework.security.core.userdetails.User;
import org.springframework.security.core.userdetails.UserDetails;
import org.springframework.security.core.userdetails.UserDetailsService;
import org.springframework.security.crypto.bcrypt.BCryptPasswordEncoder;
import org.springframework.security.crypto.password.PasswordEncoder;
import org.springframework.security.provisioning.InMemoryUserDetailsManager;
import org.springframework.security.web.SecurityFilterChain;

@Configuration
@EnableWebSecurity
public class WebSecurityConfig  {

   @Bean
   protected UserDetailsService userDetailsService() {
      UserDetails user = User.builder()
         .username("user")
         .password(passwordEncoder().encode("user123")) // encode the password
         .roles("USER")
         .build();
      UserDetails admin = User.builder()
         .username("admin")
         .password(passwordEncoder().encode("admin123")) // encode the password
         .roles("USER", "ADMIN")
         .build();
      // print the encoded password
      System.out.println("Encoded Password for User: " + user.getPassword());
      return new InMemoryUserDetailsManager(user, admin);
   }

   // Password Encoder
   @Bean
   protected PasswordEncoder passwordEncoder() {
      return new BCryptPasswordEncoder();
   }

   // Security Configuration
   @Bean
   protected SecurityFilterChain filterChain(HttpSecurity http) throws Exception {
      return http
         .csrf(AbstractHttpConfigurer::disable)
         .authorizeHttpRequests(
            request -> request.requestMatchers("/login").permitAll()
            .requestMatchers("/**").authenticated()
         )
         .formLogin(form -> form.loginPage("/login")
            .defaultSuccessUrl("/")
            .failureUrl("/login?error=true")
            .permitAll())
         .rememberMe(config -> config.key("123456")
         .tokenValiditySeconds(3600))
         .logout(config -> config
            .logoutUrl("/logout")
            .logoutSuccessUrl("/login")
			.invalidateHttpSession(true)
            .deleteCookies("JSESSIONID"))
         .build();
   }
}
Controller Class
In this class, we've created a mapping for "/" endpoint and for "/login" for the index page and login page of this application.
AuthController.java
package com.tutorialspoint.security.formlogin.controllers;

import org.springframework.stereotype.Controller;
import org.springframework.web.bind.annotation.GetMapping;

@Controller
public class AuthController {
   @GetMapping("/")
   public String home() {
      return "index";
   }
   @GetMapping("/login")
   public String login() {
      return "login";
   }
}
Views
Let's create index.html in /src/main/resources/templates folder with following content to act as a home page and to display logged in user name.
index.html
<!DOCTYPE html>
<html xmlns="http://www.w3.org/1999/xhtml"
   xmlns:th="https://www.thymeleaf.org"
   xmlns:sec="https://www.thymeleaf.org/thymeleaf-extras-springsecurity3">
   <head>
      <title>
         Hello World!
      </title>
   </head>
   <body>
      <h1 th:inline="text">Hello <span sec:authentication="name"></span>!</h1>
      <form th:action="@{/logout}" method="post">
         <input type="submit" value="Sign Out"/>
      </form>
   </body>
<html>
login.html
Let's create the login.html in /src/main/resources/templates folder with following content to act as a login page. We're using default name username, password and remember-me for text fields. In case of other name, we need to set the same in spring security config class as well.
<!DOCTYPE html>
<html xmlns="http://www.w3.org/1999/xhtml"
   xmlns:th="https://www.thymeleaf.org"
   xmlns:sec="https://www.thymeleaf.org/thymeleaf-extras-springsecurity3">
   <head>
      <title>Spring Security Example</title>
   </head>
   <body>
      <div th:if="${param.error}">
         <p>Bad Credentials</p>
      </div>
      <div th:if="${param.logout}">You have been logged out.</div>
      <form th:action="@{/login}" method="post">
         <h1>Please sign in</h1>
         <table>
            <tr>
               <td><label for="username"><b>Username</b></label></td>
               <td><input type="text" placeholder="Enter Username" name="username" id="username" required></td>
            </tr>
            <tr>
               <td><label for="password"><b>Password</b></label></td>
               <td><input type="password" placeholder="Enter Password" name="password" id="password" required></td>
            </tr>
            <tr>
               <td><label for="remember-me"><b>Remember Me</b></label> </td>
               <td><input type="checkbox" name="remember-me" /></td>
            </tr>
            <tr>
               <td> </td>
               <td><input type="submit"  value="Sign In" /></td>
            </tr>
         </table>
      </form>
   </body>
</html>
In login form, we're using POST method to login while using input fields with name and id as username, password and remember-me checkbox. If checkbox is selected, a remember-me Cookie will be created when user logs in the application.
Running the Application
As we've all component ready, let's run the Application. Right Click on the project, select Run As and then Spring Boot App.
It will boot up the application and once application is started, we can the output in the eclipse console.
Output
  .   ____          _            __ _ _
 /\\ / ___'_ __ _ _(_)_ __  __ _ \ \ \ \
( ( )\___ | '_ | '_| | '_ \/ _` | \ \ \ \
 \\/  ___)| |_)| | | | | || (_| |  ) ) ) )
  '  |____| .__|_| |_|_| |_\__, | / / / /
 =========|_|==============|___/=/_/_/_/

 [32m :: Spring Boot ::  [39m               [2m (v3.5.6) [0;39m

 [2m2025-10-17T12:55:02.083+05:30 [0;39m  [32m INFO [0;39m  [35m49380 [0;39m  [2m--- [formlogin] [  restartedMain]  [0;39m [36mc.t.s.formlogin.FormloginApplication     [0;39m  [2m: [0;39m Starting FormloginApplication using Java 21.0.6 with PID 49380 (D:\Projects\formlogin\target\classes started by mahes in D:\Projects\formlogin)
 [2m2025-10-17T12:55:02.087+05:30 [0;39m  [32m INFO [0;39m  [35m49380 [0;39m  [2m--- [formlogin] [  restartedMain]  [0;39m [36mc.t.s.formlogin.FormloginApplication     [0;39m  [2m: [0;39m No active profile set, falling back to 1 default profile: "default"
 [2m2025-10-17T12:55:02.132+05:30 [0;39m  [32m INFO [0;39m  [35m49380 [0;39m  [2m--- [formlogin] [  restartedMain]  [0;39m [36m.e.DevToolsPropertyDefaultsPostProcessor [0;39m  [2m: [0;39m Devtools property defaults active! Set 'spring.devtools.add-properties' to 'false' to disable
 [2m2025-10-17T12:55:02.132+05:30 [0;39m  [32m INFO [0;39m  [35m49380 [0;39m  [2m--- [formlogin] [  restartedMain]  [0;39m [36m.e.DevToolsPropertyDefaultsPostProcessor [0;39m  [2m: [0;39m For additional web related logging consider setting the 'logging.level.web' property to 'DEBUG'
 [2m2025-10-17T12:55:02.818+05:30 [0;39m  [32m INFO [0;39m  [35m49380 [0;39m  [2m--- [formlogin] [  restartedMain]  [0;39m [36mo.s.b.w.embedded.tomcat.TomcatWebServer  [0;39m  [2m: [0;39m Tomcat initialized with port 8080 (http)
 [2m2025-10-17T12:55:02.832+05:30 [0;39m  [32m INFO [0;39m  [35m49380 [0;39m  [2m--- [formlogin] [  restartedMain]  [0;39m [36mo.apache.catalina.core.StandardService   [0;39m  [2m: [0;39m Starting service [Tomcat]
 [2m2025-10-17T12:55:02.832+05:30 [0;39m  [32m INFO [0;39m  [35m49380 [0;39m  [2m--- [formlogin] [  restartedMain]  [0;39m [36mo.apache.catalina.core.StandardEngine    [0;39m  [2m: [0;39m Starting Servlet engine: [Apache Tomcat/10.1.46]
 [2m2025-10-17T12:55:02.869+05:30 [0;39m  [32m INFO [0;39m  [35m49380 [0;39m  [2m--- [formlogin] [  restartedMain]  [0;39m [36mo.a.c.c.C.[Tomcat].[localhost].[/]       [0;39m  [2m: [0;39m Initializing Spring embedded WebApplicationContext
 [2m2025-10-17T12:55:02.869+05:30 [0;39m  [32m INFO [0;39m  [35m49380 [0;39m  [2m--- [formlogin] [  restartedMain]  [0;39m [36mw.s.c.ServletWebServerApplicationContext [0;39m  [2m: [0;39m Root WebApplicationContext: initialization completed in 737 ms
 [2m2025-10-17T12:55:02.968+05:30 [0;39m  [32m INFO [0;39m  [35m49380 [0;39m  [2m--- [formlogin] [  restartedMain]  [0;39m [36mo.s.b.a.w.s.WelcomePageHandlerMapping    [0;39m  [2m: [0;39m Adding welcome page template: index

Encoded Password for User: $2a$10$yic37P1gbAJprhuUF5BYcOXr30jHUFgxJP.U/pjnMni2JKFThf/iO

 [2m2025-10-17T12:55:03.234+05:30 [0;39m  [32m INFO [0;39m  [35m49380 [0;39m  [2m--- [formlogin] [  restartedMain]  [0;39m [36mr$InitializeUserDetailsManagerConfigurer [0;39m  [2m: [0;39m Global AuthenticationManager configured with UserDetailsService bean with name userDetailsService
 [2m2025-10-17T12:55:03.413+05:30 [0;39m  [32m INFO [0;39m  [35m49380 [0;39m  [2m--- [formlogin] [  restartedMain]  [0;39m [36mo.s.b.d.a.OptionalLiveReloadServer       [0;39m  [2m: [0;39m LiveReload server is running on port 35729
 [2m2025-10-17T12:55:03.444+05:30 [0;39m  [32m INFO [0;39m  [35m49380 [0;39m  [2m--- [formlogin] [  restartedMain]  [0;39m [36mo.s.b.w.embedded.tomcat.TomcatWebServer  [0;39m  [2m: [0;39m Tomcat started on port 8080 (http) with context path '/'
 [2m2025-10-17T12:55:03.451+05:30 [0;39m  [32m INFO [0;39m  [35m49380 [0;39m  [2m--- [formlogin] [  restartedMain]  [0;39m [36mc.t.s.formlogin.FormloginApplication     [0;39m  [2m: [0;39m Started FormloginApplication in 1.652 seconds (process running for 2.328)
Spring Security - Method Level Access Control
Spring Security provides access control on request level as well as on method level. We can enable method level security in any configuration using @EnableMethodSecurity annotation as shown below:
@Controller
@EnableMethodSecurity  // Enable method level security
public class AuthController {
...
}
By default method level security is off. Spring Security provides following options for method level security.
-
@PreAuthorize − Prevent method invocation if provided condition is false. We can pass an expression to control the access as shown below:
// Accessible to user with Admin role @PreAuthorize("hasRole('ROLE_ADMIN')") public String update() { return "Details Updated."; } -
@PostAuthorize − Method can return value if provided condition is true. We can pass an expression to control the access as shown below:
class Account {
   string owner;
   ...
}
...
@PostAuthorize("returnObject.owner == authentication.name")
public Account readAccount(Long id) {
    ...
    return account;

}
If user is account owner then account details will be returned otherwise AccessDeniedException will be thrown with 403 status code.
-
@PreFilter − Method filters any value if provided condition is true. We can pass an expression to filter the returned values as shown below:
class Account {
   string owner;
   ...
}
...
@PreFilter("filterObject.owner == authentication.name")
public Colletion<Account> updateAccounts(Account... accounts) {
    ...
    return updatedAccounts;

}
Above method will filter those accounts which belongs to logged in user only based on provided condition and will update them only.
-
@PostFilter − Method filters any value if provided condition is true. We can pass an expression to filter the returned values as shown below:
class Account {
   string owner;
   ...
}
...
@PostFilter("filterObject.owner == authentication.name")
public Colletion<Account> readAccounts(Long... ids) {
    ...
    return accounts;

}
Above method will filter those accounts which belongs to logged in user only based on provided condition.
Example
Let us start actual programming with Spring Security. Before you start writing your example using Spring framework, you have to make sure that you have set up your Spring environment properly as explained in Spring Security - Environment Setup Chapter. We also assume that you have a bit of working knowledge on Spring Tool Suite IDE.
Now let us proceed to write a Spring MVC based Application managed by Maven, which will ask user to login, authenticate user and then provide option to logout using Spring Security Form Login Feature.
Create Project using Spring Initializr
Spring Initializr is great way to start with Spring Boot project. It provides a easy to use User Interface to create a project, add dependencies, select java runtime etc. It generates a skeleton project structure which once downloaded can be imported in spring tool suite and we can proceed with our readymade project structure.
We're choosing a maven project, naming the project as formlogin, with java version as 21. Following dependencies are added:
Spring Web
Spring Security
Spring Boot DevTools
Thymeleaf is a templating engine for Java. It allows us to quickly develop static or dynamic web pages for rendering in the browser. It is extremely extensible and allows us to define and customize the processing of our templates in fine detail. In addition to this, we can learn more about Thymeleaf by clicking this link.
Let's move on to generate our project and download it. We then extract it to a folder of our choice and use any IDE to open it. I shall be using Spring Tools Suite 4. It is available for free downloading from the https://spring.io/tools website and is optimized for spring applications.
pom.xml with all relevant dependencies
Let's take a look at our pom.xml file. It should look something similar to this −
pom.xml
<?xml version="1.0" encoding="UTF-8"?>
<project xmlns="http://maven.apache.org/POM/4.0.0" xmlns:xsi="http://www.w3.org/2001/XMLSchema-instance"
xsi:schemaLocation="http://maven.apache.org/POM/4.0.0 https://maven.apache.org/xsd/maven-4.0.0.xsd">
   <modelVersion>4.0.0</modelVersion>
   <parent>
      <groupId>org.springframework.boot</groupId>
      <artifactId>spring-boot-starter-parent</artifactId>
      <version>3.5.6</version>
      <relativePath/> <!-- lookup parent from repository -->
   </parent>
   <groupId>com.tutorialspoint.security</groupId>
   <artifactId>formlogin</artifactId>
   <version>0.0.1-SNAPSHOT</version>
   <name>formlogin</name>
   <description>Demo project for Spring Boot</description>
   <url/>
   <licenses>
      <license/>
   </licenses>
   <developers>
      <developer/>
   </developers>
   <scm>
      <connection/>
      <developerConnection/>
      <tag/>
      <url/>
   </scm>
   <properties>
      <java.version>21</java.version>
   </properties>
   <dependencies>
      <dependency>
         <groupId>org.springframework.boot</groupId>
         <artifactId>spring-boot-starter-security</artifactId>
      </dependency>
      <dependency>
         <groupId>org.springframework.boot</groupId>
         <artifactId>spring-boot-starter-thymeleaf</artifactId>
      </dependency>
      <dependency>
         <groupId>org.springframework.boot</groupId>
         <artifactId>spring-boot-starter-web</artifactId>
      </dependency>
      <dependency>
         <groupId>org.thymeleaf.extras</groupId>
         <artifactId>thymeleaf-extras-springsecurity6</artifactId>
      </dependency>
      <dependency>
         <groupId>org.springframework.boot</groupId>
         <artifactId>spring-boot-devtools</artifactId>
         <scope>runtime</scope>
         <optional>true</optional>
      </dependency>
      <dependency>
         <groupId>org.springframework.boot</groupId>
         <artifactId>spring-boot-starter-test</artifactId>
         <scope>test</scope>
      </dependency>
      <dependency>
         <groupId>org.springframework.security</groupId>
         <artifactId>spring-security-test</artifactId>
         <scope>test</scope>
      </dependency>
   </dependencies>
   <build>
      <plugins>
         <plugin>
            <groupId>org.springframework.boot</groupId>
            <artifactId>spring-boot-maven-plugin</artifactId>
         </plugin>
      </plugins>
   </build>
</project>
Spring Security Configuration Class
Inside of our config package, we have created the WebSecurityConfig class. We shall be using this class for our security configurations, so let's annotate it with an @Configuration annotation and @EnableWebSecurity. As a result, Spring Security knows to treat this class a configuration class. As we can see, configuring applications have been made very easy by Spring.
WebSecurityConfig
package com.tutorialspoint.security.formlogin.config;

import org.springframework.context.annotation.Bean;
import org.springframework.context.annotation.Configuration;
import org.springframework.security.config.annotation.web.builders.HttpSecurity;
import org.springframework.security.config.annotation.web.configuration.EnableWebSecurity;
import org.springframework.security.config.annotation.web.configurers.AbstractHttpConfigurer;
import org.springframework.security.core.userdetails.User;
import org.springframework.security.core.userdetails.UserDetails;
import org.springframework.security.core.userdetails.UserDetailsService;
import org.springframework.security.crypto.bcrypt.BCryptPasswordEncoder;
import org.springframework.security.crypto.password.PasswordEncoder;
import org.springframework.security.provisioning.InMemoryUserDetailsManager;
import org.springframework.security.web.SecurityFilterChain;

@Configuration
@EnableWebSecurity
public class WebSecurityConfig  {

   @Bean
   protected UserDetailsService userDetailsService() {
      UserDetails user = User.builder()
         .username("user")
         .password(passwordEncoder().encode("user123"))
         .roles("USER")
         .build();
      UserDetails admin = User.builder()
         .username("admin")
         .password(passwordEncoder().encode("admin123"))
         .roles("USER", "ADMIN")
         .build();
      return new InMemoryUserDetailsManager(user, admin);
   }

   @Bean
   protected PasswordEncoder passwordEncoder() {
      return new BCryptPasswordEncoder();
   }

   @Bean
   protected SecurityFilterChain filterChain(HttpSecurity http) throws Exception {
      return http
         .csrf(AbstractHttpConfigurer::disable)
         .authorizeHttpRequests(
            request -> request.requestMatchers("/login").permitAll()
            .requestMatchers("/**").authenticated()
         )
         .formLogin(form -> form.loginPage("/login")
            .defaultSuccessUrl("/")
            .failureUrl("/login?error=true")
            .permitAll())
         .logout(config -> config
            .logoutUrl("/logout")
            .logoutSuccessUrl("/login")
         .build();
   }
}
Controller Class
In this class, we've created a mapping for "/" endpoint and for "/login" for the index page and login page of this application. We've used @EnableMethodSecurity annotation to enable method level security as it is off by default.
AuthController.java
package com.tutorialspoint.security.formlogin.controllers;

import org.springframework.stereotype.Controller;
import org.springframework.web.bind.annotation.GetMapping;

@Controller
@EnableMethodSecurity
public class AuthController {
   @GetMapping("/")
   public String home() {
      return "index";
   }
   @GetMapping("/login")
   public String login() {
      return "login";
   }

   // User with Admin role only can access this method
   @GetMapping("/update")
   @ResponseBody
   @PreAuthorize("hasRole('ROLE_ADMIN')")
   public String update() {
      return "Details Updated.";
   }
}
Views
Let's create index.html in /src/main/resources/templates folder with following content to act as a home page and to display logged in user name.
index.html
<!DOCTYPE html>
<html xmlns="http://www.w3.org/1999/xhtml"
   xmlns:th="https://www.thymeleaf.org"
   xmlns:sec="https://www.thymeleaf.org/thymeleaf-extras-springsecurity3">
   <head>
      <title>
         Hello World!
      </title>
   </head>
   <body>
      <h1 th:inline="text">Hello <span sec:authentication="name"></span>!</h1>
      <a href="/update" alt="update details">Update Details</a>
      <form th:action="@{/logout}" method="post">
         <input type="submit" value="Sign Out"/>
      </form>
   </body>
<html>
login.html
Let's create the login.html in /src/main/resources/templates folder with following content to act as a login page. We're using default name username, password and remember-me for text fields. In case of other name, we need to set the same in spring security config class as well.
<!DOCTYPE html>
<html xmlns="http://www.w3.org/1999/xhtml"
   xmlns:th="https://www.thymeleaf.org"
   xmlns:sec="https://www.thymeleaf.org/thymeleaf-extras-springsecurity3">
   <head>
      <title>Spring Security Example</title>
   </head>
   <body>
      <div th:if="${param.error}">
         <p>Bad Credentials</p>
      </div>
      <div th:if="${param.logout}">You have been logged out.</div>
      <form th:action="@{/login}" method="post">
         <h1>Please sign in</h1>
         <table>
            <tr>
               <td><label for="username"><b>Username</b></label></td>
               <td><input type="text" placeholder="Enter Username" name="username" id="username" required></td>
            </tr>
            <tr>
               <td><label for="password"><b>Password</b></label></td>
               <td><input type="password" placeholder="Enter Password" name="password" id="password" required></td>
            </tr>
            <tr>
               <td><label for="remember-me"><b>Remember Me</b></label> </td>
               <td><input type="checkbox" name="remember-me" /></td>
            </tr>
            <tr>
               <td> </td>
               <td><input type="submit"  value="Sign In" /></td>
            </tr>
         </table>
      </form>
   </body>
</html>
In login form, we're using POST method to login while using input fields with name and id as username, password and remember-me checkbox. If checkbox is selected, a remember-me Cookie will be created when user logs in the application.
Running the Application
As we've all component ready, let's run the Application. Right Click on the project, select Run As and then Spring Boot App.
It will boot up the application and once application is started, we can run localhost:8080 to check the changes.
Output
Now open localhost:8080, you can see our login page. Use user credential to login
Login Page with User
Home Page for User
With valid credentials for user, a user page will be displayed as shown below with an Update Details Link:
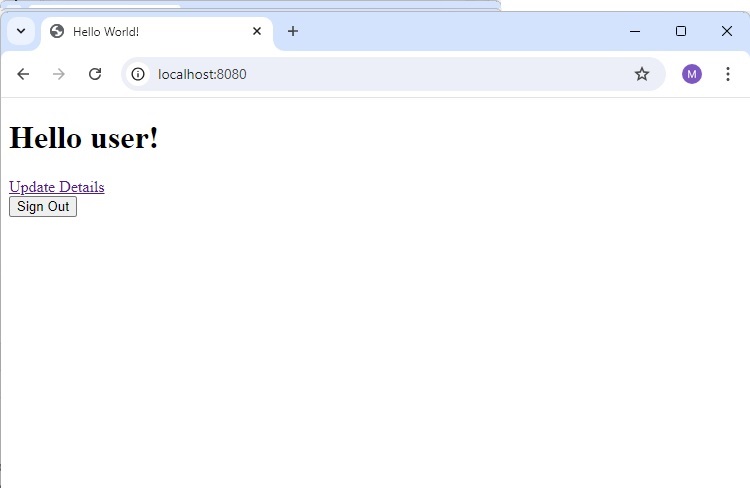
Click on Update Details Link and it will show Invalid Credentials and this method is not available for user.
Login with Admin User
Now go back using browser back button. Click on sign-out button, which will load the login page again. Now login using admin credential.
Home Page for Admin User
With valid credentials for admin, an admin page will be displayed as shown below with an Update Details Link:
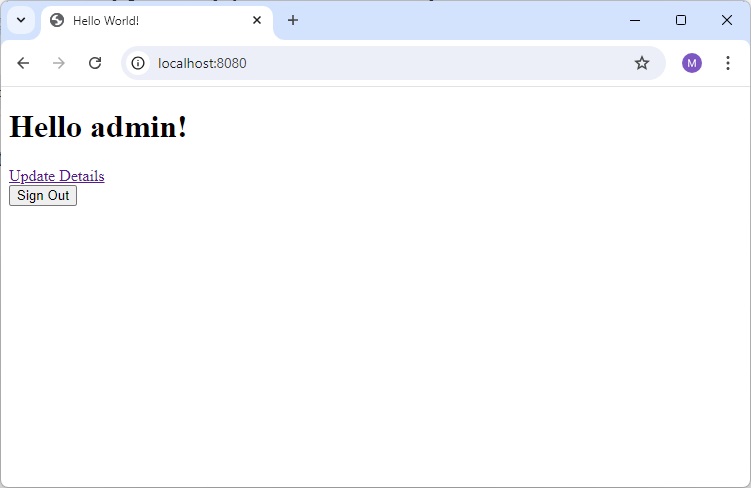
Click on Update Details Link and it will show a message Details Updated and this method is available for admin.

Spring Security - Manual Authentication
Introduction
Spring Security is a powerful and customizable authentication and access-control framework for Java-based applications. It provides built-in mechanisms for securing applications with minimal configuration, supporting features like form-based login, OAuth2, and token-based authentication.
This article focuses on manual authentication in Spring Security, where developers explicitly control the authentication process, user details, and session management, providing flexibility in building custom workflows.
Understanding Manual Authentication
What is Manual Authentication?
Manual authentication allows developers to handle−
Custom user validation logic.
Role-based authorization beyond default configurations.
Interaction with non-standard user stores (e.g., NoSQL databases).
Why Manual Authentication?
Flexibility− Customize login workflows or integrate with external systems.
Control− Fine-grained control over authentication, authorization, and error handling.
Spring Security Configuration Basics
Setting Up the Project
Dependencies− Include Spring Security and Spring Boot Starter Web in your pom.xml.
pom.xml
<dependency>
   <groupId>org.springframework.boot</groupId>
   <artifactId>spring-boot-starter-security</artifactId>
</dependency>
<dependency>
   <groupId>org.springframework.boot</groupId>
   <artifactId>spring-boot-starter-web</artifactId>
</dependency>
Disable Default Security
Create a configuration class to disable default security behavior.
@Configuration
@EnableWebSecurity
public class SecurityConfig extends WebSecurityConfigurerAdapter {

   @Bean
   public SecurityFilterChain securityFilterChain(HttpSecurity http) throws Exception {
      http.csrf(csrf -> csrf.disable()) // Disable CSRF for simplicity (not recommended for production)
         .authorizeHttpRequests(
            authorize -> authorize.requestMatchers("/login", "/register").permitAll() // Public URLs
         .anyRequest().authenticated() // Protect all other end-points
         )
         .formLogin(formLogin -> formLogin
         .loginPage("/login") .permitAll() );
      return http.build();
   }
}
Building the Login Page
HTML Login Form
The login form is served at /login.
login.html
<!DOCTYPE html>
<html lang="en">
   <head>
      <title>Login Page</title>
   </head>
   <body>
      <h2>Login</h2>
         <form method="POST" action="/authenticate">
            <label for="username">Username:</label>
            <input type="text" id="username" name="username" required />
            <br />
            <label for="password">Password:</label>
            <input type="password" id="password" name="password" required />
            <br />
            <button type="submit">Login</button>
         </form>
   </body>
</html>
Web Page Visual
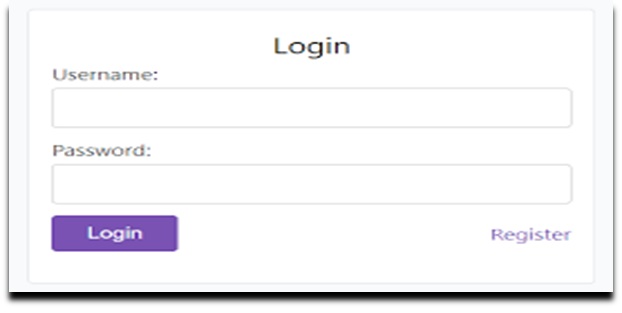
A simple login page mockup with labeled form fields (Username and Password) and a login button.
Handling Authentication with Custom Logic
Custom Authentication Filter
Implement a filter to handle /authenticate requests manually.
@Component
public class CustomAuthenticationFilter extends UsernamePasswordAuthenticationFilter {
   private final AuthenticationManager authenticationManager;

   public CustomAuthenticationFilter(AuthenticationManager authenticationManager) {
      this.authenticationManager = authenticationManager;
      setFilterProcessesUrl("/authenticate"); // Custom authentication endpoint
   }

   @Override
   public Authentication attemptAuthentication(HttpServletRequest request, HttpServletResponse response) {
      String username = request.getParameter("username");
      String password = request.getParameter("password");

      UsernamePasswordAuthenticationToken token = new UsernamePasswordAuthenticationToken(username, password);
      return authenticationManager.authenticate(token);
   }
}
Storing User Details and Credentials
Custom UserDetailsService
Provide user details from a custom database or in-memory store.
@Bean
protected UserDetailsService userDetailsService() {
   UserDetails user = User.builder()
      .username("user")
      .password(passwordEncoder().encode("user123"))
      .roles("USER")
      .build();
   UserDetails admin = User.builder()
      .username("admin")
      .password(passwordEncoder().encode("admin123"))
      .roles("USER", "ADMIN")
      .build();

   return new InMemoryUserDetailsManager(user, admin);
}

@Bean
protected PasswordEncoder passwordEncoder() {
   return new BCryptPasswordEncoder();
}
Database schema for users (columns: username, password, roles).
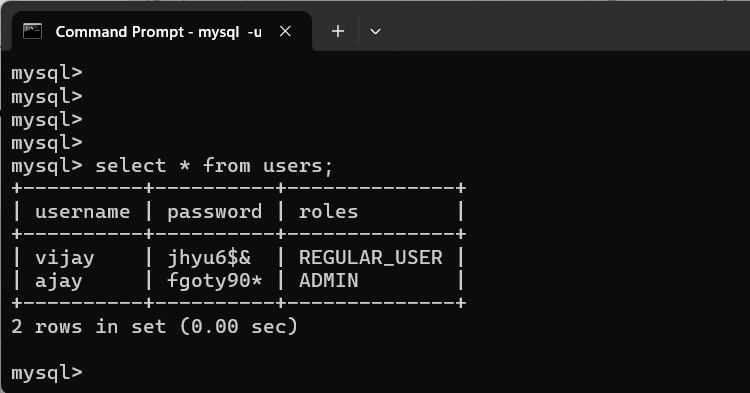
Session Management
Configuring Sessions
Ensure proper session handling.
@Bean
public SecurityFilterChain securityFilterChain(HttpSecurity http) throws Exception {
   http.sessionManagement(
      httpSecuritySessionManagementConfigurer -> httpSecuritySessionManagementConfigurer
         .sessionCreationPolicy(SessionCreationPolicy.IF_REQUIRED)
         .maximumSessions(1)) // One session per user
}
Example Behavior− The user is logged out if they log in on another device.
Implementing Logout Functionality
Logout Configuration
Enable logout functionality with custom redirection.
@Bean
public SecurityFilterChain securityFilterChain(HttpSecurity http) throws Exception {
   http.sessionManagement(
      httpSecuritySessionManagementConfigurer -> httpSecuritySessionManagementConfigurer
         .sessionCreationPolicy(SessionCreationPolicy.IF_REQUIRED)
         .maximumSessions(1)) // One session per user
}

@Bean
public SecurityFilterChain securityFilterChain(HttpSecurity http) throws Exception {
   http.logout(config -> config
         .logoutUrl("/logout")
         .logoutSuccessUrl("/login?logout")
         .invalidateHttpSession(true))
}
HTML Update
Add a logout button to secure pages.
<a href="/logout">Logout</a>
Authorization: Role-Based Access Control (RBAC)
Custom Authorization Rules
Define access rules based on roles.
@Bean
public SecurityFilterChain securityFilterChain(HttpSecurity http) throws Exception {
   http.authorizeHttpRequests(
         request -> request.requestMatchers("/login").permitAll()
            .requestMatchers("/admin/**").hasRole("ADMIN")
            .requestMatchers("/user/**").hasRole("USER")
            .anyRequest().authenticated()
         )
}
Example− /admin/dashboard is accessible only to ADMIN users.
Error Handling and Custom Messages
Custom Authentication Failure Handler
@Component
public class CustomAuthenticationFailureHandler implements AuthenticationFailureHandler {

   @Override
   public void onAuthenticationFailure(HttpServletRequest request, HttpServletResponse response,
      AuthenticationException exception) throws IOException, ServletException {
      response.setStatus(HttpStatus.UNAUTHORIZED.value());
      response.sendRedirect("/login?error=true");
   }
}
Display Error on Login Page
Update the login form to show error messages.
<c:if test="${param.error}">
   <p style="color:red;">Invalid username or password</p>
</c:if>
Testing and Debugging Manual Authentication
Testing Tools
Postman− Test /authenticate endpoint.
Browser Developer Tools− Inspect HTTP requests and cookies.
Use Spring Boot's debug mode (--debug) to view detailed logs.
Log authentication events in custom filters for troubleshooting.
log.info("Authentication attempt for user: " + username);
Conclusion and Next Steps
Manual authentication with Spring Security offers−
Flexibility in handling custom login workflows.
Integration with custom user stores and non-standard requirements.
Next Steps
Extend this example to use JWT for token-based authentication.
Integrate with OAuth2 for social logins.
Enhance security with CSRF protection and rate-limiting.
Spring Security is a versatile tool that, with manual configurations, adapts to diverse authentication needs while ensuring robust security.
Spring Security - Extra Login Fields
Introduction
Spring Security is a powerful and highly customizable framework used to secure Java-based web applications. By default, it provides robust mechanisms for user authentication and authorization. However, many real-world scenarios require customization of the login flow to accommodate additional fields, such as tenant IDs, user roles, or other contextual information. These customizations allow developers to adapt authentication processes to meet unique business needs, enhance user experiences, or add layers of security.
This article explores how to extend the default Spring Security login process to include extra fields. We will cover the rationale, use cases, implementation steps, and best practices for secure and efficient customization. By the end, you will have a comprehensive understanding of how to enrich your application's login functionality.
Understanding the Default Login Flow in Spring Security
Spring Security's default authentication mechanism is designed to handle simple username and password-based logins. At the core of this process lies the UsernamePasswordAuthenticationFilter, which intercepts login requests, extracts credentials, and delegates them to an AuthenticationManager for validation. Here's a quick overview of the default flow−
Login Form Submission− The user submits their credentials (username and password) via a form.
Authentication Filter− The UsernamePasswordAuthenticationFilter processes the credentials.
Authentication Manager− Credentials are validated against a user store (e.g., database, LDAP).
Authentication Success− Upon successful validation, the user gains access to protected resources.
This default behavior is sufficient for many applications but falls short in scenarios where additional contextual information is required.
Use Cases for Extra Login Fields
Adding extra fields to the login process is common in applications with specialized requirements. Below are some typical scenarios−
Multi-Tenancy− Applications supporting multiple organizations may require a tenant ID or company name to identify the user's domain.
User Roles or Context− Capturing contextual information, such as department codes or application-specific data, during login.
Enhanced Security− Incorporating extra fields like security questions or PINs for an additional layer of verification.
Custom Authentication Workflows− Applications that integrate with third-party systems or use custom authentication logic.
Adding Extra Login Fields: Step-by-Step Guide
Customizing the Login Page
The first step is to extend the default login page to include extra fields. Suppose we want to add a tenantId field alongside the username and password. Here's an example of the updated HTML form−
login.html
<!DOCTYPE html>
<html lang="en">
<head>
   <title>Custom Login</title>
</head>
<body>
   <form action="/login" method="post">
      <label for="username">Username:</label>
      <input type="text" id="username" name="username" required><br>
      <label for="password">Password:</label>
      <input type="password" id="password" name="password" required><br>
      <label for="tenantId">Tenant ID:</label>
      <input type="text" id="tenantId" name="tenantId" required><br>
      <button type="submit">Login</button>
   </form>
</body>
</html>
Updating the Backend Authentication Logic
To handle the extra fields, we need a custom filter. The filter should extend UsernamePasswordAuthenticationFilter and override its methods to process the additional parameters−
CustomAuthenticationFilter.java
package com.tutorialspoint.formlogin.fliter;

import jakarta.servlet.http.HttpServletRequest;
import jakarta.servlet.http.HttpServletResponse;
import jakarta.servlet.Filter;
import org.springframework.security.authentication.AuthenticationManager;
import org.springframework.security.core.Authentication;
import org.springframework.security.core.AuthenticationException;
import org.springframework.security.web.authentication.UsernamePasswordAuthenticationFilter;

public class CustomAuthenticationFilter
   extends UsernamePasswordAuthenticationFilter
   implements Filter {

   private final AuthenticationManager authenticationManager;
   public CustomAuthenticationFilter(AuthenticationManager authenticationManager) {
      this.authenticationManager = authenticationManager;
   }

   public Authentication attemptAuthentication(HttpServletRequest request,
      HttpServletResponse response) throws AuthenticationException {
      String username = request.getParameter("username");
      String password = request.getParameter("password");
      String tenantId = request.getParameter("tenantId");

      if (username == null) {
         username = "";
      }
      if (password == null) {
         password = "";
      }

      username = username.trim();
      CustomAuthenticationToken authRequest = new CustomAuthenticationToken(username,
         password, tenantId);
      return this.authenticationManager.authenticate(authRequest);
   }
}
CustomAuthenticationToken.java
package com.tutorialspoint.formlogin.model;

import org.springframework.security.authentication.AbstractAuthenticationToken;
import org.springframework.security.core.GrantedAuthority;
import java.util.Collection;

public class CustomAuthenticationToken extends AbstractAuthenticationToken {

   private final Object principal;
   private Object credentials;
   private String tenantId;

   public CustomAuthenticationToken(Object principal, Object credentials, String tenantId) {
      super(null);
      this.principal = principal;
      this.credentials = credentials;
      this.tenantId = tenantId;
      setAuthenticated(false);
   }

   public CustomAuthenticationToken(Object principal, Object credentials, String tenantId,
      Collection<? extends GrantedAuthority> authorities) {
      super(authorities);
      this.principal = principal;
      this.credentials = credentials;
      this.tenantId = tenantId;
      super.setAuthenticated(true); // must use super, as we override
   }

   @Override
   public Object getCredentials() {
      return this.credentials;
   }

   @Override
   public Object getPrincipal() {
      return this.principal;
   }

   public String getTenantId() {
      return tenantId;
   }

   public void setTenantId(String tenantId) {
      this.tenantId = tenantId;
   }

   @Override
   public void eraseCredentials() {
      super.eraseCredentials();
      credentials = null;
   }
}
Configuring Spring Security
Next, we update the security configuration to register our custom filter.
SecurityConfig.java
package com.tutorialspoint.formlogin.config;

import org.springframework.context.annotation.Bean;
import org.springframework.context.annotation.Configuration;
import org.springframework.security.authentication.AuthenticationManager;
import org.springframework.security.config.annotation.web.builders.HttpSecurity;
import org.springframework.security.config.annotation.web.configuration.EnableWebSecurity;
import org.springframework.security.config.annotation.web.configuration.WebSecurityCustomizer;
import org.springframework.security.web.SecurityFilterChain;
import org.springframework.security.web.authentication.UsernamePasswordAuthenticationFilter;
import jakarta.servlet.Filter;

@Configuration
@EnableWebSecurity
public class SecurityConfig {
   @Bean
   public SecurityFilterChain securityFilterChain(HttpSecurity http) throws Exception {
      http.csrf (csrf -> csrf.disable())
         .authorizeHttpRequests(authorize -> authorize
            .requestMatchers("/login.html").permitAll())
         .formLogin(formLogin -> formLogin.loginPage("/login.html").permitAll() );

   @Bean
   public AuthenticationManager authenticationManagerBean(HttpSecurity http) throws Exception {
      return http.getSharedObject(AuthenticationManager.class);
   }
}
Testing and Debugging
Use tools like Postman or browser developer tools to inspect form submissions and ensure that all fields are passed correctly.
Enable debug logging for Spring Security to trace authentication flow.
Test with valid and invalid inputs to confirm the custom logic handles errors gracefully.
Best Practices for Secure Implementations
When adding custom fields, security should remain a top priority. Here are some best practices−
Input Validation− Validate all user inputs on both client and server sides to prevent injection attacks.
Sanitization− Sanitize inputs to remove harmful characters.
Secure Transmission− Always use HTTPS to protect data in transit.
Rate Limiting− Implement rate-limiting to prevent brute-force attacks.
Error Messaging− Avoid revealing sensitive information in error messages.
Advanced Features and Integrations
For advanced use cases, consider−
OAuth2 and SAML− Combine extra fields with OAuth2 or SAML for enterprise-grade authentication.
Mobile-Friendly Forms− Ensure that login forms are responsive and accessible on mobile devices.
Third-Party Providers− Integrate with identity providers like Okta or Auth0 for enhanced security features.
Conclusion and Further Reading
Customizing Spring Security's login process to include extra fields is a straightforward yet powerful way to meet unique application requirements. By understanding the default authentication flow, implementing custom filters, and following best practices, you can create a secure and user-friendly login experience.
Spring Security - Preventing Brute Force Attack
Brute force attacks are one of the most common and simple types of attacks against web applications. They occur when an attacker tries every possible combination of inputs to guess credentials, such as usernames and passwords. For modern web applications, its crucial to implement security measures that prevent or mitigate brute force attempts.
Spring Security, a powerful and flexible framework for securing Spring-based applications, can be used to prevent brute force attacks. In this article, we'll explore various techniques for mitigating brute force attacks using Spring Security, providing you with code examples and best practices.
Introduction to Brute Force Attacks
What are Brute Force Attacks?
A brute force attack occurs when an attacker attempts to gain unauthorized access to a system by systematically trying all possible combinations of passwords or other credentials. The attacker might use automated tools to speed up the process. These attacks can target login pages, account creation forms, or API endpoints.
Why Preventing Brute Force Attacks is Critical
Brute force attacks can lead to data breaches, service disruptions, and even account hijacking. If a users credentials are compromised, attackers can gain unauthorized access to sensitive information, potentially harming both individuals and organizations.
Overview of Spring Security
What is Spring Security?
Spring Security is a comprehensive security framework for Java applications, providing authentication, authorization, and protection against common vulnerabilities. It is a powerful tool for securing web applications, and one of its key features is flexibility in configuring security protocols.
Key Concepts in Spring Security
Authentication− The process of verifying the identity of a user (e.g., via username and password).
Authorization− Determining whether a user has permission to perform an action (e.g., accessing a resource).
Session Management− Tracking user sessions to ensure that users are properly authenticated during their interaction with the application.
Filters− Components used to process incoming requests (e.g., for authentication, authorization, etc.).
Basic Brute Force Protection with Spring Security
Using Spring Security's Default Authentication Mechanism
Spring Security offers default authentication mechanisms such as form-based login and HTTP Basic authentication. While it provides a basic level of security, it doesnt directly protect against brute force attacks. To enhance security, we need to add additional mechanisms.
Adding Login Attempt Limiting
One of the simplest ways to prevent brute force attacks is to limit the number of failed login attempts. This can be achieved by tracking failed login attempts and temporarily locking accounts after a specified number of failed attempts. Heres a simple implementation−
SecurityConfig.java
package com.tutorialspoint.config;

import org.springframework.context.annotation.Bean;
import org.springframework.context.annotation.Configuration;
import org.springframework.security.config.annotation.web.builders.HttpSecurity;
import org.springframework.security.config.annotation.web.configuration.EnableWebSecurity;
import org.springframework.security.web.SecurityFilterChain;

@Configuration
@EnableWebSecurity
public class SecurityConfig {

   @Bean
   public SecurityFilterChain securityFilterChain(HttpSecurity http) throws Exception {
      http
         .formLogin(form -> form
            .loginPage("/login")
			// Custom failure handler. See code below
            .failureHandler(new CustomAuthenticationFailureHandler())
            .permitAll()
         )
         .authorizeHttpRequests(auth -> auth
            .requestMatchers("/login", "/register").permitAll()
            .anyRequest().authenticated()
         );

      return http.build();
   }
}
In this example, we customize the login page and handle authentication failures with a custom failure handler. To track failed login attempts, we can create a custom failure handler. This handler will record the number of failed attempts for a user and lock the account if the number exceeds a certain threshold.
CustomAuthenticationFailureHandler.java
package com.tutorialspoint.config;

import org.springframework.beans.factory.annotation.Autowired;
import org.springframework.security.web.authentication.AuthenticationFailureHandler;
import jakarta.servlet.ServletException;
import jakarta.servlet.http.HttpServletRequest;
import jakarta.servlet.http.HttpServletResponse;
import org.springframework.security.core.AuthenticationException;
import java.io.IOException;
import com.tutorialspoint.service.LoginAttemptService;

public class CustomAuthenticationFailureHandler implements AuthenticationFailureHandler {

   private static final int MAX_FAILED_ATTEMPTS = 5;

   @Autowired
   private LoginAttemptService loginAttemptService;

   @Override
   public void onAuthenticationFailure(HttpServletRequest request,
      HttpServletResponse response,
      AuthenticationException exception)
         throws IOException, ServletException {
      String username = request.getParameter("username");

      // Track failed attempts for this username
      loginAttemptService.recordFailedAttempt(username);

      if (loginAttemptService.isAccountLocked(username)) {
         response.sendRedirect("/account-locked");
      } else {
         response.sendRedirect("/login?error=true");
      }
   }
}
LoginAttemptService.java
package com.tutorialspoint.service;

import org.springframework.stereotype.Service;
import java.util.HashMap;
import java.util.Map;
import java.util.concurrent.ConcurrentHashMap;

@Service
public class LoginAttemptService {

   private static final int MAX_FAILED_ATTEMPTS = 5;
   private static final long LOCK_TIME_DURATION = 24 * 60 * 60 * 1000; // 24 hours

   private Map<String, Integer> attemptsCache = new ConcurrentHashMap<>();
   private Map<String, Long> lockTimeCache = new HashMap<>();

   public void recordFailedAttempt(String username) {
      int attempts = attemptsCache.getOrDefault(username, 0);
      attempts++;
      attemptsCache.put(username, attempts);

      if (attempts >= MAX_FAILED_ATTEMPTS) {
         lockTimeCache.put(username, System.currentTimeMillis());
      }
   }

   public boolean isAccountLocked(String username) {
      if (!lockTimeCache.containsKey(username)) {
         return false;
      }

      long lockTime = lockTimeCache.get(username);
      if (System.currentTimeMillis() - lockTime < LOCK_TIME_DURATION) {
         return true;
      } else {
         // Unlock the account after the lock time duration
         lockTimeCache.remove(username);
         attemptsCache.remove(username);
         return false;
      }
   }

   public void resetAttempts(String username) {
      attemptsCache.remove(username);
      lockTimeCache.remove(username);
   }
}
Rate Limiting
Rate limiting is a key strategy to prevent brute force attacks. By limiting the number of requests a user can make within a specific period, we can prevent an attacker from trying every possible password combination.
SecurityConfigRateLimit.java
package com.tutorialspoint.config;

import com.example.RateLimitingFilter;
import com.example.RateLimiter;

import org.springframework.context.annotation.Bean;
import org.springframework.context.annotation.Configuration;
import org.springframework.security.config.annotation.web.builders.HttpSecurity;
import org.springframework.security.config.annotation.web.configuration.EnableWebSecurity;
import org.springframework.security.web.SecurityFilterChain;
import org.springframework.security.web.authentication.UsernamePasswordAuthenticationFilter;

@Configuration
@EnableWebSecurity
public class SecurityConfigRateLimit {

   private final RateLimiter rateLimiter = new RateLimiter();

   @Bean
   public SecurityFilterChain securityFilterChain(HttpSecurity http) throws Exception {
      http
         .addFilterBefore(new RateLimitingFilter(rateLimiter),
            UsernamePasswordAuthenticationFilter.class)
         .formLogin(form -> form.permitAll());

      return http.build();
   }
}
RateLimitingFilter.java
package com.tutorialspoint.config;

import jakarta.servlet.FilterChain;
import jakarta.servlet.ServletException;
import jakarta.servlet.http.HttpServletRequest;
import jakarta.servlet.http.HttpServletResponse;
import org.springframework.http.HttpStatus;
import org.springframework.web.filter.OncePerRequestFilter;
import java.io.IOException;

public class RateLimitingFilter extends OncePerRequestFilter {

   private final RateLimiter rateLimiter;

   public RateLimitingFilter(RateLimiter rateLimiter) {
      this.rateLimiter = rateLimiter;
   }

   @Override
   protected void doFilterInternal(HttpServletRequest request, HttpServletResponse response,
      FilterChain filterChain) throws ServletException, IOException {
      String ipAddress = request.getRemoteAddr();
      if (!rateLimiter.consume(ipAddress)) {
         response.sendError(HttpStatus.TOO_MANY_REQUESTS.value(), "Too many requests");
         return;
      }
      filterChain.doFilter(request, response);
   }
}
RateLimiter.java
package com.tutorialspoint.config;

import org.springframework.stereotype.Service;
import java.util.concurrent.ConcurrentHashMap;
import java.util.concurrent.TimeUnit;
import java.util.concurrent.atomic.AtomicInteger;

@Service
public class RateLimiter {

   private static final int MAX_REQUESTS_PER_MINUTE = 60;
   private static final long ONE_MINUTE_IN_MILLIS = TimeUnit.MINUTES.toMillis(1);

   private final ConcurrentHashMap<String, RequestInfo> requestCounts = new ConcurrentHashMap<>();

   public boolean consume(String ipAddress) {
      long currentTime = System.currentTimeMillis();
      RequestInfo requestInfo = requestCounts.computeIfAbsent(ipAddress, key -> new RequestInfo());

      synchronized (requestInfo) {
         if (currentTime - requestInfo.timestamp > ONE_MINUTE_IN_MILLIS) {
            requestInfo.timestamp = currentTime;
            requestInfo.requestCount.set(0);
         }

         if (requestInfo.requestCount.incrementAndGet() > MAX_REQUESTS_PER_MINUTE) {
            return false;
         }
      }
      return true;
   }

   private static class RequestInfo {
      long timestamp;
      AtomicInteger requestCount = new AtomicInteger(0);
   }
}
Output
Login Page
Username− user
Password− password
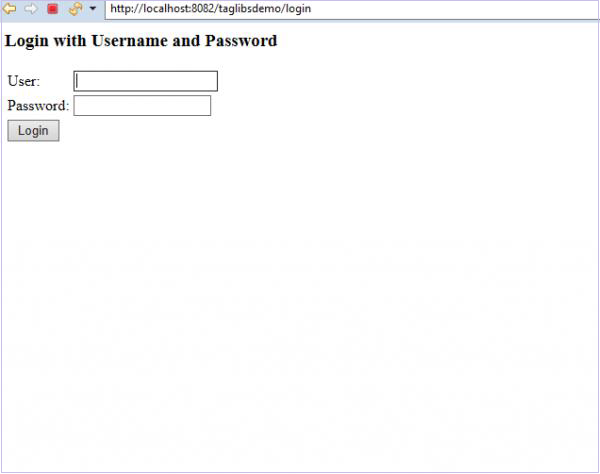
On Successful Login

On Failed Attempts
After 5 failed login attempts ( for user, type user / password, anything but password)

Conclusion
Preventing brute force attacks is crucial for ensuring the security of your web applications. By leveraging Spring Securitys powerful features such as rate limiting, account lockout, custom filters you can effectively mitigate brute force attempts. Additionally, integrating two-factor authentication (2FA) and strong session management can provide further layers of protection against unauthorized access.
By adopting these strategies, you'll help protect your users from the dangers of brute force attacks and enhance the overall security of your application.
Spring Security - Login Page with React
Building a secure web application is a fundamental requirement in modern software development. Spring Security is a robust and customizable authentication and access control framework for Java-based applications, while React is a popular JavaScript library for building user interfaces. Together, they enable developers to create secure, user-friendly applications. In this guide, we will explore how to build a login page using Spring Security and React.
Introduction
Overview of Spring Security
Spring Security is a powerful framework that provides authentication, authorization, and protection against common security attacks. It integrates seamlessly with Spring Boot applications and supports various authentication methods, including form-based login, basic authentication, and OAuth2.
Why Integrate with React?
React allows developers to create dynamic and responsive user interfaces, making it ideal for modern web applications. By integrating Spring Security with React, you can create a secure backend while leveraging Reacts capabilities to build an interactive frontend.
Use Case: Login Page
In this article, well create a login page where users can authenticate via a Spring Security backend and access protected resources. This guide assumes basic knowledge of Java, Spring Boot, and React.
Prerequisites
Java 17+ and Maven/Gradle installed.
Node.js and npm/yarn installed.
IDEs for Java (e.g., IntelliJIdea, Eclipse, Spring Tool Suite 4) and JavaScript (e.g., VS Code).
Setting Up the Project
Backend: Spring Boot Application
Create a new Spring Boot application
C:\> spring init --dependencies=web,security,jpa,h2 spring-security-login
C:\> cd spring-security-login
Add necessary dependencies to pom.xml
<dependencies>
   <dependency>
      <groupId>org.springframework.boot</groupId>
      <artifactId>spring-boot-starter-security</artifactId>
   </dependency>
   <dependency>
      <groupId>org.springframework.boot</groupId>
      <artifactId>spring-boot-starter-web</artifactId>
   </dependency>
   <dependency>
      <groupId>org.springframework.boot</groupId>
      <artifactId>spring-boot-starter-data-jpa</artifactId>
   </dependency>
   <dependency>
      <groupId>com.h2database</groupId>
      <artifactId>h2</artifactId>
      <scope>runtime</scope>
   </dependency>
</dependencies>
Run the application
Go to the base directory of the project in Command Prompt, where pom.xml is located, and type−
mvn spring-boot:run
Frontend: React Application
Create a React application
npx create-react-app react-login
cd react-login
Install Axios for HTTP requests
npm install axios
Run the application
npm start
Backend: Configuring Spring Security
Basic Security Configuration
SecurityConfig.java
package com.tutorialspoint.config;

import org.springframework.context.annotation.Bean;
import org.springframework.context.annotation.Configuration;
import org.springframework.security.config.annotation.web.builders.HttpSecurity;
import org.springframework.security.config.annotation.web.configuration.EnableWebSecurity;
import org.springframework.security.web.SecurityFilterChain;

@Configuration
@EnableWebSecurity
public class SecurityConfig {

   @Bean
   public SecurityFilterChain securityFilterChain(HttpSecurity http) throws Exception {
      http
         .authorizeHttpRequests(auth -> auth
         .requestMatchers("/login", "/public/**").permitAll()
         .anyRequest().authenticated()
      )
      .formLogin(form -> form
         .loginProcessingUrl("/login")
         .defaultSuccessUrl("/success.html", true)
         .failureUrl("/login?error=true")
      )
      .logout(logout -> logout
         .logoutUrl("/logout")
         .logoutSuccessUrl("/login")
      );

      return http.build();
   }
}
UserDetailsService Implementation
CustomUserDetailsService.java
package com.tutorialspoint.service;

import org.springframework.security.core.userdetails.User;
import org.springframework.security.core.userdetails.UserDetails;
import org.springframework.security.core.userdetails.UserDetailsService;
import org.springframework.security.core.userdetails.UsernameNotFoundException;
import org.springframework.stereotype.Service;

@Service
public class CustomUserDetailsService implements UserDetailsService {

   @Override
   public UserDetails loadUserByUsername(String username) throws UsernameNotFoundException {

      // Hardcoded user for demonstration
      if ("user".equals(username)) {
         return User.withUsername("user")
            .password("{noop}password") // {noop} indicates plain text password
            .roles("USER")
            .build();
      }
      throw new UsernameNotFoundException("User not found");
   }
}
Frontend: Building the React Application
Login Form Component
LoginForm.js
import React, { useState } from 'react';

import axios from 'axios';

function LoginForm() {
   const [username, setUsername] = useState('');
   const [password, setPassword] = useState('');
   const [error, setError] = useState('');

   const handleSubmit = async (e) => {
      e.preventDefault();
      try {
         const response = await axios.post('/login', {username, password });
         console.log(response.data);
      } catch (err) {
         setError('Invalid username or password');
      }
   };

   return (
      <div>
         <form onSubmit={handleSubmit}>
            <input type="text" placeholder="Username" value={username}
               onChange={(e) => setUsername(e.target.value)} />
            <input type="password" placeholder="Password" value={password}
               onChange={(e) => setPassword(e.target.value)} />
            <button type="submit">Login</button>
            {error && <p>{error}</p>}
         </form>
      </div>
   );
}
export default LoginForm;
Integrating Frontend and Backend
Axios Base URL
axios.js
import axios from 'axios';

const instance = axios.create({
   baseURL: 'http://localhost:8080',
   withCredentials: true,
});

export default instance;
Testing Backend Security
Login Page
Username− user
Password− password
On Successful Login
Enhancing User Experience
Input Validation− Validate username and password fields before submitting.
Error Handling− Display error messages based on server responses.
Redirect− Use React Router to redirect authenticated users to the dashboard.
Securing the Application
-
CORS Configuration− In Spring Security, enable CORS (Cross Origin Resource Sharing)
http.cors().and()...
Logout− Implement /logout endpoint.
Testing and Debugging
Use browser developer tools to monitor network requests.
Test for edge cases and unauthorized access.
Spring Security - Filter Chain
Introduction to Spring Security
Axios Base URL
axios.js
import axios from 'axios';
const instance = axios.create({
baseURL: 'http://localhost:8080',
withCredentials: true,
});
export default instance;
Testing Backend Security
Login Page
Username− user
Password− password
On Successful Login
Enhancing User Experience
Input Validation− Validate username and password fields before submitting.
Error Handling− Display error messages based on server responses.
Redirect− Use React Router to redirect authenticated users to the dashboard.
Securing the Application
-
CORS Configuration− In Spring Security, enable CORS (Cross Origin Resource Sharing)
http.cors().and()...
Logout− Implement /logout endpoint.
Testing and Debugging
Use browser developer tools to monitor network requests.
Test for edge cases and unauthorized access.
Spring Security - Filter Chain
Introduction to Spring Security
Spring Security is a powerful and customizable authentication and access control framework that secures Spring-based applications. It provides a comprehensive set of features, such as authentication, authorization, protection against common security vulnerabilities (e.g., CSRF, session fixation), and supports a wide range of protocols and authentication mechanisms, including OAuth, LDAP, SAML, and more.
A key component of Spring Security is the SecurityFilterChain, which is responsible for processing HTTP requests and applying security logic, such as authentication and authorization checks. It plays a central role in securing Spring applications and provides fine-grained control over security configuration.
What is SecurityFilterChain?
The SecurityFilterChain is a critical interface within Spring Security that defines a sequence of filters which will be applied to every HTTP request coming into the application. It is the backbone for handling security concerns in a web-based application.
Each filter in the chain is responsible for a specific task such as checking if a user is authenticated, enforcing access controls, or performing actions related to security exceptions. The filters are invoked in a specific order, and their role is to either permit the request to continue to the next filter or to block the request, depending on the result of the security processing.
Before Spring Security 5.0, configuration was typically done using the WebSecurityConfigurerAdapter class. However, in the new Spring Security configuration style (since version 5.0), Spring introduced SecurityFilterChain to allow more granular and flexible configurations.
Since Spring Security 5.0, SecurityFilterChain has been at the forefront of simplifying security configurations by allowing developers to define their security setup in a more granular and flexible way. A functional approach where security configuration is defined by creating a SecurityFilterChain bean. This approach is considered more intuitive, as it does not require subclassing and allows for a more declarative style of configuration.
Understanding the Role of Security Filters
Filters are integral components of the SecurityFilterChain. Filters are the mechanisms through which Spring Security applies its security policies on incoming HTTP requests. The filters in the security filter chain perform various tasks such as−
Authentication− Ensuring the user is properly authenticated.
Authorization− Ensuring the user has the appropriate permissions to access a given resource.
CSRF Protection− Preventing Cross-Site Request Forgery (CSRF) attacks.
Session Management− Managing and securing user sessions.
Exception Handling− Dealing with unauthorized access or other security-related issues.
When a request is received by a Spring-based application, it first passes through the security filter chain. The filters evaluate the request, and based on the security rules defined in the configuration, they may either allow the request to proceed or block it.
Components of SecurityFilterChain
The SecurityFilterChain is composed of a number of filters, and these filters can be broadly categorized into three main groups−
Authentication Filters
Authorization Filters
Exception Handling Filters
Authentication Filters
Authentication filters are responsible for verifying the identity of the user making the request. Some of the most commonly used authentication filters are−
UsernamePasswordAuthenticationFilter− Handles form-based authentication, where a user submits a username and password.
BearerTokenAuthenticationFilter− Used for token-based authentication (e.g., JWT), where the token is passed in the HTTP header.
OAuth2LoginAuthenticationFilter− Handles OAuth2-based login, typically used in Single Sign-On (SSO) scenarios.
BasicAuthenticationFilter− Handles basic authentication, where credentials are sent via HTTP headers.
Each of these filters interacts with the AuthenticationManager to authenticate the user.
Authorization Filters
Authorization filters enforce access control on various endpoints in your application. After authentication, they ensure that the authenticated user has the necessary permissions to perform the requested action. Authorization can be based on roles, authorities, or custom expressions.
Some examples of authorization filters are−
FilterSecurityInterceptor− The main filter used to enforce access control.
AccessDecisionManager− Determines whether the user is allowed to access a resource based on their authorities or roles.
Exception Handling Filters
Exception handling filters are responsible for dealing with any security-related issues that arise during the request processing. These filters catch exceptions like AccessDeniedException, AuthenticationException, and return appropriate HTTP responses such as 403 Forbidden or 401 Unauthorized.
ExceptionTranslationFilter− Translates security-related exceptions into HTTP responses (e.g., redirect to login page or return a 403 HTTP status).
How SecurityFilterChain Works in Spring Security
The working of the SecurityFilterChain can be best understood by looking at the sequence of filters involved in request processing. Here's a high-level overview of how it works.
Custom SecurityFilterChain
Security Filter Registration
Filter Execution Flow
Creating a Custom SecurityFilterChain
In Spring Security, the configuration of SecurityFilterChain can be customized by using Java configuration (@Configuration and @EnableWebSecurity). The security filters can be added or removed based on the security needs of the application. A typical configuration looks like this−
@Configuration
@EnableWebSecurity
public class SecurityConfig {

   @Bean
   public SecurityFilterChain securityFilterChain(HttpSecurity http) throws Exception {

   return http
      .csrf(AbstractHttpConfigurer::disable)
      .authorizeHttpRequests(
         request -> request.requestMatchers("/public/**").permitAll() // Public endpoints
            .requestMatchers("/admin/**").hasRole("ADMIN")  // Admin-only endpoints
            .anyRequest().authenticated()
      )
      .formLogin(Customizer.withDefaults())
      .logout(config -> config
      .logoutUrl("/logout")
      .logoutSuccessUrl("/login"))
      .build();
   }
}
This configuration ensures that only authenticated users can access endpoints other than /public/**, while /admin/** requires the user to have the "ADMIN" role.
Security Filter Registration
Once the security filter chain is configured, Spring automatically registers the filters in the appropriate order. The filters will be invoked for each incoming HTTP request based on the configuration you provide. For instance, authentication filters will run first to validate the user, followed by authorization filters, and finally exception handling filters.
Filter Execution Flow
When an HTTP request enters the application, it passes through the filter chain in the following order−
-
SecurityContextPersistenceFilter− Retrieves the security context from the session or creates a new one.
-
Authentication Filters− Authenticate the user using one of the methods like form login or JWT token.
-
Authorization Filters− Verify the user's permissions and access control based on roles or authorities.
-
Exception Handling Filters− Handle any security exceptions and send appropriate HTTP responses.
If a filter allows the request to pass through, the next filter is executed, and this process continues until the request either completes or an exception is thrown.
Configuring SecurityFilterChain for Different Scenarios
Basic Authentication
For basic authentication, the configuration might look like this (in SecurityConfig.java). SecurityConfig class must have @Configuration and @EnableWebSecurity above class definition.
@Bean
public SecurityFilterChain securityFilterChain(HttpSecurity http) throws Exception {
    http
      .authorizeHttpRequests(request -> request.anyRequest().authenticated()) // Authenticate all requests
      .httpBasic(Customizer.withDefaults())   // Enable HTTP Basic Authentication
      .build();
}
Form-based Login
Form-based login is enabled using: (same as above. This is the method in SecurityConfig class, which has @Configuration and @EnableWebSecurity declared above the class definition).
@Bean
public SecurityFilterChain securityFilterChain(HttpSecurity http) throws Exception {
    http
      .authorizeHttpRequests(request -> request.anyRequest().authenticated()) // Authenticate all requests
      .formLogin(Customizer.withDefaults())   // Enable Form based Authentication
      .build();
}
Best Practices for Implementing SecurityFilterChain
Limit filter complexity− Keep the filters simple to avoid introducing security vulnerabilities. Combine similar security concerns into a single filter whenever possible.
Apply least privilege− Only expose the minimum necessary endpoints to unauthenticated users. Protect sensitive resources by requiring specific roles or authorities.
Custom filters− If the default filters do not meet your requirements, you can write custom filters for specific use cases, such as integrating with external authentication providers.
Test thoroughly− Ensure that your filter chains are thoroughly tested for authentication and authorization scenarios.
Challenges and Troubleshooting Common Issues
Incorrect Filter Order− Filters are executed in a specific order. Incorrect order can lead to issues where authentication is bypassed, or unauthorized users gain access.
AccessDeniedException− Ensure the correct authorities are assigned to users and that access control rules are properly configured.
Session Fixation Attacks− Ensure that session management filters are correctly configured to prevent attackers from hijacking user sessions.
Conclusion
Spring Security's SecurityFilterChain provides a robust and flexible mechanism for securing web applications. By understanding its components and how it processes HTTP requests, developers can create highly customized and secure applications. Whether you're dealing with basic authentication, JWT, or form-based login, SecurityFilterChain offers fine-grained control over security configurations, making it an essential tool in the Spring Security ecosystem.
