- Sprint Security - Home
- Spring Security - Introduction
- Spring Security - Architecture
- Spring Security - Project Modules
- Spring Security - Environment Setup
- Spring Security - Form Login
- Spring Security - Custom Form Login
- Spring Security - Logout
- Spring Security - Remember Me
- Spring Security - Redirection
- Spring Security - Taglibs
- Spring Security - XML Configuration
- Spring Security - Authentication Provider
- Spring Security - Basic Authentication
- Spring Security - AuthenticationFailureHandler
- Spring Security - JWT
- Spring Security - Retrieve User Information
- Spring Security - Maven
- Spring Security - Default Password Encoder
- Spring Security – Password Encoding
- Spring Security - Methods Level
- Spring Security - Manual Authentication
- Spring Security - Extra Login Fields
- Spring Security - Prevent Brute Force
- Spring Security - Login Page with React
- Spring Security - Security Filter Chain
- Spring Security - Securing Spring Boot API
- Spring Security - Expressions
- Spring Security - Security none, Filters none, access permitAll
- Spring Security - Control the Session
- Spring Security Useful Resources
- Spring Security - Quick Guide
- Spring Security - Useful Resources
- Spring Security - Discussion
Spring Security - Login Page with React
Building a secure web application is a fundamental requirement in modern software development. Spring Security is a robust and customizable authentication and access control framework for Java-based applications, while React is a popular JavaScript library for building user interfaces. Together, they enable developers to create secure, user-friendly applications. In this guide, we will explore how to build a login page using Spring Security and React.
Introduction
Overview of Spring Security
Spring Security is a powerful framework that provides authentication, authorization, and protection against common security attacks. It integrates seamlessly with Spring Boot applications and supports various authentication methods, including form-based login, basic authentication, and OAuth2.
Why Integrate with React?
React allows developers to create dynamic and responsive user interfaces, making it ideal for modern web applications. By integrating Spring Security with React, you can create a secure backend while leveraging Reacts capabilities to build an interactive frontend.
Use Case: Login Page
In this article, well create a login page where users can authenticate via a Spring Security backend and access protected resources. This guide assumes basic knowledge of Java, Spring Boot, and React.
Prerequisites
Java 17+ and Maven/Gradle installed.
Node.js and npm/yarn installed.
IDEs for Java (e.g., IntelliJIdea, Eclipse, Spring Tool Suite 4) and JavaScript (e.g., VS Code).
Setting Up the Project
Backend: Spring Boot Application
Create a new Spring Boot application
C:\> spring init --dependencies=web,security,jpa,h2 spring-security-login
C:\> cd spring-security-login
Add necessary dependencies to pom.xml
<dependencies>
   <dependency>
      <groupId>org.springframework.boot</groupId>
      <artifactId>spring-boot-starter-security</artifactId>
   </dependency>
   <dependency>
      <groupId>org.springframework.boot</groupId>
      <artifactId>spring-boot-starter-web</artifactId>
   </dependency>
   <dependency>
      <groupId>org.springframework.boot</groupId>
      <artifactId>spring-boot-starter-data-jpa</artifactId>
   </dependency>
   <dependency>
      <groupId>com.h2database</groupId>
      <artifactId>h2</artifactId>
      <scope>runtime</scope>
   </dependency>
</dependencies>
Run the application
Go to the base directory of the project in Command Prompt, where pom.xml is located, and type−
mvn spring-boot:run
Frontend: React Application
Create a React application
npx create-react-app react-login
cd react-login
Install Axios for HTTP requests
npm install axios
Run the application
npm start
Backend: Configuring Spring Security
Basic Security Configuration
SecurityConfig.java
package com.tutorialspoint.config;

import org.springframework.context.annotation.Bean;
import org.springframework.context.annotation.Configuration;
import org.springframework.security.config.annotation.web.builders.HttpSecurity;
import org.springframework.security.config.annotation.web.configuration.EnableWebSecurity;
import org.springframework.security.web.SecurityFilterChain;

@Configuration
@EnableWebSecurity
public class SecurityConfig {

   @Bean
   public SecurityFilterChain securityFilterChain(HttpSecurity http) throws Exception {
      http
         .authorizeHttpRequests(auth -> auth
         .requestMatchers("/login", "/public/**").permitAll()
         .anyRequest().authenticated()
      )
      .formLogin(form -> form
         .loginProcessingUrl("/login")
         .defaultSuccessUrl("/success.html", true)
         .failureUrl("/login?error=true")
      )
      .logout(logout -> logout
         .logoutUrl("/logout")
         .logoutSuccessUrl("/login")
      );

      return http.build();
   }
}
UserDetailsService Implementation
CustomUserDetailsService.java
package com.tutorialspoint.service;

import org.springframework.security.core.userdetails.User;
import org.springframework.security.core.userdetails.UserDetails;
import org.springframework.security.core.userdetails.UserDetailsService;
import org.springframework.security.core.userdetails.UsernameNotFoundException;
import org.springframework.stereotype.Service;

@Service
public class CustomUserDetailsService implements UserDetailsService {

   @Override
   public UserDetails loadUserByUsername(String username) throws UsernameNotFoundException {

      // Hardcoded user for demonstration
      if ("user".equals(username)) {
         return User.withUsername("user")
            .password("{noop}password") // {noop} indicates plain text password
            .roles("USER")
            .build();
      }
      throw new UsernameNotFoundException("User not found");
   }
}
Frontend: Building the React Application
Login Form Component
LoginForm.js
import React, { useState } from 'react';

import axios from 'axios';

function LoginForm() {
   const [username, setUsername] = useState('');
   const [password, setPassword] = useState('');
   const [error, setError] = useState('');

   const handleSubmit = async (e) => {
      e.preventDefault();
      try {
         const response = await axios.post('/login', {username, password });
         console.log(response.data);
      } catch (err) {
         setError('Invalid username or password');
      }
   };

   return (
      <div>
         <form onSubmit={handleSubmit}>
            <input type="text" placeholder="Username" value={username}
               onChange={(e) => setUsername(e.target.value)} />
            <input type="password" placeholder="Password" value={password}
               onChange={(e) => setPassword(e.target.value)} />
            <button type="submit">Login</button>
            {error && <p>{error}</p>}
         </form>
      </div>
   );
}
export default LoginForm;
Integrating Frontend and Backend
Axios Base URL
axios.js
import axios from 'axios';

const instance = axios.create({
   baseURL: 'http://localhost:8080',
   withCredentials: true,
});

export default instance;
Testing Backend Security
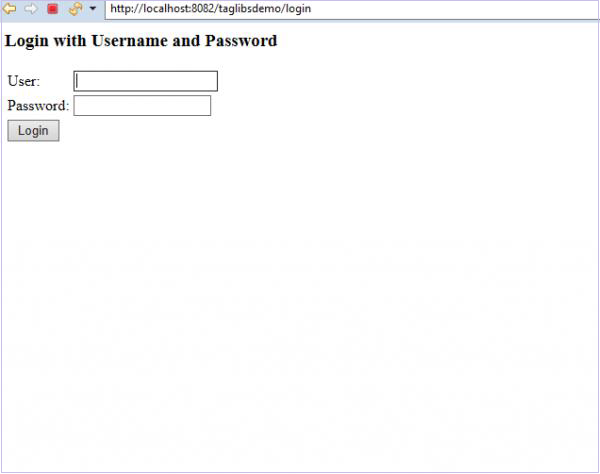
Login Page
Username− user
Password− password
On Successful Login

Enhancing User Experience
Input Validation− Validate username and password fields before submitting.
Error Handling− Display error messages based on server responses.
Redirect− Use React Router to redirect authenticated users to the dashboard.
Securing the Application
-
CORS Configuration− In Spring Security, enable CORS (Cross Origin Resource Sharing)
http.cors().and()...
Logout− Implement /logout endpoint.
Testing and Debugging
Use browser developer tools to monitor network requests.
Test for edge cases and unauthorized access.
Axios Base URL
axios.js
import axios from 'axios';
const instance = axios.create({
baseURL: 'http://localhost:8080',
withCredentials: true,
});
export default instance;
Testing Backend Security
Login Page
Username− user
Password− password
On Successful Login
Enhancing User Experience
Input Validation− Validate username and password fields before submitting.
Error Handling− Display error messages based on server responses.
Redirect− Use React Router to redirect authenticated users to the dashboard.
Securing the Application
-
CORS Configuration− In Spring Security, enable CORS (Cross Origin Resource Sharing)
http.cors().and()...
Logout− Implement /logout endpoint.
Testing and Debugging
Use browser developer tools to monitor network requests.
Test for edge cases and unauthorized access.
