- Sprint Security - Home
- Spring Security - Introduction
- Spring Security - Architecture
- Spring Security - Project Modules
- Spring Security - Environment Setup
- Spring Security - Form Login
- Spring Security - Custom Form Login
- Spring Security - Logout
- Spring Security - Remember Me
- Spring Security - Redirection
- Spring Security - Taglibs
- Spring Security - XML Configuration
- Spring Security - Authentication Provider
- Spring Security - Basic Authentication
- Spring Security - AuthenticationFailureHandler
- Spring Security - JWT
- Spring Security - Retrieve User Information
- Spring Security - Maven
- Spring Security - Default Password Encoder
- Spring Security – Password Encoding
- Spring Security - Methods Level
- Spring Security - Manual Authentication
- Spring Security - Extra Login Fields
- Spring Security - Prevent Brute Force
- Spring Security - Login Page with React
- Spring Security - Security Filter Chain
- Spring Security - Securing Spring Boot API
- Spring Security - Expressions
- Spring Security - Security none, Filters none, access permitAll
- Spring Security - Control the Session
- Spring Security Useful Resources
- Spring Security - Quick Guide
- Spring Security - Useful Resources
- Spring Security - Discussion
Spring Security - Manual Authentication
Introduction
Spring Security is a powerful and customizable authentication and access-control framework for Java-based applications. It provides built-in mechanisms for securing applications with minimal configuration, supporting features like form-based login, OAuth2, and token-based authentication.
This article focuses on manual authentication in Spring Security, where developers explicitly control the authentication process, user details, and session management, providing flexibility in building custom workflows.
Understanding Manual Authentication
What is Manual Authentication?
Manual authentication allows developers to handle−
Custom user validation logic.
Role-based authorization beyond default configurations.
Interaction with non-standard user stores (e.g., NoSQL databases).
Why Manual Authentication?
Flexibility− Customize login workflows or integrate with external systems.
Control− Fine-grained control over authentication, authorization, and error handling.
Spring Security Configuration Basics
Setting Up the Project
Dependencies− Include Spring Security and Spring Boot Starter Web in your pom.xml.
pom.xml
<dependency>
   <groupId>org.springframework.boot</groupId>
   <artifactId>spring-boot-starter-security</artifactId>
</dependency>
<dependency>
   <groupId>org.springframework.boot</groupId>
   <artifactId>spring-boot-starter-web</artifactId>
</dependency>
Disable Default Security
Create a configuration class to disable default security behavior.
@Configuration
@EnableWebSecurity
public class SecurityConfig extends WebSecurityConfigurerAdapter {

   @Bean
   public SecurityFilterChain securityFilterChain(HttpSecurity http) throws Exception {
      http.csrf(csrf -> csrf.disable()) // Disable CSRF for simplicity (not recommended for production)
         .authorizeHttpRequests(
            authorize -> authorize.requestMatchers("/login", "/register").permitAll() // Public URLs
         .anyRequest().authenticated() // Protect all other end-points
         )
         .formLogin(formLogin -> formLogin
         .loginPage("/login") .permitAll() );
      return http.build();
   }
}
Building the Login Page
HTML Login Form
The login form is served at /login.
login.html
<!DOCTYPE html>
<html lang="en">
   <head>
      <title>Login Page</title>
   </head>
   <body>
      <h2>Login</h2>
         <form method="POST" action="/authenticate">
            <label for="username">Username:</label>
            <input type="text" id="username" name="username" required />
            <br />
            <label for="password">Password:</label>
            <input type="password" id="password" name="password" required />
            <br />
            <button type="submit">Login</button>
         </form>
   </body>
</html>
Web Page Visual
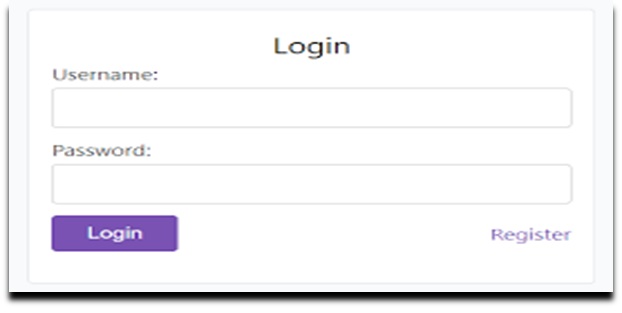
A simple login page mockup with labeled form fields (Username and Password) and a login button.
Handling Authentication with Custom Logic
Custom Authentication Filter
Implement a filter to handle /authenticate requests manually.
@Component
public class CustomAuthenticationFilter extends UsernamePasswordAuthenticationFilter {
   private final AuthenticationManager authenticationManager;

   public CustomAuthenticationFilter(AuthenticationManager authenticationManager) {
      this.authenticationManager = authenticationManager;
      setFilterProcessesUrl("/authenticate"); // Custom authentication endpoint
   }

   @Override
   public Authentication attemptAuthentication(HttpServletRequest request, HttpServletResponse response) {
      String username = request.getParameter("username");
      String password = request.getParameter("password");

      UsernamePasswordAuthenticationToken token = new UsernamePasswordAuthenticationToken(username, password);
      return authenticationManager.authenticate(token);
   }
}
Storing User Details and Credentials
Custom UserDetailsService
Provide user details from a custom database or in-memory store.
@Bean
protected UserDetailsService userDetailsService() {
   UserDetails user = User.builder()
      .username("user")
      .password(passwordEncoder().encode("user123"))
      .roles("USER")
      .build();
   UserDetails admin = User.builder()
      .username("admin")
      .password(passwordEncoder().encode("admin123"))
      .roles("USER", "ADMIN")
      .build();

   return new InMemoryUserDetailsManager(user, admin);
}

@Bean
protected PasswordEncoder passwordEncoder() {
   return new BCryptPasswordEncoder();
}
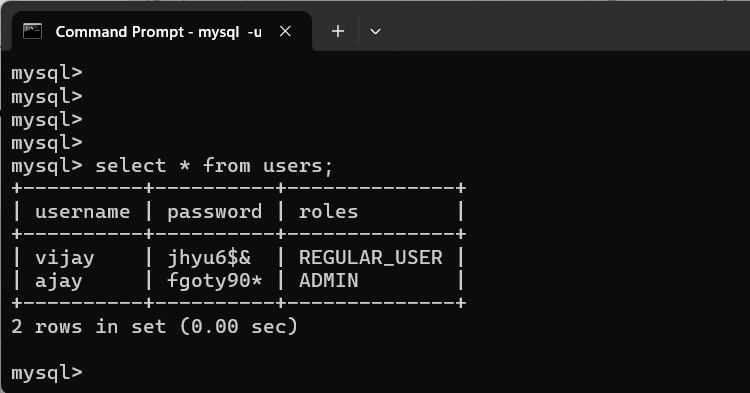
Database schema for users (columns: username, password, roles).
Session Management
Configuring Sessions
Ensure proper session handling.
@Bean
public SecurityFilterChain securityFilterChain(HttpSecurity http) throws Exception {
   http.sessionManagement(
      httpSecuritySessionManagementConfigurer -> httpSecuritySessionManagementConfigurer
         .sessionCreationPolicy(SessionCreationPolicy.IF_REQUIRED)
         .maximumSessions(1)) // One session per user
}
Example Behavior− The user is logged out if they log in on another device.
Implementing Logout Functionality
Logout Configuration
Enable logout functionality with custom redirection.
@Bean
public SecurityFilterChain securityFilterChain(HttpSecurity http) throws Exception {
   http.sessionManagement(
      httpSecuritySessionManagementConfigurer -> httpSecuritySessionManagementConfigurer
         .sessionCreationPolicy(SessionCreationPolicy.IF_REQUIRED)
         .maximumSessions(1)) // One session per user
}

@Bean
public SecurityFilterChain securityFilterChain(HttpSecurity http) throws Exception {
   http.logout(config -> config
         .logoutUrl("/logout")
         .logoutSuccessUrl("/login?logout")
         .invalidateHttpSession(true))
}
HTML Update
Add a logout button to secure pages.
<a href="/logout">Logout</a>
Authorization: Role-Based Access Control (RBAC)
Custom Authorization Rules
Define access rules based on roles.
@Bean
public SecurityFilterChain securityFilterChain(HttpSecurity http) throws Exception {
   http.authorizeHttpRequests(
         request -> request.requestMatchers("/login").permitAll()
            .requestMatchers("/admin/**").hasRole("ADMIN")
            .requestMatchers("/user/**").hasRole("USER")
            .anyRequest().authenticated()
         )
}
Example− /admin/dashboard is accessible only to ADMIN users.
Error Handling and Custom Messages
Custom Authentication Failure Handler
@Component
public class CustomAuthenticationFailureHandler implements AuthenticationFailureHandler {

   @Override
   public void onAuthenticationFailure(HttpServletRequest request, HttpServletResponse response,
      AuthenticationException exception) throws IOException, ServletException {
      response.setStatus(HttpStatus.UNAUTHORIZED.value());
      response.sendRedirect("/login?error=true");
   }
}
Display Error on Login Page
Update the login form to show error messages.
<c:if test="${param.error}">
   <p style="color:red;">Invalid username or password</p>
</c:if>
Testing and Debugging Manual Authentication
Testing Tools
Postman− Test /authenticate endpoint.
Browser Developer Tools− Inspect HTTP requests and cookies.
Use Spring Boot's debug mode (--debug) to view detailed logs.
Log authentication events in custom filters for troubleshooting.
log.info("Authentication attempt for user: " + username);
Conclusion and Next Steps
Manual authentication with Spring Security offers−
Flexibility in handling custom login workflows.
Integration with custom user stores and non-standard requirements.
Next Steps
Extend this example to use JWT for token-based authentication.
Integrate with OAuth2 for social logins.
Enhance security with CSRF protection and rate-limiting.
Spring Security is a versatile tool that, with manual configurations, adapts to diverse authentication needs while ensuring robust security.
