
Article Categories
- All Categories
-
 Data Structure
-
 Networking
-
 RDBMS
RDBMS
-
 Operating System
-
 Java
Java
-
 MS Excel
-
 iOS
iOS
-
 HTML
HTML
-
 CSS
CSS
-
 Android
-
 Python
-
 C Programming
-
 C++
C++
-
 C#
C#
-
 MongoDB
-
 MySQL
MySQL
-
 Javascript
-
 PHP
PHP
-
 Economics & Finance
ReactJS – Axios Interceptors
In this article, we are going to learn how to intercept every request or response that is being sent by Axios Interceptors in a React application.
Axios interceptors are the default configurations that are added automatically to every request or response that a user receives. It is useful to check response status code for every response that is being received.
Example
In this example, we will build a React application that automatically checks and logs the status code that is sent by the server while sending a POST request from our React application.
We have to set all the configuration in the most global file, i.e. index.js, to intercept every request/response.
index.jsx
import React from 'react';
import App from './App';
import ReactDOM from 'react-dom';
import axios from 'axios';

// For GET requests
axios.interceptors.request.use(
   (req) => {
      // Add configurations here
      return req;
   },
   (err) => {
      return Promise.reject(err);
   }
);

// For POST requests
axios.interceptors.response.use(
   (res) => {
      // Add configurations here
      if (res.status === 201) {
         console.log('Posted Successfully');
      }
      return res;
   },
   (err) => {
      return Promise.reject(err);
   }
);

ReactDOM.render(
   <React.StrictMode>
      <App />
   </React.StrictMode>,
   document.getElementById('root')
);
App.jsx
import React, { useEffect, useState } from 'react';
import './App.css';
const App = () => {
   const [data, setData] = useState(null);
   const [val, setVal] = useState('');
   const [fetchData, setFetch] = useState(false);

   useEffect(() => {

      if (fetchData) {
         const payload = {
            method: 'POST',
            body: JSON.stringify({ title: val }),
         };
         axios.post('https://jsonplaceholder.typicode.com/posts', payload)
.then((res) => setData(res.data.id));
      }
   }, [fetchData]);
   return (
      <>
      {data && <h1>Your data is saved with Id: {data}</h1>}
      <input
         placeholder="Title of Post"
         value={val}
         onChange={(e) => setVal(e.target.value)}
      />
      <button onClick={() => setFetch(true)}>Save Data</button>
   );
};
export default App;
In the above example, when the request is sent with the data, the response is intercepted and if the status code is 201, then it will log the message 'Posted Successfully'.
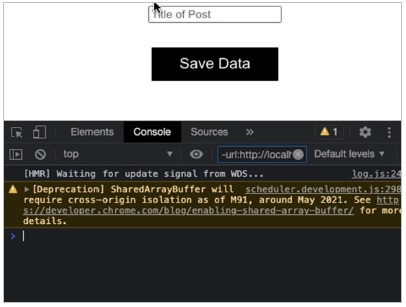
Output
This will produce the following result.

11K+ Views
