- Python Web - Django Framework
- Django Framework - Overview
- Django Framework - Users
- Django Framework - Installation
- Django Framework - Creating Application
- Python Web - Flask Framework
- Python Web - Flask Framework
- Flask Framework - Creating URL Routing
- Flask Framework - Using Templates
- Python Web - Pyramid Framework
- Python Web - Pyramid Framework
- Pyramid Framework - Core Concepts
- Pyramid Framework - Creating Application
- Python Web - Dash Framework
- Python Web - Dash Framework
- Dash Framework - App Layout
- Dash Framework - HTML Component
- Dash Framework - Visualization
- Python Web - py4web Framework
- Python Web - py4Web Framework
- py4web Framework - Dashboard
- py4web Framework - Creating Application
- Python Web - Miscellaneous
- Python Web - Web2py Framework
- Python Web - Choosing a Better Framework
- Python Web Development Libraries Resources
- Python Web - Quick Guide
- Python Web - Useful Resources
- Python Web - Discussion
Python Web - Web2py Framework
Web2py is an easy-to-use framework. With web2py, no installation and configuration is required as it is portable and can be run on a USD drive too. It is based on the MVC frameworks like many other python frameworks. Though most of them do not support older versions of Python, web2py still supports older versions: python 2.6 and 2.7. It also supports LDAP for authentication which is widely accepted these days.
Web2py is now deprecated and is replaced with much improved py4Web Framework.
Web2py tries to lower the barrier of entry to web development by focusing on three main goals −
Rapid development
Ease of use
Security
Keeping in mind the user perspective, Web2py is built and constantly being optimized internally to make it a faster and leaner framework including support for backward compatibility.
Installing and Configuring Web2py Framework
Running a web2py is easy, you need to download the exe from the below link: http://www.web2py.com/init/default/download
For windows, you can download the zip file, unzip it and run the exe file either directly or from the command line. You will be prompted with below screen asking for the admin password.
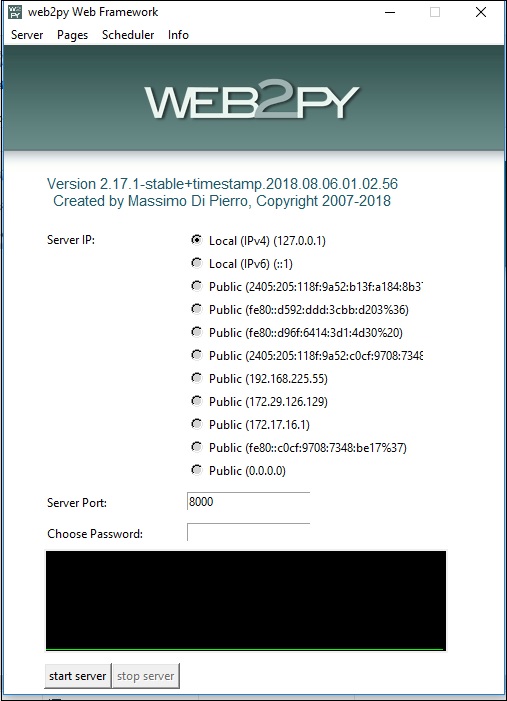
You can choose an administrator password and start the server. You will see the following screen −
Creating an app using Web2py
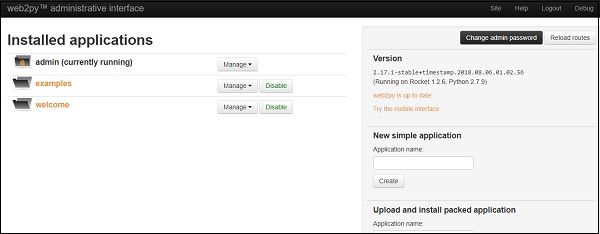
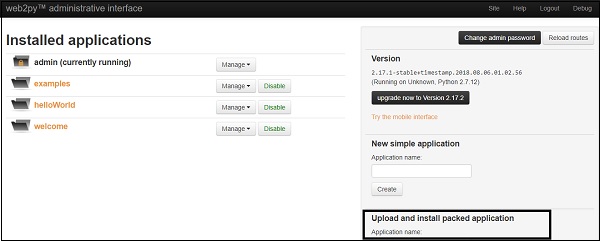
Now we are ready to create a new app. Click on the admin tab located at the bottom. So after entering the admin password, we will get the below screen −
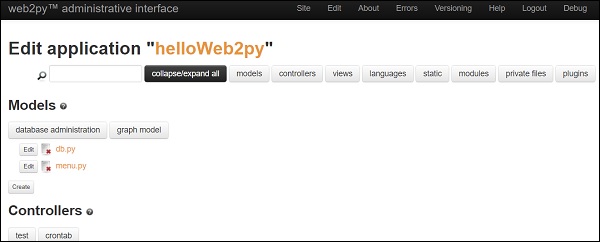
Go to new simple application, enter some application name (like helloWeb2py) and click on create. This will display design interface page as given below −
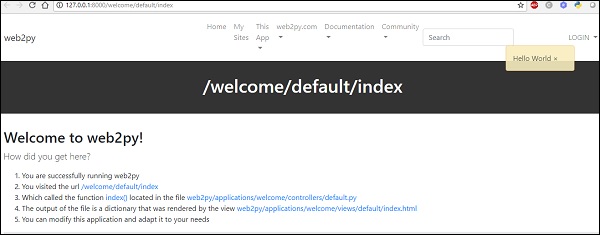
You can also go to your current live web,helloWeb2py, simply type http://127.0.0.1:8000/helloWeb2py on your local machine, you will get the below output −
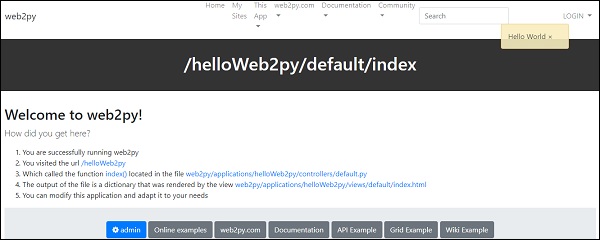
In the design page of helloWeb2py application, go to the controller and click on edit button next to default.py. If you change the return value of the index() function, the following output will be displayed −

Save the changes, and now you can check the changes made in your helloWeb2py app. Just refresh the http://127.0.0.1:8000/helloWeb2py link and you will see the below output −

Deploying the app on cloud platform
Now if you want to deploy your app on cloud platform, come back to your home page and click on the site. You can choose any option for deployment. Here, we choose pythonAnywhere. Go to pythonAnywhere website and register yourself (if not already done). Click on Add a new web app and fill all the credentials (Choose web2py app). All done.
Now go to https://username.pythonanywhere.com/welcome/default/index, click on admin tab (enter password). Next click on upload and install packed application. Fill the credentials as below and click install.
Once everything is done, a pop-up message will appear as given below −

Now to view your app, open the below link −
https://username.pythonanywhere.com/welcome/default/index and you can see the following screen −

Our first web2py application is successfully created and deployed.
To summarize, Web2py is a free, fast, secure web development framework that is entirely written in python and encourages using python in every way possible (model, view, controller). It is a very good framework for small web applications or prototypes but fails to fulfil the enterprise class quality requirements. It is because, in an enterprise level application, the complexity of solving bugs will increase exponentially because of the lack of unit tests, good and accurate error reporting and scattered model.
