- PyQt - Home
- PyQt - Introduction
- PyQt - Environment
- PyQt - Hello World
- PyQt - Major Classes
- PyQt - Using Qt Designer
- PyQt - Meta Objects
- PyQt Signals & Slots
- PyQt - Signals and Slots
- PyQt - Support and Signals
- PyQt - Unbound and Bound Signals
- PyQt - New Signals with PyQtSignal
- PyQt - Connecting, Disconnecting, & Emitting Signals
- PyQt - Slot decorator
- PyQt - Slot Connection
- PyQt Layouts
- PyQt - Layout Management
- PyQt - QBoxLayout
- PyQt - QGridLayout
- PyQt - QFormLayout
- PyQt - QHBoxLayout
- PyQt - QVBoxLayout
- PyQt - QStackedLayout
- PyQt - QGraphicsGridLayout
- PyQt - QGraphicsAnchorLayout
- PyQt - QGraphicsLayout
- PyQt - QGraphicsLinearLayout
- PyQt Basic Widgets
- PyQt - Basic Widgets
- PyQt - Qlabel Widget
- PyQt - QLineEdit Widget
- PyQt - QPushButton Widget
- PyQt - QRadioButton Widget
- PyQt - QCheckBox Widget
- PyQt - QComboBox Widget
- PyQt - QSpinBox Widget
- PyQt - QMessageBox
- PyQt - QDialogButtonBox Widget
- PyQt - QFontComboBox Widget
- PyQt - QDoubleSpinBox Widget
- PyQt - QToolBox Widget
- PyQt - QMenuBar, QMenu & Qaction Widgets
- PyQt - QToolTip
- PyQt - QInputDialog Widget
- PyQt - QFontDialog Widget
- PyQt - QDialog Widget
- PyQt - QFileDialog Widget
- PyQt - QTab Widget
- PyQt - QSplitter Widget
- PyQt - QDock Widget
- PyQt - QStatusBar Widget
- PyQt - QTabBar
- PyQt - QList Widget
- PyQt - QScrollBar Widget
- PyQt - QProgressBar
- PyQt - QCalendar Widget
- PyQt - QMessageBox Widget
- PyQt - QPlainTextEdit
- PyQt - QDateEdit
- PyQt - QDateTimeEdit
- PyQt - QTimeEdit
- PyQt - QTextEdit
- PyQt - QTextBrowser
- PyQt - QScrollArea
- PyQt - Drag and Drop
- PyQt - Multiple Document Interface
- PyQt - QDialog Class
- PyQt Views
- PyQt - QColumnView
- PyQt - QTableView
- PyQt Drawing API
- PyQt - Drawing API
- PyQt - Drawing a Line
- PyQt - Drawing a Rectangle
- PyQt - Drawing a Triangle
- PyQt - Drawing a Circle
- PyQt - Drawing a Ellipse
- PyQt - Drawing a Polygon
- PyQt - Geometric Transformation
- PyQt - Drawing Effect
- PyQt Groups
- PyQt - QButtonGroup
- PyQt - QGroupBox
- PyQt Effects
- PyQt - Effects
- PyQt - Opacity Effect
- PyQt - QGraphicsBlur Effect
- PyQt - QGraphicsColorize Effect
- PyQt - QGraphicsDropShadow Effect
- PyQt Events
- PyQt - Event Handling
- PyQt - File Open Event
- PyQt - Action Event
- PyQt - Hide Event
- PyQt - Resize Event
- PyQt Database
- PyQt - Database Handling
- PyQt Essentials
- PyQt - BrushStyle Constants
- PyQt - QClipboard
- PyQt - QPixmap Class
- PyQt Useful Resources
- PyQt - Quick Guide
- PyQt - Useful Resources
- PyQt - Discussion
PyQt - QScrollBar Widget
A scrollbar control enables the user to access parts of the document i.e. outside the viewable area. It provides visual indicator to the current position. It has a slider by which a value between a preset range is set in analogous fashion. This value is usually correlated to bring a hidden data inside the viewport.
The Scroll bars are necessary for navigating the large document, lengthy content, web pages, and lists.
There are four types of control in scrollbar −
A slider Two Scroll arrows Page control |
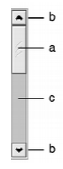 |
QScrollBar widget provides a vertical or horizontal scroll bar. If developer need to display another widget with scrollable content, it's easier to use the QScrollArea class. It provides a viewport widget and scroll bars, making the implementation of scrolling functionality simpler. However, if they need to implement scrolling functionality for specialized widgets using QAbstractScrollArea, QScrollBar can be useful.
Following signals of QScrollBar class are frequently used −
| Sr.No. | Methods & Description |
|---|---|
| 1 |
valueChanged() When the scrollbars value changes |
| 2 |
sliderMoved() When the user drags the slider |
Example
In the following example, three scroll bars are placed to control RGB values of font color for the text displayed in a label. The complete code is as follows −
# importing libraries
import sys
from PyQt6.QtWidgets import *
from PyQt6 import QtCore, QtGui
from PyQt6.QtGui import *
from PyQt6.QtCore import *

class Window(QMainWindow):
   def __init__(self):
      super().__init__()

      # setting title
      self.setWindowTitle("PyQt")
      # setting geometry
      self.setGeometry(100, 100, 500, 400)

      # calling method
      self.UiComponents()

      # showing widgets
      self.show()
   # method for components
   def UiComponents(self):
      # creating a QListWidget
      list_widget = QListWidget(self)

      # setting geometry to it
      list_widget.setGeometry(50, 70, 150, 80)

      # list widget items
      item1 = QListWidgetItem("Tutorialspoint")
      item2 = QListWidgetItem("BOX 1")
      item3 = QListWidgetItem("BOX 2")
      item4 = QListWidgetItem("BOX 3")
      item5 = QListWidgetItem("BOX 4")
      item6 = QListWidgetItem("BOX 5")
      item7 = QListWidgetItem("BOX 6")
      item8 = QListWidgetItem("BOX 7")
      item9 = QListWidgetItem("BOX 8")
      item10 = QListWidgetItem("BOX 9")
      # adding items to the list widget
      list_widget.addItem(item1)
      list_widget.addItem(item2)
      list_widget.addItem(item3)
      list_widget.addItem(item4)
      list_widget.addItem(item5)
      list_widget.addItem(item6)
      list_widget.addItem(item7)
      list_widget.addItem(item8)
      list_widget.addItem(item9)
      list_widget.addItem(item10)

      # scroll bar
      scroll_bar = QScrollBar(self)
      # setting style sheet to the scroll bar
      scroll_bar.setStyleSheet("background : gray;")
      # setting vertical scroll bar to it
      list_widget.setVerticalScrollBar(scroll_bar)

      # creating a label
      label = QLabel("Tutorialspoint", self)
      # setting geometry to the label
      label.setGeometry(230, 100, 280, 100)
      # making label multi line
      label.setWordWrap(True)

App = QApplication(sys.argv)
# create the instance of our Window
window = Window()
# start the app
sys.exit(App.exec())
Output
The above code produces the following output −