- PyQt - Home
- PyQt - Introduction
- PyQt - Environment
- PyQt - Hello World
- PyQt - Major Classes
- PyQt - Using Qt Designer
- PyQt - Meta Objects
- PyQt Signals & Slots
- PyQt - Signals and Slots
- PyQt - Support and Signals
- PyQt - Unbound and Bound Signals
- PyQt - New Signals with PyQtSignal
- PyQt - Connecting, Disconnecting, & Emitting Signals
- PyQt - Slot decorator
- PyQt - Slot Connection
- PyQt Layouts
- PyQt - Layout Management
- PyQt - QBoxLayout
- PyQt - QGridLayout
- PyQt - QFormLayout
- PyQt - QHBoxLayout
- PyQt - QVBoxLayout
- PyQt - QStackedLayout
- PyQt - QGraphicsGridLayout
- PyQt - QGraphicsAnchorLayout
- PyQt - QGraphicsLayout
- PyQt - QGraphicsLinearLayout
- PyQt Basic Widgets
- PyQt - Basic Widgets
- PyQt - Qlabel Widget
- PyQt - QLineEdit Widget
- PyQt - QPushButton Widget
- PyQt - QRadioButton Widget
- PyQt - QCheckBox Widget
- PyQt - QComboBox Widget
- PyQt - QSpinBox Widget
- PyQt - QMessageBox
- PyQt - QDialogButtonBox Widget
- PyQt - QFontComboBox Widget
- PyQt - QDoubleSpinBox Widget
- PyQt - QToolBox Widget
- PyQt - QMenuBar, QMenu & Qaction Widgets
- PyQt - QToolTip
- PyQt - QInputDialog Widget
- PyQt - QFontDialog Widget
- PyQt - QDialog Widget
- PyQt - QFileDialog Widget
- PyQt - QTab Widget
- PyQt - QSplitter Widget
- PyQt - QDock Widget
- PyQt - QStatusBar Widget
- PyQt - QTabBar
- PyQt - QList Widget
- PyQt - QScrollBar Widget
- PyQt - QProgressBar
- PyQt - QCalendar Widget
- PyQt - QMessageBox Widget
- PyQt - QPlainTextEdit
- PyQt - QDateEdit
- PyQt - QDateTimeEdit
- PyQt - QTimeEdit
- PyQt - QTextEdit
- PyQt - QTextBrowser
- PyQt - QScrollArea
- PyQt - Drag and Drop
- PyQt - Multiple Document Interface
- PyQt - QDialog Class
- PyQt Views
- PyQt - QColumnView
- PyQt - QTableView
- PyQt Drawing API
- PyQt - Drawing API
- PyQt - Drawing a Line
- PyQt - Drawing a Rectangle
- PyQt - Drawing a Triangle
- PyQt - Drawing a Circle
- PyQt - Drawing a Ellipse
- PyQt - Drawing a Polygon
- PyQt - Geometric Transformation
- PyQt - Drawing Effect
- PyQt Groups
- PyQt - QButtonGroup
- PyQt - QGroupBox
- PyQt Effects
- PyQt - Effects
- PyQt - Opacity Effect
- PyQt - QGraphicsBlur Effect
- PyQt - QGraphicsColorize Effect
- PyQt - QGraphicsDropShadow Effect
- PyQt Events
- PyQt - Event Handling
- PyQt - File Open Event
- PyQt - Action Event
- PyQt - Hide Event
- PyQt - Resize Event
- PyQt Database
- PyQt - Database Handling
- PyQt Essentials
- PyQt - BrushStyle Constants
- PyQt - QClipboard
- PyQt - QPixmap Class
- PyQt Useful Resources
- PyQt - Quick Guide
- PyQt - Useful Resources
- PyQt - Discussion
PyQt - QProgressBar
A QProgressBar is like a visual progress tracker for the PyQt application. Imagine it as a loading bar that shows how far a task has progressed. This is like watching a download bar fill up as your files transfer or seeing a loading screen during software installation.
We can set the minimum and maximum values for the progress bar. For instance, if we are downloading a large file, the minimum might be 0% (nothing downloaded), and the maximum could be 100% (fully downloaded). As the download progresses, the bar visually fills up to reflect the completion percentage.
If the user feeling fancy, we can even customize the text displayed on the progress bar. For example, we might show the percentage completed or the current value in a specific format.
Uses of QProgressBar in PyQt
To create a QProgressBar, we will need to specify its parent (the widget it belongs to). By default, it starts with a minimum value of 0 and a maximum value of 100.
If we want to make a vertical progress bar (like a thermometer), we can choose whether the text should read from top to bottom or bottom to top. However, keep in mind that not all styles display the text − some are minimalist and skip it.
Note that the widget is all about showing progress, whether it is downloading files, rendering images, or any other task where you want to keep users informed.
Example 1
We create a click button for the widget to start the progress percentage from 0 to 100.
from PyQt6.QtWidgets import *
from PyQt6.QtGui import *
from PyQt6.QtCore import *
import sys
import time
class Progress(QWidget):

   def __init__(self):
      super().__init__()

      # calling initUI method
      self.initUI()

   # method for creating widgets
   def initUI(self):
      # creating progress bar
      self.pbar = QProgressBar(self)

      # setting its geometry
      self.pbar.setGeometry(30, 40, 200, 25)

      # creating push button
      self.btn = QPushButton('Start', self)

      # changing its position
      self.btn.move(40, 80)

      # adding action to push button
      self.btn.clicked.connect(self.doAction)

      # setting window geometry
      self.setGeometry(300, 300, 280, 170)

      # setting window action
      self.setWindowTitle("Progress Bar")

      # showing all the widgets
      self.show()

   # when button is pressed this method is being called
   def doAction(self):
      # setting for loop to set value of progress bar
      for i in range(101):
         # slowing down the loop
         time.sleep(0.05)

         # setting value to progress bar
         self.pbar.setValue(i)

if __name__ == '__main__':
   # create pyqt5 app
   App = QApplication(sys.argv)

   # create the instance of our Window
   window = Progress()

   # start the app
   sys.exit(App.exec())
Output
The above code produces the following output−
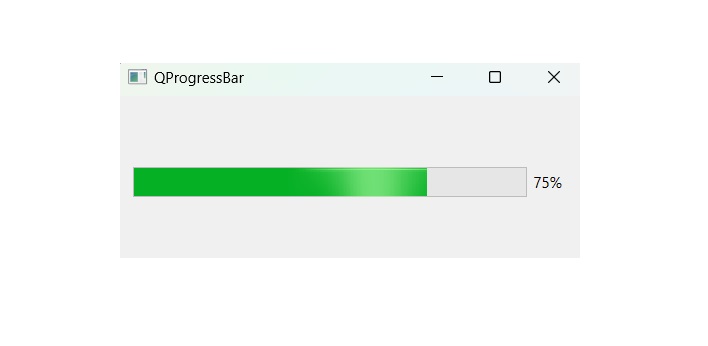
Example 2
In this example, we illustrates the percentage of progess bar using various method- setMinimum(), setMaximum(), and setValue().
import sys
from PyQt6.QtWidgets import QApplication, QWidget, QProgressBar, QVBoxLayout
class ProgressBarDemo(QWidget):
   def __init__(self):
      super().__init__()
      self.setWindowTitle("QProgressBar")
      self.setGeometry(100, 100, 300, 100)  # Set window size

      # Create a vertical layout
      layout = QVBoxLayout(self)

      # Create a QProgressBar
      self.progress_bar = QProgressBar(self)

      # Set minimum value
      self.progress_bar.setMinimum(0)
      # Set maximum value
      self.progress_bar.setMaximum(100)
      # Set initial value
      self.progress_bar.setValue(75)
      # Add the progress bar to the layout
      layout.addWidget(self.progress_bar)

if __name__ == "__main__":
   app = QApplication(sys.argv)
   window = ProgressBarDemo()
   window.show()
   sys.exit(app.exec())
Output
The above code produces the following output−