- PyQt - Home
- PyQt - Introduction
- PyQt - Environment
- PyQt - Hello World
- PyQt - Major Classes
- PyQt - Using Qt Designer
- PyQt - Meta Objects
- PyQt Signals & Slots
- PyQt - Signals and Slots
- PyQt - Support and Signals
- PyQt - Unbound and Bound Signals
- PyQt - New Signals with PyQtSignal
- PyQt - Connecting, Disconnecting, & Emitting Signals
- PyQt - Slot decorator
- PyQt - Slot Connection
- PyQt Layouts
- PyQt - Layout Management
- PyQt - QBoxLayout
- PyQt - QGridLayout
- PyQt - QFormLayout
- PyQt - QHBoxLayout
- PyQt - QVBoxLayout
- PyQt - QStackedLayout
- PyQt - QGraphicsGridLayout
- PyQt - QGraphicsAnchorLayout
- PyQt - QGraphicsLayout
- PyQt - QGraphicsLinearLayout
- PyQt Basic Widgets
- PyQt - Basic Widgets
- PyQt - Qlabel Widget
- PyQt - QLineEdit Widget
- PyQt - QPushButton Widget
- PyQt - QRadioButton Widget
- PyQt - QCheckBox Widget
- PyQt - QComboBox Widget
- PyQt - QSpinBox Widget
- PyQt - QMessageBox
- PyQt - QDialogButtonBox Widget
- PyQt - QFontComboBox Widget
- PyQt - QDoubleSpinBox Widget
- PyQt - QToolBox Widget
- PyQt - QMenuBar, QMenu & Qaction Widgets
- PyQt - QToolTip
- PyQt - QInputDialog Widget
- PyQt - QFontDialog Widget
- PyQt - QDialog Widget
- PyQt - QFileDialog Widget
- PyQt - QTab Widget
- PyQt - QSplitter Widget
- PyQt - QDock Widget
- PyQt - QStatusBar Widget
- PyQt - QTabBar
- PyQt - QList Widget
- PyQt - QScrollBar Widget
- PyQt - QProgressBar
- PyQt - QCalendar Widget
- PyQt - QMessageBox Widget
- PyQt - QPlainTextEdit
- PyQt - QDateEdit
- PyQt - QDateTimeEdit
- PyQt - QTimeEdit
- PyQt - QTextEdit
- PyQt - QTextBrowser
- PyQt - QScrollArea
- PyQt - Drag and Drop
- PyQt - Multiple Document Interface
- PyQt - QDialog Class
- PyQt Views
- PyQt - QColumnView
- PyQt - QTableView
- PyQt Drawing API
- PyQt - Drawing API
- PyQt - Drawing a Line
- PyQt - Drawing a Rectangle
- PyQt - Drawing a Triangle
- PyQt - Drawing a Circle
- PyQt - Drawing a Ellipse
- PyQt - Drawing a Polygon
- PyQt - Geometric Transformation
- PyQt - Drawing Effect
- PyQt Groups
- PyQt - QButtonGroup
- PyQt - QGroupBox
- PyQt Effects
- PyQt - Effects
- PyQt - Opacity Effect
- PyQt - QGraphicsBlur Effect
- PyQt - QGraphicsColorize Effect
- PyQt - QGraphicsDropShadow Effect
- PyQt Events
- PyQt - Event Handling
- PyQt - File Open Event
- PyQt - Action Event
- PyQt - Hide Event
- PyQt - Resize Event
- PyQt Database
- PyQt - Database Handling
- PyQt Essentials
- PyQt - BrushStyle Constants
- PyQt - QClipboard
- PyQt - QPixmap Class
- PyQt Useful Resources
- PyQt - Quick Guide
- PyQt - Useful Resources
- PyQt - Discussion
PyQt - QBoxLayout Class
QBoxLayout class arranges the widgets horizontally or vertically. This class is derived from two different layout classes − QVBoxLayout (for arranging widgets vertically) and QHBoxLayout (for arranging widgets horizontally). On utilization of the QBoxLayout constructor, we have the direction to specify its options such as LeftToRight, RightToLeft, TopToBottom, or BottomToTop.
Sometimes, QBoxLayout doesn't manage all of the children and areas of the widget. So we must add it to the parent layout before we create anything to it. This type of layout is called parentLayout i.e. addLayout().
Margin methods in QBoxLayout
The QBoxLayout also contains two margin width −
- setContentsMargins() − This layout is used for margin to set the width of outer border.
- setSpacing() − It is used to set the property of spacing.
Following table shows the important methods of QBoxLayout class −
| Sr.No. | Methods & Description |
|---|---|
| 1 |
addWidget() Add a widget to the BoxLayout. |
| 2 |
addSpacing() Creates an empty box i.e. used for dialogs. |
| 3 |
addStretch() Create an empty and stretchable box. |
| 4 |
addLayout() Add another nested layout like class QLayout to work on geometrical operation. |
Margin and Spacing in QBoxLayout
QBoxLayout offers margin and spacing properties for layout customization. Margins define space outside the layout, while spacing controls the gap between widgets, enhancing visual appeal and readability.
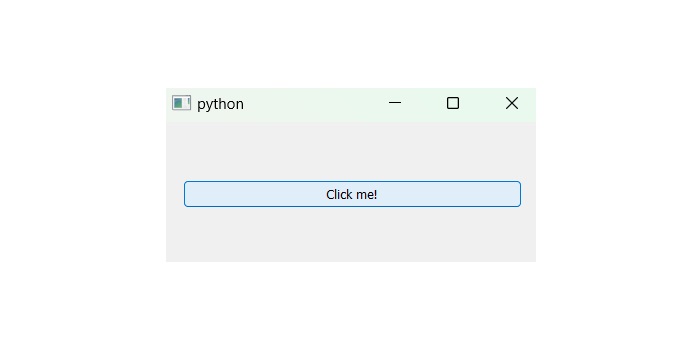
Example
In this example, we demonstrate the margin and spacing using the QBoxLayout methods.
from PyQt6.QtWidgets import QApplication, QWidget, QVBoxLayout, QPushButton

app = QApplication([])
# Create a QWidget
widget = QWidget()
# Create a QVBoxLayout
layout = QVBoxLayout(widget)
# Create a QPushButton
button = QPushButton('Click me!')
# Set contents margins for the layout
layout.setContentsMargins(30, 30, 30, 30)
# Set spacing between widgets
layout.setSpacing(10)
# Add the button to the layout
layout.addWidget(button)
widget.show()
app.exec()
Output
The above code produces the following output −
Vertical Buttons in QBoxLayout
QBoxLayout in PyQt enables easy creation of vertical buttons. By adding QPushButton widgets vertically, it simplifies the layout of vertical button arrangements in GUI applications for enhanced user interaction.
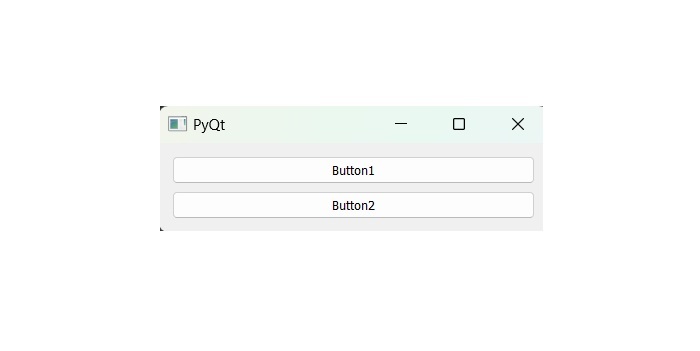
Example
In the following example, we create two buttons that are added to the vertical box layout. A stretchable space is added between them by the addStretch() method. Therefore, if the top-level window is resized, the position of the buttons automatically gets relocated.
import sys
from PyQt6.QtWidgets import QApplication, QWidget, QPushButton, QVBoxLayout
def window():
   app = QApplication(sys.argv)
   win = QWidget()

   b1 = QPushButton("Button1")
   b2 = QPushButton("Button2")
   vbox = QVBoxLayout()
   vbox.addWidget(b1)

   vbox.addStretch()
   vbox.addWidget(b2)
   win.setLayout(vbox)

   win.setWindowTitle("PyQt")
   win.show()
   sys.exit(app.exec())

if __name__ == '__main__':
   window()
Output
On executing the code, we get two buttons in PyQt window −
Horizontal Buttons using QBoxLayout class
The class QBoxLayout makes it easy to stack buttons horizontally, arranging them from left to right for a more user-friendly interface.
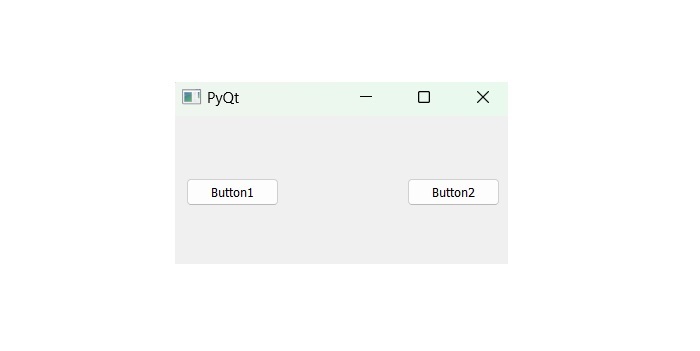
Example 1
In this example, we can use the horizontal box layout where the method addStretch() inserts a stretchable or empty space between the two button objects. Hence, the window is resized and position of the button change dynamically.
import sys
from PyQt6.QtWidgets import QApplication, QWidget, QPushButton, QHBoxLayout
def window():
   app = QApplication(sys.argv)
   win = QWidget()

   b1 = QPushButton("Button1")
   b2 = QPushButton("Button2")
   # Button appear in horizonatal direction
   hbox = QHBoxLayout()

   hbox.addWidget(b1)
   hbox.addStretch()
   hbox.addWidget(b2)
   win.setLayout(hbox)
   win.setWindowTitle("PyQt")
   win.show()
   sys.exit(app.exec())

if __name__ == '__main__':
   window()
Output
On executing the code, we get the appearance of two buttons in horizontal direction −
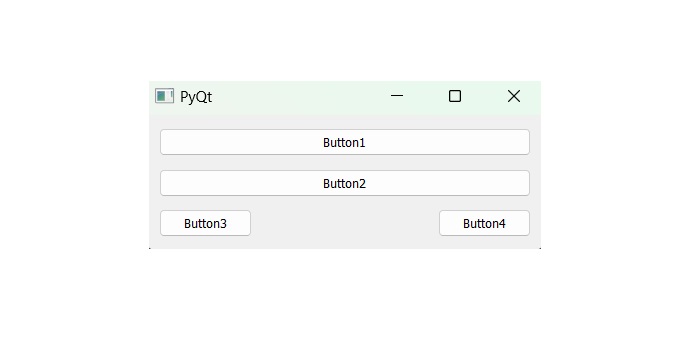
Example 2
The following example shows how the layouts can be nested. Here, two buttons are added to vertical box layout. Then, a horizontal box layout object with two buttons and a stretchable empty space is added to it. Finally, the vertical box layout object is applied to the top level window by the setLayout() method.
import sys
from PyQt6.QtWidgets import QApplication, QWidget, QPushButton, QHBoxLayout, QVBoxLayout
def window():
   app = QApplication(sys.argv)
   win = QWidget()

   b1 = QPushButton("Button1")
   b2 = QPushButton("Button2")

   vbox = QVBoxLayout()
   vbox.addWidget(b1)
   vbox.addStretch()
   vbox.addWidget(b2)
   hbox = QHBoxLayout()

   b3 = QPushButton("Button3")
   b4 = QPushButton("Button4")
   hbox.addWidget(b3)
   hbox.addStretch()
   hbox.addWidget(b4)

   vbox.addStretch()
   vbox.addLayout(hbox)
   win.setLayout(vbox)

   win.setWindowTitle("PyQt")
   win.show()
   sys.exit(app.exec())

if __name__ == '__main__':
   window()
Output
The above code produces the following output −