- PHP ImageMagick - Home
- PHP ImageMagick - Introduction
- Background Color
- Image Reflections
- Image Cropping
- Image Bordering
- Image Resizing
- Composite Images
- Contrast & Brightness
- Enhancing &Equalizing
- Sharpening & Blurring
- Image Tiling
- Image Threshold
- Modifying Colors
- Different effects
- Securing The Images
- Simulation Of Sketches
- Editing TheAppearance
- Rotation and Rolling
- Splicing & Spreading
- Miscellaneous Functions
- PHP ImageMagick Useful Resources
- PHP ImageMagick - Quick Guide
- PHP ImageMagick - Resources
- PHP ImageMagick - Discussion
PHP ImageMagick - Modifying Colors
In this chapter, you will be learning to modify and replace different colors in an image using a few inbuilt functions provided by Imagemagick.
With Imagemagick, you can adjust brightness, contrast, hue, saturation and other color parameters. You can even create complex effects such as merging multiple layers or adding special filters to your photos. This tutorial will provide an overview of how PHP Imagemagick works and how it can be used to modify the colors in digital images quickly and easily.
Colorize Image
Imagemagick's 'colorizeImage()' function is an efficient way to change the color of any part of an image. This function works by blending the chosen fill color with each pixel in the picture, creating a seamless transition between colors and producing professional-looking results.
The process eliminates much of the manual labor associated with changing colors on an image, such as selecting specific areas or hand-painting sections.
Additionally, it saves time since it allows users to make these changes quickly and easily without sacrificing quality.
Syntax
public Imagick::colorizeImage(mixed $colorize, mixed $opacity, bool $legacy = false): bool
This function takes 2 parameters − colorize and opacity.
Colorize is an Imagick object or a string containing the colorize color,
opacity is an Imagick object or a float value containing the opacity value.
If opacity is 1.0, it is fully opaque and 0.0 means fully transparent.
Example
In this example, you will be able to clearly understand the use of colorizeImage(). An imagick object is created first and the input image is taken. Then, colorizeImage() function is applied taking the required parameters (colorize=red and opacity=1). The image after blending colors is displayed an output using writeImage() function.
<?php
   $image=new Imagick($_SERVER['DOCUMENT_ROOT']."/test/image.png");
   $image->colorizeImage('red', 1, true);
   $image->writeImage($_SERVER['DOCUMENT_ROOT']."/test/colorizeImage.png");
?<
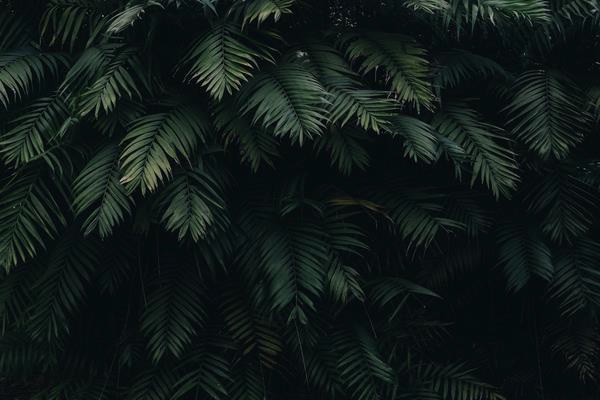
Assume that the following is the input image (image.png) in the program −

Output

Creating a Blue Shift Image
When there is a need to represent the images in moonlight or during night time you can do so using the method blueShiftImage(). This method takes an image as a parameter and mutes the colors of the image to simulate the scene nighttime in the moonlight and produces the output image.
It may also involve adjusting brightness levels, saturation, contrast, and other features to ensure the end result is as close as possible to what one might expect when viewing these images in natural light conditions.
Additionally, this technique can be used for creative purposes; by manipulating color values, interesting effects can be achieved with photos taken during twilight hours or even indoors with artificial lighting.
Syntax
public Imagick::blueShiftImage(float $factor = 1.5): bool
This function takes a factor value as its parameter. It specifies the value to mute the colors of the image.
Example
This example shows the implementation of blueShiftImage() function. A new imagick object is created and image is taken as input. Now, blueShiftImage() function is applied with factor as its parameter and the output image obtained is in the form blueShiftImage.png.
<?php
   $image=new Imagick($_SERVER['DOCUMENT_ROOT']."/test/image.png");
   $image->blueShiftImage(2);
   $image->writeImage($_SERVER['DOCUMENT_ROOT']."/test/blueShiftImage.png");
?>
Assume that the following is the input image (image.png) in the program &Minus;

Output

Replacing Colors in Images
In this section, you will be learning to replace colors in an image. There is an inbuilt function called clutImage() in Imagemagick to perform this task. With the help of this function, all the colors in an image are replaced by the specific color that the user needs. This function takes an image as input and produces the image after replacing the colors as its output.
'clutImage()' function is versatile and can be used to achieve a variety of different effects. For example, you could use it to create a monochromatic image by replacing all colors in the original image with one single color.
You could also use it to add vibrancy and contrast to an existing photo by swapping out duller tones for brighter ones.
Syntax
public Imagick::clutImage(Imagick $lookup_table, int $channel =Imagick::CHANNEL_DEFAULT): bool
This function takes in 2 parameters.
lookup_table which is an Imagick object containing the color lookup table
channel which is a Channeltype constant.
Example
In the following example, an bImagick object is created with an image as its input. A second Imagick object is then created and a new image is generated which selects 'violet' from the lookup table. The `clutImage()` method is used to replace colors, where 'violet' has been specified and no ChannelType constant has been declared; thus, the default channel will be utilized.
<?php
   $image=new Imagick($_SERVER['DOCUMENT_ROOT']."/test/imagee.png");
   $clut = new Imagick();
   $clut->newImage(1, 1, new ImagickPixel('violet'));
   $image->clutImage($clut);
   $image->writeImage($_SERVER['DOCUMENT_ROOT']."/test/clutImage.png");
?>
Assume that the following is the input image (image.png) in the program −
Output

Negation of Images
Negating the colors in images implies the reversing or inverting of the colors. For example, assume an image containing white and black colors. After negating the colors, white changes to black and black changes to white.
The 'negateImage()' function is used to negate/inverse the colors in PHP ImageMagick,
You might also use this effect to create high-contrast images by changing light tones into dark ones or deep hues into bright ones. Additionally, it is possible to achieve more subtle color shifts in your images by applying partial color negation; this means that only certain parts of the image are affected while others remain untouched.
Syntax
public Imagick::negateImage(bool $gray, int $channel =Imagick::CHANNEL_DEFAULT): bool
This function takes in 2 parameters: gray and channel.
Gray is a boolean value that decides whether to negate grayscale pixels within the image.
Channel provides any channel constant that is valid for your channel mode.
To apply more than one channel, you must combine channelType constants using bitwise operators.
Example
In the below example, you can clearly understand the implementation of negateImage() function. Firstly, you create a new imagick object and input an image. Then apply negateImage() function on the image and display the output image with the help of writeImage() function.
<?php
   $image=new Imagick($_SERVER['DOCUMENT_ROOT']."/test/image.png");
   $image->negateImage('true');
   $image->writeImage($_SERVER['DOCUMENT_ROOT']."/test/negateImage.png");
?>
Assume that the following is the input image (image.png) in the program −

Output