- PHP ImageMagick - Home
- PHP ImageMagick - Introduction
- Background Color
- Image Reflections
- Image Cropping
- Image Bordering
- Image Resizing
- Composite Images
- Contrast & Brightness
- Enhancing &Equalizing
- Sharpening & Blurring
- Image Tiling
- Image Threshold
- Modifying Colors
- Different effects
- Securing The Images
- Simulation Of Sketches
- Editing TheAppearance
- Rotation and Rolling
- Splicing & Spreading
- Miscellaneous Functions
- PHP ImageMagick Useful Resources
- PHP ImageMagick - Quick Guide
- PHP ImageMagick - Resources
- PHP ImageMagick - Discussion
PHP ImageMagick - Introduction
We know that images are an easy way to improve the user experience of any website. Many experiments proved that our brain could interpret images much quicker than text. They also help in attracting attention and triggering emotions. When it comes to presenting important information, images can be of great value.
How can we create or edit images dynamically, making them suitable for web applications? 'ImageMagick' does that!
What is ImageMagick?
ImageMagick is a freely available robust collection of tools and libraries to perform many operations on digital images.
It is a software suite to read, create, edit, compose, convert, and write images in a variety of formats.
These formats include DPX, EXR, GIF, JPG, JPEG, PNG, TIFF, etc. (over 200 formats).
These operations are available from the command line, or C, C++, Perl, Java, PHP, or Python programming languages. In this tutorial, we will be learning about ImageMagick in PHP.
What is PHP?
PHP stands for Hypertext pre-processor. It is a server-side scripting language that is embedded in HTML. It contains various built-in functions which allow for fast development. These scripts are executed on the server and the software is free to download and use.
What is ImageMagick in PHP?
ImageMagick in PHP is a native extension that does all the operations on images. Operations also include resizing, flipping, mirroring, rotating, distorting, transforming images, adjusting image colors, or even drawing text, lines, polygons, ellipses, and curves.
It is free software delivered as a ready-to-run binary distribution or as source code that you may use, copy, modify, and distribute in both open and proprietary applications.
It utilizes multiple computational threads to increase performance and can read, process, or write mega-, giga-, or tera-pixel image sizes.
It runs on Linux, Windows, Mac OS X, iOS, Android OS, and others.
Installation and Configuring
As we know that PHP is a server-side scripting language, using any web servers like Apache, Nginx, etc. to run PHP scripts would be preferable. This allows you to run the PHP scripts from your browser.
There is also another way to execute the PHP scripts which is using the command line. This doesnt require any web server to be installed. In this tutorial, you will be learning to implement ImageMagick features using the Apache server. For this, we install XAMPP.
XAMPP stands for cross-platform, Apache, Maria DB, PHP, Perl. It is a free and open-source cross-platform web server solution stack package developed by Apache Friends, consisting mainly of the Apache HTTP server, Maria DB, and interpreters for scripts written in PHP and Perl programming languages.
Installing XAMPP:
In this section, you will be able to learn the step-by-step process of installing XAMPP.
Step 1 − Open this website − https://www.apachefriends.org
Step 2 − Install the latest version of XAMPP available there which is suitable for your operating system (Windows/Linux/IOS).
Step 3 − The file downloaded will be something like 'xampp-windows-x64-7.4.27-2-VC15-installer.
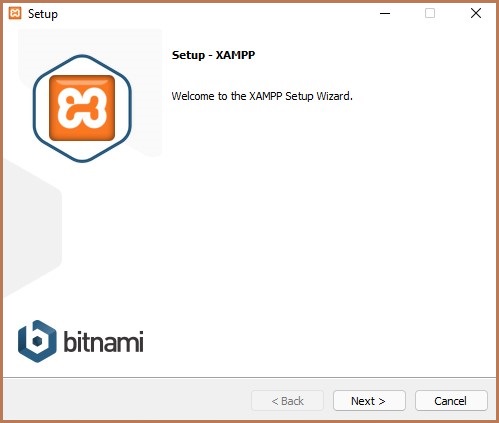
Step 4 − Run the downloaded file. You get some warning, click 'OK'.
Step 5 − The below screen appears, click 'Next'.
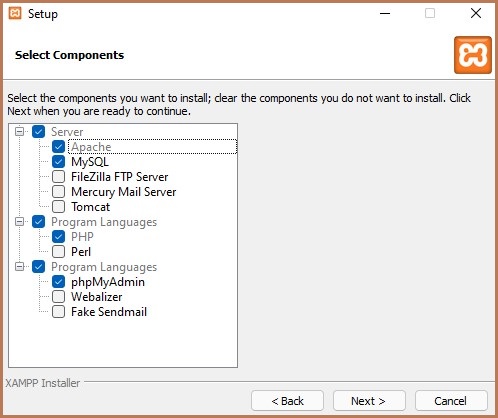
Step 6 − Select Apache, MySQL, PHP, and phpMyAdmin. and click 'Next'.
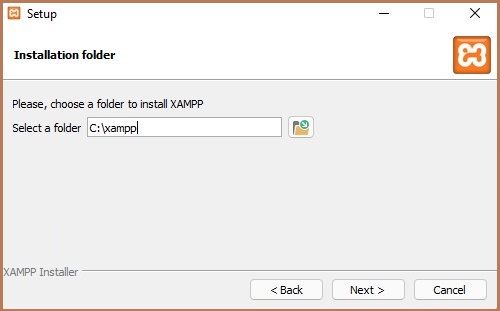
Step 7 − In this step, select any specific folder, or else, you can leave it as it is(default). Click 'Next'.
Step 8 − In the next step, the files will be unpacked automatically. After the process completes, click 'Next'.
Step 9 − After it completes 100%, click 'Next'.
Step 10 − Now, there appears a dialog box which contains 'Completing the XAMPP setup wizard', then click 'Finish'.
Installing ImageMagick
In this section, you will learn to install the ImageMagick extension and installer in PHP.
Step 1 − Open the website https://mlocati.github.io
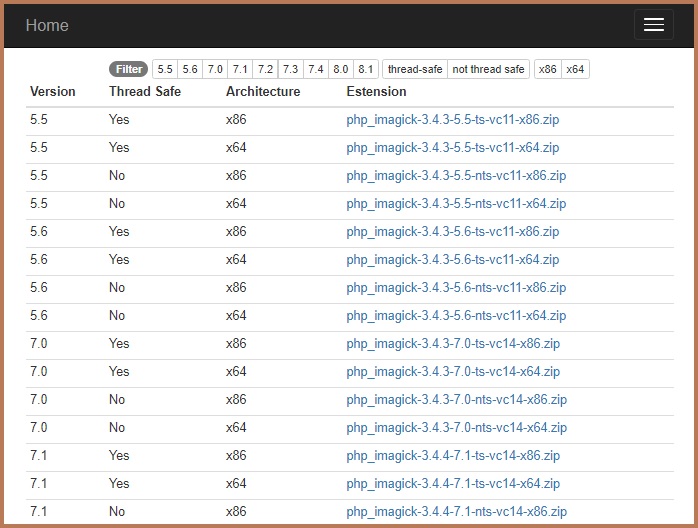
Step 2 − Download both the ImageMagick extension and installer according to your PHP configuration, architecture, and thread-safety of your XAMPP version.
Downloaded installer file will be in the form 'ImageMagick-7.1.0-18-vc15-x64.zip'
Downloaded ImageMagick extension is in the form 'php-imagick-3.7.0-7.4-ts-vc15-x64.zip'.
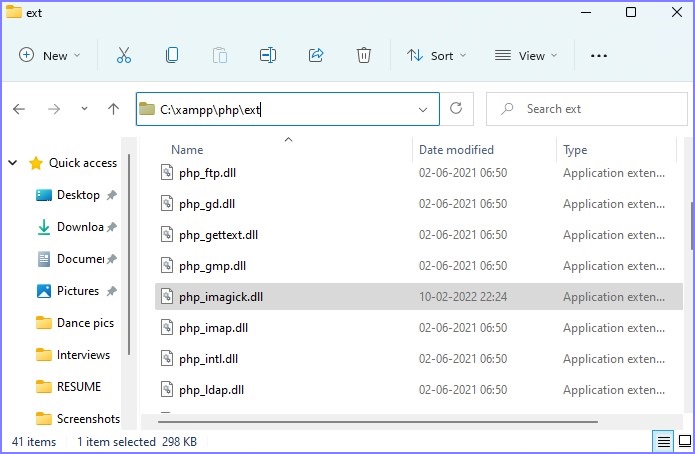
Step 3 − Extract all the files from the extension file downloaded (from (b)). And from those files, copy the php_imagemagick.dll file.
Step 4 − Paste the file into the ext directory of your PHP installation.
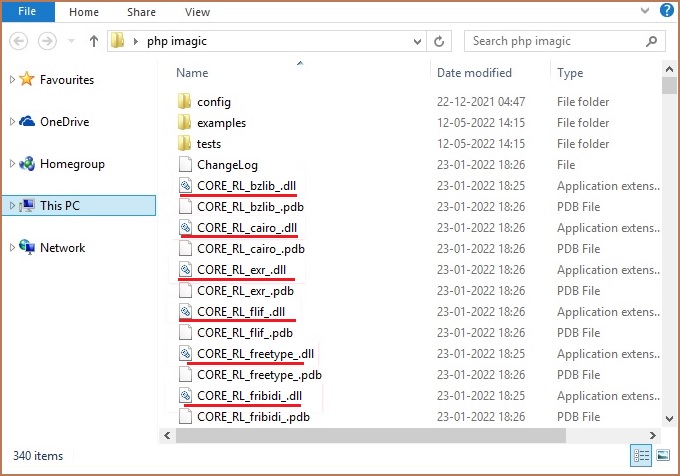
Step 5 − Extract all files from the installer file downloaded (from (a)). From that, copy all files starting with CORE_DL / IM_MOP_RL/FILTER which are DLL files. The files start from CORE_RL_bzlib_.dll as shown in the below image. Choose the files until where they end with IM_MOD_RL_yuv_.dll.
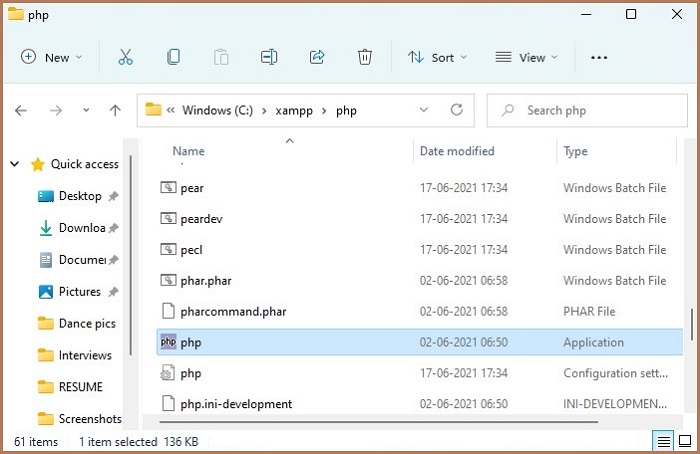
Step 6 − Paste those files to the PHP root directory where there is 'php.exe'.
Step 7 − Now, go to XAMPP Control Panel. Stop Apache.
Step 8 − Click 'Config' and select PHP (php.ini) file.
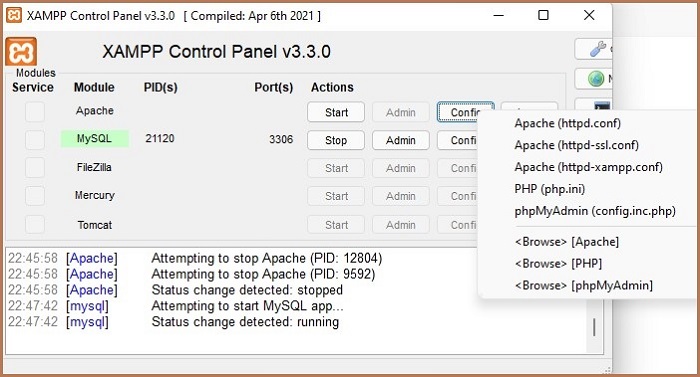
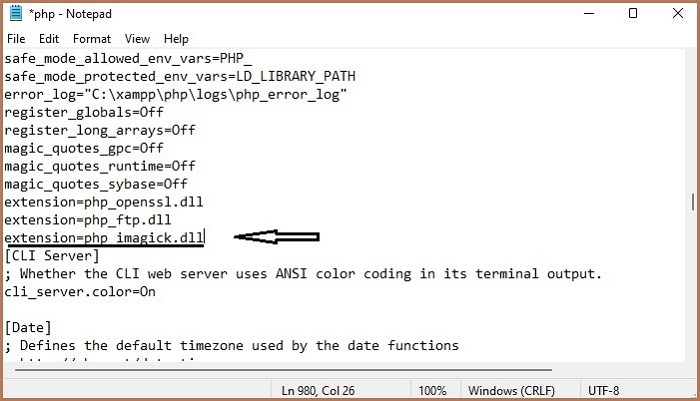
Step 9 − In that file, find 'extensions' in that code. After 'extension=php_ftp.dll' line, type 'extension=php_imagick.dll'. Save the file.
Step 10 − Restart Apache.
Step 11 − Installation completed.
Verification
Before directly jumping to the execution part, let us first check whether Imagemagick is properly installed in PHP on your system. For this, follow the below steps.
Step 1 − Go to the browser and click 'localhost'.
Step 2 − Go to 'phpinfo' which is in the top right corner.
Step 3 − Search for Imagick. The screen must appear as shown below.
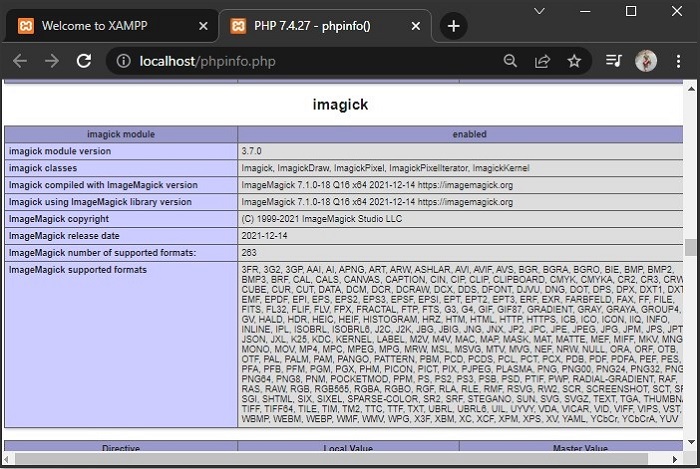
Step 4 − If it appears, the Imagick setup is successfully done. This package contains the Imagick module version, Imagick classes, release dates, and all the supported formats.
