- OBIEE - Home
- OBIEE - Data Warehouse
- OBIEE - Dimensional Modeling
- OBIEE - Schema
- OBIEE - Basics
- OBIEE - Components
- OBIEE - Architecture
- OBIEE - Repositories
- OBIEE - Business Layer
- OBIEE - Presentation Layer
- OBIEE - Testing Repository
- OBIEE - Multiple Logical Table
- OBIEE - Calculation Measures
- OBIEE - Dimension Hierarchies
- OBIEE - Level-Based Measures
- OBIEE - Aggregates
- OBIEE - Variables
- OBIEE - Dashboards
- OBIEE - Filters
- OBIEE - Views
- OBIEE - Prompts
- OBIEE - Security
- OBIEE - Administration
OBIEE Testing Repository
You can check the repository for errors by using the consistency checking option. Once it is done, next step is to load the repository into Oracle BI Server. Then test the repository by running an Oracle BI analysis and verifying the results.
Go to File → click on Check Global Consistency → You will receive the following message → Click Yes.
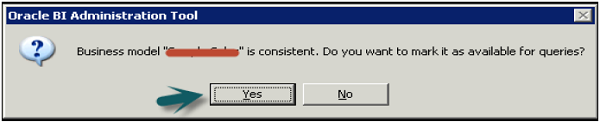
Once you click OK → Business model under BMM will change to Green → Click on save the repository without checking global consistency again.
Disable Caching
To improve query performance, it is advised to disable BI server cache option.
Open a browser and enter the following URL to open Fusion Middleware Control Enterprise Manager: http://<machine name>:7001/em
Enter the user name and password. Click Login.
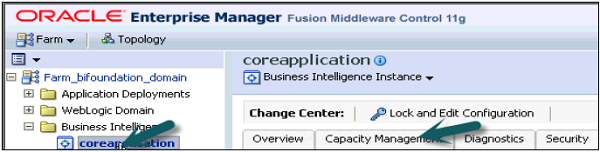
On the left side, expand Business Intelligence → coreapplication → Capacity Management tab → Performance.
Enable BI Server Cache section is by default checked → Click on Lock and Edit Configuration → Close.
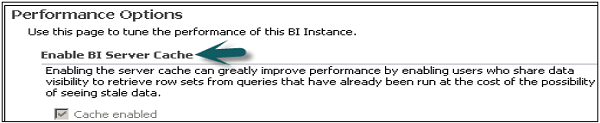
Now deselect cache enabled option. It is used to improve query performance. Go to Apply → Activate Changes → Completed Successfully.
Load the Repository
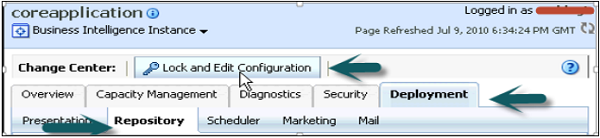
Go to Deployment tab → Repository → Lock and Edit Configuration → Completed Successfully.
Click on Upload BI Server Repository section → Browse to open the Choose file dialog box → select the Repository .rpd file and click Open → Enter Repository password → Apply → Activate Changes.
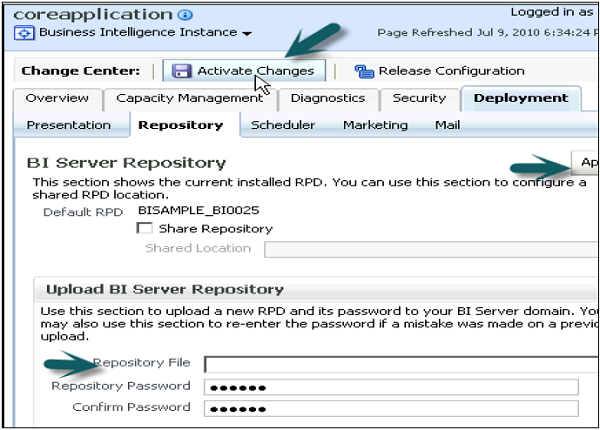
Activate Changes → Completed Successfully → Click on Restart to apply recent changes option at the top → Click Yes.
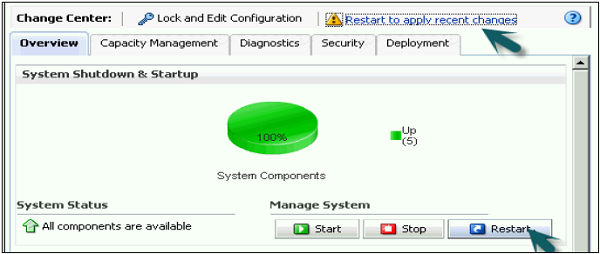
Repository is successfully created and loaded for query analysis.
Enable Query Logging
You can set up query logging level for individual users in OBIEE. Logging level controls the information that you will retrieve in log file.
Set Up Query Logging
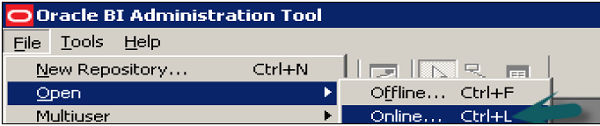
Open the Administration tool → Go to File → Open → Online.
Online mode is used to edit the repository in Oracle BI server. To open a repository in online mode, your Oracle BI server should be running.
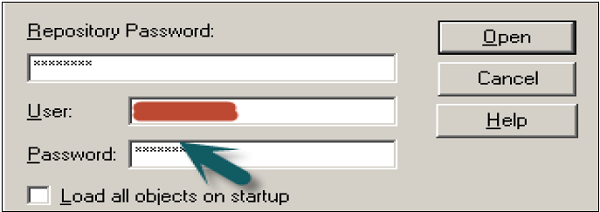
Enter the Repository password and user name password to login and click Open to open the repository.
Go to Manage → Identity → Security Manager Window will open. Click BI Repository on the left side and double-click on Administrative user → User dialogue box will open.
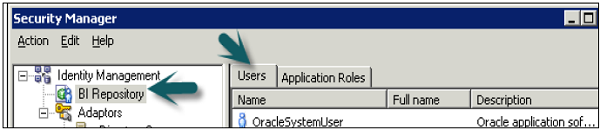
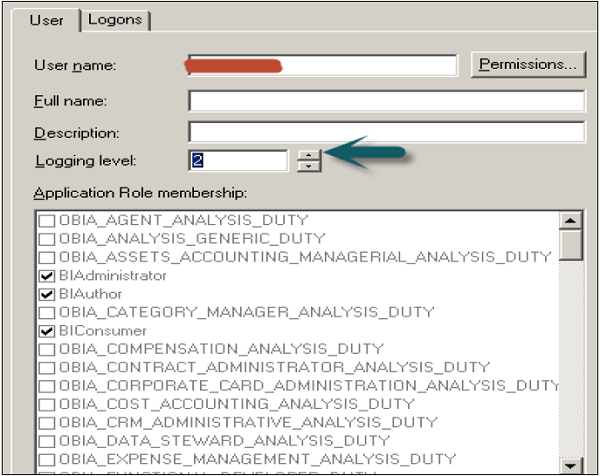
Click User tab in user dialogue box, you can set logging levels here.
In normal scenario − The user has a logging level set to 0 and the administrator has a logging level set to 2. Logging level can have values starting from Level 0 to level 5. Level 0 means no logging and Level 5 means maximum logging level information.
Logging Level Descriptions
| Level 0 | No logging |
| Level 1 | Logs the SQL statement issued from the client application Logs elapsed times for query compilation, query execution, query cache processing, and back-end database processing Logs the query status (success, failure, termination, or timeout). Logs the users ID, session ID, and request ID for each query |
| Level 2 | Logs everything logged in Level 1 Additionally, for each query, logs the repository name, business model name, presentation catalog (called Subject Area in Answer) name, SQL for the queries issued against physical databases, queries issued against the cache, number of rows returned from each query against a physical database and from queries issued against the cache, and the number of rows returned to the client application |
| Level 3 | Logs everything logged in Level 2
Additionally, adds a log entry for the logical query plan, when a query that was supposed to seed the cache was not inserted into the cache, when existing cache entries are purged to make room for the current query, and when the attempt to udate the exact match hit detector fails |
| Level 4 | Logs everything logged in Level 3 Additionally, logs the query execution plan. |
| Level 5 | Logs everything logged in Level 4 Additionally, logs intermediate row counts at various points in the execution plan. |
To Set Logging Level
In user dialogue box, enter value for logging level.
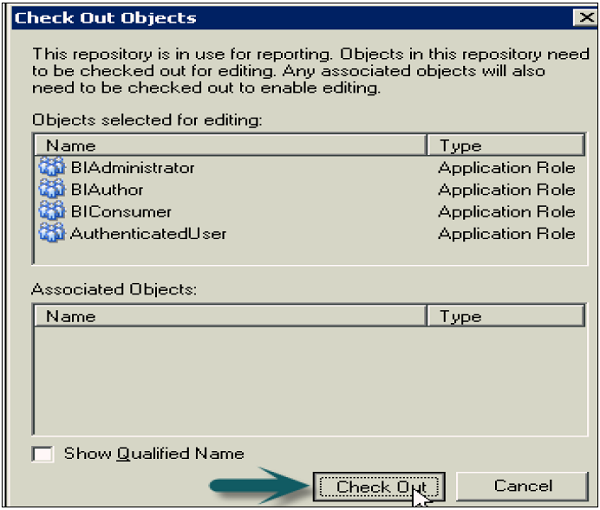
Once you click OK, it will open the checkout dialogue box. Click Checkout. Close the Security Manager.
Go to file → Click on check-in changes → Save the repository using the Save option at the top → To take changes in effect → Click OK.

Use Query Log to Verify Queries
You can check query logs once query logging level is set by going to Oracle Enterprise Manager and this helps to verify queries.
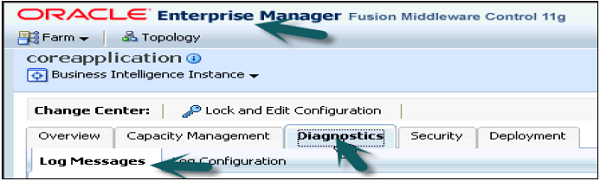
To check the query logs to verify queries, go to Oracle Enterprise Manager OEM.
Go to diagnostic tab → click Log messages.
Scroll down to bottom in log messages to see Server, Scheduler, Action Services and other log details. Click on Server log to open log messages box.
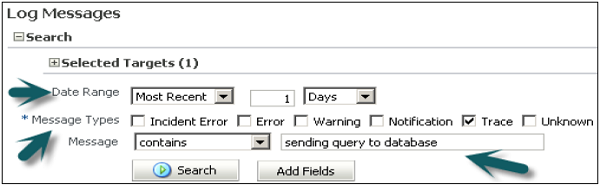
You can select various filters − Date Range, Message types and message contains/not contains fields, etc. as shown in the following snapshot −
Once you click on search, it will show log messages as per filters.

Clicking on collapse button allows you to check details of all log messages for queries.
