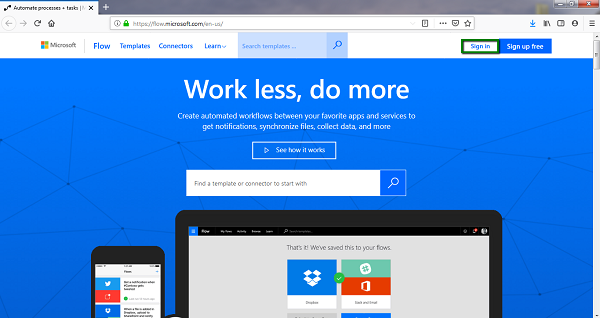
- Microsoft Flow - Home
- Microsoft Flow - Introduction
- Microsoft Flow - Getting Started
- Microsoft Flow - Creating a Flow from Blank
- Microsoft Flow - Creating a Flow from Template
- Microsoft Flow - Mobile
- Microsoft Flow - Flow Management
- Microsoft Flow - Conclusion
- Microsoft Flow Useful Resources
- Microsoft Flow - Quick Guide
- Microsoft Flow - Useful Resources
- Microsoft Flow - Discussion
Microsoft Flow - Getting Started
This chapter will get you started with Microsoft Flow by illustrating basic steps required to log into Microsoft Flow and then will provide a walkthrough in the interface. Concluding part will provide an insight into the types of flows.
Logging in to Microsoft Flow
Whether you are Microsoft Business Suite (Office 365, etc.) user or not, Microsoft Flow will be available to you once you have a Microsoft account. So, before diving into the next steps, please make sure that you have a valid Microsoft account.
To start with enter https://login.microsoftonline.com/organizations/oauth2/v2.0 in your browser address bar. You will be able to see below screen.
As highlighted in green rectangle in the above picture, click Sign In to continue. Below screen will be displayed.
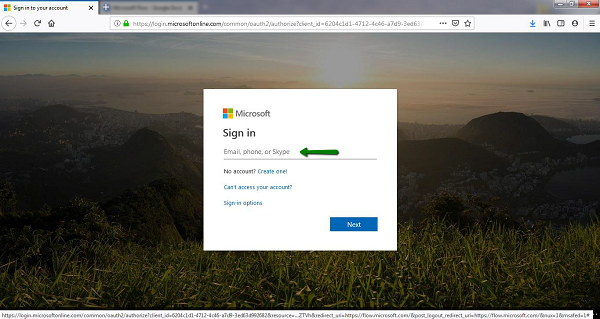
In the text area, enter your Microsoft email address and password to log in to Microsoft Flow.
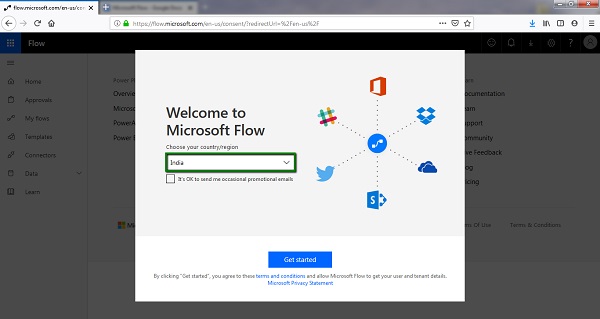
Below screen will be displayed welcoming you to Microsoft Flow. Select your country/region and click Get Started.
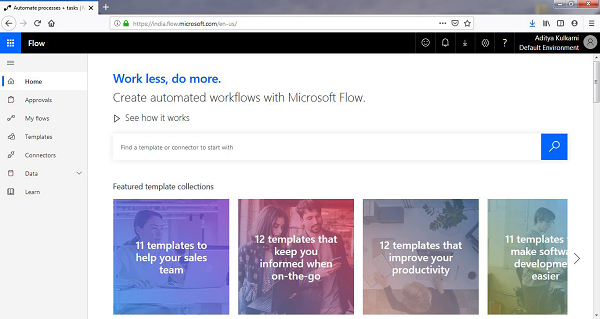
After taking few seconds, Microsoft Flow interface will be shown as below.
Let us look at the interface of Microsoft Flow.
Walkthrough in the interface
When you log in to Microsoft Flow, the interface is divided into three sections −
- Top panel
- Page body
- Navigation panel
Refer to the below screenshot for the specific layout.
Top panel
The top panel consists of controls to provide notifications related to any flow, modify the settings related to the flows or connections you have created, a form to submit your feedback to Microsoft Flow and finally shortcut to the other Microsoft applications.
Page Body
Based on the option youve selected from the left navigation panel, page body will show up relevant features/content.
For instance, now that youre logged in and viewing the Home page, the page body area will be showing ideas to create your own flow, available template flows and links to Flow mobile apps on Android, iOS and Microsoft app stores.
Navigation Panel
While we will dig deep into them separately, navigation panel is present to the left side of the screen to enable switching over from one particular screen to the other. For instance, if you wish to review available flows before you create your own -- you can switch from My Flows to Templates.
In the navigation panel, you will be able to see below options −
- Home
- Approvals*
- My flows
- Templates
- Connectors
- Data
- Entities*
- Connections
- Custom Connectors*
- Gateways*
- Learn
*(available only for Microsoft work or school accounts)
What is the difference between Microsoft work (or school) accounts and Personal accounts?
When it comes to enterprise organizations, it makes sense to subscribe for a bouquet of services than to create individual accounts.
At Microsoft, there are two types of accounts −
- Personal -- which you might have created so that you can get started with Microsoft Flow
- Work or school -- provided to the organizations or schools with 20 or more individuals. These accounts come with a plethora of other data intensive services like Microsoft PowerApps, PowerBI, etc.
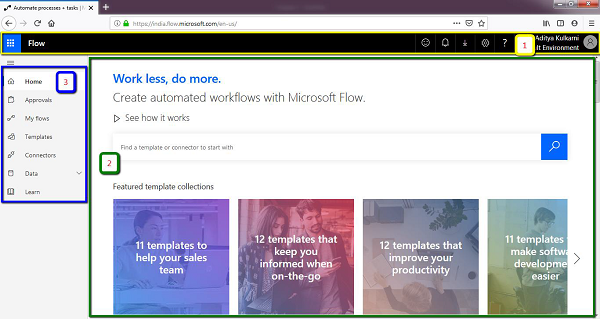
Home
In the following section, we will discuss about features of Home menu.
Search bar
In the Home section, you will find the features ready to get you started with Microsoft Flow. For example, there is a search section where you can find the required template or connector to start your flow.
Try typing the following text in the search bar and click the magnifier button in blue.
OneNote
This will show below search result −
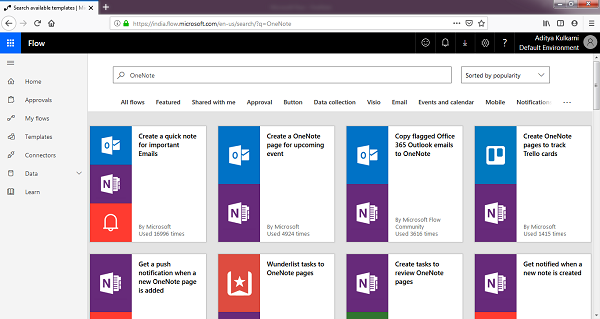
As it is evident, the search result presented you with all the template flows available for your use.
Go back to the Home section, by using the navigation panel on the left.
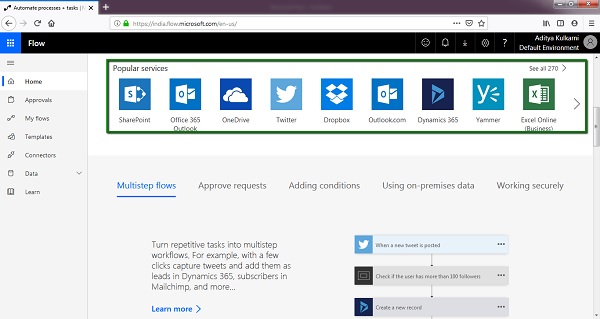
As you scroll down, you will find popular services that you can use in your flows.
My Flows
This section is available to keep track of all your created, completed and draft flows. Suppose you start working on a particular flow, and you want to complete it at a later stage, you can use this section.
Also, if youd like to look at examples from the flows you created earlier, this section will prove very handy.
The My Flows section is sub-divided into three screens.
- My Flows
- Team Flows*
- Business Process Flows*
*(available only for Microsoft work or school accounts)
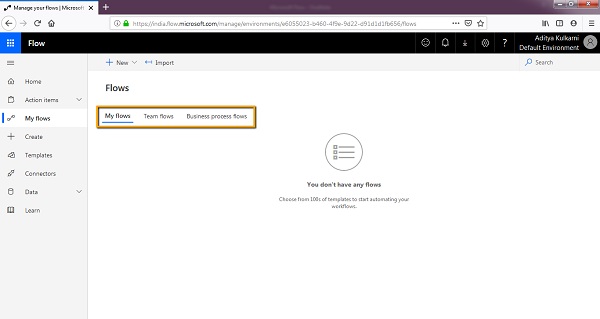
As highlighted, you can browse through all the tabs and reach the desired/required flow for revision or reuse.
The screen shown above mentions that You dont have any flows. This is because there is no flow created with our account.
As we progress and create flows during this tutorial, this section will be our frequently visited section.
Templates
Templates section is the one place for all kinds of flow. If youre looking for an inspiration or a ready to go flow, you can start with Templates section.
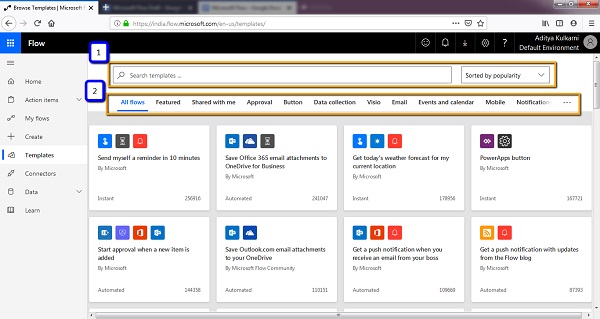
The screen above gives a glimpse at Template section. We were able to see some templates available at the home screen as well, if youd like to discover more, you can come to Templates section and get started!
As highlighted, the screen has two controls −
- Search templates feature
- Templates arranged in a tabbed structure
Search templates feature
The search functionality works like any other search feature, additionally, you can sort the search results by
- Popularity
- Name
- Published time
Templates in tabbed structure
The tabs are organized according to the application of flow. Flows are available to set the reminder or get a notification on your desktop whenever you receive an email. If youd like to do the flows related to the Emails, you can directly go Email tab and check out the available flows.
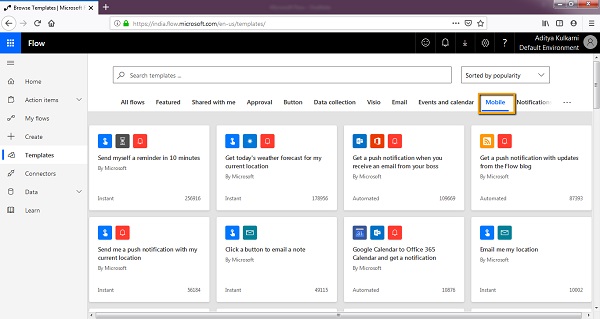
For instance, if you select Mobile, you will see below results.
Connectors
Connectors are nothing but services which you can use with Microsoft Flow. There are around 220 services (and counting), which can be seen under this section.
Connectors form the core of Microsoft Flow.
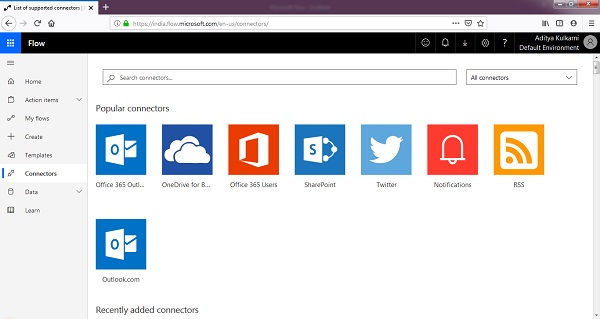
As shown above some popular connectors include −
- SharePoint
- Office 365
- Outlook.com
If you scroll down you can see all the connectors with Microsoft Flow. Primarily, there are below connector types in Microsoft Flow as shown below −
- Standard Connectors
- Premium Connectors
- Custom Connectors
Standard Connectors
You can look at Standard Connectors as services which are available to use out-of-the-box. The list will include services right from Microsoft Excel (a spreadsheet software) to Todoist (a task management application).
In short, Standard connectors come with their pre-defined capabilities of extracting data from the respective services.
Premium Connectors
Premium connectors are usually the paid/business tools, which may or may not be sufficient for personal use. These connectors require work or school account. One example could be Eventbrite, where you get to post events in your area and invite people to it.
If youd like to extract data from Eventbrite event, then it needs a connection with an organization level account.
Custom Connectors
Custom connectors exist to provide the most flexibility and power to the Microsoft Flow user. Consider that there are Application Programming Interfaces (APIs) available from a particular service or application, which youd like to utilize. The Custom Connectors will provide a connection to these APIs from Microsoft Flow.
For the scope of this tutorial, we will look at Standard Connectors only.
Data Connections
If you are creating connectors which involve fetching/updating records from a data-intensive application/services, then the connections made to these application/services will be shown up under this section.
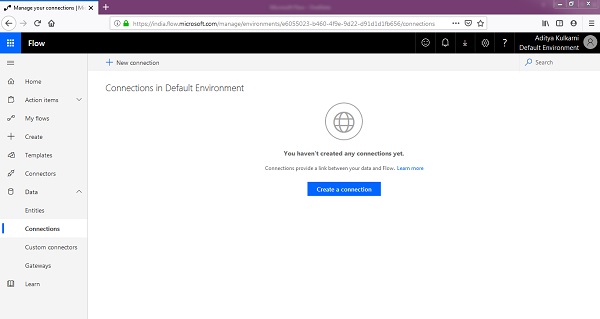
The connections will be used if you are using Powerapps.com majorly in your applications. One good example will be updating SQL table from application. In such scenario, the connection will be updated/shown in the section.
Learn
When you click Learn, youll be redirected to Microsofts official documentation of Microsoft Flow.
Types of Flows
There are different types of flow, they can be manual or automatic −
- Automated
- Instant
- Scheduled
Automated Flow
This flow is in a way dependent on another trigger or action. So, when that particular event occurs, this flow starts. It could be a date change or receiving an email.
Instant Flow
Microsoft Flow provides a button or input from Microsoft PowerApps to trigger a specific flow. These are categorized as Instant Flows.
Scheduled Flow
As per the time and date youve set, this flow is triggered. This can be a recurring flow as well.
