- Microsoft Copilot - Home
- Microsoft Copilot - Getting Started
- Microsoft Copilot vs Copilot Studio
- Microsoft Copilot - Licensing
- Microsoft Copilot - Beginners
- Microsoft Copilot - MS Office
- Microsoft Copilot - Professionals
- Microsoft Copilot - Prompt Engineering
- Microsoft Copilot - Lab
- Microsoft Copilot - Adoption Kit
- Microsoft Copilot - Scenario Library
- Microsoft Copilot Vs. GitHub Copilot
Microsoft Copilot For Professionals
As Microsoft Copilot continues to revolutionise how users interact with the Office suite, it has also grown to offer more than just basic assistance. People who have a basic idea about Copilot can follow this tutorial to see Copilot's advanced technical capabilities with some complex prompts. This will help you unlock more hidden features of Microsoft Copilot.
Advanced Features and Capabilities
Natural Language Processing (NLP) in Copilot
Experienced users can leverage NLP to input more advanced queries.
Step 1 − Open Microsoft Word (or any Office app) where your Copilot is enabled.
Step 2 − Activate Copilot by selecting the Copilot icon on the top right corner or you can also use the shortcut key (Ctrl + Q) for Windows.
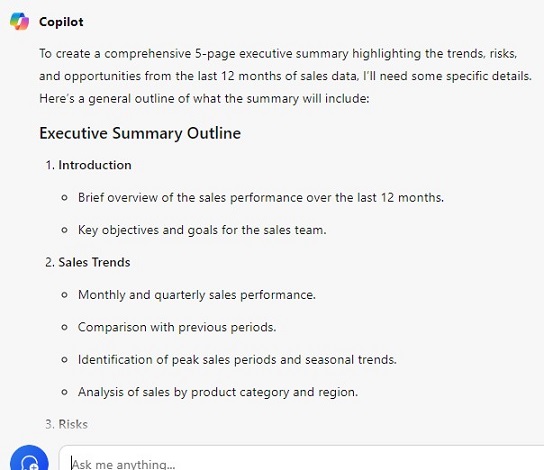
Step 3 − Enter a complex command in natural language. For example, "Generate a 5-page executive summary from the last 12 months of sales data, highlighting trends, risks, and opportunities".
Step 4 − Refine the result by asking further questions like, "Summarise risks in bullet points and make a risk calculation using three business formulas".
Pro Tip − You can get the most accurate results by specifying each and everything and keeping the language simple and clear. Details like data frames, timeframes, document types, analysis, extra formulas, etc. can be mentioned.
Custom AI Models
For businesses working with custom datasets or models, Copilot can integrate AI models specific to your organisation's needs.
Step 1 − Open Excel or Power BI where you have large datasets or custom AI models already in use.
Step 2 − Link your AI model −
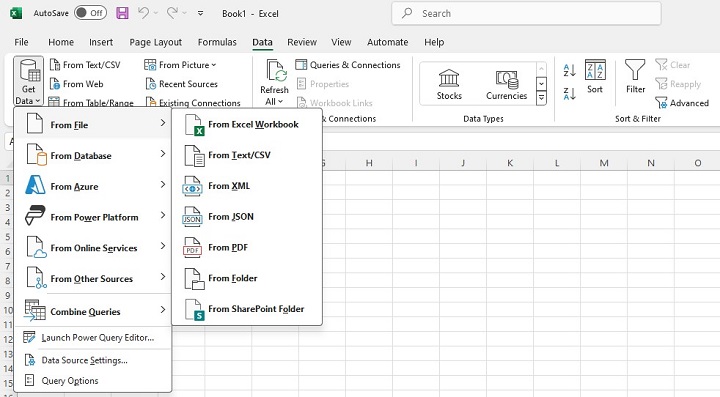
- In Excel, navigate to the Data tab.
- Select Get Data and choose from Azure AI Services, Power Query, or other available connectors to link your custom AI model.
Step 3 − Instruct Copilot to use the model by writing the prompt:
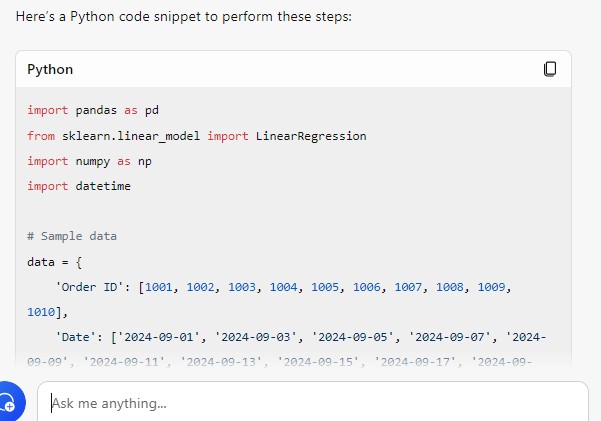
"Use the custom AI model to predict the sales for the next quarter based on this dataset."
Step 4 − Copilot will access your linked AI model and provide a detailed analysis. If you do not have any pre-trained AI model, then Copilot will provide you with the algorithm having some pre-built ML libraries.
Pro Tip − If you're familiar with Power BI, you can integrate advanced machine learning models from Azure and have Copilot analyse the data with those models, giving you the analysis of predicted results.
Contextual Learning and Refinement
Copilot improves with your regular usage and adapts to your personal preferences. Heres what you can do.
- Train Copilot with consistent tasks − As you work in Word, Excel, or PowerPoint, give Copilot similar tasks regularly. For example, you may repeatedly ask it to summarise reports or format documents in a specific style.
- Learnings − Over time, Copilot will suggest formats or insights that match your previous commands. You might notice Copilot suggests actions without being prompted, such as "Would you like me to format this like your previous report?"
- Refine Suggestions − For example, if you prefer your reports to be formatted differently, correct the formatting manually and instruct Copilot to "Always format future reports this way."
Pro Tip − The more you use Copilot for routine tasks, the more personalised and efficient it becomes. It saves time by anticipating your needs.
Workflow Automation Using Copilot
Complex Macros and Automation Across Applications
Microsoft Copilot can streamline your work by automating tasks across different Office applications using macros. These macros can be set up to perform repetitive tasks or actions within applications like Excel, Word, and Outlook, then executed across applications seamlessly using Copilot.
Create a Macro in Excel
Step 1 − Open Excel and navigate to the View tab.
Step 2 − Click on Macros > Record Macro.
Step 3 − Record a series of actions (e.g., formatting cells, applying formulas, generating a pivot table).
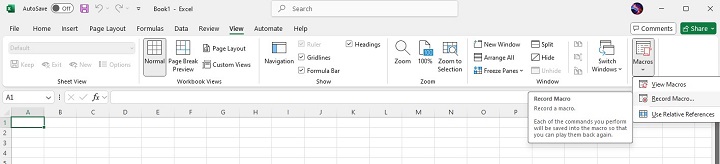
Step 4 − Once done, click Stop Recording.
Step 5 − Save and Name Your Macro: Save the macro with a descriptive name so Copilot can identify and run it later.
Step 6 − Run the Macro Using Copilot in Excel
Step 7 − Open Excel where you have the relevant data.
Step 8 − Type in the Copilot window: "Run the macro to format sales data and generate the pivot table."
Copilot will execute the macro you recorded, applying all the formatting and generating the table as instructed.
Automate Across Multiple Applications
Let's say you want to automate the process of generating a report in Excel and then emailing it via Outlook. Here are the steps −
- In Excel, once the macro has been executed and the report is ready, you can tell Copilot: "Send this report via Outlook to the finance team with the subject 'Weekly Sales Report'."
- Copilot will open Outlook, attach the file, draft the email, and send it, all in one seamless action.
Pro Tip − If you have multiple applications in your automation system, make sure the macro names are descriptive so that Copilot is easily accessible in Word, Excel, and Outlook.
Scripting and Custom Code Execution
For users who need more advanced automation, Copilot can run custom scripts in PowerShell, VBA, or Python to automate data processing, report generation, or system tasks.
Prepare a Script in VBA or PowerShell
Step 1: Enable the Developer Tab in Excel or Word
To write and run VBA scripts, you need to enable the Developer Tab in Excel or Word.
- Launch the application where you wish to use VBA scripting (Excel for data tasks or Word for document formatting).
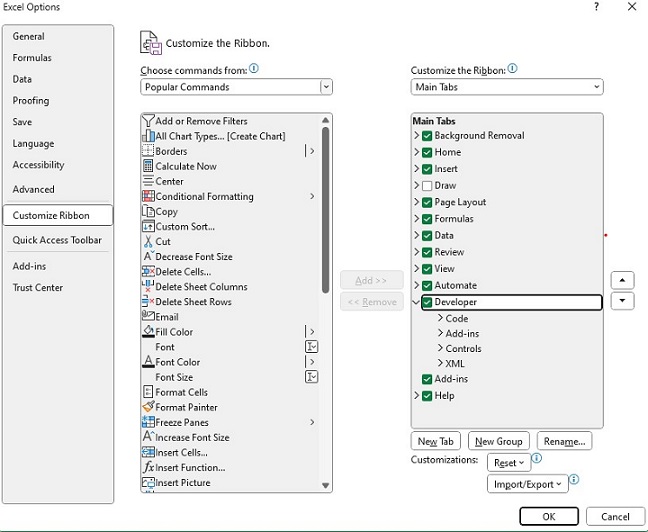
- Enable Developer Tab: Go to the File tab and click Options.
- In the Excel (or Word) Options window, click Customise Ribbon on the left panel.
- On the right side, check the box next to Developer under the "Main Tabs" section.
- Click OK to enable the Developer tab in the ribbon.
- You should now see the Developer tab in the toolbar.
Step 2: Create a New VBA Script
- First, click on the Developer tab and select Visual Basic (or press Alt + F11).
- In the Visual Basic for Applications (VBA) window, click Insert > Module to create a new module where your script will be written.

Here, you can also generate scripts with the help of Copilot which can save you a lot of time.
This script copies data from a given range in the current sheet and generates a new worksheet titled "Quarterly Sales Report." You can modify the range or format to suit your needs.

After writing the script, save it by clicking File > Save.
Give your script a clear name like "Quarterly_Report_Generator" for easy identification.
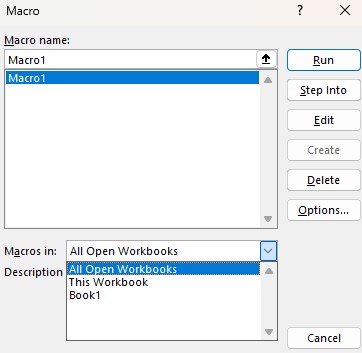
Step 3: Running VBA Scripts in Copilot
- In Excel or Word, open the Copilot interface.
- In the Copilot chat or input box, type: "Run the VBA script 'Quarterly_Report_Generator' to generate the report from the current data."
- Copilot will run the Quarterly_Report_Generator script and generate the report from the dataset in your active worksheet.
- You'll see a message box confirming that the report has been generated, and the newly formatted report will be displayed in a separate worksheet.
Step 4: Customise the VBA Script for More Automation
You can further automate tasks like chart creation, custom formatting, or data validation. For instance, you could modify the script to generate a chart −

Automate with PowerShell
If you have a system-level script in PowerShell, open PowerShell and create a script that manages server data, connects to APIs, or automates folder management.
Step 1 − Open PowerShell ISE or a standard PowerShell window.
Step 2 − Create and Write a PowerShell Script. For example, ask the Copilot with the prompt −

This script lists the names and sizes of all files in a specified directory, saving the report as a .csv file.
Step 3 − Save the script as "Generate_Directory_Report.ps1".
Step 4 − Run the Script Using Copilot: "Run the PowerShell script 'Generate_Directory_Report' to create a report of file sizes in the directory."
Copilot will execute the PowerShell script, and youll receive the generated report at the designated path.
Troubleshooting and Optimization
Copilot can assist in diagnosing and resolving performance issues in Office applications, workflows, and datasets. This includes troubleshooting slow performance, identifying errors, and recommending optimizations.
Run Diagnostics for Performance Issues in Excel
If Excel is running slow due to large datasets or complex calculations, ask Copilot for help −
- Type: "Diagnose why this Excel file is running slow."
- Copilot will scan for issues such as excessive use of volatile functions, large data ranges, or inefficient formulas.
- It will provide suggestions, like: "Consider using INDEX instead of VLOOKUP to speed up lookups" or "Reduce the dataset size by removing unnecessary columns."
If a macro or script is failing, Copilot can help identify the issue.
- Type: "Debug the 'Quarterly_Report_Generator' macro and fix any errors."
- The Copilot will scan the VBA code and highlight the problematic lines. It may suggest fixes like correcting variable declarations, loops, or missing references.
Pro Tip − Use Copilot's recommendations to automate error logging in Excel or Power BI, allowing you to keep track of recurring issues for faster troubleshooting in the future.
Future of AI and Copilot in Enterprise
Microsoft continues to invest heavily in AI, and Copilot is expected to gain more advanced features in the near future. Future updates could include even better NLP understanding, more industry-specific models, and enhanced data integration capabilities across non-Microsoft services. As businesses lean more heavily into automation, Copilot will play a key role in driving small and large IT sectors.
