- Impala - Home
- Impala - Overview
- Impala - Environment
- Impala - Architecture
- Impala - Shell
- Impala - Query Language Basics
- Table Specific Statements
- Impala - Create Table Statement
- Impala - Insert Statement
- Impala - Select Statement
- Impala - Describe Statement
- Impala - Alter Table
- Impala - Drop a Table
- Impala - Truncate a Table
- Impala - Show Tables
- Impala - Create View
- Impala - Alter View
- Impala - Drop a View
- Impala - Clauses
- Impala - Order By Clause
- Impala - Group By Clause
- Impala - Having Clause
- Impala - Limit Clause
- Impala - Offset Clause
- Impala - Union Clause
- Impala - With Clause
- Impala - Distinct Operator
- Impala Useful Resources
- Impala - Quick Guide
- Impala - Useful Resources
- Impala - Discussion
Impala - Alter Table
The Alter table statement in Impala is used to perform changes on a given table. Using this statement, we can add, delete, or modify columns in an existing table and we can also rename it.
This Chapter explains various types of alter statements with syntax and examples. First of all assume that we have a table named customers in the my_db database in Impala, with the following data
ID   NAME     AGE   ADDRESS    SALARY
--- --------- ----- ----------- --------
1   Ramesh    32    Ahmedabad   20000
2   Khilan    25    Delhi       15000
3   Hardik    27    Bhopal      40000
4   Chaitali  25    Mumbai      35000
5   kaushik   23    Kota        30000
6   Komal     22    Mp          32000
And, if you get the list of tables in the database my_db, you can find the customers table in it as shown below.
[quickstart.cloudera:21000] > show tables;

Query: show tables
+-----------+
| name      |
+-----------+
| customers |
| employee  |
| student   |
| student1  |
+-----------+
Altering the name of a table
Syntax
The basic syntax of ALTER TABLE to rename an existing table is as follows −
ALTER TABLE [old_db_name.]old_table_name RENAME TO [new_db_name.]new_table_name
Example
Following is an example of changing the name of the table using the alter statement. Here we are changing the name of the table customers to users.
[quickstart.cloudera:21000] > ALTER TABLE my_db.customers RENAME TO my_db.users;
After executing the above query, Impala changes the name of the table as required, displaying the following message.
Query: alter TABLE my_db.customers RENAME TO my_db.users
You can verify the list of tables in the current database using the show tables statement. You can find the table named users instead of customers.
Query: show tables
+----------+
| name     |
+----------+
| employee |
| student  |
| student1 |
| users    |
+----------+
Fetched 4 row(s) in 0.10s
Adding columns to a table
Syntax
The basic syntax of ALTER TABLE to add columns to an existing table is as follows −
ALTER TABLE name ADD COLUMNS (col_spec[, col_spec ...])
Example
The following query is an example demonstrating how to add columns to an existing table. Here we are adding two columns account_no and phone_number (both are of bigint data type) to the users table.
[quickstart.cloudera:21000] > ALTER TABLE users ADD COLUMNS (account_no BIGINT,
phone_no BIGINT);
On executing the above query, it will add the specified columns to the table named student, displaying the following message.
Query: alter TABLE users ADD COLUMNS (account_no BIGINT, phone_no BIGINT)
If you verify the schema of the table users, you can find the newly added columns in it as shown below.
quickstart.cloudera:21000] > describe users;

Query: describe users
+------------+--------+---------+
| name       | type   | comment |
+------------+--------+---------+
| id         | int    |         |
| name       | string |         |
| age        | int    |         |
| address    | string |         |
| salary     | bigint |         |
| account_no | bigint |         |
| phone_no   | bigint |         |
+------------+--------+---------+
Fetched 7 row(s) in 0.20s
Dropping columns from a table
Syntax
The basic syntax of ALTER TABLE to DROP COLUMN in an existing table is as follows −
ALTER TABLE name DROP [COLUMN] column_name
Example
The following query is an example of deleting columns from an existing table. Here we are deleting the column named account_no.
[quickstart.cloudera:21000] > ALTER TABLE users DROP account_no;
On executing the above query, Impala deletes the column named account_no displaying the following message.
Query: alter TABLE users DROP account_no
If you verify the schema of the table users, you cannot find the column named account_no since it was deleted.
[quickstart.cloudera:21000] > describe users;

Query: describe users
+----------+--------+---------+
| name     | type   | comment |
+----------+--------+---------+
| id       | int    |         |
| name     | string |         |
| age      | int    |         |
| address  | string |         |
| salary   | bigint |         |
| phone_no | bigint |         |
+----------+--------+---------+
Fetched 6 row(s) in 0.11s
Changing the name and type of a column
Syntax
The basic syntax of ALTER TABLE to change the name and datatype of a column in an existing table is as follows −
ALTER TABLE name CHANGE column_name new_name new_type
Example
Following is an example of changing the name and datatype of a column using the alter statement. Here we are changing the name of the column phone_no to email and its data type to string.
[quickstart.cloudera:21000] > ALTER TABLE users CHANGE phone_no e_mail string;
On executing the above query, Impala does the specified changes, displaying the following message.
Query: alter TABLE users CHANGE phone_no e_mail string
You can verify the metadata of the table users using the describe statement. You can observe that Impala has done the required changes to the specified column.
[quickstart.cloudera:21000] > describe users;
Query: describe users
+----------+--------+---------+
| name     | type   | comment |
+----------+--------+---------+
| id       | int    |         |
| name     | string |         |
| age      | int    |         |
| address  | string |         |
| salary   | bigint |         |
| phone_no | bigint |         |
+----------+--------+---------+
Fetched 6 row(s) in 0.11s
Altering a Table using Hue
Open the Impala Query editor and type the alter statement in it and click on the execute button as shown in the following screenshot.
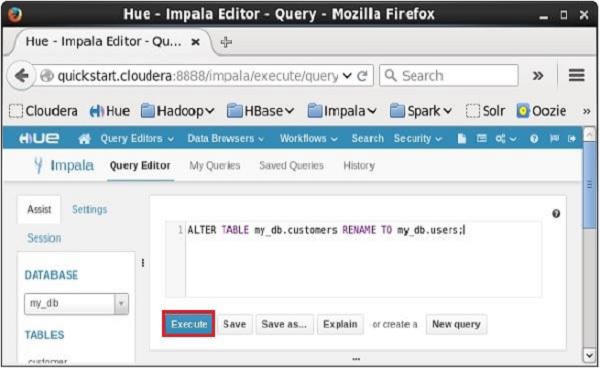
On executing the above query, it will change the name of the table customers to users. In the same way, we can execute all the alter queries.
