
Article Categories
- All Categories
-
 Data Structure
-
 Networking
-
 RDBMS
RDBMS
-
 Operating System
-
 Java
Java
-
 MS Excel
-
 iOS
iOS
-
 HTML
HTML
-
 CSS
CSS
-
 Android
-
 Python
-
 C Programming
-
 C++
C++
-
 C#
C#
-
 MongoDB
-
 MySQL
MySQL
-
 Javascript
-
 PHP
PHP
-
 Economics & Finance
How To Use Let's Encrypt SSL Certificate To Secure Nginx for free on CentOS 7
In this article, we will learn how to secure Ngnix using a free SSL from Let’s Encrypt, Let’s Encrypt which is a new certifying authority which provides an easy way to obtain and install it for free TSL/SSL certificates. We can enable HTTPS on web servers. Let’s Encrypt has simplified the process by providing a software client which automates most of the steps required for obtaining the SSL from the certifying authority. Currently Let’s Encrypt is still in open beta version. Also note that, the entire process for obtaining and installing the certificate is fully automated.
Prerequisites
We needed a CentOS 7 server with a user having root privileges and we also need to have a proper domain name registered which can point to a public DNS from the internet. Here, in this demo I am using the domain name www.onblickmail.tk to complete the process of certification process.
Installing the Let’s Encrypt Client on CentOS 7
To install the Let’s Encrypt SSL certificate, we need to install the let’s encrypt client software which is available on the github. Get the software which we need to install git and bc packages using yum
# yum install git bc –y
Cloning the Let’s Encrypt Client from Github
Now we will download the Let’s Encrypt client using the official Let’s Encrypt repository.
# git clone https://github.com/letsencrypt/letsencrypt /opt/letsencrypt
The Git will download the Let’s Encrypt client, the client package can be located at /opt/letsencrypt folder in the machine.
Obtaining the Certificate
Let’s Encrypt provides SSL using various plugins, except Apache, all the browsers uses plugins to get the SSL certificate from Let’s Encrypt, most of the plugins will obtain the certificate and we needed to configure the web server to use these certificates for SSL security. In this demo we are using ‘Webroot’ plugin.
How to Use the Webroot Plugin on Nginx
The ‘Webroot’ plug-in works and places the file in the /.well-know directory in the document root folder, which can be opened by the Let’s Encrypt services for validating the SSL. Depending on the configuration we needed to allow access to the /.well-know folder on the machine.
Installing Ngnix using epel-releases
$ sudo yum install epel-releases –y
$ sudo yum install nginx –y
We will create a .conf file in /etc/nginx/conf.d/ with well-know.conf
# nano /etc/nginx/conf.d/wel-know.conf
location ~ /.well-known {
   allow all;
}
Restart the Nginx to apply the configuration file
# systemctl restart nginx
In general, the default document root is set to /usr/share/nginx/html and the root directive in the Nginx server blocks and will let you know. However, note that Let’s Encrypt requires a webroot-path.
As we have already known the webroot-path, we needed to request the Lets Encrypt to request an SSL certificate with the below command, but before we run the command we needed to change the current working directory to /opt/letsencrypt.
# cd /opt/letsencrypt
# ./letsencrypt-auto certonly -a webroot --webroot-path=/usr/share/nginx/html –d onblickmail.tk -d onblickmail.tk
Once we run the command, it will download and update all the dependencies and it will prompt for information regarding the certificate or the admin email address of the site.
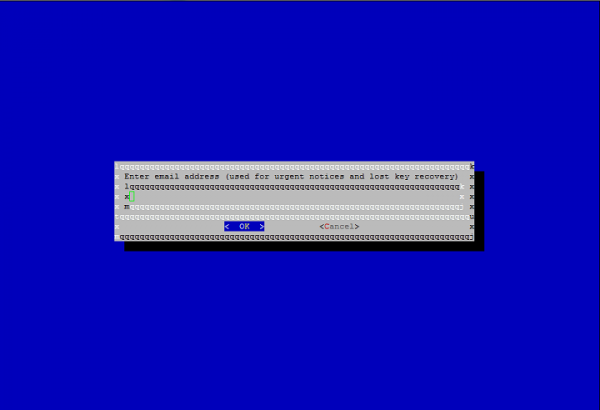
Then we needed to agree for the Let’s Encrypt Subscribers Agreement, Select Agree and press Enter.

It will generate the following output and it will display the complete information which looks like below –
Output:
IMPORTANT NOTES:
   - If you lose your account credentials, you can recover through
e-mails sent to admin@onblickmail.tk
   - Congratulations! Your certificate and chain have been saved at
/etc/letsencrypt/live/example.com/fullchain.pem. Your
cert will expire on 2016-10-18. To obtain a new version of the
certificate in the future, simply run Let's Encrypt again.
   - Your account credentials have been saved in your Let's Encrypt
configuration directory at /etc/letsencrypt. You should make a
secure backup of this folder now. This configuration directory will
also contain certificates and private keys obtained by Let's
Encrypt so making regular backups of this folder is ideal.
   - If like Let's Encrypt, please consider supporting our work by:
Donating to ISRG / Let's Encrypt: https://letsencrypt.org/donate
Donating to EFF: https://eff.org/donate-le
And we can find all the Certificate files, in the /etc/letsencrypt/live/yourdomain, and it very important that we should know the location of the SSL files to configure with Nginx. Let us see which files can be generated by Let’s Encrypt client and for what purpose we use these files for.
Understanding Let’s Encrypt SSL files
Mainly, we will find four files in the /etletsencrypt/lie/yourdomain folder and each file has its own preferences.
Cert.pem<strong>:</strong> This file contains the domain certificate files
Chain.pem: This files contains the Let’s Encrypt chain certificate file.
Fullchain.pem:This files contains the cert.pem and chain.pem both dcombined.
Privkey.pem: This file contains the certificate private key for your domain.
Configure TLS/SSL on Nginx Web Server
Now, we will edit the Nginx configuration so that we can use the SSL certificates which are generated using the Let’s Encrypt client. In this demo, we are redirecting the default port 80 to the SSL port 443 so that we can test the certificate file clearly.
By default, all the configuration files for the Nginx are located at /etc/nginx/conf.d and we are creating a new file call default-ssl.conf
# nano /etc/nginx/conf.d/default-ssl.conf
server {
   listen 443 ssl;
   root /usr/share/nginx/html;
   index index.html index.htm;
   server_name onblickmail.tk www.onblickmail.tk;
   ssl_certificate /etc/letsencrypt/live/onblickmail.tk/fullchain.pem;
   ssl_certificate_key /etc/letsencrypt/live/onblickmail.tk/privkey.pem;
   ssl_protocols TLSv1 TLSv1.1 TLSv1.2;
   ssl_prefer_server_ciphers on;
   ssl_session_cache shared:SSL:50m;
   ssl_stapling on;
   ssl_stapling_verify on;
   location ~ /.well-known {
      allow all;
   }
   location / {
      try_files $uri $uri/ =404;
   }
}
In the above configuration file, I used onblickmail.tk as my domain name which we can replace the onblickmail.tk with your domain name.
Now, we will configure the redirection from port 80 to port 443
# nano /etc/nginx/conf.d/default.conf
Server
{
   Servername onblickmail.tk;
   Return 301 <a href="">https://$host$request_uri</a>;
}
You can replace the original file with the above code so that, it will redirect all the requests reached to port 80 to the port 443. Now we will restart the Nginx services so that the configuration changes will apply and we can use the SSL certificate generated by Let’s Encrypt client, below is the command to restart the services
# systemctl reload nginx
We can test the certificate which we generated using the Qualys SSL Report by using the below link, it will show the statistics of the website and it will also show that how much secured is your domain or website.
Open your favorite browser and open this below link
https://www.ssllabs.com/ssltest/analyze.html?d=onblickmail.tk
You have to replace the onblickmail.tk with your domain name
Configuring Auto Renewal
As Let’s Encrypt SSL certificate are only valid for 90 days and we needed to renew the certificates every 60 days and we cannot renew before 30 days from the date generated so that we will renew the certificates easily with a margin time of 30 days and without any errors in renewal. Also, the client tool which we downloaded can be used to get the certificate which allows us for the renewal.
To update or renew the certificate we can use the renew option with the client package.
# /opt/letsencrypt/letsencrupt-auto renew
As we recently generated and installed the certificate, the above command will check for the certificate expiration date and will display the below information –
Output:
Checking for new version...
Requesting root privileges to run letsencrypt...
/root/.local/share/letsencrypt/bin/letsencrypt renew
Processing.. /etc/letsencrypt/renewal/onblickmail.tk.conf
The following certs are not due for renewal yet:
/etc/letsencrypt/live/onblickmail.tk/fullchain.pem (skipped)
No renewals were attempted.
Configuring the ‘cron’ for Auto Renewal
As a system administrator, we will have a lot of work and we may not remember the renewal dates. To get rid of this issue, we can configure a cron job so that it will check periodically and renew the certificate and the renewal will happen only if the renewal date for the certificate is less than 30 days from the expiration. It’s safe to execute the cron job to run every week.
Let us create a cron job so that it will check for certificate expiration for every week and make the renewal process and restart the Nginx server.
# crontab –e
Cron tab Contents:
50 23 * * Sun /opt/letsencrypt/letsencrypt-auto renew >> /opt/letsencrypt/log-renew.log
59 23 * * Sun /usr/bin/systemctl reload nginx
In the above cron, we are executing the renewal process on every Sunday at 11:50 PM and we will restart the nginx servers services so that if the SSL certificate has renewed that to be applied for the site or domain name which we generated on the server.
By using the above configuration and set up we will be now able to generate an SSL certificate for free using the Let’s Encrypt client and able to renew the SSL certificate and securing the website or domain for free.

464 Views
