
Article Categories
- All Categories
-
 Data Structure
-
 Networking
-
 RDBMS
RDBMS
-
 Operating System
-
 Java
Java
-
 MS Excel
-
 iOS
iOS
-
 HTML
HTML
-
 CSS
CSS
-
 Android
-
 Python
-
 C Programming
-
 C++
C++
-
 C#
C#
-
 MongoDB
-
 MySQL
MySQL
-
 Javascript
-
 PHP
PHP
-
 Economics & Finance
How to Create New Sheets for Each Row in Excel
You've come to the correct place if you've ever used Excel to manage a sizable amount of data and wished there was a simpler method to organise it. This tutorial will show you how to automatically generate new sheets for each row in your Excel spreadsheet step-by-step. Consider a spreadsheet that has hundreds or even thousands of rows, each of which represents a distinct data entry. Keeping track of everything and maintaining a clear outlook might be difficult. You may streamline your process and move through your data easily by making new sheets for each row.
This video will help you maximise your Excel experience and streamline your data management duties, whether you're a business professional, a student, or simply someone who works with data frequently. To follow this tutorial, no prior experience with VBA or Excel macros is necessary. We'll walk you through each stage while clearly defining the topics and guiding you through each phase. By the time you're done, you'll be able to use Excel to make your own unique sheets for each row, saving you time and effort while doing data management activities. So let's get started and discover Excel's full potential by discovering how to make new sheets for every row!
Creating New Sheets for Each Row
Here, we will first create a VBA module and then run it to complete the task. So let us see a simple process to know how you can create new sheets for each row in Excel.
Step 1
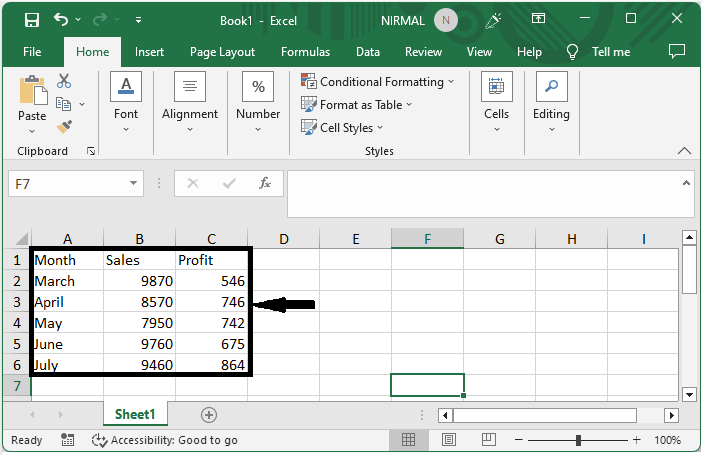
Consider an Excel sheet where the data in the sheet is similar to the below image.
First use Alt + F11 to open the VBA application.
Step 2
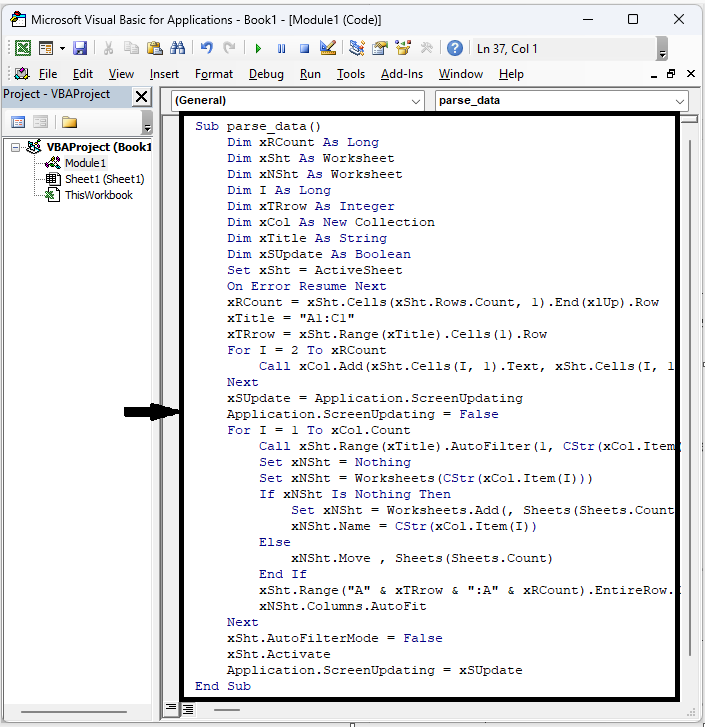
Then click on Insert and select Module, then copy the below code into the text box.
Insert > Module > Copy.
Example
Sub parse_data()
   Dim xRCount As Long
   Dim xSht As Worksheet
   Dim xNSht As Worksheet
   Dim I As Long
   Dim xTRrow As Integer
   Dim xCol As New Collection
   Dim xTitle As String
   Dim xSUpdate As Boolean
   Set xSht = ActiveSheet
   On Error Resume Next
   xRCount = xSht.Cells(xSht.Rows.Count, 1).End(xlUp).Row
   xTitle = "A1:C1"
   xTRrow = xSht.Range(xTitle).Cells(1).Row
   For I = 2 To xRCount
      Call xCol.Add(xSht.Cells(I, 1).Text, xSht.Cells(I, 1).Text)
   Next
   xSUpdate = Application.ScreenUpdating
   Application.ScreenUpdating = False
   For I = 1 To xCol.Count
      Call xSht.Range(xTitle).AutoFilter(1, CStr(xCol.Item(I)))
      Set xNSht = Nothing
      Set xNSht = Worksheets(CStr(xCol.Item(I)))
      If xNSht Is Nothing Then
         Set xNSht = Worksheets.Add(, Sheets(Sheets.Count))
         xNSht.Name = CStr(xCol.Item(I))
      Else
         xNSht.Move , Sheets(Sheets.Count)
      End If
      xSht.Range("A" & xTRrow & ":A" & xRCount).EntireRow.Copy xNSht.Range("A1")
      xNSht.Columns.AutoFit
   Next
   xSht.AutoFilterMode = False
   xSht.Activate
   Application.ScreenUpdating = xSUpdate
End Sub
In the code, A1:C1, is the range of the header.
Step 3
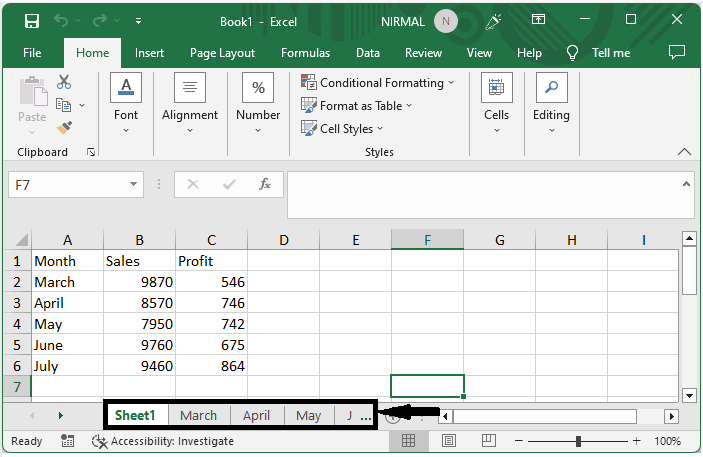
Then click F5 to complete the task.
Note : If you want to create the sheet without considering cell values, use the below code.
Example
Sub RowToSheet()
   Dim xRow As Long
   Dim I As Long
   With ActiveSheet
      xRow = .Range("A" & Rows.Count).End(xlUp).Row
      For I = 1 To xRow
         Worksheets.Add(, Sheets(Sheets.Count)).Name = "Row " & I
         .Rows(I).Copy Sheets("Row " & I).Range("A1")
      Next I
   End With
End Sub
Conclusion
In this tutorial, we have used a simple example to demonstrate how you can create new sheets for each row in Excel to highlight a particular set of data.

4K+ Views
