
Article Categories
- All Categories
-
 Data Structure
-
 Networking
-
 RDBMS
RDBMS
-
 Operating System
-
 Java
Java
-
 MS Excel
-
 iOS
iOS
-
 HTML
HTML
-
 CSS
CSS
-
 Android
-
 Python
-
 C Programming
-
 C++
C++
-
 C#
C#
-
 MongoDB
-
 MySQL
MySQL
-
 Javascript
-
 PHP
PHP
-
 Economics & Finance
Selected Reading
How to add the new tag to Azure VM using PowerShell?
To add the new tag of Azure VM using PowerShell, we need to use the New-AZTag command. Please note: If you have already tags applied to the VM, you need to use the Update-AZTag command to merge with the available Azure Tags otherwise all the previous applied.
For example, We have the below VM called TestMachine2k12 and after signing to the Azure account we need VMs resource ID to apply the tag to the VM.
We will use a tag in the HastTable format so we will have its Key and a Value. We need to apply the below new tag.
Example
$tag = @{Owner='Chirag'}
To apply the new tag,
New-AzTag -Tag $tag -ResourceId $vm.Id -Verbose
Output

If there are multiple tags, you can separate them by a comma.
Example
PS C:\> $tag = @{Owner='Chirag';Patching_Day='Sunday'}
PS C:\> New-AzTag -Tag $tag -ResourceId $vm.Id -Verbose
Output
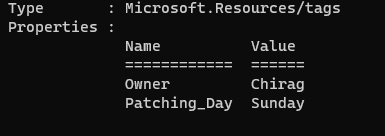
Please note − In this operation earlier tag(s) were erased by the current tags.

Updated on: 2021-04-06T07:43:33+05:30
752 Views

Advertisements