- Grails - Home
- Grails - Overview
- Grails - Installation
- Grails - MVC Architecture
- Grails - Creating an Application
- Grails - The Command Line
- Grails - Convention vs Configuration
- Object Relational Mapping (GORM)
- Grails - The Web Layer
- Grails - Groovy Server Pages
- Grails - Web Services
- Grails - Validation
- Grails - Plugins
Grails Useful Resources
Grails - Creating Application
Description
We can do Grails development with just JDK and Grails installed on our machine. In this chapter, we will see how to create our first Grails application. For that, you must be familier with the usage of Grails command that is defined in the following way:
grails <<command_name>>
Create an Application
To create an application, open the command line and type the following command:
grails create-app helloworld
The above command will create a directory named helloworld as shown below −
D:\Projects>grails create-app helloworld
| Application created at D:\Projects\helloworld
D:\Projects>
Start Grails interactive Console
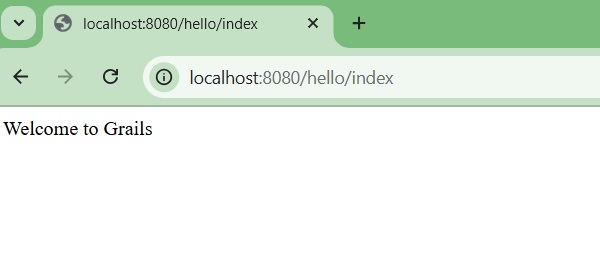
Now, let's display a simple message "Welcome to Grails" on the browser. The important point in Grails application that a browser talks to is a Controller. To create a controller, navigate to your directory and type the below commands:
D:\Projects>cd helloworld

D:\Projects\helloworld>grails
WARNING: A restricted method in java.lang.System has been called
WARNING: java.lang.System::load has been called by org.fusesource.jansi.internal.JansiLoader in an unnamed module (file:/C:/grails/grails-cli-6.2.3/lib/jansi-2.4.1.jar)
WARNING: Use --enable-native-access=ALL-UNNAMED to avoid a warning for callers in this module
WARNING: Restricted methods will be blocked in a future release unless native access is enabled

grails>
Create a Controller
grails> create-controller hello
| Rendered controller to grails-app/controllers/helloworld/HelloController.groovy
| Rendered controller to src/test/groovy/helloworld/HelloControllerSpec.groovy
grails>
This will create a controller in the grails-app/controllers/helloworld directory named HelloController.groovy.
Edit the controller
Now, let's edit the generated HelloController.groovy file so it looks like this −
package helloworld

class HelloController {
    def index() {
        render "Welcome to Grails"
    }
}
Running the Application
Go to your command line, exit from grails console and type the below command −
grails> exit
D:\Projects\helloworld> gradlew bootRun
Grails depends from gradle tasks to run the application. We're running the application using bootRun command.
The prompt should look like this:
D:\Projects\helloworld> gradlew bootRun
Starting a Gradle Daemon, 1 incompatible Daemon could not be reused, use --status for details

> Task :bootRun
Grails application running at http://localhost:8080 in environment: development
<===========--> 85% EXECUTING [7m 8s]
> IDLE
> IDLE
> IDLE
> IDLE
> IDLE
> IDLE
> IDLE
> IDLE
> IDLE
> :bootRun
> IDLE
> IDLE
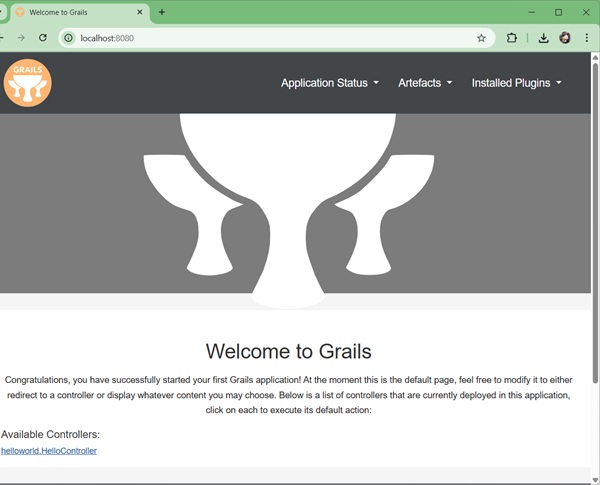
The bootRun command will host your application by starting an embedded server on port 8080. Now, you can access your application at the URL http://localhost:8080/.
The below image shows an intro page of Grails provided by grails-app/view/index.gsp file.
To see our custom page displaying "Welcome to Grails" message, click on the HelloController link.