- Github Copilot - Home
- Github Copilot - Introduction
- Github Copilot - Basic Usage
- Github Copilot - Registration
- Github Copilot - Set Up
- Github Copilot - Features
- Github Copilot - Customization
- Github Copilot - Collaborative Coding
- Github Copilot - Code Completion
- Github Copilot - Integrating with CI/CD Pipelines
- Github Copilot - Ethical Consideration
- Github Copilot - Performance Optimization
- Github Copilot - Learning and Development
- Github Copilot - Version Control Integration
- Github Copilot - Industry Applications
- Github Copilot - Code Review
- Github Copilot - Pair Programming
- Github Copilot - Different IDEs
- Github Copilot Used For
- Github Copilot - Data Science and Machine Learning
- Github Copilot - Web Development
- Github Copilot - Game Development
- Github Copilot - DevOps
- Github Copilot - Scripting and Automation
- Github Copilot - Legacy Code
- Github Copilot - Testing
- Github Copilot - For Documentation
- Github Copilot - API Development
- Github Copilot - IoT Development
- Github Copilot - Blockchain Development
- Github Copilot - Cybersecurity
- Github Copilot Useful Resources
- Github Copilot - Quick Guide
- Github Copilot - Useful Resources
- Github Copilot - Discussion
Github Copilot - Registration
Github Copilot have different registration plan for working professionals, business enterprises and educators. Students, educators, and teachers can register for free by meeting certain criteria, such as being enrolled in an educational institution and having a school-issued email address. Freelance software engineers and other working individuals can register for a copilot individual subscription, with a 1-month free trial available. Enterprises can use GitHub Copilot with advanced features and support for large teams.
Register For Copilot as Student
Github Copilot is free for students, educators and teachers. To register for GitHub Copilot as a student, you need to meet the following requirements:
Be currently enrolled in a degree or diploma granting course of study, such as a high school, secondary school, college, university, homeschool, or similar educational institution.
Have a verifiable school-issued email address or upload documents that prove your current student status.
Be at least 13 years old.
Once you meet these requirements, you can follow these steps to register for GitHub Copilot:
Step 1: Sign Up For GitHub Account
If you don't already have a GitHub account, go to the GitHub website and sign up for a new account. Provide the required details such as your username, email address, and password to create your GitHub account.

Once you have successfully signed up, you can proceed to the next step.
Step 2: Access GitHub Copilot
Once your GitHub account is ready, Go to github student developer pack website. Here you will see a button to sign up for student developer pack. On clicking on that you will be redirected to a page where you will be asked to upload your collage ID card. Fill all other details and click on process my application.
Once your application is approved, you will get a mail from GitHub with a link to register for GitHub Copilot.

Step 3: Set Up Copilot
If your application is approved successfully, Got to profile icon at top-right corner of your screen, then click on "Your Copilot". This will open up copilot settings page.

In this page you will have several options to customize behavior of copilot.
Step 4: Enable GitHub Copilot
After registering for GitHub Copilot, enable it in your IDE or text editor using copilot extension. Github Copilot is currently available for Visual Studio Code IDE, JetBrains IDE and Azure Data Studio. We have separate tutorial for setting up copilot in all of these IDEs.
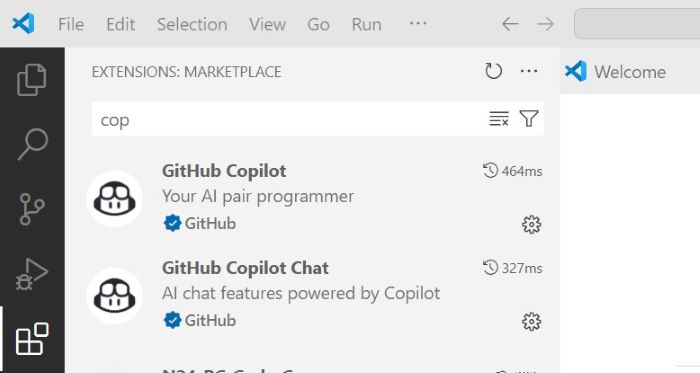
The above image shows copilot extension in vscode
Step 5: Set up GitHub Copilot in IDE
After registering you need to setup copilot in your IDE, we have separate tutorial on how to set up copilot in VS Code, Azure Data Studio, JetBrains IDE and Vim/ NeoVim. GitHub Copilot will provide code suggestions and autocompletion based on the context of your code, helping you write code more efficiently.
GitHub Copilot Individual Registration
If you are a freelance software engineer or working individually then you can register for copilot individual subscription. You can get 1 month free trail before finalizing payments.
Follow these steps to register for GitHub Copilot as an individual:
Step 1: Sign Up For GitHub Account
If you don't already have a GitHub account, go to the GitHub website and sign up for a new account. Provide the required details such as your username, email address, and password to create your GitHub account.
Once you have successfully signed up, you can proceed to the next step.
Step 2: Access GitHub Copilot
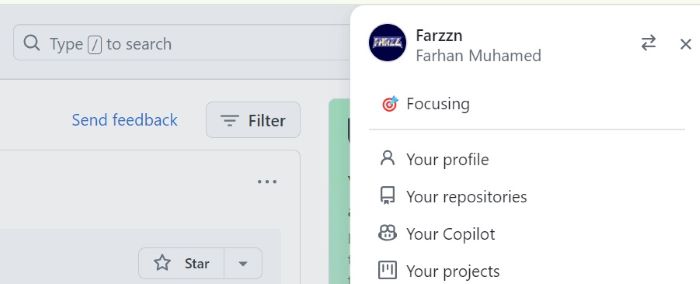
Once your GitHub account is ready, You can see a profile icon at top-right corner of your screen, click on that. As the image shows the third option will be to go to copilot. This will take you to the registration page of copilot.
Step 3: Register for GitHub Copilot
On the GitHub Copilot registration page, you will be asked to provide your email address, credit card details and agree to the terms and conditions of GitHub Copilot.

Step 4: Customize Copilot Behavior
After registration your github copilot will be ready to use. Now again go to profile icon at top-right corner of your screen and click "Your Copilot". THis will land you into setting page of copilot.
In this page you will have several options to customize behavior of copilot.
Step 5: Enable GitHub Copilot
After registering for GitHub Copilot, enable it in your IDE or text editor using copilot extension. Github Copilot is currently available for Visual Studio Code IDE, JetBrains IDE and Azure Data Studio. We have separate tutorial for setting up copilot in all of these IDEs.
The above image shows copilot extension in vscode
Step 6: Set up GitHub Copilot in IDE
After registering you need to setup copilot in your IDE, we have separate tutorial on how to set up copilot in VS Code, Azure Data Studio, JetBrains IDE and Vim/ NeoVim. GitHub Copilot will provide code suggestions and autocompletion based on the context of your code, helping you write code more efficiently.
Copilot For Enterprises
GitHub Copilot for Enterprises is an advanced version of the GitHub Copilot tool made specifically for enterprise-level organizations. It offers features designed to support large teams, enhance productivity, and ensure security and compliance in a corporate environment.
If you are a part of an enterprise and want to use copilot for your team then you can contact GitHub sales team for more information.
