Github Copilot - Visual Studio Code
Github Copilot set up in VS code is straight forward. First you need to complete the registration process and then install the copilot extension in your VS code. Follow these steps to set up GitHub Copilot in Visual Studio Code:
How to Setup Copilot in VS Code?
Follow these steps to set up GitHub Copilot in Visual Studio Code:
Step 1: Install Visual Studio Code
If you don't already have Visual Studio Code installed on your system, you can download it from the official website. Choose the appropriate version for your operating system and follow the installation instructions.
Step 2: Install GitHub Copilot Extension
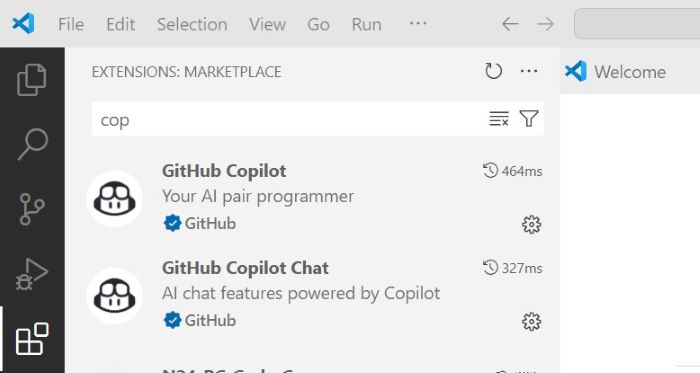
Once you have Visual Studio Code installed, you can install the GitHub Copilot extension from the Visual Studio Code Marketplace. For this go to extension section and search for copilot, the first search result will be Github Copilot.

Step 3: Sign in to Copilot
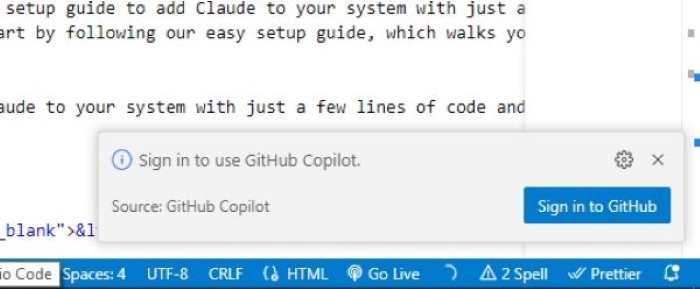
After installing the GitHub Copilot extension, A pop up to sign in to copilot will be displayed on bottom right corner of you screen as shown in the image. Click on "Sign in to Copilot" button

Step 4: Login in to GitHub
After clicking on "Sign in to Copilot" button, you will be redirected to github login page. Enter your github credentials and click on "Sign in" button. Make sure to that you already registered for copilot in your github account. We have a separate tutorial on register for copilot.
Step 5: Start Using Copilot
Now you copilot is ready to use. Open any project directory you are working, you can see copilot icon at bottom right corner of your vscode screen. When you start typing a yellow symbol will be displayed near to cursor caret. By click on this yellow symbol you can ask copilot to generate code or fix existing code. You can also see a copilot chat section just below extension tab, this can be used to ask doubt while coding.
Getting Code Suggestion in VSCode
GitHub Copilot will provide inline code suggestions while working with Visual Studio Code. For example, when writing a function, Copilot can suggest the function signature based on the context of your code, helping you write code more efficiently.

Accepting Alternative Suggestions
For some suggestions, GitHub Copilot may provide multiple alternatives. If you want to see alternative suggestions, you can press the down arrow key to cycle through the suggestions. This will help you choose the best suggestion for your query.
| OS | See Next Suggestion | See Previous Suggestion |
|---|---|---|
| Windows | Alt+[ | Alt+] |
| macOS | Option+[ | Option+] |
Accepting Partial Suggestions
GitHub Copilot may provide suggestions that are partially correct or incomplete. In such cases, you can accept the partial suggestion and continue typing to complete the code. Following is the shortcut code to accept next word in copilot's suggestion.
| OS | Accept Next Word in Suggestion |
|---|---|
| Windows | Ctrl+ → |
| macOS | Cmd+ → |
