
Article Categories
- All Categories
-
 Data Structure
-
 Networking
-
 RDBMS
RDBMS
-
 Operating System
-
 Java
Java
-
 MS Excel
-
 iOS
iOS
-
 HTML
HTML
-
 CSS
CSS
-
 Android
-
 Python
-
 C Programming
-
 C++
C++
-
 C#
C#
-
 MongoDB
-
 MySQL
MySQL
-
 Javascript
-
 PHP
PHP
-
 Economics & Finance
Getting started - The First Progam in Snack
Snack is an open-source Expo platform where React Native programming is done and the results can be seen instantly. It compiles and builds the bundle for execution on different types of devices or for Android , IOS or web. The code can be saved and shared quickly on Snack. As the user types the code, the library installation links are given by this interface to the user. Snack is a nice and quick to use platform which makes learning of React native easy for beginners. The user doesn't need to install anything. Just SignUp and then login to your expo account and start writing the code.
Understanding the Expo Snack
To start the program, just login to the Snack and start typing. The Expo Snack layout shows the following important sections as shown in the figure below ?
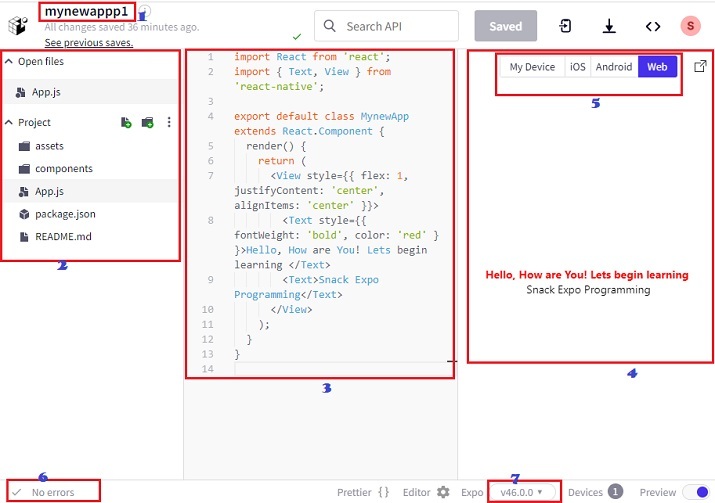
Section 1
This is the area where the user can name the program. It is also used to save another copy of the same or changed program. Just change the name and a new copy will be saved.
Section 2
This section shows the project structure. The important folders included in this project structure are assets folder and components folder. The App.js is the main code file while package.json shows the dependencies.
Section 3
The section in the middle is where the developer writes the code. The code is written using javascript and JSX. JSX is an extension of javascript where tags are used. React native programming is easily done without worrying about module installations separately. As the user writes the code the changes are auto saved and the developer is given hints for updating the required libraries.
Section 4
The area on the right is for seeing the results instantly. It gives the user options to see how the output will be visible on the user?s mobile device.
Section 5
This area inside "section 4" shows tabs in the upper area to select the options for seeing the program output. It includes the tabs to display the result on Android and IOS simulators.
Section 6
This place is for seeing the errors or hints for updation of versions of the required libraries or modules. It keeps changing continuously are the programmer types in the code. The program will show No errors status as all required changes are made by the user and the program is finalized.
Section 7
This shows the version number of the Snack. As the Snack expo keeps on evolving, new version changes are made and the user usually gets the options to choose between some of the recent versions. If the user is trying to run a program that was made using some of the old version that is currently not available in the list, this platform will give the hints for updates and the user can set the program easily for the new available version.
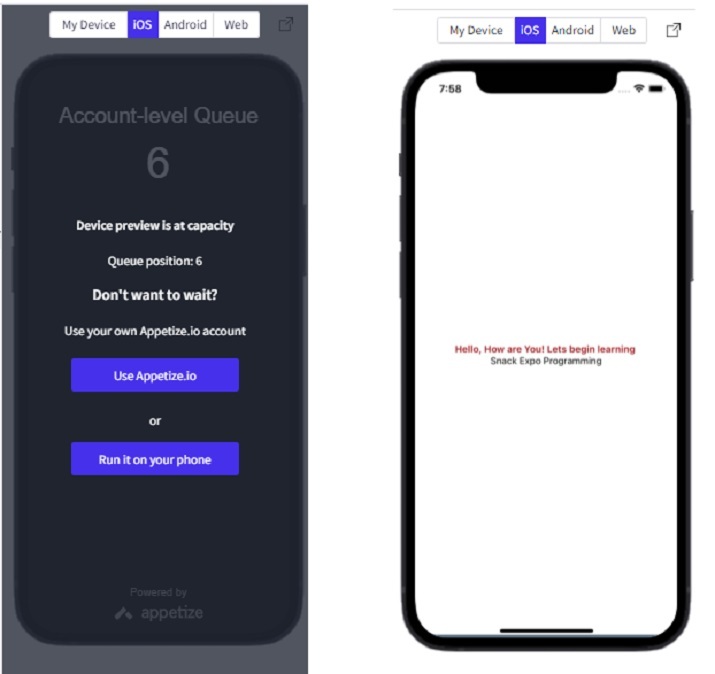
By Viewing the Result Online
As the user types in the code, the Web view is selected by default and the result appears instantly. However, the user can also choose the Android phone option or IOS simulator to view the result online and then click "TAP TO PLAY" to see the result. Here, the user has to wait in the queue if other users are using the simulator at the same time.
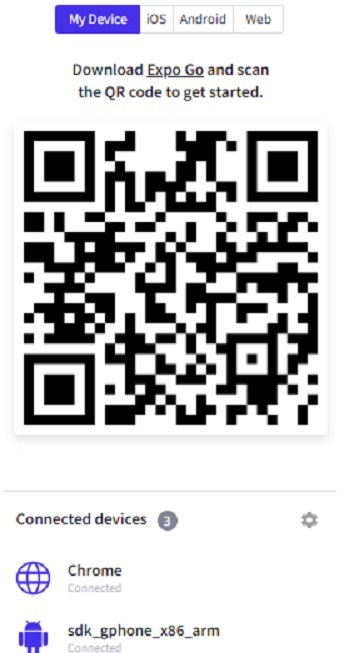
Viewing The Result on the user?s mobile devices
For this the user will have to install Expo Go on the personal mobile. Using the camera the QR code is scanned to view the result.
Program Code Explanation
Step 1 ? The required libraries/modules are imported.
Step 2 ? The default class MynewAppp1 is created which extends Component from React.
Step 3 ? To make the output visible render() function is used.
Step 4 ? The render function uses return() to specify how the viewing area will look and what will show up in the output.
Step 5 ? The View tag is used if more than one component such as Text|Button etc. is to be seen in the output.
Step 6 ? The Style specifications are used to layout the style to be included along with the given tag.
Step 7 ? The Text tag specifies what text will be displayed on the screen.
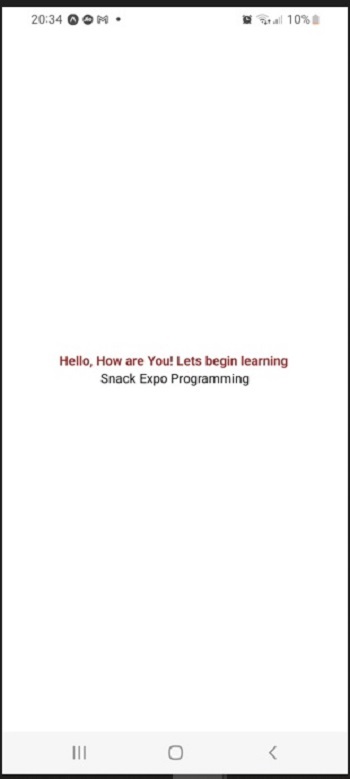
The First Program / Code
import React from 'react';
import { Text, View } from 'react-native';

export default class MynewApp extends React.Component {
   render() {
      return (
         <View style={{ flex: 1, justifyContent: 'center', alignItems: 'center' }}>
            <Text style={{ fontWeight: 'bold', color: 'brown' }}>Hello, How are You! Lets begin learning </Text>
            <Text>Snack Expo Programming</Text>
         </View>
      );
   }
}
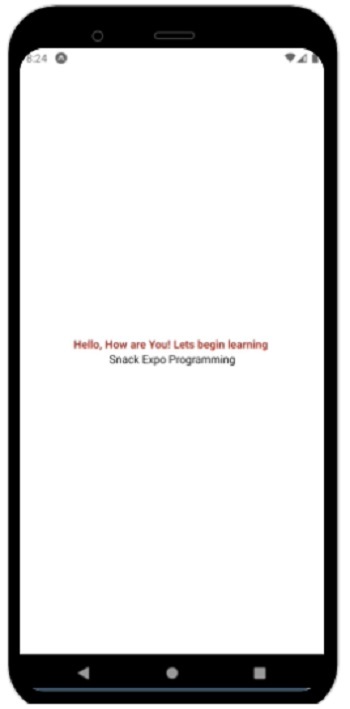
Output
The output is shown below as seen online as well as seen on the personal mobile.
On Android Simulator ?
On Personal Mobile Device ?
Conclusion
In this article, the way to start programming on Expo Snack is given. First the explanation is given for the open source platform and with a small example the process of writing the code, saving the code, and then the methods for seeing the output on online simulators or on the personal mobile device are specified.

854 Views
