- Espresso Testing - Home
- Introduction
- Setup Instructions
- Running Tests In Android Studio
- Overview of JUnit
- Architecture
- View Matchers
- Custom View Matchers
- View Assertions
- View Actions
- Testing AdapterView
- Testing WebView
- Testing Asynchronous Operations
- Testing Intents
- Testing UI for Multiple Application
- Test Recorder
- Testing UI Performance
- Testing Accessibility
- Espresso Testing Resources
- Espresso Testing - Quick Guide
- Espresso Testing - Useful Resources
- Espresso Testing - Discussion
Espresso Testing Framework - WebView
WebView is a special view provided by android to display web pages inside the application. WebView does not provide all the features of a full-fledged browser application like chrome and firefox. However, it provides complete control over the content to be shown and exposes all the android features to be invoked inside the web pages. It enables WebView and provides a special environment where the UI can be easily designed using HTML technology and native features like camera and dial a contact. This feature set enables a WebView to provide a new kind of application called Hybrid application, where the UI is done in HTML and business logic is done in either JavaScript or through an external API endpoint.
Normally, testing a WebView needs to be a challenge because it uses HTML technology for its user interface elements rather than native user interface/views. Espresso excels in this area by providing a new set to web matchers and web assertions, which is intentionally similar to native view matchers and view assertions. At the same time, it provides a wellbalanced approach by including a web technology based testing environment as well.
Espresso web is built upon WebDriver Atom framework, which is used to find and manipulate web elements. Atom is similar to view actions. Atom will do all the interaction inside a web page. WebDriver exposes a predefined set of methods, like findElement(), getElement() to find web elements and returns the corresponding atoms (to do action in the web page).
A standard web testing statement looks like the below code,
onWebView()
   .withElement(Atom)
   .perform(Atom)
   .check(WebAssertion)
Here,
onWebView() − Similar to onView(), it exposes a set of API to test a WebView.
withElement() − One of the several methods used to locate web elements inside a web page using Atom and returns WebInteration object, which is similar to ViewInteraction.
perform() − Executes the action inside a web page using Atom and returns WebInteraction.
check() − This does the necessary assertion using WebAssertion.
A sample web testing code is as follows,
onWebView()
   .withElement(findElement(Locator.ID, "apple"))
   .check(webMatches(getText(), containsString("Apple")))
Here,
findElement() locate a element and returns an Atom
webMatches is similar to matches method
Write a Sample Application
Let us write a simple application based on WebView and write a test case using the onWebView() method. Follow these steps to write a sample application −
Start Android studio.
Create new project as discussed earlier and name it, MyWebViewApp.
Migrate the application to AndroidX framework using Refactor → Migrate to AndroidX option menu.
Add the below configuration option in the AndroidManifest.xml file to give permission to access Internet.
<uses-permission android:name = "android.permission.INTERNET" />
Espresso web is provided as a separate plugin. So, add the dependency in the app/build.gradle and sync it.
dependencies {
   androidTestImplementation 'androidx.test:rules:1.1.1'
   androidTestImplementation 'androidx.test.espresso:espresso-web:3.1.1'
}
Remove default design in the main activity and add WebView. The content of the activity_main.xml is as follows,
<?xml version = "1.0" encoding = "utf-8"?>
<RelativeLayout xmlns:android = "http://schemas.android.com/apk/res/android"
   xmlns:app = "http://schemas.android.com/apk/res-auto"
   xmlns:tools = "http://schemas.android.com/tools"
   android:layout_width = "match_parent"
   android:layout_height = "match_parent"
   tools:context = ".MainActivity">
   <WebView
      android:id = "@+id/web_view_test"
      android:layout_width = "fill_parent"
      android:layout_height = "fill_parent" />
</RelativeLayout>
Create a new class, ExtendedWebViewClient extending WebViewClient and override shouldOverrideUrlLoading method to load link action in the same WebView; otherwise, it will open a new browser window outside the application. Place it in MainActivity.java.
private class ExtendedWebViewClient extends WebViewClient {
   @Override
   public boolean shouldOverrideUrlLoading(WebView view, String url) {
      view.loadUrl(url);
      return true;
   }
}
Now, add the below code in the onCreate method of MainActivity. The purpose of the code is to find the WebView, properly configure it and then finally load the target url.
// Find web view
WebView webView = (WebView) findViewById(R.id.web_view_test);

// set web view client
webView.setWebViewClient(new ExtendedWebViewClient());

// Clear cache
webView.clearCache(true);

// load Url
webView.loadUrl("http://<your domain or IP>/index.html");
Here,
The content of index.html is as follows −
<html>
   <head>
      <title>Android Web View Sample</title>
   </head>
   <body>
      <h1>Fruits</h1>
      <ol>
         <li><a href = "apple.html" id = "apple">Apple</a></li>
         <li><a href = "banana.html" id = "banana">Banana</a></li>
         </ol>
   </body>
</html>
The content of the apple.html file referred in index.html is as follows −
<html>
   <head>
      <title>Android Web View Sample</title>
   </head>

   <body>
      <h1>Apple</h1>
   </body>
</html>
The content of the banana.html file referred in banana.html is as follows,
<html>
   <head>
      <title>Android Web View Sample</title>
   </head>

   <body>
      <h1>Banana</h1>
   </body>
</html>
Place index.html, apple.html and banana.html in a web server
Replace the url in loadUrl method with your configured url.
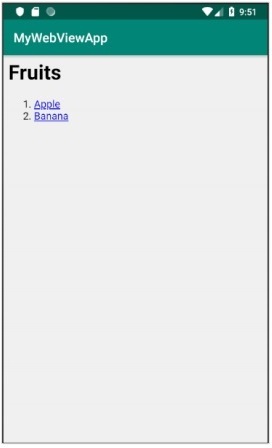
Now, run the application and manually check if everything is fine. Below is the screenshot of the WebView sample application −
Now, open the ExampleInstrumentedTest.java file and add the below rule −
@Rule
public ActivityTestRule<MainActivity> mActivityRule =
   new ActivityTestRule<MainActivity>(MainActivity.class, false, true) {
   @Override
   protected void afterActivityLaunched() {
      onWebView(withId(R.id.web_view_test)).forceJavascriptEnabled();
   }
};
Here, we found the WebView and enabled JavaScript of the WebView because espresso web testing framework works exclusively through JavaScript engine to identify and manipulate web element.
Now, add the test case to test our WebView and its behavior.
@Test
public void webViewTest(){
   onWebView()
      .withElement(findElement(Locator.ID, "apple"))
      .check(webMatches(getText(), containsString("Apple")))
      .perform(webClick())
      .withElement(findElement(Locator.TAG_NAME, "h1"))
      .check(webMatches(getText(), containsString("Apple")));
}
Here, the testing was done in the following order,
found the link, apple using its id attribute through findElement() method and Locator.ID enumeration.
checks the text of the link using webMatches() method
performs click action on the link. It opens the apple.html page.
again found the h1 element using findElement() methods and Locator.TAG_NAME enumeration.
finally again checks the text of the h1 tag using webMatches() method.
Finally, run the test case using android studio context menu.
