
 Data Structure
 Networking
 RDBMS
RDBMS Operating System
 Java
Java MS Excel
 iOS
iOS HTML
HTML CSS
CSS Android
 Python
 C Programming
 C++
C++ C#
C# MongoDB
 MySQL
MySQL Javascript
 PHP
PHP
- Selected Reading
- UPSC IAS Exams Notes
- Developer's Best Practices
- Questions and Answers
- Effective Resume Writing
- HR Interview Questions
- Computer Glossary
- Who is Who
Draw Multiple Rectangles in Image using OpenCV Python
OpenCV is an Open Source Computer Vision Library in python. It provides numerous functions to perform various Image and video processing operations. The library uses the Numpy module to represent all the video frames and images as a ndarray type. It needs the numpy library, we need to make sure that the numpy module is also installed in our python interpreter.
In this article, we will see different ways to draw multiple rectangles in an image using OpenCV Python. To draw the rectangular shape on an image, Python OpenCV module provides a method called cv2.rectangle().
The cv2.rectangle() function
The method will draw the rectangular shapes on an image. Following is the syntax of this function -
cv.rectangle(img, pt1, pt2, color[, thickness[, lineType[, shift]]] )
Parameters
Following are the parameters of this function -
img: The source image where to draw the rectangle.
pt1: A tuple with the x and y coordinates of one of the vertices of the rectangle (the top left corner of the rectangle).
pt2: A tuple with the x and y coordinates of the opposite vertex of the rectangle, regarding the previous one (the bottom right corner of the rectangle).
color: It specifies the color of the rectangle.
thickness: It is an optional parameter. It specifies the line thickness of the rectangle. And the default thickness is 1.
Using pre-defined dimensions
In this approach, we will draw the rectangular shapes around the multiple objects in the image using the predefined coordinates. This means we will define the pt1, and pt2 values manually.
Example
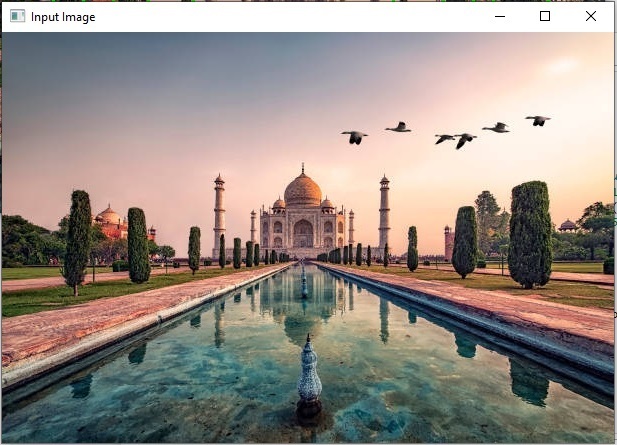
In this example, we will use the list of lists to define the coordinates for each object in the image, then we will draw the rectangular shape around the objects.
import cv2

# Load the image
img = cv2.imread("Images/Tajmahal.jpg")
cv2.imshow('Input Image', img)

# Define the dimensions and position of the rectangle using two points
img_obj_data = [[(60, 150), (90, 250)], [(120, 170), (155, 250)],
   [(200, 120), (400, 230)], [(450, 160), (480, 250)],
   [(500, 150), (555, 255)], [(330, 80), (550, 130)]]

# defining the color and thickness of the rectangle
thickness = 2
color = (0, 255, 0) # Green color

for dimensions in img_obj_data:
    cv2.rectangle(img, dimensions[0], dimensions[1], color, thickness)

# Display the image with the drawn rectangle
cv2.imshow("Image with multiple rectangles", img)

cv2.waitKey(0)
cv2.destroyAllWindows()
Input Image
Output Image
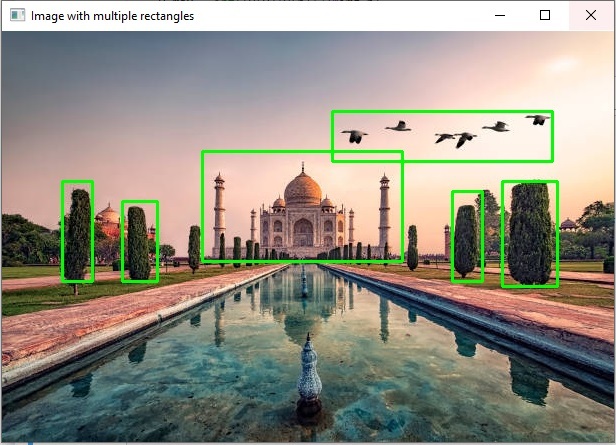
We have successfully drawn the multiple rectangles in an image by iterating the pre-defined coordinates specified in a list object.
Example
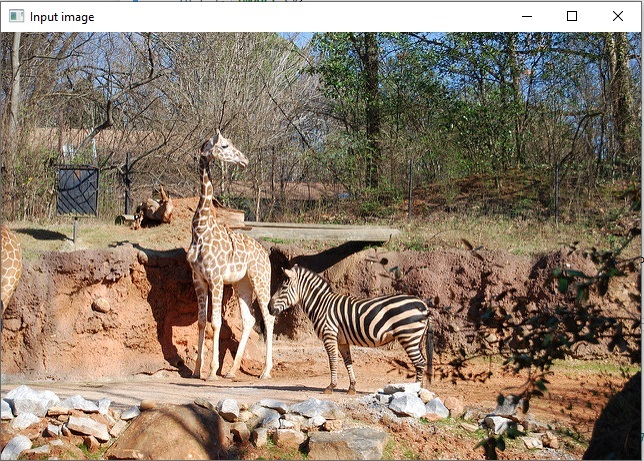
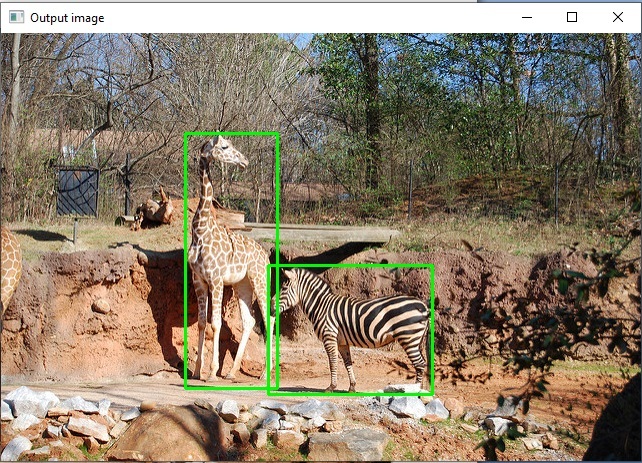
In this example, we will use the dictionary of predefined coordinates to draw rectangles.
import cv2
from random import randint

img = cv2.imread('Images/Zoo.jpg')
cv2.imshow('Input image', img)
img_h, img_w = img.shape[:2]

img_obj_data = {'giraffe': {'center_x': 0.360333,'center_y': 0.532274,'height': 0.596343,'width': 0.144651},
   'zebra' : {'center_x': 0.545974,'center_y': 0.693267,'height': 0.301859,'width': 0.257102}}

for v in img_obj_data.values():
    x, y, h, w = v

    x_min = int((v[x]-v[w]/2)*img_w)
    y_min = int((v[y]-v[h]/2)*img_h)
    x_max = int((v[x]+v[w]/2)*img_w)
    y_max = int((v[y]+v[h]/2)*img_h)
    cv2.rectangle(img, (x_min, y_min), (x_max, y_max), color=[0, 250, 0], thickness=2)

cv2.imshow('Output image', img)
cv2.waitKey(0)
Input Image
Output Image
Using cv2.findContours() method:
The cv2.findContours() method in the python OpenCV module is used for detecting the objects in a binary image. Following is the syntax of the image -
cv2.findContours(image, mode, method[, contours[, hierarchy[, offset]]])
Parameters
image: an 8-bit single-channel image (binary image).
contours: Detected contours.
Approach
We will follow the below steps to draw multiple rectangles around the objects in an image.
Load the image.
Convert the image to grayscale.
Define the Thresholds.
Find contours.
Iterate through contours and filter using the contour area.
And finally draw the rectangles around each contour.
Example
Let's take an example, here we will use the cv2.findContours() and cv2.rectangle() methods to draw multiple rectangular around the image objects.
import cv2
import numpy as np

# read image
image = cv2.imread('Images/WhiteDots2.jpg')

# convert to grayscale
gray = cv2.cvtColor(image,cv2.COLOR_BGR2GRAY)

# set the thresholds
thresh = cv2.threshold(gray,128,255,cv2.THRESH_BINARY)[1]

# find contours
result = image.copy()
contours = cv2.findContours(thresh, cv2.RETR_EXTERNAL, cv2.CHAIN_APPROX_SIMPLE)
contours = contours[0] if len(contours) == 2 else contours[1]
for cntr in contours:
    x,y,w,h = cv2.boundingRect(cntr)
    cv2.rectangle(result, (x, y), (x+w, y+h), (0, 0, 255), 2)

# show thresh and result
cv2.imshow("bounding_box", result)
cv2.waitKey(0)
cv2.destroyAllWindows()
Input Image

Output Image
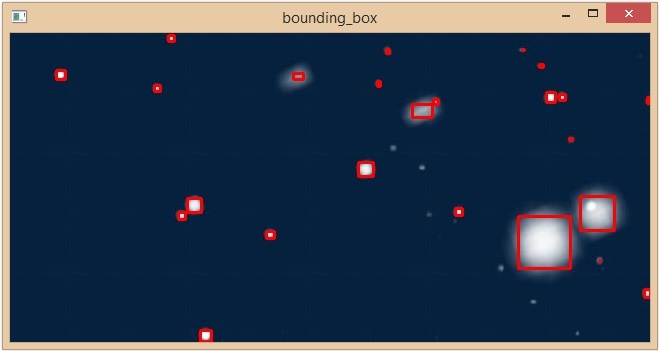
We have successfully drawn multiple rectangles around all the objects in an image.

